
Related Manuals for Vigilant Guardian 10

Summary of Contents for Vigilant Guardian 10
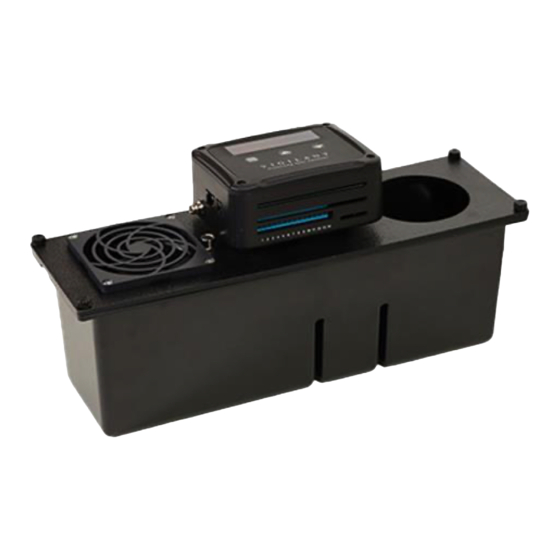
- Page 1 Guardian 10, 100 & 150 Humidification Systems for Guitars Operating Instructions 85 Industrial Park Drive | Dover, NH 03820 | 888-812-4427 | info@vigilantinc.com...
- Page 2 (RH) to within 2% of your desired setting. Should you have any questions regarding the installation or operation of Vigilant’s Guardian Humidification System, please call us toll-free at 888-812-4427. We will be happy to assist you.
- Page 3 Installation and Start-Up Operation IMPORTANT: • DO NOT OVERFILL THE RESERVOIR AS OVERFILLING WILL CAUSE DAMAGE TO YOUR CABINET! • DO NOT POUR WATER ON THE FAN THIS CAN CAUSE DAMAGE TO THE ELECTRONICS. • DO NOT MOVE CABINET WITH WATER IN IT. 1.
- Page 4 Remove the thumbscrews, lift the cover off and remove the filter. 3. Wipe the walls of the reservoir with a damp paper towel 4. Wicks should be changed every 90-120 days and can be ordered directly from Vigilant’s online store at https://store.vigilantinc.com/.
-
Page 5: Troubleshooting
If the set point is below the humidity level of the cabinet’s interior, the fan will not run. • Press the far-left button on the control panel to check set point. If these troubleshooting recommendations do not correct the problem, call Vigilant at 888-812-4427 and a service representative will gladly assist you. - Page 6 Guardian Digital Controller Overview Designed in-house to be the most advanced micro-climate controller in the industry, the new Guardian is the culmination of 25 years in producing the finest long-term storage and preservation devices. A bright, intuitive display and easy-to-navigate menu makes setup and operation simple, while the powerful microprocessor automatically keeps conditions in check.
- Page 7 DIMENSIONS KEYHOLE MOUNTING LOCATIONS...
- Page 8 CONNECTIONS Sensor local / remote switch Local Sensor Remote control wire connection Wired remote sensor connection Power input connection Back Bottom I/O Terminals I/O Terminal screws...
- Page 9 KEYS & SWITCHES Menu Key. Each menu keypress press will index through user settings. Raise Key. Adjusts setting value up. Lower Key. Adjusts setting value down. SENSOR LOCAL / REMOTE SWITCH LOC: Controller uses onboard sensor REM: Controller uses wired remote sensor Disconnect power before making selection...
- Page 10 POWER-UP STABILIZATION MODE The Guardian sensor requires an initial stabilization period TEMP: --F RH: --% when first powered. At this time, the controller will run a STANDBY stabilization program. This program will delay operation for 10 minutes and all outputs will be OFF.
- Page 11 ICON KEY Cabinet Lights* TEMP: 70F RH:70% Circulation Fans* Heating * Cooling* Humidification Dehumidification* * Optional Equipment Icons will only appear onscreen when the feature is ON or active.
- Page 12 SETTINGS Menu Key. Each menu keypress press will index through enabled user settings in the following order: • If no key is pressed for 20 seconds the display will return to the home screen. • Press and hold the key anywhere in the user menu for 3 seconds to force return to the home screen.
- Page 13 SETTINGS (continued) Temperature set point* TEMPERATURE SET Raise. Temperature set point Lower. Temperature set point Temperature set point range is 60-80°F unless specified *Temperature is optional equipment. You may not see this option. Relative Humidity (RH SET) RH SET Raise. Humidity set point Lower.
- Page 14 SETTINGS (continued) Temperature Units UNITS Raise. Fahrenheit Selection Lower. Celsius Selection Temperature (TEMP) offset TEMP OFFEST Raise. Temperature Offset Lower. Temperature Offset Factory may adjust during set up. Use this number as Default. Use this feature to offset the display if needed. Offset Max is +10 F/C°. Offset minimum is 10 F/C°...
- Page 15 SETTINGS (continued) Relative Humidity (RH) offset RH OFFEST Raise. RH Offset Lower. RH Offset Factory may adjust during set up. Use this number as Default Use this feature to offset the display if needed. Offset Max is +10 %. Offset minimum is 10 % Brightness BRIGHTNESS...
- Page 16 SETTINGS (continued) Sleep Mode SLEEP MODE NONE Select option Select option Options • NONE. Display stays on • OFF. Display turns off after 20 seconds. Wakes up with button press. • DIM. Display dims to 25% of set brightness after 20 seconds. Wakes up with button press.
- Page 17 MANUALLY CHANGING MODE TEMP: 70F RH:70% STANDBY Hold for 3 seconds to enable standby mode. Hold for 3 seconds to disable standby mode. When STANDBY is enabled, all devices will switch OFF and display will remain active. When STANDBY is disabled, the controller will resume normal operation VIEW SAVED MIN/MAX LEVELS MIN: 70F MAX: 72F...
-
Page 18: Filter Access
CABLES DC power extension – 36” Sensor assembly Remote control wire (optional) Power supply – 60” FILTER ACCESS 1. Remove thumb screws 2. Lift cover off ADDING WATER • Display will indicate low water. • Fill the reservoir with distilled water. Treat the water with Bacteriostat at this time if desired. - Page 19 CONTROLLER REMOVAL/ATTACHMENT Controller can be detached from reservoir and mounted remotely. Contact Vigilant for optional remote control wires. Slide the controller back on the mounts Lift the controller off the reservoir and press lever to disconnect the control wire Tuck the control wire back into the housing...
- Page 20 Locate the control wire inlets on both the controller and reservoir. Push the remote control wire onto the inlet and thread clockwise to secure.
-
Page 21: Warranty
• Warranty is non-transferable and valid for the original owner only. Vigilant is a reseller for many fine products in the industry. Products resold by Vigilant carry the original manufacturer’s warranty. Please contact Vigilant at 888-812-4427 if you have any questions about your warranty. Learn more...
Need help?
Do you have a question about the Guardian 10 and is the answer not in the manual?
Questions and answers