Table of Contents
Advertisement
Quick Links
Advertisement
Table of Contents

Related Manuals for Heinz Walz ULM-500


Summary of Contents for Heinz Walz ULM-500
- Page 1 Universal Light Meter ULM-500 User Manual 7.100 / 06.2009 edition (May 2012) Heinz Walz GmbH, 2009 Heinz Walz GmbH Eichenring 6 91090 Effeltrich Germany Tel. +49-(0)9133 / 7765-0 Fax +49-(0)9133 / 5395 E-Mail: info@walz.com Internet:...
- Page 3 ULM-500 ENTER CALIBRATION FACTOR chose chose chose chose chose Display Display Display Display Display MENU MENU MENU MENU enter Main Menu enter Main Menu enter Main Menu chose chose chose chose chose Sensors Sensors Sensors Sensors Sensors MENU MENU MENU...
-
Page 5: Table Of Contents
3.2.6 Info..................22 3.2.7 Memory................22 4 Connection to the Computer ............. 23 5 Operating the ULM-500 via WinControl-3 ......24 5.1 The Initial Tab / Chart Tab ............. 24 5.1.1 Main Menu Bar - Box (1) ..........25 5.1.2 Data Management and Graph Design - Box (2) .... - Page 6 CONTENTS 5.1.7 Protocols - Box (7)............30 5.1.8 Graph, Data and Fluorometer Settings Tabs - Box (8) ..31 5.1.9 Axis Control - Box (9) ............31 5.1.10 Ordinate Selection and Text Field - Box (10)....32 5.1.11 Chart - Selecting Data............33 5.2 The Report Tab ...............
-
Page 7: Safety Instructions
SAFETY INSTRUCTIONS 1 Safety Instructions Instructions. Read all the safety instructions and operating instructions thoroughly before using the device for the first time. Keep these safety instructions and operating instructions somewhere safe in case you need to refer to them again in the future. Safety warnings. -
Page 8: Assembling The Ulm-500
Neill-Concelman, PAR #1 and #2) shown in the image below: Fig. 1 configuration of ULM-500 sensor connectors After connecting new sensors to the ULM-500 please do not forget to check the calibration factors needed! (Chapter 2) Two further optional accessories used mainly on Monitoring-PAMs, the leaf-clip holder (e.g. - Page 9 NiCd or NiMH cells are also possible but can not be charged when inserted. Under extreme low temperature (0°C) 1.5V Li-cells are recommended. When placing the ULM-500 into storage for a longer time, please make sure that no batteries are inserted.
- Page 10 THE ULM-500 INSTRUMENT Fig. 3 Connecting sensors to the ULM-500 (here: BNC to PAR #1) To connect a male BNC plug to PAR #1 or #2 push and carefully right-turn the connector as shown in Fig. 3 The connectors used for the panel plugs 1 and 2 need to be screwed to get good contact with the accessory sensors.
-
Page 11: The Keypad
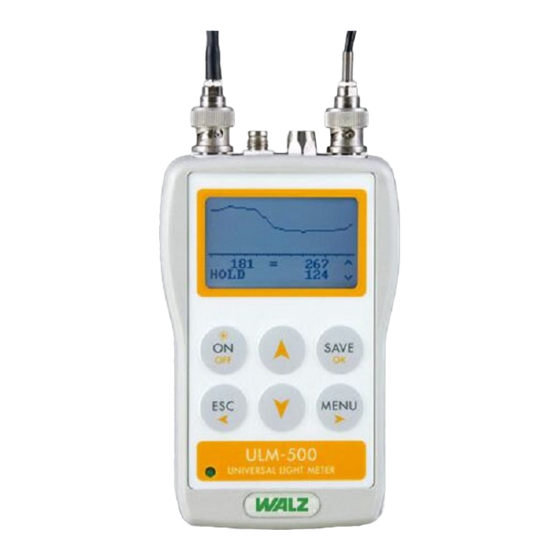
ON/OFF switches the instrument on or off when held for more than 3 seconds. Additionally the display illumination can be switched on with this button by pressing it shortly while the ULM-500 is already switched on. Illumination will switch off automatically after 40 seconds to save battery power. -
Page 12: Input Of Calibration Values
ULM-500). In the third line “Att” is the attenuation index as perceptual loss of PAR intensity between sensors connected via PAR #1 and PAR #2. The third line also shows the internal temperature of the ULM-500 (this... - Page 13 2 – Fig 1). In the last line the recent time and date used in the instrument is indicated (these values can be set via the ULM-500 or automatically via WinControl-3 software when the ULM-500 is connected).
-
Page 14: Order Of Measuring Windows
From here the instrument can be switched off at any time by pressing the “off” button for three seconds (pressing this button once shortly will activate the display illumination for 5 mins). From this measure mode, the menu can be entered by pressing “MENU” on the keypad of the ULM-500. -
Page 15: The Par Window
PAR #1 and #2. At the end of the line, the internal temperature of the instrument is shown. Please note that this temperature may differ from the ambient temperature when the ULM-500 is operated e.g. in sunlight. Below date and time stored in the instrument are shown (can be synchronized with the system time of a computer via WinControl-3 software –... -
Page 16: The Air Sensor Window
The measured amplitude is displayed as value below the chart. When the trigger has been activated the chart runs as long as the trigger level is not yet reached. In case the ULM-500 registers a fast increase of... - Page 17 “ESC” and the trigger is still activated again (if it has been activated before). The graphic is not saved; a continuous record of the radiation can be achieved when the ULM-500 is used together with the WinControl-3 software. In this case the recording time is not limited.
-
Page 18: Before The Measurement
“Menu” will switch one level deeper into the calibration settings. To make the navigation easier, the ULM-500 remembers the position in the menu that you chose last time and displays it inverted. Moving the active field is done by using the “up”... - Page 19 (2nd Page). Under “Leafclip” also the optional leaf-clip holder connected to the ULM-500 can be defined. In the case of a MINI-PAM or PAM-2500 leaf clip holder (2030-B) or the sensor set 2060-M an additional adapter cable is necessary (2030-B/ULM) and the setting has to be “MINI- PAM LC”.
-
Page 20: Changing Calibration Factors
The ULM-500 stores up to 10 calibration factors shown on two pages in the menu. While the factors themselves can be edited directly in the ULM-500, it is not possible to change the sensor names in the field without using a computer. This can only be... -
Page 21: Measure Settings
The clock time can be set between 10 s and 40 min in the line below. For long term data logging the ULM-500 offers a sleep mode to save battery power. This sleep mode is automatically active when a measuring interval of 1 min or more is chosen. - Page 22 MENU AND OPERATION The electronic damping reduces the noise in the radiation signal measured with the ULM-500 (only channel #1!). “On” or “Off” can be chosen as setting. Since the damping may in some cases interfere with the “Auto Range” function it is recommended to use damping “on”...
- Page 23 MENU AND OPERATION Range maximum minimum [µmol m [µmol m 250 nA 0.0061 0.061 nA 2.5 µA 0.061 0.61 nA 2500 25 µA 0.61 6.1 nA 25000 250 µA 61 nA 250000 2.5 mA 0.61 µA Tab. 1 measuring ranges for an example sensor with an assumed calibration factor of 100.
-
Page 24: Device Settings
“MENU” to activate the digits. Afterwards each item can be changed. Using the Computer (WinControl-3 software) provides an automated protocol via the settings tab in WinControl-3 that synchronizes time and date between computer and ULM-500 with just one click (chapter 5.4.1). -
Page 25: Applications
MENU AND OPERATION The status LED is the signal light in the lower left corner of the ULM-500. In case absolute darkness is needed, this blinking light can be switched off. The beeper normally helps to confirm a pressing of buttons. It can be switched on or off in the device settings. - Page 26 Yes/No can be pressed and to take a look at the changed settings the “Info” field is used. Is used to get back to the standard factory settings of the ULM-500 and contains the following settings that can be found by clicking “Info”.
-
Page 27: User Applications
MENU AND OPERATION To reduce the noise in continuous measurements this application can be used due to the electronic damping the measured mean value shall be more accurate. For data logging the clock timer is needed. Standard interval is 5 minutes changed afterwards. -
Page 28: Info
The MEM function can be left at any time by just pressing “ESC” on the keypad of the ULM-500. -
Page 29: Connection To The Computer
(USB standard B to standard A) is provided with the instrument. The PC software WinControl-3, shipped together with the instrument, is used for the external control of the ULM-500 and can be used to rename the preset sensors, change the calibration factors. -
Page 30: Operating The Ulm-500 Via Wincontrol-3
OPERATION VIA COMPUTER Operating the ULM-500 via WinControl-3 The Initial Tab / Chart Tab The software WinControl-3 offers the standard options of Windows operating systems to vary window sizes. Fig. 6 depicts the initial window of the WinControl-3 software. The window is graphically divided into 11 sections: 10 boxes and the chart area. -
Page 31: Main Menu Bar - Box (1)
OPERATION VIA COMPUTER 5.1.1 Main Menu Bar - Box (1) [File] [Load Data] Delete current data and load saved data. Note: loading data with [Rec. Online] checked (see Box (2)) will display the currently recorded data rather than the loaded data. -
Page 32: Data Management And Graph Design - Box (2)
OPERATION VIA COMPUTER [Record File] The command prompts WinControl-3 to continuously save data and, thereby, minimize data loss in the case of program failure. Execution of [Record File] is indicated by a tick, []. Data are saved in the PAM data file format (filename.pam). - Page 33 OPERATION VIA COMPUTER [Sampling Frequency] The downward arrow gives access three different sampling frequencies: [5/s], [1/s], and [1/10s]. The frequency setting affects only online data (Ft, PAR*, and Temp*, see below). The highest sampling frequency of [5/s] is available only for the Ft: sampling of PAR* and Temp* occurs with [1/s] at most.
-
Page 34: Sidebar - Box (3)
OPERATION VIA COMPUTER 5.1.3 Sidebar - Box (3) Three Tabs ([Val.], [Rec.] and [Chan.]) permit switching between different sidebars. In the [Val.] sidebar, all types of temperature, light and humidity data measurements and data calculated by WinControl-3 are represented by acronyms. The graphical presentation of data is controlled by checkboxes attached to the acronyms. - Page 35 The [Chan.] sidebar lists all WinControl-3 compatible devices connected via USB to the computer. Note: only one JUNIOR-PAM can be operated by WinControl-3 at a time but the combination of 1 JUNIOR-PAM and other WinControl-3 compatible devices (higher-order fluorometers or the light meter ULM-500) is possible.
-
Page 36: Online Values - Box (4)
“saturation pulse”. This box is derived from the PAM instruments and does of course not switch the Sat pulse in the ULM-500 – only when there is an additional PAM connected and recognized. When switching on the clock, the time defined under the settings tab or in the field left (Clk. -
Page 37: Graph, Data And Fluorometer Settings Tabs - Box (8)
Highlighting data in the [chart] graph will highlight the corresponding lines in the report data. [Memory] In this tab the instrument time of the ULM-500 can be synchronized with the computer and logged data of stand alone applications can be downloaded from the ULM. It is also... -
Page 38: Ordinate Selection And Text Field - Box (10)
OPERATION VIA COMPUTER [Manual Abscissa Scaling] Clicking the horizontally pointing arrows changes scaling of the abscissa (time axis). At increased time axis resolution, experimental data can be scrolled using the scroll bar on top of the chart area, or by placing the mouse pointer inside the chart and turning the mouse wheel. -
Page 39: Chart - Selecting Data
OPERATION VIA COMPUTER 5.1.11 Chart - Selecting Data As described above, to select a section of graphed data, click with the left mouse button on the left border of the target data, and move the mouse with the left button held down to the right border of target data. -
Page 40: The Report Tab
The boxes (2) to (3) indicated in Fig. below include specific functions for handling of [Report] data as explained below. Fig. 8 Typical report tab in WinControl-3 with ULM-500 connected, some measurements were already done with the JUNIOR-B monitoring leaf clip connected... -
Page 41: Data Management And Graph Design - Box (2)
OPERATION VIA COMPUTER - Box (2) 5.2.1 Data Management and Graph Design Clicking the [Print Report] button opens the printer dialogue window from which printing of all parameters present in the [Report Data Field] is initiated. The parameters printed are identical to the parameters displayed in the [Report] table. - Page 42 [Export Selected Lines] exports only the selected data. Table 5.2: Report Data - Abbreviations Dataset derived from an ULM-500 When other compatible instruments are connected, also the abbreviations below might appear. Identification of device: number, type and user annotation (see 5.6.1)
-
Page 43: The Report Data Field - Box (11)
Table 5.2 summarized the abbreviations used to log data types. 5.3 The Memory Tab In this tab the instrument time of the ULM-500 can be synchronized with the computer and logged data of stand-alone applications can be downloaded from the ULM. It is also possible to delete the memory of the ULM-500 from here. -
Page 44: Box (12) - Memory Operations
ULM-500 can be edited. This function is also available on the instrument directly. When the internal time of the ULM-500 is different from the used system time in the connected PC, the user will be also asked if time and date shall automatically be synchronized with the PC. -
Page 45: The Settings Tab
With the reset button the chosen instrument (here #10: ULM-500) can be set back to factory settings. All parameters except the sensor names will be changed. Additionally this box can also be used to personalize the instrument with a comment. In the case more than one WinControl-3 compatible instrument is connected to the computer;... -
Page 46: Instrument Settings - Box (13)
The [Beeper] normally helps to press the right buttons. It can be switched off in the device settings. [Auto Off] - In case the ULM-500 is battery powered only, it will automatically switch off when it is inactive for more than 5 minutes to save battery power. - Page 47 It can not be edited by direct input from here, but it is possible to synchronize it with the system time of the PC connected. Direct editing of the ULM-500 time and date is possible in the ULM-500 menu directly (chapter 3.2.3).
-
Page 48: Instrument Information - Box (14)
OPERATION VIA COMPUTER 5.4.3 Instrument Information - Box (14) In the Instrument Information the name and serial number of the chosen instrument is displayed. When calibration factors shall be changed on the right side the “System Settings” button can be found Clicking on the button “System Settings”... -
Page 49: System Settings - Box (15)
System Settings – Box (15) Fig. 11 System Settings Tab The ULM-500 as well as the WinControl-3 software can store up to ten different calibration factors for different sensors. In the field [PAR Sensor Profiles] the stored sensor data can be applied to the both BNC channels #1 and #2. - Page 50 OPERATION VIA COMPUTER [Int. Temp.], [Air Sensor] and [Select Leaf-Clip] offer calibration parameters like offset and gain for the calibration of optional or internal sensors and the available leaf clip holders. To learn more about the [Select Leaf-Clip] field please also read chapter 5.4.2...
-
Page 51: Technical Specifications
SPECIFICATIONS 6 Technical Specifications* Design light grey plastic housing with connectors, membrane keyboard and a white illuminated LCD graphic display Dimensions 12 x 7.5 x 3.5 cm Weight 210 g (including 4 AAA 1.5 V batteries) Power supply 4 AAA type batteries or 5 V DC from USB voltage source Operation time 100 h continuous working time. - Page 52 SPECIFICATIONS Operation channel with samples / second in the fast trigger mode. PAR channel #2 with 5 samples / second (all channels – via 5 samples / second WinControl- 3 software) channel PAR #1 also 100 samples / second Software WinControl-3 software for PAM fluorometers Data/power cable...
-
Page 53: Warranty Conditions
WARRANTY 7 Warranty Conditions All products supplied by the Heinz Walz GmbH, Germany, are warranted by Heinz Walz GmbH, Germany to be free from defects in material and workmanship for one (1) year from the shipping date (date on invoice). - Page 54 3. All products being returned for warranty service must be carefully packed and sent freight prepaid. 4. Heinz Walz GmbH, Germany is not responsible or liable, for missing components or damage to the unit caused by handling during shipping. All claims or damage should be directed to the shipping carrier.
- Page 55 ALPHABETICAL INDEX µmol/m ................6, 43 2030-B..............2, 9, 13, 28, 40 2030-B/ULM .................9 2060-M.................9, 13, 28, 40 Abscissa Scaling................32 absolute time ................32 Air ....................10 Air Sensor................2, 44 ambient temperature..............9 applications .................19 arrow button .................8 Assembly ..................2 Att ....................6, 9 Att.* .....................28 attenuation index ................9 Auto Off.................19, 40 Auto Range..................16...
- Page 56 ALPHABETICAL INDEX battery compartment ..............2 Battery Type .................19, 40 beeper ..................19 BNC ..................2, 4, 40 calibration constant..............16 calibration factor ..............2, 14, 16 Calibration Values................6 Chan....................29 chart................10, 17, 31, 33 Chart Window ................10 clear memory ................38 Clock..................15, 41 Computer ..................23 connecting sensors ................4 continuous recording..............26 contrast..................19...
- Page 57 ALPHABETICAL INDEX Dimensions ..................45 Display Control................37 display illumination..............8 Download ..................38 ESC ....................5 Export..................36 Export All................27, 36 Export Selected Lines..............36 Export Selection................27 fast measurement................16 File ....................25 floating chart................26 fluorescent light ................16 HOLD ..................11 Humidity ..................2 illumination ...................8 incident radiation ...............10 Info....................22 Input 1, PAR ................41 Inputs...................45 Instrument Settings ..............40...
- Page 58 ALPHABETICAL INDEX internal temperature ..............9 irradiance ..................6 JUNIOR-B.................2, 13, 34 JUNIOR-PAM ................29 keypad ...................5 Leaf Sensor..................40 Leaf-Clip Window ................9 LED....................40 Length..................17 light sensor ..................16 Load.....................26 Load Data..................25 LPAR* ..................28 LTemp* ..................28 Manual Abscissa Scaling ............32 Manual Ordinate Scaling............31 Measure settings .................15 Measurement ................12 measuring windows ..............8 MEM....................22...
- Page 59 ALPHABETICAL INDEX Memory Tab ................37 MENU..................5, 8 MINI-PAM..................2 MINI-PAM LC ..............13, 40 MONITORING LC............2, 13, 40 NiCd....................3 NiMH .....................3 noise .....................21 OFF....................5 ON....................5 Online data..................28 Online Values................30 Operation ..................46 Operation time................45 Options ..................35 Ordinate Scaling.................31 PAM.....................16 PAR....................6, 9 PAR #1.................2, 4, 41 PAR #2..................2, 4 PAR 1*..................28 PAR Window ................9...
- Page 60 ALPHABETICAL INDEX PAR2*..................28 PC software.................23 Power supply................45 Print Chart..................26 Print Report ................35 Protocols..................30 Quit ....................25 radiation sensors.................16 Range ...................16 Rec....................29 Record File ..................26 recording time................11 relative time ................32 Report..................31 Report Data Field ...............35 Report Tab ..................34 Report Window ................33 Reset ....................39 Results Panel................25 S…………..................29...
- Page 61 ALPHABETICAL INDEX saturating pulse ................10 Save..................5, 11, 26 Save Data..................25 select data ................27, 33 Select Leaf-Clip ................44 Sensors online ................29 Settings ..................31, 39 Sidebar ..................28 signal noise ..................21 Software ..................46 start screen ..................6 starting screen................6 status LED...................19 Status Panel.................25 Store Data..................30 storing the ULM ................3 support ..................23 Switch Grid .................26...
- Page 62 ALPHABETICAL INDEX Temp. Unit ..................41 Temperature .................2 Temperature Units ..............25 thermocouple ................9 Time/Date..................18 Trigger..................18 Triggered Data................30 ULM triggered................29 user App.1 ...................21 User Applications ...............21 Val....................30 View .....................25 View Lines...................26 View Symbols................26 W....................6 Warnings ..................25 Warranty Conditions ..............47 Weight ..................45 WinControl-3................7, 23 ..................6, 43 Working conditions ..............45 X 12...
- Page 63 ALPHABETICAL INDEX Zoom to Selection ...............27 Heinz Walz GmbH Eichenring 6 91090 Effeltrich Germany Tel. +49-(0)9133 / 7765-0 Fax +49-(0)9133 / 5395 E-mail: info@walz.com Internet: www.walz.com...
Need help?
Do you have a question about the ULM-500 and is the answer not in the manual?
Questions and answers