Advertisement
Table of Contents
- 1 Table of Contents
- 1 Chapter 1 Learn about Your 3D Printer
- 2 Chapter 2 Preparation before Printing
- 3 Chapter 3 Adjustment to the Printing Platform
- 4 Chapter 4 Load, Unload and Change Filament
- 5 Chapter 5 Choose the Model to Print
- 6 Chapter 6 Motherboard Wiring Diagram
- 7 Chapter 7 Analysis of Common Problems
- Download this manual
Advertisement
Table of Contents

Related Manuals for MakerPi P2


Summary of Contents for MakerPi P2
-
Page 3: Table Of Contents
Catalogue Chapter 1 Learn about your 3D printer............1 1.1 3D printer introduction..............1 Chapter 2 Preparation before printing............3 2.1 Install the gantry frame ..............3 Chapter 3 Adjustment to the printing platform..........5 3.1 Coarse tuning..................5 3.2 Fine tuning ..................7 Chapter 4 Load, unload and change filament..........9 Chapter 5 Choose the model to print............ -
Page 4: Chapter 1 Learn About Your 3D Printer
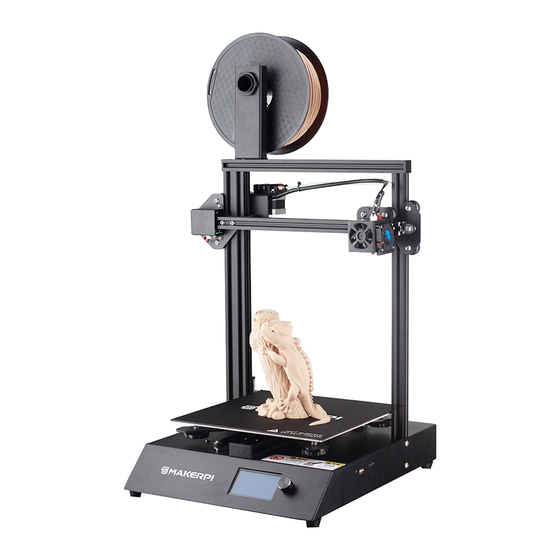
Chapter 1 Learn about your 3D printer 1.1 3D printer introduction 1、X-axis limit switch 7、Leveling nut 13、 Z-axis limit switch 2、Extrusion head kit 8、TF card slot 14、X-axis motor 3 、 Magnetic printing 9、USB port 15、Z-axis motor platform 4、LCD screen 10、Micro-USB port 16、Y-axis motor 5、Knob 11、Feeder... - Page 5 2. Please follow the instructions in the guide while operating this machine. If you have any questions contact your reseller or the MakerPi after-sales department; 3. If support material needs to be removed from the printed model, please wear gloves so as not to be hurt by tools or the support material during the clean-up process;...
-
Page 6: Chapter 2 Preparation Before Printing
Chapter 2 Preparation before printing 2.1 Install the gantry frame ②gantry frame X1 ①base frameX1... - Page 7 ② ④ ④ ① ③ ③ Insert the gantry frame into the corresponding hole of the base frame, then fix the two M5*8 screws at the bottom first, and finally tighten the four M5*25 screws on both sides of the machine. It may be easier if you temporarily remove the magnetic bed.
-
Page 8: Chapter 3 Adjustment To The Printing Platform
Chapter 3 Adjustment to the printing platform 3.1 Coarse tuning LCD screen select Motion → Auto Home When the machine returns to zero, the motor will be automatically locked. You need to select Motion → Disable Steppers to unlock the motors Move the nozzles from corner to corner around the glass plate. - Page 9 Rotate the platform leveling knob counterclockwise to lower the platform In coarse tuning, the approximate distance between the nozzle and the glass plate is the thickness of a piece of paper. If the distance is too great, the platform leveling knob should be rotated clockwise to move the platform upward.
-
Page 10: Fine Tuning
3.2 Fine tuning Select a model to print. By looking at the result of the first layer you can determine if fine-tuning of the platform is required. If you do not have a good first layer with proper flow of material you can stop printing, fine-tune and adjustment for the next print. - Page 11 If the distance between the nozzle and the platform is too large or too small, please stop printing and adjust the platform until the distance between the platform and the nozzle is appropriate. In most cases, the printing failure is caused by the platform not being adjusted properly.
-
Page 12: Chapter 4 Load, Unload And Change Filament
Chapter 4 Load, unload and change filament Pass the filament through the hole of the feeder Select Change Filament in the main interface of the menu. There are three options, they are Change Filament , Load Filament and unload Filament. - Page 13 Change Filament: Preheat PLA –Preheats the hotend to a temperature suitable for PLA material changes ; Preheat ABS –Preheats the hotend to a temperature suitable for ABS material changes ; Preheat Custom –Preheats to a custom temperature to change (Choosing these three options will unload filament and re-start to load filament) Load Filament :...
-
Page 14: Chapter 5 Choose The Model To Print
After the load filament is completed the interface will display; Purge more; will continue to extrude more; Continue; allows you to proceed. The final step, after selection, will return you to the main interface. Chapter 5 Choose the model to print Press the knob to enter the menu, select "Print from Media", and ... -
Page 15: Chapter 6 Motherboard Wiring Diagram
Chapter 6 Motherboard wiring diagram... -
Page 16: Chapter 7 Analysis Of Common Problems
Chapter 7 Analysis of common problems 1. Shocked by the machine when using it The metal-clad machine itself is electrostatically charged, which does not harm the human body. The reason for static electricity is that there is no ground wire at home. The solution to this problem is: (1) Connect the ground when laying wires at home;... - Page 17 3.Filament will not load normally due to the extruder gear being stuck (1) The temperature has not reached the best melting point of filaments. The temperature can be adjusted properly on the LCD. Generally, the temperature is not high enough. (2) The feeding reel is knotted and the filament is not available.
- Page 18 5.The nozzle temperature does not rise, triggering an alarm (1) Check whether the heating cartridge and the thermistor wire are inserted properly, and that there is no breakage or damage; (2) The line terminal is in poor contact, shut down and re-plug the plug-in terminal and the rehearsal line, and restart the machine;...
-
Page 19: Attachment
Attachment: It is recommended to use the original slicing software. If the machine is damaged by using any other software, the consequences will be borne by you. If you use other people's software, please refer to the following to change the parameters and commands. Add the machine ... - Page 20 Configuration parameter ...
Need help?
Do you have a question about the P2 and is the answer not in the manual?
Questions and answers