Advertisement
Table of Contents
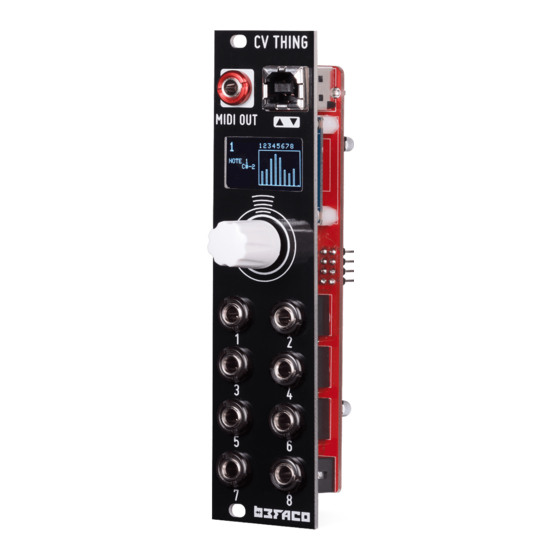
CV Thing v1 - ASSEMBLY GUIDE rev. Aug 2021
THANKS FOR CHOOSING ONE OF OUR KITS!
This manual has been written taking into account the common issues that we often find people
experience in our
workshops. The order in which the components are placed on the board is meant to make
assembly as easy as possible.
Some steps are not obvious, so even if you're an experienced DIYer please read the steps
thoroughly before starting.
If this is your first project, please read this article before you start assembling the kit:
www.befaco.org/howto/
You will be soldering both boards at the same time. Keeping them in the panel together, until
stated to split them, might help you through the build. Check last pages of the Build for PCB
pics to help you identify components.
OPEN BAG A
RESISTORS
It's strongly recommended to measure the resistors with a multimeter. Color code might be
hard to read with blue background.
Qty Value
Code
4
10k
Brown, black, black, red, brown
3
33k
Orange, orange, black, red, brown
2
56 ohm Green, blue, black, gold, brown
2
100k
Brown, black, black, orange, brown R6, R8
1
1k
Brown, black, black, brown, brown
1
2k2
Red, Red, black, brown, brown
DIODES
Solder the diodes observing their polarity. The black or white line on the diode must
match with the white line on the diode symbol on the PCB silkscreen.
Qty Value
2
1N5817
2
BAT85
FERRITES
Solder the two ferrite beads by using a recycled diode leg passed through each ferrite and
proceed as if it were a resistor. Ferrite beads don't have polarity.
Qty Name on PCB+
2
F1, F2
Name on PCB
D3, D4
D1, D2
Name on PCB
R5, R10, R11, R13
R1, R4, R9
R2, R3
R7
R12
1
Advertisement
Table of Contents

Summary of Contents for Befaco CV Thing
- Page 1 CV Thing v1 - ASSEMBLY GUIDE rev. Aug 2021 THANKS FOR CHOOSING ONE OF OUR KITS! This manual has been written taking into account the common issues that we often find people experience in our workshops. The order in which the components are placed on the board is meant to make assembly as easy as possible.
-
Page 2: Power Connector
CV Thing v1 - ASSEMBLY GUIDE rev. Aug 2021 IC SOCKETS First we will place the sockets (taking care to orientate them properly – the notch on one end of the socket should match the silkscreen) and solder them into their correct positions. -
Page 3: Troubleshooting
CV Thing v1 - ASSEMBLY GUIDE rev. Aug 2021 TROUBLESHOOTING At this point we will perform a smoke test and check that power arrives to every relevant spot in the boards. This is very important, as testing all this once mechanical components are soldered will be hard. -
Page 4: Pin Headers
CV Thing v1 - ASSEMBLY GUIDE rev. Aug 2021 PREPARING TEENSY In order to place Teensy properly straight, we will first place the female pin headers in the pcb without soldering, then male headers into these females. This will allow us to easily place and solder the Teensy. -
Page 5: Oled Screen
5. Proceed to solder the socket. TROUBLESHOOTING Connect both boards together and power the module ON. The OLED should show Befaco splash screen and then, main screen. Place ICs in their sockets. Take care of polarity, notch or dot mark orientation. - Page 6 CV Thing v1 - ASSEMBLY GUIDE rev. Aug 2021 OPEN MECHANICAL COMPONENTS BAG SPACER Secure the 19 mm. spacer onto control PCB. Use a screw to secure it. USB CONNECTOR USB connector but don't solder it yet. Place ENCODER Place the encoder on the PCB where the silkscreen indicates. Leave an hex nut on't in place, this will give encoder the right height and avoid damaging your module.
- Page 7 CV Thing v1 - ASSEMBLY GUIDE rev. Aug 2021 CALIBRATION We will perform now a factory calibration. This procedure need to be done with a very precise voltage source. We suggest to measure with a three digits multimeter. In order to get into calibration mode, press the encoder for more than three seconds,this will get you into general settings menu.
- Page 8 CV Thing v1 - ASSEMBLY GUIDE rev. Aug 2021...
- Page 9 CV Thing v1 - ASSEMBLY GUIDE rev. Aug 2021...


Need help?
Do you have a question about the CV Thing and is the answer not in the manual?
Questions and answers