
Subscribe to Our Youtube Channel
Related Manuals for Asada ROLL GROOVER 640

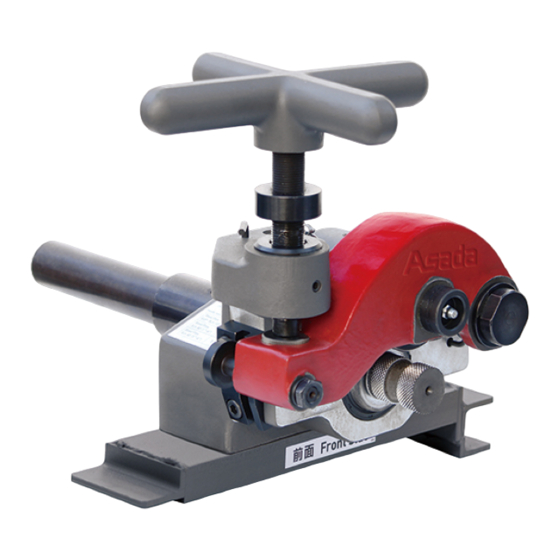
Summary of Contents for Asada ROLL GROOVER 640
- Page 1 Portable Roll Groover ROLL GROOVER 640 INSTRU CT IO N M ANUAL 【Read through this manual carefully before using the machine】...
-
Page 2: Table Of Contents
ROLL GROOVER 640 SAFETY PRECAUTIONS Thank you for choosing our ROLL GROOVER 640. ● This Instruction Manual must be retained by the user of this machine. ● Read the Instruction Manual carefully and completely before use and thoroughly understand the usage, capacity, cautions, and easy repairs for correct operation. -
Page 3: Cautions In Use
ROLL GROOVER 640 CAUTIONS IN USE ● To prevent accidents such as fire, electrical shock and injury, always follow the "SAFETY INSTRUCTIONS" described below. ● Before using the machine, read all "SAFETY INSTRUCTIONS" to use it correctly according to the instructions. - Page 4 ROLL GROOVER 640 WARNING ◆ Wear caps or hair covers to protect long hair. Otherwise, you may get caught in moving parts. ◆ When not in use or process under cleaning, checking or replacing parts, switch off and unplug the machine. If the machine remains plugged in, it will start suddenly, leading to accident or injury.
- Page 5 ROLL GROOVER 640 CAUTION ◆ Hold a material certainly using a Grooving Shaft and a pipe stand. ◆ If a material is 60cm or longer, be sure to use a pipe stand. ◆ Do not leave the machine with a long material set on it. You may tumble over it and get hurt.
-
Page 6: Components Of The Machine
ROLL GROOVER 640 COMPONENTS OF THE MACHINE Main Parts Feed Screw Handle Feed Screw Roller Bracket Adjust Nut Hex Wrench 4 ㎜ Roller Shaft Connection Shaft Bracket Bolt Grooving Roller Grooving Body Grooving Shaft Base Bracket Bracket Pin Guide Bolt... -
Page 7: Specifications
ROLL GROOVER 640 Specifications Description ROLL GROOVER 640 Code.No GR640 Schedule 10 Steel Pipe 1″~6″ Capacity Schedule 40 Steel Pipe 1″~6″ Schedule 10 Steel Pipe 2″~6″ Standard Capacity Schedule 40 Steel Pipe 2″~6″ Weight 12kg(Except Base Bracket and Connection Shaft) Size L:280㎜×W:260㎜×H:250㎜... -
Page 8: Preparations
ROLL GROOVER 640 PREPARATIONS Preparing for Threading Machine WARNING ◆ Always ground the machine. It may cause a trouble or electrical shock. ◆ Do not install the machine inclined or on unstable places. The machine may fall down and cause a serious injury. -
Page 9: Preparation Before Operation
ROLL GROOVER 640 Preparation Before Operation CAUTION ◆ Base Bracket that matches to the Threading Machine must be used. Otherwise, it will not allow proper operation and may cause a damage to the machine. ◆ Install Base Bracket as the seal side comes in front. -
Page 10: Operation
ROLL GROOVER 640 OPERATION Installing to the Threading Machine ① Set Base Bracket of Roll Groover on the Guide Bar of Threading Machine. Hammer Chuck Hold ② Hold Connection Shaft tightly by Hammer Chuck. Base Bracket Guide Bar Setting Materials CAUTION ◆... - Page 11 ROLL GROOVER 640 ⑤ Insert the material until the end of Grooving Shaft. End of Grooving Shaft CAUTION ◆ If the material is 60cm or longer, be sure to use a pipe Support. (Optional accessories) Material Insert ⑥ Make the material and the Threading Machine parallel by using Level.
-
Page 12: Grooving Depth Adjustment
ROLL GROOVER 640 Grooving Depth Adjustment CAUTION ◆ Groove depth adjusted with Depth Gauge is only a guide. Check the depth by a trial operation before starting. Use Adjust Nut in case if the groove depth is not meeting the standard. -
Page 13: Grooving
ROLL GROOVER 640 Grooving CAUTION ◆ If the gap between the surface of Grooving Shaft and the material opens, turn off the machine immediately and stop the rotation of the material. The material may come off from Grooving Shaft and drop. This might cause of a serious injury. - Page 14 ROLL GROOVER 640 ③ Turn the handle until Adjust Nut touches Body. Stop turning the handle once the handle gets Feed Screw Handle Touches Body hard to turn. Stop ④ After rotating the material once or more, loosen Material up the handle and upper Roller Bracket. Then Rotating Once or More turn off the Threading Machine.
-
Page 15: Checking The Size Of Groove
ROLL GROOVER 640 Checking the Size of Groove CAUTION ◆ Please make sure to check the size of the groove after the operation. Measure Groove Diameter (G), Seal Surface Width (L), and Groove Width (W) after the operation and confirm that they are in the standard. -
Page 16: Changing Size
ROLL GROOVER 640 Changing Size CAUTION ◆ Make sure to replace Grooving Roller and Grooving Shaft as a set. Correct operation cannot be done with the wrong combination. ◆ Grooving Roller, Grooving Shaft, Roller Shaft, and Thrust Washer must be clean when they will be installed. -
Page 17: Maintenance & Inspection
ROLL GROOVER 640 MAINTENANCE & INSPECTION CAUTION ◆ When cleaning, checking or replacing parts, turn off and unplug the machine. If the machine remains plugged in, it will start suddenly, leading to accident or injury. ◆ Always wear gloves when replacing repair parts. -
Page 18: Troubleshooting
ROLL GROOVER 640 TROUBLESHOOTING ● Before asking for repairs, check following troubleshooting. ● If the problem cannot be solved, contact the shop you purchased or our sales office. Phenomenon Causes Counter Measures Size of Grooving Roller & Grooving Use the right size of Grooving Roller &... - Page 19 ROLL GROOVER 640...
- Page 20 Ver.03 Code No. IM0467 A...
Need help?
Do you have a question about the ROLL GROOVER 640 and is the answer not in the manual?
Questions and answers