
Related Manuals for KMS CAN display


Summary of Contents for KMS CAN display
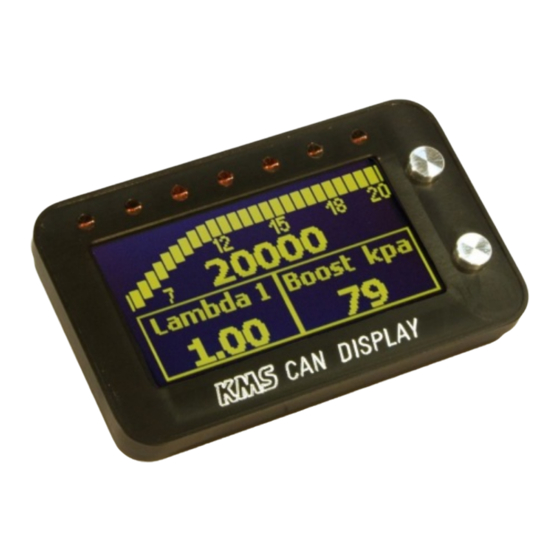
- Page 1 EN—NL—DE kms.vankronenburg.nl CAN display Manual for installation and setup • Handleiding voor installatie en instelling • Anleitung für Installation und Setup •...
- Page 3 EN—NL—DE kms.vankronenburg.nl CAN display Part nr: 01-01-01-0009 Technical specifications and installation...
-
Page 4: Table Of Contents
This document contains detailed information about the technical specifications and calibration values for the CAN display. Additional information, user manu- als, wiring examples ands software can be found on our website: kms.vankronenburg.nl or on the software CD included with the ECU. -
Page 5: Contents Of The Package
Instruction manual 3. Installation of the CAN display The KMS CAN display is splash waterproof. However it’s best to place your KMS CAN display in a dry place where temperatures don’t exceed 65°C. Warning: don’t place the CAN display and wires near any ‘high powered’ cables (sparkplug leads, etc), because of electrical interference. -
Page 6: Wiring Of The Can Bus
0,5m of the CAN bus. If the CAN Bus is connected to the KMS MP25, IA23 or FA23 ECU (using the RS232 to CAN converter) or the KMS MD35 ECU, it is not necessary to use a CAN terminating resistor plug. -
Page 7: Controlling The Display
5. Controlling the display There are two buttons on the right side of the CAN display. With these two buttons you can control all the options on the display. The top/upper button is the ‘enter’ button. With this button you can confirm the option that is selected (the illuminating beam) in the display. -
Page 8: Main Menu
Exit: Back to the main menu • Pressure: Set pressure units to bar, kPa or PSI • Temperature: Set temperature units to °C or °F • Lambda: Set lambda units to A/F ratio or λ value __________________________________________________________ KMS CAN display Part nr: 01-01-01-0009... -
Page 9: Layout
4 bargraphs: Four bargraphs displayed under each other 6.5.1.1 Single screen • Exit: Back to the preset menu • Column 1: Select the value to be displayed in column 1 of the single screen __________________________________________________________ KMS CAN display Part nr: 01-01-01-0009... - Page 10 15000 or 20000 RPM. • Row 2: Select the EGT or lambda sensor to be displayed in bargraph • Row 3: Select the EGT or lambda sensor to be displayed in bargraph 2 __________________________________________________________ KMS CAN display Part nr: 01-01-01-0009...
- Page 11 Row 2: Select the EGT or lambda sensor to be displayed in bargraph 2 • Row 3: Select the EGT or lambda sensor to be displayed in bargraph 3 • Row 4: Select the EGT or lambda sensor to be displayed in bargraph 4 __________________________________________________________ KMS CAN display Part nr: 01-01-01-0009...
-
Page 12: Led Setup
• EGT: LED on when exhaust gas temperature is above limit. The limit can be configured to suit your own requirements. Save and exit: Save new settings and return to LED setup menu __________________________________________________________ KMS CAN display Part nr: 01-01-01-0009... -
Page 13: Can Communication
Save and exit: Save new settings and return to main menu 6.8 Default settings • Cancel: Back to main menu • Yes: Set to default settings • No: Don’t set back to default settings __________________________________________________________ KMS CAN display Part nr: 01-01-01-0009... - Page 14 EN—NL—DE kms.vankronenburg.nl 7. Appendix: Display dimensions __________________________________________________________ KMS CAN display Part nr: 01-01-01-0009...
- Page 15 EN—NL—DE kms.vankronenburg.nl CAN display Onderdeel nr: 01-01-01-0009 Technische specificaties en installatie...
- Page 16 EN—NL—DE kms.vankronenburg.nl Dit document bevat gedetailleerde informatie over de KMS CAN display. Overige informatie, handleidingen, kabelboomschema’s en software kan worden gevonden op onze website: kms.vankronenburg.nl of op de software CD bijgeleverd bij deze ECU. Inhoud Inhoud Inhoud van de kit...
-
Page 17: Inhoud Van De Kit
• Handleiding 3. Installatie van het CAN display De KMS CAN display is spatwater dicht. Het is echter het beste om de KMS CAN dis- play op een droge plaats te monteren waar temperaturen niet boven de 65°C ko- men. -
Page 18: Aansluiting Van De Can Bus
Wanneer de CAN bus aangesloten wordt op een KMS MP25, IA23 of FA23 ECU (d.m.v. de RS232 naar CAN omzetter) of een KMS MD35 ECU, is het niet nodig om een CAN afsluitingsweerstand (CAN terminating resistor plug) te gebruiken. Wanneer de CAN... -
Page 19: Bediening Van Het Display
De LED lampjes kunnen naast de bovenstaande functie, ook worden ingesteld als schakellampjes. Dit kan ook geheel naar eigen wens worden aangepast. __________________________________________________________ KMS CAN display Onderdeel nr: 01-01-01-0009... -
Page 20: Hoofd Menu
Exit: Terug naar het hoofd menu • Pressure: Stel druk eenheid in: bar, kPa of PSI • Temperature: Stel temperatuur eenheid in: °C of °F • Lambda: Stel lambda eenheid in A/F ratio of λ waarde __________________________________________________________ KMS CAN display Onderdeel nr: 01-01-01-0009... -
Page 21: Single Screen
4 bargraphs: Vier grafieken onder elkaar 6.5.2 Single screen: enkelvoudig scherm • Exit: Terug naar preset menu • Column 1: Selecteer de waarde welke weergege- ven moet worden in kolom 1 van het scherm __________________________________________________________ KMS CAN display Onderdeel nr: 01-01-01-0009... - Page 22 13000, 15000 of 20000 RPM.. • Row 2: Selecteer EGT of lambda sensor om weer te geven in diagram 1 • Row 3: Selecteer EGT of lambda sensor om weer te geven in diagram 2 __________________________________________________________ KMS CAN display Onderdeel nr: 01-01-01-0009...
- Page 23 Row 2: Selecteer de EGT of lambda sensor om weer te geven in grafiek 2 • Row 3: Selecteer de EGT of lambda sensor om weer te geven in grafiek 3 Row 4: Selecteer de EGT of lambda sensor om weer te geven in grafiek 4 __________________________________________________________ KMS CAN display Onderdeel nr: 01-01-01-0009...
-
Page 24: Led 1 T/M
• EGT: LED aan wanneer de uitlaat gas temperatuur boven de vooraf ingestelde limiet komt. • Save and exit: Sla nieuwe instellingen op en ga terug naar LED setup menu __________________________________________________________ KMS CAN display Onderdeel nr: 01-01-01-0009... -
Page 25: Can Communicatie
Save and exit: Sla nieuwe instellingen op en keer terug naar hoofd menu 6.8 Default settings: standaardinstellingen • Cancel: Terug naar het hoofd menu • Yes: Stel in op standaard instellingen • No: Stel niet in op standaard in stellingen __________________________________________________________ KMS CAN display Onderdeel nr: 01-01-01-0009... - Page 26 EN—NL—DE kms.vankronenburg.nl 7. Appendix: Display afmetingen __________________________________________________________ KMS CAN display Onderdeel nr: 01-01-01-0009...
- Page 27 EN—NL—DE kms.vankronenburg.nl CAN display Teilenummer: 01-01-01-0009 Technische Information und Einstellung...
- Page 28 EN—NL—DE kms.vankronenburg.nl Dieses Dokument enthält detaillierte Information über den KMS CAN Display. Weitere Informationen, Bedienungsanleitungen, Schaltpläne finden Sie auf unse- rer Website: kms.vankronenburg.nl oder auf die bei dem Steuergerät beigeleg- ten CD. 1. Inhalt Inhalt Inhalt von diesem Kit KMS CAN Display montage Anschließen an der CAN Linie...
-
Page 29: Inhalt Von Diesem Kit
• Can Verlängerungskabel männlich—weiblich 0,4m 3. KMS CAN Display montage Das KMS CAN Display ist Wassergeschützt. Am besten können Sie aber das KMS CAN Display auf einen trockenen Platz montieren, wo die Temperatur von 65°C nicht überschritten wird. Vorsicht: montieren Sie das KMS CAN Diplay mit die dazu gehörende Kabeln nicht in der nähe von Hochspannungskabeln (zum Beispiel: Zündkabeln) um Störungen zu... -
Page 30: Anschließen An Der Can Linie
Diese Geräte dürfen sich nicht mehr als 0.5m von die CAN Linie entfernt befin- den. Wenn die CAN Linie angeschlossen wird am KMS MP25, IA23 oder FA23 ECU (über die RS232 à CAN Interface) oder am KMS MD35 ECU, ist es nicht notwendig ein Sperrwi- derstand (CAN terminating resistor plug) zu verwenden. -
Page 31: Bedienung
Warnleuchte/Anzeige eingesetzt werden für zum Beispiel: Öldrück, Kraftstoffdrück, Wassertemperatur, A.L.S., Launch Control, Lambda Control, usw. Wenn eine Warnleuchte aufleuchtet wird der überschrittene Wert blinkend im Bild- schirm angezeigt. Die LED-leuchten können auch als Schaltleuchte dienen. __________________________________________________________ KMS CAN Display Teilenummer: 01-01-01-0009... -
Page 32: Units
6.4 Units: Einheiten • Exit: zurück zum Hauptmenü • Pressure: Einheiten ändern: bar, kPa of PSI • Temperature: Einheit Temperatur ändern in: °C oder °F • Lambda: Lambda-Einheit ändern in A/F ratio oder λ __________________________________________________________ KMS CAN Display Teilenummer: 01-01-01-0009... -
Page 33: Single Screen
4 rows: Vier Reihen mit die Werte unter einander • 4 bargraphs: Vier Grafiken unter einander 6.5.1.1 Single screen: Einzelbild • Exit: zurück zum Presetmenü • Column 1: wählen Sie den Wert der in die erste Kolumne vom Bildschirm gezeigt werden muß __________________________________________________________ KMS CAN Display Teilenummer: 01-01-01-0009... - Page 34 Exit: zurück zum Presetmenü • Row 1: Drehzahlmesser kann eingestellt werden bis maximal: 6000, 8000, 10000, 13000, 15000 oder 20000 RPM • Row 2: wählen Sie entweder EGT oder Lambda um an zu zeigen in Grafik 1 __________________________________________________________ KMS CAN Display Teilenummer: 01-01-01-0009...
- Page 35 Row 2: wählen Sie entweder EGT oder Lambda um zu zeigen in Grafik 2 • Row 3: wählen Sie entweder EGT oder Lambda um zu zeigen in Grafik 3 • Row 4: wählen Sie entweder EGT oder Lambda um zu zeigen in Grafik 4 __________________________________________________________ KMS CAN Display Teilenummer: 01-01-01-0009...
-
Page 36: Led Setup
Water temperature: LED leuchtet auf wenn die Wassertemperatur die einge- stellte Grenze überschreitet. • EGT: LED leuchtet auf wenn die Abgastemperatur die eingestellte Grenze über- schreitet. • Save and exit: Änderungen speichern und zurück zum LED-setupmenü __________________________________________________________ KMS CAN Display Teilenummer: 01-01-01-0009... -
Page 37: Can Kommunication
Autodetect: Die Geschwindigkeit der CAN Linie automatisch suchen und einstel- • Save and exit: Änderungen speichern und zurück zum Hauptmenü 6.8 Default settings: Standardeinstellungen • Cancel: zurück zum Hauptmenü • Yes: Werkseinstellung herstellen • No: Werkseinstellung nicht herstellen __________________________________________________________ KMS CAN Display Teilenummer: 01-01-01-0009... - Page 38 EN—NL—DE kms.vankronenburg.nl 7. Anhang: Display groβe __________________________________________________________ KMS CAN Display Teilenummer: 01-01-01-0009...
- Page 40 Please visit our website for more information, manuals, software and prices: kms.vankronenburg.nl...
Need help?
Do you have a question about the CAN display and is the answer not in the manual?
Questions and answers