COX CXO300 Owner's Manual
Diesel outboard
Hide thumbs
Also See for CXO300:
- Installation manual (60 pages) ,
- Manual (29 pages) ,
- User manual (20 pages)

Related Manuals for COX CXO300


Summary of Contents for COX CXO300
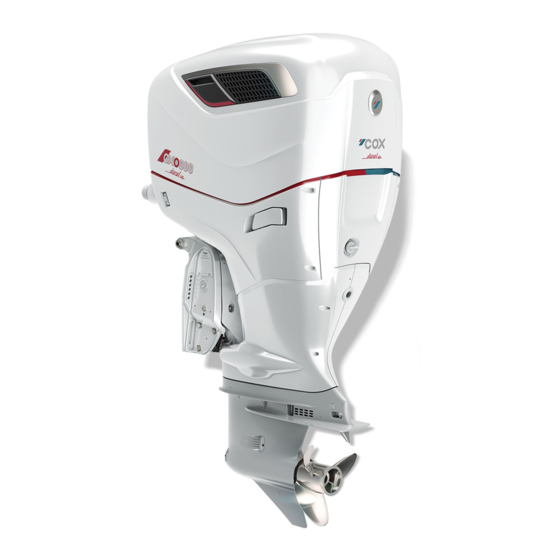
- Page 1 OWNER’S MANUAL ––– CXO300 – the power of diesel when you need it most coxmarine.com...
-
Page 3: Table Of Contents
TABLE OF CONTENTS MAINTENANCE WELCOME INFORMATION Maintenance chart Welcome information Maintenance schedule Certification of conformity California warnings Grease points Maintenance procedures Environmental considerations 6.4.1 Cowlings 1.3.1 Disposing of used oil Identification 6.4.2 Checking powerhead oil level 6.4.3 Changing powerhead oil Date collection &... -
Page 4: Welcome Information
Cox Powertrain. Cox Powertrain reserves the right to change specifications without notice in accordance with its policy of continuous product improvement. 1.0 WELCOME INFORMATION... -
Page 5: Certification Of Conformity
1.1 CERTIFICATION OF CONFORMITY The Cox CXO300 outboard engine is in conformity with the following requirements: USA EPA – 40 CFR 1042 Tier 3 IMO Annex VI Reg.13 Tier II (EIAPP) EU Directives: 2013/53/EU (RCD II). (ii) 2006/42/EC (Machinery). (iii) 2014/30/EU (EMC). -
Page 6: Environmental Considerations
Inspect for fouling regularly, clean if necessary and consider applying anti-fouling paints to keep your hull smooth and your vessel efficient. Consult your boat builder or an authorized Cox Powertrain dealer for paint recommendations. -
Page 7: Disposing Of Used Oil
Contact your local environmental authority or authorized Cox Powertrain dealer to review your local options for disposal which may include waste management centers, recycling facilities, local automotive, marine businesses or collection services etc. Oil is a finite and valuable resource which many of these facilities can process for reuse. -
Page 8: Identification
Refer to Owner’s Manual for service and viewable after removing the upper cowling. Made in the United Kingdom Figure: Serial number label Model designation Build month and year Outboard serial number 1.0 WELCOME INFORMATION CXO300 OWNER’S MANUAL... - Page 9 Cox Powertrain have adequate safety and privacy policies, including encryption, to keep such data safe for a limited period of retention. The data will remain under the control of Cox Powertrain and third parties, of whom Cox Powertrain warrants to have in place safety and privacy policies that are equivalent to those of Cox Powertrain for data protection and safe keeping.
-
Page 10: Outboard Safety
Never work on a propeller with the outboard running. Passengers may fall overboard and come into contact with a moving propeller. Remain aware and vigilant to minimize the risk of injury. 2.0 OUTBOARD SAFETY CXO300 OWNER’S MANUAL... - Page 11 Triggering the kill switch will result in sudden and violent deceleration as outboard drive thrust is shut off, especially if traveling at high speed. Take care to avoid false triggering and always make sure your passengers are appropriately seated. CXO300 OWNER’S MANUAL 2.0 OUTBOARD SAFETY...
-
Page 12: Boating Safety
Be sure to have sufficient and appropriate personal flotation devices on board for all passengers, operator included. Cox Powertrain recommends the use of personal flotation devices whenever boating and they may be a legal requirement in one or more of the territories in which you will operate your vessel. - Page 13 Ensure your passengers are aware of the basics of safe outboard operation on your vessel in case of emergency, for example, to recover you in a man overboard situation. Always check weather forecasts and tidal charts prior to leaving port. Do not set out in adverse weather or tides. CXO300 OWNER’S MANUAL 2.0 OUTBOARD SAFETY...
-
Page 14: Man Overboard
Restart the outboard(s) using the master fob as soon as possible to reactivate fob functionality. In the event the master fob is misplaced, a new master can be paired using the procedure in section 4.4.2. 2.0 OUTBOARD SAFETY CXO300 OWNER’S MANUAL... -
Page 15: Warning Labels
(3a-3d) outboard WARNING Always keep the master fob on your person 2.4 WARNING LABELS Please note the following safety labels placed on your outboard. AWARENESS OF VESSEL LOAD CXO300 OWNER’S MANUAL 2.0 OUTBOARD SAFETY... -
Page 16: Technical Specification
3259 rpm (1.23 ratio) 2737 rpm (1.46 ratio) Propeller shaft output 31.75 mm (1.25”) shaft, 19 tooth spline Maximum propeller diameter 406.4 mm (16”) Gear oil SAE 80W90, API GL-5 Gear oil capacity 1.9 L (2.0 US qt) 3.0 TECHNICAL SPECIFICATION CXO300 OWNER’S MANUAL... -
Page 17: Design Overview
3.2 DESIGN OVERVIEW Main sub-systems Figure: Main sub-systems Upper cowling Power tilt-trim and bracket unit Powerhead Spacer (if fitted) Mid-section Transmission CXO300 OWNER’S MANUAL 3.0 TECHNICAL SPECIFICATION... -
Page 18: Design Features
3.0 TECHNICAL SPECIFICATION 3.3 DESIGN FEATURES Outboard interfaces - port side Figure: Outboard Interface - Port Side Power tilt-trim switch Rear water inlets Trim tab anode and bolt Front water inlets 3.0 TECHNICAL SPECIFICATION CXO300 OWNER’S MANUAL... - Page 19 Outboard interfaces Figure: Outboard Interface Rear flush connector Idle relief (bottom) Anti-ventilation plate CXO300 OWNER’S MANUAL 3.0 TECHNICAL SPECIFICATION...
- Page 20 3.0 TECHNICAL SPECIFICATION 3.3 DESIGN FEATURES Outboard interfaces - starboard side Figure: Outboard Interface Front flush connector (top) and tell-tale stream (bottom) 3.0 TECHNICAL SPECIFICATION CXO300 OWNER’S MANUAL...
- Page 21 Inside upper cowling Figure: Important under-cowl components Oil dipstick / Oil extraction point Fuel filter Air filters CCV canister / Oil fill point Oil filter Powerhead oil drain plugs / Oil drain point CXO300 OWNER’S MANUAL 3.0 TECHNICAL SPECIFICATION...
- Page 22 3.0 TECHNICAL SPECIFICATION 3.3 DESIGN FEATURES PTT Bracket Unit Figure: Bracket and power tilt-trim components Upper mounting bolts Trim rams Lower mounting bolt PTT anode (at underside) Tilt lock Manual pressure relief valve Tilt ram 3.0 TECHNICAL SPECIFICATION CXO300 OWNER’S MANUAL...
- Page 23 Simultaneous trim-tilt switch Gear position indicators Cycle neutral warm-up or trolling mode Take command from another helm Single lever control for multiple outboards Indicator lamps Indicator lamps Take command indicator lamp Single lever control indicator lamp CXO300 OWNER’S MANUAL 3.0 TECHNICAL SPECIFICATION...
- Page 24 Figure: Trim control panel for a triple outboard install Port outboard trim-tilt switch Center outboard trim-tilt switch Starboard outboard trim-tilt switch Wireless Fob START Figure: Wireless Fob Green LED Start button ON /OFF ON/OFF Button Red LED 3.0 TECHNICAL SPECIFICATION CXO300 OWNER’S MANUAL...
- Page 25 Engine 1 control Engines 1 & 2 control Engine 2 control Engines 3 & 4 control Engine 3 control Engines 5 & 6 control Engine 4 control CXO300 OWNER’S MANUAL 3.0 TECHNICAL SPECIFICATION...
- Page 26 7” screen Figure: Helm display screen (7”) Main display screen Function buttons (x8) Menu button Return button Helm display screens 12" screen Figure: Helm display screen (12”) Main display screen Touch function button 3.0 TECHNICAL SPECIFICATION CXO300 OWNER’S MANUAL...
- Page 27 Starboard outboard RPM Port outboard gear position Starboard outboard trim position Port outboard RPM Vessel speed Port outboard trim position Wind direction Starboard outboard ID Fuel tank levels Starboard outboard gear position Vessel fuel consumption CXO300 OWNER’S MANUAL 3.0 TECHNICAL SPECIFICATION...
-
Page 28: Outboard Installation
4.2 FUEL AND OIL Diesel fuel The CXO300 has been validated and certified using diesel fuels complying with fuel standards EN 590 and ASTM D975 No.2-D. Operating on fuels with properties outside of these standards may lead to unacceptable emissions levels, increased fuel consumption, accelerated outboard wear and outboard damage which may invalidate your warranty. - Page 29 Transmission oil Cox Powertrain recommends the use of Shell Spirax S3 AX gear oil. The transmission oil must comply with the SAE 80W90 viscosity standard and API service classification GL-5. CAUTION The use of transmission oil failing to meet the above specifications can affect your outboard’s...
-
Page 30: Propeller Selection
Propeller selection plays a key role in overall vessel performance and fuel consumption. Always consult an authorized Cox Powertrain dealer for propeller recommendations for a new or re-power installation, or if your outboard(s) operate outside the propping speed range at maximum power. The propping speed range should be met with a representative vessel loading. -
Page 31: Wireless Fob
The control panel, wireless fob and their features are outlined in section 3.3. NOTE If a fob is lost, please contact an authorized Cox Powertrain dealer for a replacement. NOTE If a fob’s battery is running low, the fob’s LED will flash red quickly. -
Page 32: Changing Pin
4.0 OUTBOARD INSTALLATION 4.4.1 CHANGING PIN The factory default PIN for the fob system is 1234. Cox Powertrain recommends a personalized PIN is created. Follow the process below to change the PIN on your control panel. START ON/OFF Figure: Figure: PIN change steps... -
Page 33: Pairing Fobs
Test the system by pressing the central Start button on the fob. The control panel will unlock in response NOTE Repeat this process to pair all master fobs. The control panel can be paired with up to 10 master fobs. CXO300 OWNER’S MANUAL 4.0 OUTBOARD INSTALLATION... -
Page 34: Operation
Before you start the outboard(s), it is important you run all the pre-start checks referred to from 5.2.1. onto 5.2.5. If any of these checks indicate a fault or that an outboard is not working properly, please contact your authorized Cox Powertrain dealer for inspection and repair. Do not operate any outboard which fails the initial checks. -
Page 35: Outboard Inspection
Inspection of propeller With the outboard(s) shut down, tilt the outboard(s) fully up and visually inspect the propeller(s) for any dents, cracks or wear. Check the propeller retaining nut(s) are tight and any locking tab(s) in place. 5.0 OPERATION CXO300 OWNER’S MANUAL... - Page 36 Aft flush point Fore flush point Figure: Locating the flush points Flush Points Ensure both flush caps are in place and tightened prior to operation. 5.0 OPERATION CXO300 OWNER’S MANUAL...
-
Page 37: Checking Controls
Check that your throttle lever is in the neutral position prior to attempting to start your outboard(s). Note that by law, all Cox diesel outboards feature start-in-gear protection, which will prevent the outboard(s) from cranking if the control lever is not in the neutral position. -
Page 38: Checking Emergency Switches
Leaving the port without enough fuel for a safe return is dangerous and may incur significant recovery costs. Degraded diesel fuel, by contamination or long storage time, can lead to decreased performance, misfiring or other poor running and can cause damage to your outboard(s). 5.0 OPERATION CXO300 OWNER’S MANUAL... -
Page 39: Checking Oil
Cox Powertrain service center. Monitoring oil levels is important in identifying any issues before a significant failure arises. Carry out a check of powerhead oil level regularly by following the steps section 6.4.2. - Page 40 Release when the corresponding Within 60 seconds, press and release the outboard starts. ON/OFF button to turn on the ignition on all installed outboards. The LED will light yellow to indicate the ignition is on. 5.0 OPERATION CXO300 OWNER’S MANUAL...
- Page 41 LED is solid green, indicating will flash green 5 times quickly to indicate that MOB protection functionality is active. ignition is on. The control panel’s LED will also light yellow to indicate ignition is on. 5.0 OPERATION CXO300 OWNER’S MANUAL...
-
Page 42: Post-Start Checks
Operating in this state could cause the outboard(s) to overheat and the control system to take protective measures, including limiting performance or shutting down. CAUTION Do not operate your outboard(s) or leave port if tell-tale streams are not clearly visible. 5.0 OPERATION CXO300 OWNER’S MANUAL... -
Page 43: Shutting Down The Outboard(S)
2 seconds. The corresponding outboard, or outboard group, will be stopped. Once shut down, follow the post-use flushing procedure in section 5.10 prior to tilting your outboard(s) out of water. WARNING Shutting down soon after hard running can cause significant damage to your outboard(s). 5.0 OPERATION CXO300 OWNER’S MANUAL... -
Page 44: Early Use Break-In
5.0 OPERATION 5.5 EARLY USE BREAK-IN Each CXO300 diesel outboard follows a run-in process prior to being shipped from the factory. Nevertheless, Cox Powertrain recommends to limit load during a break-in period of 10 hours of operation, as well as limiting or avoiding periods of extended idle where possible. -
Page 45: Controlling Trim
Trimming out or UP raises the bow of your vessel. A bow-up attitude improves stability and results in less drag, however if excessive, can result in propeller ventilation or porpoising (hopping through the water), both of which are potentially dangerous. 5.0 OPERATION CXO300 OWNER’S MANUAL... - Page 46 WARNING Excessive trim in or out can lead to vessel instability, difficult or unpredictable steering and increased risk of accident. Slow down and reduce trim if you experience any of these effects. 5.0 OPERATION CXO300 OWNER’S MANUAL...
-
Page 47: Maneuvering The Vessel
NOTE The process of repeatedly engaging and disengaging gear in the direction of travel can be used to further reduce speed if necessary, for safety. However, it will reduce transmission longevity. 5.0 OPERATION CXO300 OWNER’S MANUAL... - Page 48 5.0 OPERATION CXO300 OWNER’S MANUAL...
-
Page 49: Troll Mode
Shifting one outboard into forward and the other into reverse can be used to turn the vessel in a tight space. Shifting both outboards into forward or reverse and then using different speed demands on the levers can be used to steer the vessel without turning the outboards. 5.0 OPERATION CXO300 OWNER’S MANUAL... -
Page 50: Flushing Post-Use
5.0 OPERATION 5.10 FLUSHING POST-USE CXO300 collects and pumps raw water through the powerhead and associated systems to keep them cool during operation. Although the water intakes include mesh screens to deflect large foreign objects, flushing thoroughly with clean and fresh water is necessary at the end of each day of operation to wash out any salt or other contamination. - Page 51 A missing or loose flush plug will result in overheating, limited performance and possible outboard damage or failure. CAUTION Your outboard’s warranty may be invalidated if damage is caused by the use of flushing additives. Flush with fresh water only. 5.0 OPERATION CXO300 OWNER’S MANUAL...
-
Page 52: Tilting
The ECU has detected a communications error on one of the vessel CAN networks. CAN communications error Depending on severity the ECU may allow normal operation, enter limp-home or shut down the outboard 5.0 OPERATION CXO300 OWNER’S MANUAL... - Page 53 The control system has detected an error which does not fit into the categories above and Check engine further diagnosis is required. The ECU may limit performance, enter limp-home mode or shut the outboard down. Contact an authorized Cox Powertrain dealer for further support. 5.0 OPERATION CXO300 OWNER’S MANUAL...
-
Page 54: Maintenance
– Mount bushing – – – – – Vessel fuel filter E Battery terminals – – I = Inspect* R= Replace* G= Grease* CL=Clean and Inspect* E =Emissions related part *As per the service manual 6.0 MAINTENANCE CXO300 OWNER’S MANUAL... -
Page 55: Maintenance Schedule
Cox genuine spare parts. If you are unsure of any of the instructions provided in this manual or which parts to buy, consult your Cox Powertrain official dealer. - Page 56 • Maximum 2 hours at full power in any 12 hour period • Maximum 7 hours at 75+% power in any 12 hour period For regular usage heavier than the above or in severe conditions, contact an authorized Cox Powertrain dealer for further maintenance advice.
-
Page 57: Grease Points
Certain areas of your outboard(s) require regular application of grease for best performance and longevity. Refer to the maintenance schedule for greasing intervals. Always use a water-resistant marine grade grease. Contact an authorized Cox Powertrain dealer for product recommendations. Adding grease: Prepare a hand-operated grease gun fitted with an extension hose to suit a standard grease nipple. -
Page 58: Maintenance Procedures
Operating the outboard on water without the upper cowling in place could result in death or serious injury. The upper cowling is heavy (~20 kg/~44lbs) and appropriate lifting precautions must be taken. Plan your lift prior to actioning. 6.0 MAINTENANCE CXO300 OWNER’S MANUAL... -
Page 59: Checking Powerhead Oil Level
Between marks: Oil level acceptable. Below lower mark: Top-up required. Running with too little oil can cause rapid and severe engine failure. Re-insert the dipstick and secure. Figure: Reading the powerhead oil dipstick CXO300 OWNER’S MANUAL 6.0 MAINTENANCE... -
Page 60: Changing Powerhead Oil
Engine oil and related components may be hot and can cause severe burns. Avoid direct skin contact with oil. Brief contact may cause irritation while prolonged or repeated exposure may lead to skin problems. 6.0 MAINTENANCE CXO300 OWNER’S MANUAL... -
Page 61: Changing Powerhead Oil By Extraction On Water
Remove and replace the oil filter following the procedure in section 6.3.6. Fill a clean container with fresh oil in the same quantity as extracted from your outboard, or 10.5L (11.1 US qt), whichever is higher. CXO300 OWNER’S MANUAL 6.0 MAINTENANCE... - Page 62 Once satisfied that the oil level is acceptable per the above criteria, fully insert and secure the dipstick, wipe clean any oil residue in the work area then refit the upper cowling and close the latches. WARNING Running with too little oil can cause rapid and severe powerhead failure. 6.0 MAINTENANCE CXO300 OWNER’S MANUAL...
-
Page 63: Changing Powerhead Oil By Draining Out Of Water
Prepare an empty reservoir of at least 12L (12.7 US qt) capacity and position to receive used oil drained from the preferred (port or starboard) oil drain plug. Remove the oil dipstick, wipe clean with a lint-free cloth and set aside. CXO300 OWNER’S MANUAL 6.0 MAINTENANCE... - Page 64 NOTE If there is significant build-up of metal shavings on either oil drain plug, take a photo and contact an authorized Cox Powertrain dealer for further advice. Remove and replace the oil filter following the procedure in section 6.4.6.
-
Page 65: Changing Powerhead Oil Filter
Once satisfied that the oil level is acceptable per section 6.4.2, fully insert and secure the dipstick and refit the CCV separator lid clockwise by hand. Wipe clean any oil residue in the work area then refit the two lower cowlings and tighten the joining fasteners. CXO300 OWNER’S MANUAL 6.0 MAINTENANCE... - Page 66 By hand, or using a removal tool if tight, turn the oil filter cartridge counterclockwise to loosen. NOTE Some oil may leak from the underside of the filter while loosening and removing. Have a lint-free cloth ready and turn the filter cartridge-down as soon as possible. 6.0 MAINTENANCE CXO300 OWNER’S MANUAL...
- Page 67 Wipe clean any oil residue in the work area and refit the upper cowling and close the latches unless performing other work NOTE Cox Powertrain recommends that only Cox approved oil filters are used on the outboard. CXO300 OWNER’S MANUAL 6.0 MAINTENANCE...
-
Page 68: Changing Transmission Oil
6.0 MAINTENANCE 6.4.7 CHANGING TRANSMISSION OIL The CXO300 transmission contains gear oil which lubricates the internal gears, bearings and shift parts. A full transmission service should be carried out by an authorized Cox Powertrain dealer in accordance with the maintenance schedule. However, it may occasionally be necessary to replace the transmission oil yourself, for instance when preparing for storage. - Page 69 If there is a significant build-up of shavings, or the used gear oil is milky or contains water, take a photo and contact an authorized Cox Powertrain dealer for advice. Replace the O-ring seals on both plugs with new items.
-
Page 70: Inspecting Fuel System
Visually inspect the outboard filter for any leaks around the canister or filter head. Do not physically disturb this filter. Check that the hose fittings (hose barbs) are tight inside the filter heads. Check that all filter drain ports are closed tight. 6.0 MAINTENANCE CXO300 OWNER’S MANUAL... -
Page 71: Purging Fuel Filter Water Separator
The maximum capacity of the water bowl is 120 ml (4.0 fl oz). Clean up the work area. Dispose of the container contents and cloth thoughtfully and in accordance with your local laws and regulations. Contact an authorized Cox Powertrain dealer if in doubt. NOTE The above procedure should be repeated for each installed outboard and fuel filter-water separator unit. -
Page 72: Inspecting Power Tilt-Trim & Brackets
WARNING Do not place any body parts between an outboard(s) and tilt-trim unit and do not pass or stand under an outboard while it is tilted. 6.0 MAINTENANCE CXO300 OWNER’S MANUAL... -
Page 73: Inspecting Bonding Wires
NOTE Removing the PTT sacrificial anode is necessary for visual access to the inner bonding wire bolts. Contact an authorized Cox Powertrain dealer if you identify any issues. Figure: Accessing bonding wires for inspection CXO300 OWNER’S MANUAL... -
Page 74: Inspecting Electrical Wiring
Remove the upper cowling and visually inspect the electrical harnesses and wiring regularly for any damage or loose fasteners. If in any doubt contact an authorized Cox Powertrain dealer for further advice. NOTE Do not physically push or pull any harnesses or connectors during inspection. -
Page 75: Inspecting A Battery
12V. Voltage check with your outboard(s) running at idle. This voltage must read between 14 and 15 V. Contact an authorized Cox Powertrain dealer if in doubt about the results of any of the regular checks. ... -
Page 76: Connecting & Disconnecting The Battery
These anodes will deplete during normal operation and must be maintained and replaced in line with the maintenance chart to ensure the outboard is fully protected. When replacing anodes, consult an authorized Cox Powertrain dealer for the correct type and material. 6.0 MAINTENANCE... -
Page 77: Removing & Installing Propellers
CAUTION Depending on the nature of your local waters and marinas, further anti-corrosion measures may be necessary. Consult your marina manager or an authorized Cox Powertrain dealer for further advice. 6.4.17 REMOVING AND INSTALLING PROPELLERS WARNING WARNING ... - Page 78 A gap may result in exhaust gases ventilating the propeller leading to a significant loss of thrust. If in doubt, contact your Cox Powertrain official dealer for assistance. Fit any washers and the propeller nut retaining ring, if used. Ensure the order and orientation of fitment is correct in accordance with the hub supplier’s guidelines.
-
Page 79: Storage
When intending to store your outboard(s) for one month or longer, it is important to prepare correctly in order to avoid potential degradation and damage during the period of storage. Cox Powertrain recommends that an authorized Cox Powertrain dealer prepares your outboard(s) for storage. If choosing to prepare for storage yourself, the following precautions should be taken to minimize the risks. - Page 80 Remove your propeller and store separately. Coat the exposed propeller shaft with a marine rust preventative product. Contact an authorized Cox Powertrain dealer for advice and recommendations. Identify and follow any storage instructions for other components in your installation such as your steering and controls gear, other electronic components, any bilge pumps etc.
-
Page 81: Bringing Out Of Storage
Inspect the exterior of your outboard(s) for any obvious damage or degradation, including corrosion. Contact an authorized Cox Powertrain dealer if any areas of concern are identified. Inspect the fuel system lines and correct any issues prior to attempting to operate your outboard(s). -
Page 82: Trailering
If a propeller is attached to the outboard(s) Cox Powertrain recommends a high vis propeller cover is placed over the prop to ensure it is visible to other road users and minimizes risk of injury. -
Page 83: Troubleshooting
For any issues not covered by the possible causes or if the suggested solutions do not correct the issue, contact an authorized Cox Powertrain dealer. 8.2 IMMEDIATE ACTION IN AN EMERGENCY In the event of a boating emergency such as an object strike which affects your outboard(s), follow the steps below: Shut down the affected outboard(s) immediately. - Page 84 Inspect fuel lines and clamps, check operation of lift pump, flow inspect fuel filters Powerhead operates Fuel tank nearing empty Fill tank with fresh fuel to specification erratically Fuel tank vent partially Check fuel tank vent for any obstructions and clear obstructed 8.0 TROUBLESHOOTING CXO300 OWNER’S MANUAL...
- Page 85 Check voltage and replace if necessary, check battery Low battery voltage cables and terminals Contact your Cox Powertrain official dealer for propeller Poorly matched propeller matching advice Damaged propeller Inspect for blade wear and replace the propeller if necessary...
-
Page 86: Further Support
In the event of a failure not covered by this manual or one with which you need further support, contact an authorized Cox Powertrain dealer, which can be found in your warranty documentation, on www. coxmarine.com, or on the Cox online customer portal. This includes any instances where you wish to make a warranty claim. -
Page 87: Warranty
9.3 IF YOU ARE RESIDENT IN THE USA OR CANADA Your Cox product is designed to operate on the grades of diesel fuel specified in this manual only. Use of any other fuel may result in your Cox Powertrain product no longer operating in compliance with the Environmental Protection Agency’s (EPAs) or California’s emissions requirements. -
Page 88: Appendix
10.0 APPENDIX 10.0 APPENDIX CXO300 OWNER’S MANUAL... - Page 89 CXO300 OWNER’S MANUAL 10.0 APPENDIX...
- Page 90 10.0 APPENDIX 10.0 APPENDIX CXO300 OWNER’S MANUAL...
- Page 92 COX POWERTRAIN LIMITED The Cecil Pashley Building Unit 8, Cecil Pashley Way Brighton City Airport Lancing, West Sussex BN43 5FF United Kingdom +44 (0) 1273 454 424 info@coxpowertrain.com www.coxmarine.com V2.4 NOV _2020...
Need help?
Do you have a question about the CXO300 and is the answer not in the manual?
Questions and answers