
Related Manuals for Amica ZIG 645C


Summary of Contents for Amica ZIG 645C
- Page 1 OPERATING INSTRUCTIONS ZIG 645C (MI 625 AGB) IO-DWS-1037 Please carefully read these Operating Instructions (05.2019/1) before using the appliance!
- Page 2 CONTENS ECOLOGY IN PRACTICE BASIC INFORMATION SAFETY AND GERMENT CARE LABELS INSTALL THE APPLIANCE PRODUCT DESCRIPTION PRODUCT FICHE In accordance with European Directive 2012/19/EU and Polish legislation regarding used electrical and electronic goods, this appliance is marked with the symbol of the crossed-out waste container.
-
Page 3: Ecology In Practice
ECOLOGY IN PRACTICE For many years, Amica has consistently pursued pro-ecological policy. Concern for the environment is as important for us as the use of modern technology. That’s why we focus on energy-efficient appliances of the highest energy efficiency class — A+, A++ and A+++. -
Page 4: Dear Customer
Dear customer! Thank you for choosing an Amica product. For years we have deliv- ered high-quality appliances, so that household chores become a real pleasure. Before being packaged and leaving the manufacturer, the appliance was thoroughly checked with regard to safety and func- tionality. -
Page 5: Basic Information
BASIC INFORMATION Carefully read the operating instructions before plugging dishwasher to a power outlet and using the appliance. Operating instruction include tips that will help you avoid the risk of injury and damage to the appliance. Keep dishwasher documenta- tion in a safe place for possible future use. These operating instructions have been prepared for a range of appliances and some features described herein may not apply to your appliance. -
Page 6: Safety And Germent Care Labels
SAFETY AND GERMENT CARE LABELS Do not abuse, sit on, or stand on the door or dish basket of the dishwasher. Do not touch the heating element during or immediately after using. Do not operate your dishwasher unless all enclosure panels are properly in place. - Page 7 SAFETY AND GERMENT CARE LABELS Check that the detergent recep- tacle is empty after completion of the wash cycle. Do not wash plastic items unless they are marked dishwasher safe or the equivalent. For plastic items not so marked, check the manufacturer’s recommen- dations.
- Page 8 SAFETY AND GERMENT CARE LABELS This appliance can be used by children aged from 8 years and above and persons with reduced physical, sensory or mental capabilities or lack of experience and knowledge if they have been given supervision or instruction concerning use of the appliance in a safe way and understand the hazards involved.
- Page 9 SAFETY AND GERMENT CARE LABELS During installation, the power supply must not be excessively or dangerously bent or flattened. Do not tamper with controls. The appliance is to be connected to the water mains using new hose sets, and the old hose-sets should not be reused.
-
Page 10: Install The Appliance
INSTALL THE APPLIANCE PLACEMENT OF THE PRODUCT When choosing the place of installation, make sure you will be able to easily load and remove dishes and utensils from the dishwasher. Do not place the appliance in a room where the temperature can fall below 0°C. Before installing unpack the appliance following the instructions on the packaging. - Page 11 NOTE: Aquastop water supply is used in some dishwasher models. Dangerous voltage could occur with Aquastop. Do not cut the Aquastop water supply. Do not allow it to bend or twist. Important! For safety reasons, close the water tap after every wash. THE DRAIN HOSE The drain hose can be connected directly to a water drain or kitchen sink stub pipe.
- Page 12 Always use the plug provided with the appliance. When you operate the appliance at lower voltage the dishwashing efficiency will deteriorate and may damage the appliance. The power cord may only be replaced by authorized service or a qualified electrician. Failure to comply with these rules may lead to an accident.
-
Page 13: Product Description
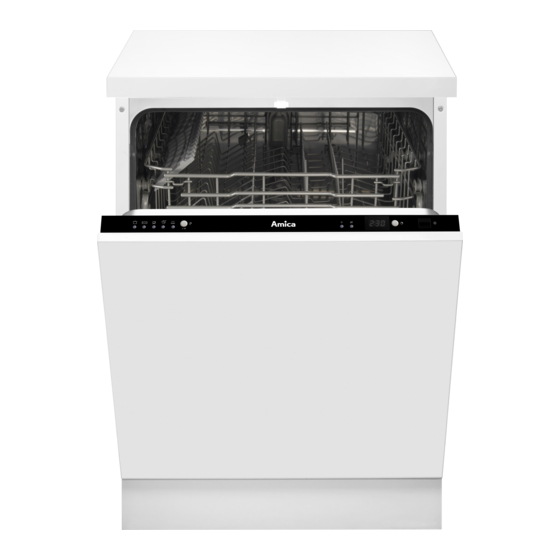
PRODUCT DESCRIPTION DISHWASHER FEA TURES The features and components of the appliance (fig. 1): 1 Upper Basket 2 Spray Arms 3 Lower Basket 4 Water Softener 5 Filters 6 Detergent Dispenser 7 Rinse Aid Dispenser 8 Cutlery basket 9 Fork shelf... -
Page 14: Control Panel
CONTROL PANEL 1. Program indicator light: when you select a washing programme, the corresponding light will display. 2 Program select button/Child lock button: Press the button to select the program. The „child lock“ will be available when you press the button 3 seconds ,and „LO“ flashes 6 times on digital displays. - Page 15 PREPARE THE APPLIANCE FOR OPERA TION The importance of water descaling A dishwasher requires soft water (with low calcium content) to operate efficiently. Otherwise, white residue main remain on the dishes and inside the appliance. This has a negative impact on the quality of dishwashing, rinsing and drying. When the water flows through the softener, ions responsible for the water hardness are removed, and the water becomes soft, for best dishwashing results.
-
Page 16: Water Softener
Loading the Salt into the Softener Always use salt intended for use with dishwasher. NOTE: If your model has no water softener, you may skip this section. WA TER SOFTENER The hardness of the water varies from place to place. If hard water is used in the dishwasher, deposits will form on the dishes and utensils. -
Page 17: Rinse Aid Dispenser
Fill the Rinse Aid Dispenser Function of Rinse Aid Rinse aid is automatically added during the last rinse, ensuring thorough rinsing, spot and streak free drying. Attention! Only use branded rinse aid for dishwasher. Never fill the rinse aid dispenser with any other substances (e.g. -
Page 18: Function Of Detergent
The rinse aid is released during the final rinse to prevent water from forming droplets on your dishes that can leave spots and streaks. It also improves drying by allowing water to sheet off the dishes. Your dishwashers are designed to use liquid rinse aids. The rinse aid dispenser is located inside the door next to the detergent dispenser. -
Page 19: Detergent Dispenser
Detergent Dispenser The dispenser must be refilled before the start of each washing cycle following the instruc- tions provided in the Wash Cycle Table. Your dishwashers use less detergent and rinse aid than conventional dishwashers. Generally, only one tablespoon of detergent is needed fora normal wash load. -
Page 20: Loading The Dishwasher Baskets
NOTE: You find information about the amount of detergent for the single programme on the last page. Please be aware that according to the level soiling and the specific hardness of water, differences are possible. Please observe the manufacturer’s recommendations on the detergent packaging. -
Page 21: Description Of The Appliance
DESCRIPTION OF THE APPLIANCE Adjusting the Upper Basket If required, the height of the upper basket can be adjusted in order to create more space for large utensils either in the upper basket or lower basket. The upper basket can be adjusted for height by putting wheels of different height into the rails. -
Page 22: Cutlery Basket
Cutlery Basket and Fork shelf Cutlery should be placed in the cutlery basket with handles at the bottom: If the basket has side baskets, the spoon should be loaded individually into the appropriate slots, especially long uten- sils should be placed in the horizontal position at the front of the upper basket. Cutlery basket Type Item... - Page 23 Loading Cutlery and Dishes Before loading the dishes, you should: Remove large left-over Soften remnants of burnt food in pans When Loading the Dishes and Cutlery, Please Note: Dishes and cutlery must not impede the rotation of the spray arms. Load hollow items such as cups, glasses, pans etc.
-
Page 24: Unloading The Dishwasher
Turning on the Appliance Starting a wash cycle... Draw out the lower and upper basket, load the dishes and 1. push them back. It is recommended to load the lower basket first, then the upper one (see the section entitled „Loading the Dishwasher”). Pour in the detergent (see the section entitled „Salt, Detergent and Rinse Aid”). -
Page 25: Maintenance And Cleaning
MAINTENANCE AND CLEANING Filtering System The filter is used to avoid the big remnants and other sundries getting inside the pump. The residue can obstruct the filter in sometime. The filter system consists of a coarse filter, a flat (Main filter) and a micro filter (fine filter). -
Page 26: Protect Against Freezing
Cleaning the Spray Arms It is necessary to clean the spray arms regularly for hard water chemicals will clog the spray arm jets and bearings. To remove the spray arms, screw off the nut cloc- kwise to take out the washer on top of the spray arm and remove the arm. Wash the arms in soapy and warm water and use a soft brush to clean the jets. -
Page 27: Troubleshooting
TROUBLESHOOTING How to Keep Your Dishwasher in Shape: After Every Wash After every wash, turn off the water supply to the appliance and leave the door slightly ajar so that moisture and odors are not trapped inside. Remove the Plug Before cleaning or performing maintenance, always remove the plug from the socket. -
Page 28: Error Codes
ERROR CODES When some malfunctions happen, the appliance will display error codes to warn you. CODES MEANINGS POSSIBLE CAUSES The door is opened when the Door open dishwasher is operating Water inlet Water inlet malfunction Water drainage Water drainage malfunction Temperature sensor Temperature sensor malfunction Overflow occurs/Water leakage... - Page 29 Dishwasher Fuse blown, or the circuit Replace fuse or reset circuit breaker. Remove any other breaker acted appliances sharing the same circuit with the dishwasher. doesn’t run Power supply is not turned Make sure the dishwasher is turned on and the door is closed securely.
- Page 30 Yellow or Tea or coffee stains Using a solution of 1/2 cup of bleach and 3 cups of warm water to remove the stains by hand. brown film WARNING on inside You have to wait for 20 minutes after a cycle to let the surfaces heating elements cool down before cleaning interior;...
-
Page 31: Product Fiche
Commission Regulation (EU) No 1016/2010. Amica Supplier’s name or trade mark Type ZIG 645C/ MI 625 AGB Rated capacity Energy efficiency class Annual energy consumption in kWh (AEC ) ( 280 cycles) Energy consumption of the standard cleaning cycle (E... -
Page 32: Installation Instruction
INSTALLATION INSTRUCTION Water pipe and eletric device should be installed by professionals Cut off the power before installing the dishwasher, or electric shock may occur Before Installation Dishwasher place requirement. The back of dishwasher should face to the wall, and the dishwasher has inlet and outlet pipe, which can be connected on the right or left side conveniently. - Page 33 The dimension of the front ornamental plate the hole with 10mm depth Fix the ornamental plate The plug with T shape 2-4×26 wo- oden screw 4-4x42 wooden screws remove 2-ST4X10 screw ST 4-4×42 wooden screw the door of dishwasher 4-4x42 wooden screws ornamental plate...
- Page 34 Tension Adjustment of the Door Spring After placed the panel on the dishwasher, please try open and close the door to test the ba- lance to check out whether the door can remain a same place. If not, please adjusting the screw in the direction of clockwise or counter-clockwise to.
- Page 35 Connecting the water outlet hose Put the hose into drainage hose which diameter is more than 40mm or into the sink, both should make sure the outlet pipe is straight ,and the height of the end of pipe should be less than 1m.
- Page 36 Installation of skirting board ornamental plate plate the skirting board Referenced dimension serial Ornamental plate Plate to ornament number the skirting board 708 mm 75 mm 698 mm 85 mm 688 mm 95 mm 678 mm 105 mm 668 mm 115 mm 658 mm 125 mm...
- Page 37 Fixation of dishwasher 1.Fixing the dishwasher with the cabinet by turning the screws. 2.Plug the four hole plugs into the holes in the sketch map. ST4*26 hole plug Dishwasher liner right and left side and the top 4 holes, use wood screws ST4*26 dishwa- sher fixed on the cabinet (selt-tapping screws were matching)
- Page 38 AMICA S.A. UL. MICKIEWICZA 52 64-510 WRONKI TEL. 67 25 46 100 FAX 67 25 40 320 WWW.AMICA.PL 05.2019./1...
Need help?
Do you have a question about the ZIG 645C and is the answer not in the manual?
Questions and answers