Table of Contents
Advertisement
Advertisement
Table of Contents

Related Manuals for Ecobike SX 300 Blue 18"

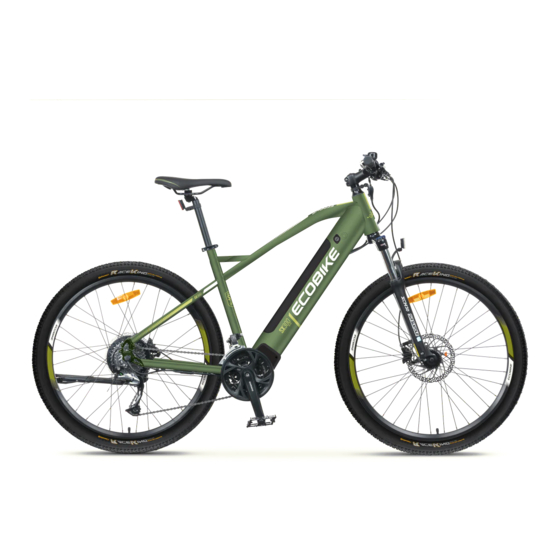
Summary of Contents for Ecobike SX 300 Blue 18"
-
Page 3: Table Of Contents
SPIS TREŚCI 1. INTRODUCE ............................. 5 2. SAFETY..............................5 2.1 FOR PARENTS / GUARDIANS ......................5 3. USE ACCORDING TO THE INTENDING ....................6 3.1 MOUNTAIN BIKE ..........................6 3.2 CENTRAL MOTOR ..........................6 4. STORAGE AND USING ..........................6 5. - Page 4 11.2 TURNING ON / OFF THE DISPLAY ....................12 11.3 MOTOR POWER INDICATION ......................13 11.4 battery soc indicator ........................13 11.5 WALK ASSISTANCE ......................... 13 11.6 backlight and light indication ...................... 13 11.7 motor assistance level selection ....................13 11.8 error indication ..........................
-
Page 5: Introduce
1. INTRODUCE First of all, we would like to thank you for purchasing our electric bike, which has been carefully designed and manufactured in accordance with the requirements of the highest international standards. We wish your new bike to be a new way of your life. Please read the following instructions carefully before proceeding with the bicycle. -
Page 6: Use According To The Intending
3. USE ACCORDING TO THE INTENDING Improper use of the bike or use contrary to its intended use may involve danger and expose you to loss of health or life. If you have any doubts whether the purpose of the bike matches your ridding style - ask the seller. -
Page 7: Technical Information
6. TECHNICAL INFORMATION 6.1 RIMS Before using your bike, always check that the wheels are centered and that the rims are undamaged. During operation of the bicycle, and especially in any collisions, cracks and cracks may appear. When you see a damaged rim, immediately contact an authorized service center for replacement with a new one. -
Page 8: Wheels
6.4 WHEELS Properly adjusted wheels should rotate slightly and smoothly, without jerks, perceptible slack. In the case of loosening in the wheel hub, it must be eliminated by adjusting. In order to adjust the wheel, you must have specialist tools, therefore, if a fault is found, please go to an authorized service point. -
Page 9: Derailleur
6.10 DERAILLEUR These are components with a complex structure that requires proper operation, operation and maintenance. When using and storing the bicycle, make sure that the guide 1 (Figure below) is not subjected to side impacts which do not occur when properly used. The alignment of the guide will cause the derailleur to operate incorrectly. -
Page 10: Fold The Frame
7.2 FOLD THE FRAME The front wheel is dismantled, therefore after opening the cartoon it is necessary to remove the protective foils and mount it on the front fork. Picture 1 – Put front wheel into the fork. Picture 2 – insert the "pin" through the wheel, tighten the nut on the left side so that the quick-release closure is tightened with the appropriate resistance. -
Page 11: Grease
9. USING BATTERY AND CHARGER 9.1 BATTERY ECOBIKE uses high-quality lithium-ion batteries in its bicycles, which are light and do not cause environmental pollution. It’s a typical source of so-called green energy. In addition, they are characterized by: ... -
Page 12: Insertion And Removal The Battery
9.3 INSERTION AND REMOVAL THE BATTERY To remove the battery, turn and hold the key, then pull the lever on the side of the battery towards you. To insert the battery, turn the key and hold it, then insert from the bottom, and finally release the twisted key. -
Page 13: Motor Power Indication
11.3 MOTOR POWER INDICATION Indicates the power with which the motor works, when the entire power bar is displayed, this means that the motor works at full power. The battery is discharged faster then. 11.4 BATTERY SOC INDICATOR The battery level is indicated by symbol located in the battery symbol in the upper left corner of the display. -
Page 14: Current Display
Error code Description Current flow fault / Communication fault Throttle fault Motor fault Hall sensor fault Brake levers fault Display connection fault 11.9 CURRENT DISPLAY When the electrical system is turned on, the display will show the speed and distance as defaults. Pressing the "i"... -
Page 15: Lcd Luminance
12.5 LCD LUMINANCE LCD luminance indicates the brightness of the display backlight. To change the brightness of the backlight, press the "+" or "-" button to select the desired value. To save the changed setting, press the "i" button - The default value is 100%. -
Page 16: Warranty Card
12. WARRANTY CARD MODEL ROWERU : ............NUMER RAMY : .............. NUMER BATERII : ............NUMER SILNIKA : ............DATA ZAKUPU : ............PODPIS I PIECZĘĆ SPRZEDAWCY ………………………………………………………….…….. DOKONANE NAPRAWY DATA DATA PIECZĄTKA PUNKTU ZAKRES NAPRAW PODPIS ZGŁOSZENIA WYKONANIA SERWISOWEGO OBOWIĄZKOWY PRZEGLĄD „ZEROWY”... -
Page 17: Notes
13. NOTES ………………………………………………………………………………………………………………………………………… ………………………………………………………………………………………………………………………………………… ………………………………………………………………………………………………………………………………………… ………….……………………………………………………………………………………………………………………………… ………………………………………………………………………………………………………………………………………… ………………………………………………………………………………………………………………………………………… …………………….…………………………………………………………………………………………………………………… ………………………………………………………………………………………………………………………………………… ………………………………………………………………………………………………………………………………………… ……………………………….………………………………………………………………………………………………………… ………………………………………………………………………………………………………………………………………… ………………………………………………………………………………………………………………………………………… ………………………………………….……………………………………………………………………………………………… ………………………………………………………………………………………………………………………………………… ………………………………………………………………………………………………………………………………………… …………………………………………………….…………………………………………………………………………………… ………………………………………………………………………………………………………………………………………… ………………………………………………………………………………………………………………………………………… ……………………………………………………………….………………………………………………………………………… ………………………………………………………………………………………………………………………………………… ………………………………………………………………………………………………………………………………………… ………………………………………………………………………….……………………………………………………………… ………………………………………………………………………………………………………………………………………… ………………………………………………………………………………………………………………………………………… …………………………………………………………………………………….…………………………………………………… ………………………………………………………………………………………………………………………………………… ………………………………………………………………………………………………………………………………………… ……………………………………………………………………………………………….………………………………………… ………………………………………………………………………………………………………………………………………… ………………………………………………………………………………………………………………………………………… ………………………………………………………………………………………………………….……………………………… ………………………………………………………………………………………………………………………………………… ………………………………………………………………………………………………………………………………………… …………………………………………………………………………………………………………………….…………………… ………………………………………………………………………………………………………………………………………… ………………………………………………………………………………………………………………………………………… ……………………………………………………………………………………………………………………………….………… ………………………………………………………………………………………………………………………………………… …………………………………………………………………………………………………………………………………………... - Page 18 ………………………………………………………………………………………………………………………………………… ………………………………………….……………………………………………………………………………………………… ………………………………………………………………………………………………………………………………………… ………………………………………………………………………………………………………………………………………… …………………………………………………….…………………………………………………………………………………… ………………………………………………………………………………………………………………………………………… ………………………………………………………………………………………………………………………………………… ……………………………………………………………….………………………………………………………………………… ………………………………………………………………………………………………………………………………………… ………………………………………………………………………………………………………………………………………… ………………………………………………………………………….……………………………………………………………… ………………………………………………………………………………………………………………………………………… ………………………………………………………………………………………………………………………………………… …………………………………………………………………………………….…………………………………………………… ………………………………………………………………………………………………………………………………………… ………………………………………………………………………………………………………………………………………… ……………………………………………………………………………………………….………………………………………… ………………………………………………………………………………………………………………………………………… ………………………………………………………………………………………………………………………………………… ………………………………………………………………………………………………………….……………………………… ………………………………………………………………………………………………………………………………………… ………………………………………………………………………………………………………………………………………… …………………………………………………………………………………………………………………….…………………… ………………………………………………………………………………………………………………………………………… ………………………………………………………………………………………………………………………………………… ……………………………………………………………………………………………………………………………….………… ………………………………………………………………………………………………………………………………………… ………………………………………………………………………………………………………………………………………… …………………………………………………………………………………………………………………………………………. ………………………………………………………………………………………………………………………………………… ………………………………………………………………………………………………………………………………………… ………………………………………………………………………………………………………………………………………… ………….……………………………………………………………………………………………………………………………… ………………………………………………………………………………………………………………………………………… ………………………………………………………………………………………………………………………………………… …………………….…………………………………………………………………………………………………………………… ………………………………………………………………………………………………………………………………………… ………………………………………………………………………………………………………………………………………… ……………………………….………………………………………………………………………………………………………… ………………………………………………………………………………………………………………………………………… …………………………………………………………………………………………………………………………………………...
Need help?
Do you have a question about the SX 300 Blue 18" and is the answer not in the manual?
Questions and answers