Table of Contents
Advertisement
Quick Links
Insert SIM card ............................................................................................................... 3
Get Started ........................................................................................................ 3
Insert Micro SD card ......................................................................................................... 4
Charge the Battery or Connect to PC ............................................................................... 5
Keys and Parts ................................................................................................... 6
Lock and Unlock the Screen .............................................................................. 8
Make it yours .................................................................................................... 9
Add widgets and icons to home screen .......................................................................... 10
Add Widgets and more icons to Home Screen ................................................. 10
Rearrange or remove widgets and icons on your Home screen ...................................... 10
Add Folders on your Screen ............................................................................ 11
Adjust Brightness ............................................................................................ 12
Make a Call ...................................................................................................... 13
Call Log............................................................................................................ 14
Reject a Call by Sending a Busy Message ......................................................... 15
Add a Contact .................................................................................................. 15
Receive a New Message ................................................................................................ 17
Messaging ....................................................................................................... 16
Content
1
Advertisement
Table of Contents

Related Manuals for Blu Studio X10+


Summary of Contents for Blu Studio X10+
-
Page 1: Table Of Contents
Content Insert SIM card ....................... 3 Get Started ......................3 Insert Micro SD card ......................4 Charge the Battery or Connect to PC ................5 Keys and Parts ....................6 Lock and Unlock the Screen ................8 Make it yours ....................9 Add widgets and icons to home screen ................ - Page 2 Edit SMS and MMS ......................17 Message conversations ....................17 Browse the Web ....................18 Enjoy Music ..................... 19 Download Applications on Google Play ............20 Manage Applications ..................21 System Update....................22 System Settings ....................23 Maintenance & Safety ..................26...
-
Page 3: Get Started
Get Started The phone is a Dual SIM mobile phone allowing you to use the facility of two networks. Insert SIM card 1. Switch off the mobile phone. 2. Insert the SIM card correctly in the card slot(s) (See figure below) SIM1 SIM2... -
Page 4: Insert Micro Sd Card
The phone supports Micro SD card, which is a multimedia memory card used to multiply Insert Micro SD card the memory of the device. Please follow the instructions as above mentioned. -
Page 5: Charge The Battery Or Connect To Pc
You can charge your battery using the charger or connect the USB cable (supplied with Charge the Battery or Connect to PC this phone) to the computer. -
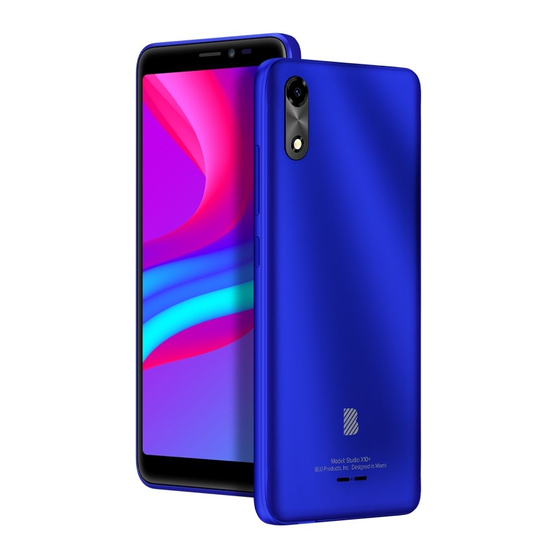
Page 6: Keys And Parts
The smart phone gives you marvelous feelings to experience on Camera, Video recorder, Keys and Parts FM radio, Music and Sound recorder. Let you install various APPs, games, and more (supports APK format) by downloading from Google Play... - Page 7 1.Headset port To connect an earphone so you can listen to music or radio, etc. To connect charger or USB data cable for data exchange. 2.USB jack Allow you to take pictures while facing the screen. To hear the voice of the other side when calling. 3.Receiver 4.Front Camera To adjust the ringer volume, adjust the voice volume during...
-
Page 8: Lock And Unlock The Screen
Press power button to enter Sleep mode and meanwhile the screen will be locked; press Lock and Unlock the Screen power button again to wake up and then swipe the screen upward to unlock. -
Page 9: Make It Yours
a) Home screen: It is your starting point to access all the features on your phone. It Make it yours displays application icons, widgets, shortcuts, and other features. b) Notification Bar: At the top of the screen, the Status bar displays the time, status, and notifications. If there is a new message, missed call or something in the notification bar, you can drag it down to open notification panel and click the desired one to have a view. -
Page 10: Add Widgets And More Icons To Home Screen
Add Widgets and more icons to Home Screen Enter menu and long press and hold an application till the app displays on the home Add widgets and icons to home screen screen, and then release your finger hold. Long press and hold the widget or icon you want to move. Once “Remove” appears, don't Rearrange or remove widgets and icons on your Home screen release your hold on the icon and drag the widget or icon to a new location on the screen. -
Page 11: Add Folders On Your Screen
Use folders to group related applications and other shortcuts to keep your Home screen Add Folders on your Screen tidy and organized. Press and hold an application icon or a widget that you want to move. Don't release your Adding folder on your screen finger. -
Page 12: Adjust Brightness
Drag notification panel down adjust brightness. enter Adjust Brightness Settings->Display->Brightness level , and adjust the brightness level here (by dragging the brightness slider to the left to decrease or to the right to increase the screen Brightness). Note: Lower the brightness of the screen to prolong the battery life. -
Page 13: Make A Call
Make a Call On the start screen choose , open dial pad then enter a complete phone number to make a call. -
Page 14: Call Log
Enter Phone interface, you can check the detailed call logs in Recents. In call log options, Call Log you can Make calls, add create new contact and send message etc. -
Page 15: Reject A Call By Sending A Busy Message
While there is an incoming call, you are inconvenient to accept the call, and then you can Reject a Call by Sending a Busy Message send a busy message for rejecting the call. Tap the message icon, some busy messages will show on the screen, short tap any of them to send out. -
Page 16: Messaging
Enter Messaging, and then compose new message. You touch a text field where you want Messaging to enter text, to open the keyboard. -
Page 17: Receive A New Message
When there is a new message comes, a new message icon will appears in the notifications Receive a New Message area of the status bar to notify you of a new text or multimedia message. To open the message, press and hold the status bar, and then slide the status bar down to open the Notifications panel. -
Page 18: Browse The Web
Open the Chrome; click the URL on the screen to search or tap website address. Browse the Web The browser is fully optimized and comes with advanced features that let you enjoy Internet browsing on your phone. You must have an active data connection or Wi-Fi connection to access the Internet. -
Page 19: Enjoy Music
When you copy music to your device, the music files will be stored in the file itself. Allow Enjoy Music YouTube Music to access and play music files, you will find the music in the albums, songs, artists. And also you can create new playlist. -
Page 20: Download Applications On Google Play
Add a Google account and then Enter Google Play Store and download apps. Download Applications on Google Play... -
Page 21: Manage Applications
Enter Settings >Apps & notifications, then manage the applications. Tap any app to view Manage Applications the information of the applications, and you can also force the apps to stop or uninstall the apps. To install Apps, you need switch on “Allow from this source” in device. -
Page 22: System Update
Enter System Settings->System->Advanced->System update, the device will automatically System Update search and check new version of software. To update your current software, you must download new software online. The device will be in Recovery mode and will start to update the system after successfully downloading the new software. -
Page 23: System Settings
1.Network & Internet System Settings You can customize wireless & network settings here, including: Turn on or turn off Wi-Fi here. Set up and manage wireless access point s here. ◆Wi-Fi ◆Mobile network ◆Data usage ◆Airplane mode ◆Mobile plan ◆Hotspot & tethering ◆Emergency Broadcasts ◆VPN ◆Private DNS... - Page 24 ◆Files received via Bluetooth ◆Printing 3.Apps & notifictaions You can manage installed application here. 4.Battery You can see the use of the battery. 5.Display You can define your wallpaper, screen timeout,font size etc. ◆Brightness level ◆Adaptive brightness ◆Dark theme ◆Wallpaper ◆Screen timeout 6.Scheduled power on /off ◆Advanced...
- Page 25 9.Privacy 10.Location 11.Security ◆Security status ◆Device security 12.Accounts 13.Accessibility 14.Digital Wellbeing&parental controls 15.Google 16.System ◆Languages &input ◆Date & time ◆Gestures ◆Reset options ◆Backup ◆System update ◆BLU Privacy Settings 17.About device...
-
Page 26: Maintenance & Safety
Please read and observe the following information for safe and proper use of your phone Maintenance & Safety and to prevent damage. Also, keep the user guide in an accessible place at all the times after reading it. Kindly refer to the Warranty Card provided in the sales package box. After sales service Charger and adapter are designed for indoor use only. - Page 27 Using a damaged battery or placing a battery in your mouth may cause serious injury. The suitable temperature for the phone and accessories is -10℃~45℃. When charging, please place the phone in an environment that has a normal room temperature and good ventilation. It is recommended to charge the phone in an environment with a temperature under 40℃.
- Page 28 tones, text messages, voice messages, picture, and videos could also be deleted.) The manufacturer is not liable for damage due to the loss of data. Do not turn your phone on or off when the phone is close to your ear. Warning: Company will not bear any responsibility for any incompliance with the above guidelines or improper use of the mobile phone.
- Page 29 FCC Regulations: This mobile phone complies with part 15 of the FCC Rules. Operation is subject to the following two conditions: (1) This device may not cause harmful interference, and (2) this device must accept any interference received, including interference that may cause undesired operation. This mobile phone has been tested and found to comply with the limits for a Class B digital device, pursuant to Part 15 of the FCC Rules.
- Page 30 The antenna(s) used for this transmitter must not be co-located or operating in conjunction with any other antenna or transmitter. RF Exposure Information (SAR) This mobile phone meets the government’s requirements for exposure to radio waves. This phone is designed and manufactured not to exceed the emission limits for exposure to radio frequency (RF) energy set by the Federal Communications Commission of the U.S.
- Page 31 The highest SAR value for the model phone as reported to the FCC when tested for use at the ear is 0.909W/kg and when worn on the body, as described in this user guide, is 1.080W/kg (Body-worn measurements differ among phone models, depending upon available accessories and FCC requirements.) While there may be differences between the SAR levels of various phones and at various positions, they all meet the government requirement.
Need help?
Do you have a question about the Studio X10+ and is the answer not in the manual?
Questions and answers