Table of Contents
Advertisement
Available languages
Available languages
Quick Links
Download this manual
See also:
Quick Reference
Advertisement
Chapters
Table of Contents

Related Manuals for Brother P-touch PT-1500PC


Summary of Contents for Brother P-touch PT-1500PC
-
Page 1: Quick Reference
1500PC Model : PT-1500PC Quick Reference • Read this Quick Reference before you start using your P-touch. • Keep this Quick Reference in a handy place for future reference. -
Page 2: Federal Communications Commission (Fcc) Declaration Of Conformity (For Usa Only)
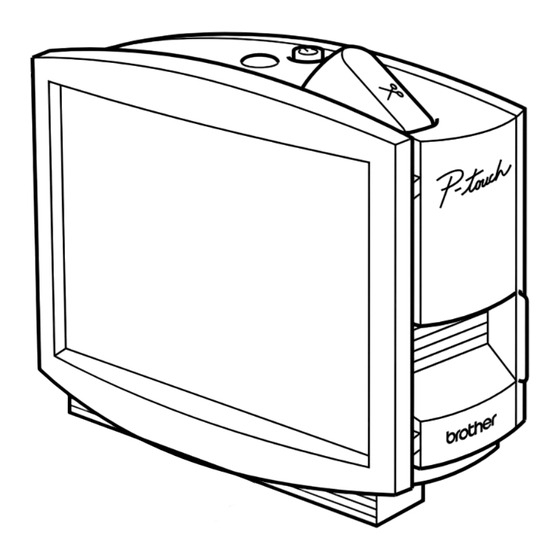
Thank you for purchasing the P-touch 1500PC! With your new Brother label printer, you can print personalized labels for any purpose. Simply insert a label cassette into the PT-1500PC, design your label with the enclosed P-touch label-designing software, and then print it out. Your customized label prints out in seconds. Label tape cassettes are available in various sizes and colors—ideal for color-coded labeling or any other special labeling needs. -
Page 3: Table Of Contents
Installing the printer driver ... 9 Reading the User’s Guide ... 9 Uninstalling the software and printer driver ... 10 Replacing, deleting or adding another printer driver ... 10 For Macintosh users ... 11 Before installation ... 11 Installing P-touch Quick Editor ... 12 Installing P-touch Editor Ver. -
Page 4: Unpacking
• 1/2” (12 mm) wide TZ tape cassette (black characters on white tape; 16’ 3/8” (5 meters)) • AC adapter (model AD-60; for plugging the PT-1500PC into the AC outlet) • USB Interface cable (for connecting the PT-1500PC to either an IBM PC-compatible or Macintosh computer) • Quick Reference •... -
Page 5: Inserting A Photo Into The Photo Frame
Inserting a photo into the photo frame A photo can be inserted into the photo frame attached to the PT-1500PC, turning it into a decorative addition to your workspace. Insert a photo into the photo frame in either of the following two ways: •... -
Page 6: Changing The Tape Caessette
Connecting the AC adapter Connect the AC adapter to the PT-1500PC as described below. 1 Insert the plug on the adapter cord into the connector marked DC IN 9.5V on the PT- 1500PC. -
Page 7: Power/Feed Key
The power/feed key ( ) can be used both for turning on and off the PT-1500PC and for feeding out tape. • To turn the PT-1500PC on or off: Press once. • To feed out some tape: Hold down for at least two seconds. -
Page 8: For Pc-Compatible Users (Windows 98/98Se/Me/2000)
Before labels can be printed on the PT-1500PC, label-designing software and the PT-1500PC printer driver must be installed. In order to design labels that can be printed on the PT-1500PC, two applications are available on the enclosed CD-ROM: P-touch Quick Editor and P-touch Editor Ver. 3.1 Before installation Check that your system configuration meets the following requirements. - Page 9 To install the printer driver, click the Yes button. The first Driver Setup dialog box appears, informing you that the PT-1500PC printer driver will be installed. ® , it will Continue with the procedure in Installing the printer driver on page 9.
-
Page 10: Installing P-Touch Editor Ver. 3.1
To install just the printer driver, click the bottom button (Driver) on the right side. The first Driver Setup dialog box appears, informing you that the PT-1500PC printer driver will be installed. Continue with the procedure in Installing the printer driver on page 9. -
Page 11: Installing The Printer Driver
CD- ROM. Be sure not to connect the PT-1500PC until you are instructed to do so. 1 Click the Next button. A dialog box appears, instructing you to connect the PT-1500PC to the computer. -
Page 12: Uninstalling The Software And Printer Driver
OK button. Replacing, deleting or adding another printer driver 1 Turn off the PT-1500PC, and then disconnect it from the computer. 2 Insert the enclosed CD-ROM into the computer’s CD-ROM drive. A dialog box appears, allowing you to select what to install. -
Page 13: For Macintosh Users
Before labels can be printed on the PT-1500PC, label-designing software and the PT-1500PC printer driver must be installed. In order to design labels that can be printed on the PT-1500PC, two applications are available on the enclosed CD-ROM: P-touch Quick Editor and P-touch Editor Ver. 3.1 Before installation Check that your system configuration meets the following requirements. -
Page 14: Installing P-Touch Quick Editor
Install the P-touch Quick Editor software on a Mac as described below. 1 With the PT-1500PC and computer turned off, connect the PT-1500PC to the Macintosh using the enclosed USB interface cable. Be sure to leave the PT-1500PC off. -
Page 15: Selecting The Driver
Selecting the printer 1 Pull down the Apple menu and select “Chooser” to display the Chooser window. 2 In the list on the left, click the PT-1500PC icon. 3 Close the Chooser window to confirm your settings. -
Page 16: Uninstalling The Software And Printer Driver
Editor Ver. 3.1 software) 2 In the System Folder, open the Extensions folder. 3 Drag the following icons to the Trash icon: • PT-1500PC and USB PT-1500PC Extension 4 In the System Folder, open the Preferences folder. 5 Drag the following icons to the Trash icon: •... -
Page 17: Starting Up The P-Touch Editor Software
Starting up the P-touch Editor software Starting up P-touch Quick Editor When P-touch Quick Editor is installed on a PC, you can choose to add shortcuts to the desktop, the StartUp menu, and to the Quick Launch toolbar. On an IBM PC-compatible computer: •... -
Page 18: Using P-Touch Quick Editor
On a Macintosh computer: • Double-click the P-touch Editor Ver3.1.6 icon in the P-touch Editor Ver3.1 folder installed on the computer. After P-touch Editor Ver. 3.1 is started, the follow- ing window is displayed. For more details on the functions of P-touch Editor Ver. -
Page 19: Importing Text
Importing text Text that has already been typed in another appli- cation can easily be imported into the label. 1 Select the desired text in the other application. 2 Import the text into the label layout either by pressing the designated shortcut keys (Windows only) or by dragging it from the other application. -
Page 20: Hiding/Displaying P-Touch Quick Editor (Windows Only)
3 Click the OK button. 1 Turn on the PT-1500PC and start up the computer. 2 Start up either P-touch Quick Editor or P-touch Editor Ver. 3.1, and make sure that the PT-1500PC is selected as the printer. 3 Design your label. -
Page 21: Removing The Label Backing
A blank horizontal line appearing through the printed label indicates that the print head and roller are dirty. Clean the print head and roller according to the following procedure. 1 Turn off the PT-1500PC. 2 Open the tape compartment cover. -
Page 22: Troubleshooting
* Cleaning can easily be done using the optional print head cleaning cassette (TZ-CL4). Monitoring the P-touch Status You can determine the status of the PT-1500PC from the status indicator. Status Indicator Lights up Flashes a few times Flashes quickly... -
Page 23: Problem-Solving
* If two or more of the same P-touch models are connected through their USB ports, select “PTUSB (PT-1500PC-XXXXXXXXX):” (where XXXXXXXXX is the serial number) instead of “PTUSB:”. The se- rial number is written above the barcode on the silver label attached to the bottom of the P-touch. -
Page 24: Accessories
Obtain tape cassettes from your nearest authorized dealer. Brother cannot be held responsible for trouble caused by the use of unauthorized supplies. Use only Brother TZ tapes with this machine. Do not use tapes that do not have the Stock No. - Page 25 Stock No. 1/4” (6 mm) laminated tapes TZ-111 Black Characters on Clear Adhesive TZ-211 Black Characters on White Adhesive TZ-315 White Characters on Black Adhesive TZ-S111 Industrial (Strong Adhesive) Black Characters on Clear Adhesive TZ-S211 Industrial (Strong Adhesive) Black Characters on White Adhesive Special tapes Stock No.
-
Page 26: Brother Contact Information
To order by mail or pay by check, please complete the accessory order form and mail it along Brother Customer Service has installed an easy-to-use fax-back System so you can get instant answers to common technical questions and product information for all Brother products. - Page 27 Stock No. Description Name: Address: City: State/Zip: Daytime Phone: SEND ORDER FORM TO: Brother International Corp. Attn: Consumer Accessory Div. P.O. Box 341332 Bartlett, TN38184-1332 Method of payment (Check one) ) Visa ( ) MasterCard ( Account Number Expiration Date...
- Page 28 Stock No. Description Name: Address: City: State/Zip: Daytime Phone: SEND ORDER FORM TO: Brother International Corp. Attn: Consumer Accessory Div. P.O. Box 341332 Bartlett, TN38184-1332 Method of payment (Check one) ) Visa ( ) MasterCard ( Account Number Expiration Date...
-
Page 29: Referencia Rápida
Referencia rápida... - Page 30 Con su nueva impresora de etiquetas Brother, podrá imprimir etiquetas personalizadas para cualquier propósito. Simplemente tiene que introducir un casete de cinta para etiquetas en la PT-1500PC, diseñar su etiqueta con el software de diseño de etiquetas P-touch incluido y finalmente imprimirla. Su etiqueta personalizada se imprimirá...
- Page 31 Desembalaje ... 2 Descripción general ... 2 Precauciones generales ... 2 Inserción de una foto en el portafotos ... 3 Casetes de cinta ... 3 Cambio del casete de cinta ... 4 Conexión del adaptador de CA ... 4 Tecla de encendido y apagado/avance ... 5 Conexión del cable de interfaz USB ...
-
Page 32: Desembalaje
• Casete de cinta TZ de 12 mm (1/2”) de ancho (caracteres negros sobre cinta blanca; 5 metros (16’ 3/8’’)) • Adaptador de CA (modelo AD-60; para enchufar la PT-1500PC en la toma de corriente de CA) • Cable de interfaz USB (para conectar la PT-1500PC a un ordenador compatible con PC IBM u ordenador Macintosh) • Referencia rápida •... -
Page 33: Inserción De Una Foto En El Portafotos
Inserción de una foto en el portafotos En el portafotos colocado en la PT-1500PC se puede insertar una foto, para convertirla en uno más de los objetos decorativos de su lugar de trabajo. Inserte una foto en el portafotos en una de las dos formas siguientes: •... -
Page 34: Cambio Del Casete De Cinta
Conexión del adaptador de CA Conecte el adaptador de CA a la PT-1500PC como se describe a continuación. 1 Inserte la clavija del cable del adaptador en el conector marcado DC IN 9.5V de la PT- 1500PC. -
Page 35: Tecla De Encendido Y Apagado/Avance
Siga los procedimientos de instalación de las páginas 6 a 10 para instalar el software y el controlador de impresora, y después conecte la PT-1500PC al ordenador cuando se le pida que lo haga. -
Page 36: Para Usuarios Con Pc Compatible (Windows 98/98Se/Me/2000)
Unidad de CD-ROM No conecte la PT-1500PC al ordenador antes de haber instalado el software de diseño de etiquetas, de lo contrario, podrá no instalarse correctamente. Asegúrese de no conectar la PT-1500PC hasta que se le haya pedido que lo haga. - Page 37 “Yes”. Aparecerá el primer cuadro de diálogo “Driver Setup”, informándole de que se va a instalar el controlador de impresora PT-1500PC. Continúe con el procedimiento de “ Instalación del controlador de impresora ” en la página 9.
-
Page 38: Instalación Del P-Touch Editor Ver. 3.1
(Driver) del lado derecho. Aparecerá el primer cuadro de diálogo “Driver Setup”, informándole de que se va a instalar el controlador de impresora PT-1500PC. Continúe con el procedimiento de “ Instalación del controlador de impresora ” en la página 9. -
Page 39: Instalación Del Controlador De Impresora
Plug-and-Play. Asegúrese de leer las instrucciones de instalación descritas más abajo antes de instalar el controlador de impresora incluido en el CD-ROM. Asegúrese de no conectar la PT-1500PC hasta que se le indique que lo haga. 1 Haga clic sobre el botón “Next”. Aparecerá un cuadro de diálogo indicándole que conecte la PT-1500PC al... -
Page 40: Desinstalación Del Software Y Controlador De Impresora
Seleccione esta opción cuando quiera actualizar el controlador de impresora, o cuando trabaje con Windows ® cambiar a una PT-1500PC que tenga un número de serie diferente. Si se selecciona “Add Brother PT-1500PC”, se añadirá un nuevo controlador de impresora. Con ®... -
Page 41: Para Un Ordenador Macintosh
Para un ordenador Macintosh Antes de poder imprimir etiquetas con la PT-1500PC, deberá instalarse el software de diseño de etiquetas y el controlador de impresora PT-1500PC. Para diseñar etiquetas que se puedan imprimir con la PT-1500PC, en el CD- ROM incluido hay disponibles dos aplicaciones: P-touch Quick Editor y P-touch Editor Ver. -
Page 42: Instalación Del P-Touch Quick Editor
Instale el software P-touch Quick Editor en un Mac como se describe a continuación. 1 Con la PT-1500PC y el ordenador apagados, conecte la PT- 1500PC al Macintosh utilizando el cable de interfaz USB incluido. Asegúrese de dejar la PT-1500PC apagada. -
Page 43: Selección De La Impresora
Seleccione las opciones que quiera instalar y a continuación haga clic sobre el botón “Install” para iniciar la instalación. Para poder imprimir con la PT-1500PC, se deberá seleccionar la instalación de “PT-1500PC Driver”. 7 Cuando termine la instalación y aparezca el siguiente cuadro de diálogo, haga clic sobre... -
Page 44: Desinstalación Del Software Y Controlador De Impresora
2 En la carpeta “System”, abra la tarjeta “Extensions”. 3 Arrastre los siguientes iconos hasta el icono “Trash”: • PT-1500PC y USB PT-1500PC Extension 4 En la carpeta “System”, abra la tarjeta “Preferences”. 5 Arrastre los siguientes iconos hasta el icono “Trash”:... -
Page 45: Inicio Del Software P-Touch Editor
Inicio del software P-touch Editor Inicio del P-touch Quick Editor Cuando instale el P-touch Quick Editor en un PC, podrá elegir si quiere añadir accesos directos al escritorio, al menú de inicio “StartUp” y a la barra de herramientas “Quick Launch”. En un ordenador compatible con PC IBM: •... -
Page 46: Utilización Del P-Touch Quick Editor
En un ordenador Macintosh: • Haga doble clic sobre el icono “P-touch Editor Ver3.1.6” en la carpeta P-touch Editor Ver.3.1 instalada en el ordenador. Una vez iniciado el P-touch Editor Ver. 3.1, se visualizará la siguiente ventana. Para más detalles sobre las funciones del P- touch Editor Ver. -
Page 47: Importación De Texto
Importación de texto El texto que ya haya sido ingresado en otra aplicación puede ser importado fácilmente a la etiqueta. 1 Seleccione el texto deseado en la otra aplicación. 2 Importe el texto al diseño de etiqueta presionando las teclas de acceso directo designadas (Windows solamente) o bien arrastrándolo desde la otra aplicación. -
Page 48: Para Ocultar/Visualizar El P-Touch Quick Editor (Windows Solamente)
Impresión de una etiqueta 1 Encienda la PT-1500PC y inicie el ordenador. 2 Inicie el P-touch Quick Editor o bien el P-touch Editor Ver. 3.1, y asegúrese de que la impresora seleccionada es la PT-1500PC. 3 Diseñe su etiqueta. 4 Haga clic sobre el comando [Print] en la aplicación, seleccione los ajustes de impresión deseados, y a... -
Page 49: Para Quitar El Respaldo De La Etiqueta
La aparición de una línea horizontal en blanco a través de la etiqueta impresa indica que el cabezal de impresión y el rodillo están sucios. Limpie el cabezal de impresión y el rodillo de acuerdo con el siguiente procedimiento. 1 Apague la PT-1500PC. 2 Abra la tapa del compartimiento de la cinta. -
Page 50: Localización Y Solución De Problemas
(TZ-CL4). Localización y solución de problemas Seguimiento del estado de la P-touch Usted puede determinar el estado de la PT-1500PC observando el indicador de estado. Indicador de estado Se enciende Parpadea unas cuantas veces Parpadea rápidamente... -
Page 51: Solución De Problemas
Si hay conectadas dos o más P-touch del mismo modelo a través de sus puertos USB, seleccione “PTUSB” (PT-1500PC- XXXXXXXXX):” (done XXXXXXXXX es el número de serie) en lugar de “PTUSB:”. El número de serie está escrito por encima del código de barras en la etiqueta plateada colocada en la parte inferior de la P-touch. -
Page 52: Accesorios
• Accesorios de consumo Adquiera los casetes de cinta en el distribuidor autorizado que le quede más cerca. Brother no puede hacerse responsable de los problemas causados por el empleo de accesorios de consumo no autorizados. Emplee sólo cintas Brother TZ con esta máquina. No emplee cintas que no tengan la marca °... - Page 53 Cintas laminadas de 6 mm (1/4”) TZ-111 Caracteres negros sobre cinta transparente TZ-211 Caracteres negros sobre cinta blanca TZ-315 Caracteres blancos sobre cinta negra TZ-S111 Caracteres negros industriales (adhesivo fuerte) sobre adhesivo transparente TZ-S211 Caracteres negros industriales (adhesivo fuerte) sobre adhesivo blanco Cintas especiales °...
-
Page 54: Información Para Contactar Con Brother
Para hacer pedidos por correo o mediante pago con cheque, rellene el formulario de pedido de accesorios y Sistema de contestación por fax El servicio al cliente Brother tiene instalado un sistema de contestación por fax de forma que el cliente puede obtener respuestas instantáneas a las preguntas comunes e información sobre productos Este servicio está... - Page 55 Printed in China LA6423001...
Need help?
Do you have a question about the P-touch PT-1500PC and is the answer not in the manual?
Questions and answers