
Related Manuals for Stern Engineering 350980

Summary of Contents for Stern Engineering 350980
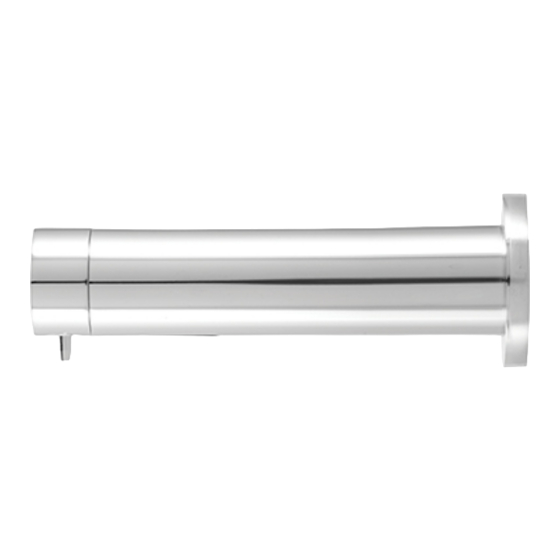
- Page 1 TUBULAR FOAM DISPENSER TOUCH FREE WALL MOUNTED FOAM SOAP DISPENSER I N S T A L L A T I O N A N D M A I N T E N A N C E G U I D E...
- Page 2 TROUBLESHOOTING The information in this document reflects products at the date of printing. Stern Engineering Ltd reserves the right, subject to all applicable laws, at any time, at its sole discretion, and without notice, to discontinue or change the features, designs, materials and other specifications of its products, and to either permanently or temporarily withdraw any of the forgoing from the market.
-
Page 3: Technical Data
TECHNICAL DATA 350980 TUBULAR FOAM E Capacity 1 Liter 33.8 oz. Power Supply 12V transformer Soap viscosity Up to 100 cPs Varies according to viscosity and soap consistency Standard discharge mm +\- mm (Adjustable by remote control) Sensor range 30-100 5.5-8.5... -
Page 4: Pre-Installation Info
PRE-INSTALLATION INFO Check contents After opening the package, check each part with the “Pack Contents” section. Make sure all parts are accounted for before discarding any packaging material. If any parts are missing, do not attempt to install the touch free foam soap dispenser until you obtain the missing parts. -
Page 5: Pack Contents
PACK CONTENTS Familiarize yourself with the part names and ensure that all the parts are included in your package. 1 X FOAM DISPENSER BODY 12V TRANSFORMER 1 X FOAM COMPRESSOR WITH PIPE 1X QUICK CONNECTION FITTING 1 X PUMP ASSEMBLY WITH BOTTLE SUPPORT AND SOAP TANK 2 SCREWS AND... -
Page 6: Installation
INSTALLATION STEP 1 – REMOVE ALL MOUNTING HARDWARE Drill a hole (23-24 mm) at the designated installation location of the foam soap dispenser body. 16mm Drill a small hole (2-3 mm) above the previous one for the anti-rotation pin. Consult the diagram. - Page 7 INSTALLATION Connect the tube extending out of the soap dispenser body to the quick connection fitting at the top of the foam compressor by snapping it in. Make sure it is firmly plugged in. Connect the quick connection fitting to the soap dispenser pump. Make sure it is firmly plugged in.
- Page 8 INSTALLATION STEP 3 – CONNECTING THE POWER SOURCE Remove the protective sticker covering the sensor. Connect the matching connector from the foam dispenser body to the compressor unit, and the O-RING VISIBLE – compressor unit to the pump NOT CONNECTED PROPERLY connector.
-
Page 9: Filling The Soap Tank
FILLING THE SOAP TANK Unscrew the soap tank from the pump assembly and pull it out from the bottle support. Fill the bottle with liquid soap up to the top line. Make sure the bottle is clean before filling it with soap. Insert the bottle back into the bottle support. -
Page 10: Remote Control Functions
REMOTE CONTROL FUNCTIONS If available, the foam dispenser remote control can adjust the dispenser’s settings. To use the remote control hold it in front of the sensor at a distance of 10-15cm (4-6”). Attention: The remote control will not operate out of the recommended range (too close or too far). -
Page 11: Spare Parts List
SPARE PARTS LIST Seals & Screws Kit Tubular Foam 07210098 10-Pack Sensor Kit Tubular Foam 07220338 Soap Dispenser Pump 07222013 Pump+Compressor Kit 07222026 Soap Bottle 1L 07100020 Soap Bottle 1L Support Kit 07220087 10-Pack Foam Filter 07212015 12V Transformer (EU) 06522081 12V Transformer (UK) 06522086... -
Page 12: Maintenance
MAINTENANCE Care and cleaning of chrome and special finishes DO NOT use steel wool or cleansing agents containing alcohol, acid, abrasives, or their like .Use of any prohibited cleaning or maintenance products or substances could damage the surface of the soap dispenser. For surface cleaning use ONLY soap and water, then wipe dry with a clean cloth or towel. -
Page 13: Limited Warranty
If a defect is found in normal use, Y. Stern Engineering Ltd. will, at its discretion, repair, provide a replacement part or product, or make appropriate adjustments. Damage caused by accident, misuse, or abuse is not covered by this warranty. -
Page 14: Troubleshooting
TROUBLESHOOTING PROBLEM INDICATOR CAUSE SOLUTION Refill the soap tank. Soap has run low or is completely out. Refer to page 7 Press the refill button located The soap tank has been filled, but at the bottom of the pump soap has not reached the spout. to prime the soap until it is dispensed from the spout. - Page 15 TROUBLESHOOTING PROBLEM INDICATOR CAUSE SOLUTION The connectors between the pump Connect the connectors Foam does not and the electronic unit are not properly so that the white stop dispensing connected properly. o-ring is not visible. Increase air ratio using the Foam is too remote control.
- Page 16 777 Passaic Avenue, Clifton NJ,07012, USA Tel: +1-973 773 8011 | Fax: +1-973-779-8768 Toll Free: 1-800-4364410 info@sternfaucets.com | sternusa@sternfaucets.com 08.16 01500284-A...
Need help?
Do you have a question about the 350980 and is the answer not in the manual?
Questions and answers