Advertisement
Quick Links
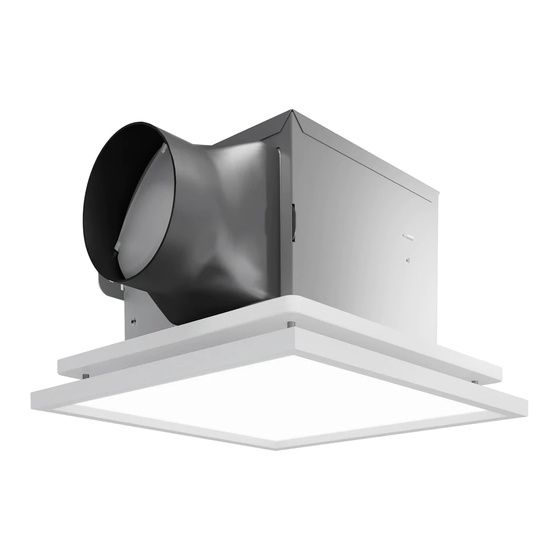
Model / Modèle / Modelo: FAB-BL
Bathroom Fan with LED Panel - Skylight Breeze
INSTRUCTION MANUAL
IMPORTANT: READ CAREFULLY AND KEEP.
Ventilateur de salle de bain avec panneau à DEL - Skylight Breeze
MANUEL D'INSTRUCTIONS
IMPORTANT : À LIRE ATTENTIVEMENT ET À CONSERVER.
Ventilador de baño con panel LED - Skylight Breeze
MANUAL DE INSTRUCCIONES
IMPORTANTE: LEER DETENIDAMENTE Y CONSERVAR.
NOT FOR USE IN KITCHENS
TO PROTECT FINISH, WASH WITH MILD SOAP OR
DETERGENT ONLY. MAY BE USED OVER TUB OR
Made in China
SHOWER WHEN INSTALLED IN A GFCI BRANCH
CIRCUIT INSTALL FAN AT LEAST 7 FEET (2.1M)
Fabriqué en Chine
FOR AMERICA OR 8.2 FEET (2.5M) FOR CANADA
ABOVE THE FLOOR. PERMANENTLY LUBRICATED
Hecho en China
MOTOR-DO NOT OIL OR DISASSEMBLE.
TM
TM
Residential use only
Usage résidentiel seulement
Uso residencial solamente
MC
Indoor use only
Usage intérieur seulement
Uso interior solamente
Rev. 15-01-2021
Advertisement

Subscribe to Our Youtube Channel
Related Manuals for Artika Skylight Breeze FAB-BL


Summary of Contents for Artika Skylight Breeze FAB-BL
- Page 1 Model / Modèle / Modelo: FAB-BL Bathroom Fan with LED Panel - Skylight Breeze INSTRUCTION MANUAL IMPORTANT: READ CAREFULLY AND KEEP. Ventilateur de salle de bain avec panneau à DEL - Skylight Breeze MANUEL D’INSTRUCTIONS IMPORTANT : À LIRE ATTENTIVEMENT ET À CONSERVER. Ventilador de baño con panel LED - Skylight Breeze MANUAL DE INSTRUCCIONES IMPORTANTE: LEER DETENIDAMENTE Y CONSERVAR.
- Page 2 INCLUDED HARDWARE MATÉRIEL INCLUS HERRAJES INCLUIDOS ITEM DESCRIPTION QUANTITY PIÈCE DESCRIPTION QUANTITÉ PIEZA DESCRIPCIÓN CANTIDAD Housing Boîte métallique × 1 Caja metálica Motor Moteur × 1 Motor Fan screw Vis du ventilateur × 3 Tornillo de ventilador Duct connector Connecteur de conduit ×...
- Page 3 TOOLS NEEDED OUTILS NÉCESSAIRES HERRAJES INCLUIDOS WHAT YOU WILL NEED VOUS AUREZ BESOIN LO QUE NECESITARÁ Pencil HVAC foil tape Crayon Ruban adhésif en aluminium HVAC Lápiz Cinta adhesiva de aluminio HVAC Screwdriver Junction box strain relief connector Tournevis Presse-étoupe Destornillador Conector de alivio de tensión Screwdriver...
- Page 4 CAUTION ATTENTION ATENCIÓN ADVERTENCIA: WARNING: AVERTISSEMENT: Riesgo de descarga Risk of electrical shock. Risque de décharge eléctrica. Desconectar Turn off power at the électrique. Éteindre la corriente eléctrica del breaker panel. le disjoncteur sur le panel (disyuntor). panneau électrique. Switch off the main electrical supply Il est important de couper Desconecte la instalación eléctrica en from the fuse box/circuit breaker...
- Page 5 CAUTION ATTENTION ATENCIÓN CAUTION ATTENTION PRECAUCIÓN 1) Not for use in kitchens 1) Ne pas utiliser dans une cuisine 1) No está diseñado para usarse en cocinas. 2) Install the fan at least 2.5 M 2) Installer de sorte que les pièces (8.2 feet) above the floor inférieures soient à...
- Page 6 CAUTION ATTENTION ATENCIÓN IMPORTANT SAFETY INSTRUCTIONS CONSIGNES DE SÉCURITÉ INSTRUCCIONES DE SEGURIDAD IMPORTANTES IMPORTANTES Read and save these instructions Veuillez lire et conserver ces Lea y conserve estas instrucciones. WARNING — To reduce the risk of fire, consignes electric shock or injury, observe the ADVERTENCIA —...
- Page 7 CAUTION ATTENTION ATENCIÓN INSTALLATION INSTRUCTIONS CONSIGNES D’INSTALLATION INSTRUCCIONES DE INSTALACIÓN WARNING — To reduce the risk of fire, AVERTISSEMENT — Pour réduire ADVERTENCIA — Para reducir el electric shock or injury, observe the les risques d’incendie, de décharge riesgo de incendios, descargas following: électrique ou de blessure, veuillez eléctricas y lesiones personales,...
- Page 8 IMPORTANT: READ BEFORE BEGINNING INSTALLATION IMPORTANT: À LIRE AVANT DE COMMENCER L’INSTALLATION IMPORTANTE: LEA ANTES DE COMENZAR LA INSTALACIÓN INSTALLATION STEPS ÉTAPES D’INSTALLATION PASOS DE INSTALACIÓN Before proceeding with the Avant de procéder à Antes de continuar con la installation of your bathroom l’installation de votre instalación de su ventilador de fan with LED panel, follow the...
- Page 9 SECTION 1: PREPARATION BEFORE INSTALLATION SECTION 1 : PRÉPARATION AVANT L’INSTALLATION SECCIÓN 1: PREPARACIÓN ANTES DE LA INSTALACIÓN Remove the motor from the housing Retirer le moteur de la boîte métallique Retire el motor de la caja metálica...
- Page 10 SECTION 1: PREPARATION BEFORE INSTALLATION SECTION 1 : PRÉPARATION AVANT L’INSTALLATION SECCIÓN 1: PREPARACIÓN ANTES DE LA INSTALACIÓN Remove the duct connector from the housing Retirer le connecteur de conduit de la boîte métallique Retire el conector de conducto de la caja metálica...
- Page 11 SECTION 1: PREPARATION BEFORE INSTALLATION SECTION 1 : PRÉPARATION AVANT L’INSTALLATION SECCIÓN 1: PREPARACIÓN ANTES DE LA INSTALACIÓN Remove the junction box Retirer le boîtier électrique Retire la caja de conexiones...
- Page 12 SECTION 1: PREPARATION BEFORE INSTALLATION SECTION 1 : PRÉPARATION AVANT L’INSTALLATION SECCIÓN 1: PREPARACIÓN ANTES DE LA INSTALACIÓN Remove the wire knockout where the electrical wires will be inserted Retirez le protecteur d’ouverture de fil où les fils électriques seront insérés Retire el protector de apertura del cable donde se insertarán los cables eléctricos...
- Page 13 SECTION 2 / SECTION 2 / SECCIÓN 2: NEW CONSTRUCTION ASSEMBLY INSTRUCTIONS INSTALLATION DANS UNE NOUVELLE CONSTRUCTION INSTRUCCIONES DE MONTAJE PARA OBRA NUEVA...
- Page 14 SECTION 2: NEW CONSTRUCTION ASSEMBLY INSTRUCTIONS SECTION 2 : INSTALLATION DANS UNE NOUVELLE CONSTRUCTION SECCIÓN 2: INSTRUCCIONES DE MONTAJE PARA OBRA NUEVA Screw on the housing Visser la boîte métallique Atornille la caja metálica...
- Page 15 SECTION 2: NEW CONSTRUCTION ASSEMBLY INSTRUCTIONS SECTION 2 : INSTALLATION DANS UNE NOUVELLE CONSTRUCTION SECCIÓN 2: INSTRUCCIONES DE MONTAJE PARA OBRA NUEVA Feed the cable through the hole and secure it in place using the junction box strain relief connector Insérer le fil dans l’ouverture et le fixer avec le presse-étoupe Inserte el cable en la apertura y asegúrelo con el conector de alivio de tensión Junction box strain relief connector (not included)
- Page 16 SECTION 2: NEW CONSTRUCTION ASSEMBLY INSTRUCTIONS SECTION 2 : INSTALLATION DANS UNE NOUVELLE CONSTRUCTION SECCIÓN 2: INSTRUCCIONES DE MONTAJE PARA OBRA NUEVA Connecting the wires, option 1 of 2: single switch connection 2-3A Connexion des fi ls, option 1 de 2 : connexion pour interrupteur unipolaire Conectando los cables, opción 1 de 2: conexión de interruptor único White (N) Blanc (N)
- Page 17 SECTION 2: NEW CONSTRUCTION ASSEMBLY INSTRUCTIONS SECTION 2 : INSTALLATION DANS UNE NOUVELLE CONSTRUCTION SECCIÓN 2: INSTRUCCIONES DE MONTAJE PARA OBRA NUEVA Connecting the wires, option 2 of 2: double switch connection 2-3B Connexion des fi ls, option 2 de 2 : connexion pour interrupteur bipolaire Conectando los cables, opción 2 de 2: conexión de doble interruptor White (N) White (N)
- Page 18 SECTION 2: NEW CONSTRUCTION ASSEMBLY INSTRUCTIONS SECTION 2 : INSTALLATION DANS UNE NOUVELLE CONSTRUCTION SECCIÓN 2: INSTRUCCIONES DE MONTAJE PARA OBRA NUEVA Screw on the junction box Visser le boîtier électrique Atornille la caja de conexiones...
- Page 19 SECTION 2: NEW CONSTRUCTION ASSEMBLY INSTRUCTIONS SECTION 2 : INSTALLATION DANS UNE NOUVELLE CONSTRUCTION SECCIÓN 2: INSTRUCCIONES DE MONTAJE PARA OBRA NUEVA Tape the flex pipe to the duct connector using the HVAC foil tape Coller le tuyau flexible sur le connecteur de conduit avec le ruban adhésif en aluminium HVAC Pegue el tubo flexible al conector del conducto con la cinta adhesiva de aluminio HVAC Flex pipe (not included) Tuyau flexible (non inclus)
- Page 20 SECTION 2: NEW CONSTRUCTION ASSEMBLY INSTRUCTIONS SECTION 2 : INSTALLATION DANS UNE NOUVELLE CONSTRUCTION SECCIÓN 2: INSTRUCCIONES DE MONTAJE PARA OBRA NUEVA Reinstall the duct connector onto the housing Réinstaller le connecteur de conduit sur la boîte métallique Reinstale el conector del conducto en la caja metálica...
- Page 21 SECTION 2: NEW CONSTRUCTION ASSEMBLY INSTRUCTIONS SECTION 2 : INSTALLATION DANS UNE NOUVELLE CONSTRUCTION SECCIÓN 2: INSTRUCCIONES DE MONTAJE PARA OBRA NUEVA Reinstall the motor onto the housing Réinstaller le moteur sur la boîte métallique Reinstale el motor en la caja metálica...
- Page 22 SECTION 2: NEW CONSTRUCTION ASSEMBLY INSTRUCTIONS SECTION 2 : INSTALLATION DANS UNE NOUVELLE CONSTRUCTION SECCIÓN 2: INSTRUCCIONES DE MONTAJE PARA OBRA NUEVA Install the LED panel onto the housing Installer le panneau à DEL sur la boîte métallique Instale el panel LED en la caja metálica...
- Page 23 SECTION 3 / SECTION 3 / SECCIÓN 3: EXISTING CONSTRUCTION ASSEMBLY INSTRUCTIONS INSTALLATION DANS UNE CONSTRUCTION EXISTANTE INSTRUCCIONES DE MONTAJE EN UNA CONSTRUCCIÓN EXISTENTE...
- Page 24 SECTION 3: EXISTING CONSTRUCTION ASSEMBLY INSTRUCTIONS SECTION 3 : INSTALLATION DANS UNE CONSTRUCTION EXISTANTE SECCIÓN 3: INSTRUCCIONES DE MONTAJE EN UNA CONSTRUCCIÓN EXISTENTE Bend the fl aps on the housing Pliez les brides de la boîte métallique Doble las correas de la caja metálica...
- Page 25 SECTION 3: EXISTING CONSTRUCTION ASSEMBLY INSTRUCTIONS SECTION 3 : INSTALLATION DANS UNE CONSTRUCTION EXISTANTE SECCIÓN 3: INSTRUCCIONES DE MONTAJE EN UNA CONSTRUCCIÓN EXISTENTE Trace an outline of the housing on the ceiling Marquer le contour de la boîte métallique sur le plafond Marque el contorno de la caja metálica en el techo...
- Page 26 SECTION 3: EXISTING CONSTRUCTION ASSEMBLY INSTRUCTIONS SECTION 3 : INSTALLATION DANS UNE CONSTRUCTION EXISTANTE SECCIÓN 3: INSTRUCCIONES DE MONTAJE EN UNA CONSTRUCCIÓN EXISTENTE Cut the drywall Couper le gypse Corte el yeso...
- Page 27 SECTION 3: EXISTING CONSTRUCTION ASSEMBLY INSTRUCTIONS SECTION 3 : INSTALLATION DANS UNE CONSTRUCTION EXISTANTE SECCIÓN 3: INSTRUCCIONES DE MONTAJE EN UNA CONSTRUCCIÓN EXISTENTE Screw down the wood pieces Visser les pièces de bois Atornille las piezas de madera...
- Page 28 SECTION 3: EXISTING CONSTRUCTION ASSEMBLY INSTRUCTIONS SECTION 3 : INSTALLATION DANS UNE CONSTRUCTION EXISTANTE SECCIÓN 3: INSTRUCCIONES DE MONTAJE EN UNA CONSTRUCCIÓN EXISTENTE Feed the cable through the hole and secure it in place using the junction box strain relief connector Insérer le fi l dans l’ouverture et le fi xer avec le presse-étoupe Inserte el cable en la apertura y asegúrelo con el conector de alivio de tensión Junction box strain relief connector (not included)
- Page 29 SECTION 3: EXISTING CONSTRUCTION ASSEMBLY INSTRUCTIONS SECTION 3 : INSTALLATION DANS UNE CONSTRUCTION EXISTANTE SECCIÓN 3: INSTRUCCIONES DE MONTAJE EN UNA CONSTRUCCIÓN EXISTENTE Screw the housing to the wood pieces Visser la boîte métallique sur les pièces de bois Atornille la caja metálica en las piezas de madera...
- Page 30 SECTION 3: EXISTING CONSTRUCTION ASSEMBLY INSTRUCTIONS SECTION 3 : INSTALLATION DANS UNE CONSTRUCTION EXISTANTE SECCIÓN 3: INSTRUCCIONES DE MONTAJE EN UNA CONSTRUCCIÓN EXISTENTE Connecting the wires, option 1 of 2: single switch connection 3-7A Connexion des fi ls, option 1 de 2 : connexion pour interrupteur unipolaire Conectando los cables, opción 1 de 2: conexión de interruptor único Lumière et moteur Blanc Switch Blanc...
- Page 31 SECTION 3: EXISTING CONSTRUCTION ASSEMBLY INSTRUCTIONS SECTION 3 : INSTALLATION DANS UNE CONSTRUCTION EXISTANTE SECCIÓN 3: INSTRUCCIONES DE MONTAJE EN UNA CONSTRUCCIÓN EXISTENTE Connecting the wires, option 2 of 2: double switch connection 3-7B Connexion des fi ls, option 2 de 2 : connexion pour interrupteur bipolaire Conectando los cables, opción 2 de 2: conexión de doble interruptor Lumière et moteur Blanc Switch Blanc...
- Page 32 SECTION 3: EXISTING CONSTRUCTION ASSEMBLY INSTRUCTIONS SECTION 3 : INSTALLATION DANS UNE CONSTRUCTION EXISTANTE SECCIÓN 3: INSTRUCCIONES DE MONTAJE EN UNA CONSTRUCCIÓN EXISTENTE Screw on the junction box Visser le boîtier électrique Atornille la caja de conexiones...
- Page 33 SECTION 3: EXISTING CONSTRUCTION ASSEMBLY INSTRUCTIONS SECTION 3 : INSTALLATION DANS UNE CONSTRUCTION EXISTANTE SECCIÓN 3: INSTRUCCIONES DE MONTAJE EN UNA CONSTRUCCIÓN EXISTENTE Tape the fl ex pipe to the duct connector using the HVAC foil tape Coller le tuyau fl exible sur le connecteur de conduit avec le ruban adhésif en aluminium HVAC Pegue el tubo fl exible al conector del conducto con la cinta adhesiva de aluminio HVAC Flex pipe (not included) Tuyau fl exible (non inclus)
- Page 34 SECTION 3: EXISTING CONSTRUCTION ASSEMBLY INSTRUCTIONS SECTION 3 : INSTALLATION DANS UNE CONSTRUCTION EXISTANTE SECCIÓN 3: INSTRUCCIONES DE MONTAJE EN UNA CONSTRUCCIÓN EXISTENTE Reinstall the duct connector onto the housing 3-10 Réinstaller le connecteur de conduit sur la boîte métallique Reinstale el conector del conducto en la caja metálica...
- Page 35 SECTION 3: EXISTING CONSTRUCTION ASSEMBLY INSTRUCTIONS SECTION 3 : INSTALLATION DANS UNE CONSTRUCTION EXISTANTE SECCIÓN 3: INSTRUCCIONES DE MONTAJE EN UNA CONSTRUCCIÓN EXISTENTE Reinstall the motor onto the housing 3-11 Réinstaller le moteur sur la boîte métallique Reinstale el motor en la caja metálica...
- Page 36 SECTION 3: EXISTING CONSTRUCTION ASSEMBLY INSTRUCTIONS SECTION 3 : INSTALLATION DANS UNE CONSTRUCTION EXISTANTE SECCIÓN 3: INSTRUCCIONES DE MONTAJE EN UNA CONSTRUCCIÓN EXISTENTE Install the LED panel onto the housing 3-12 Installer le panneau à DEL sur la boîte métallique Instale el panel LED en la caja metálica...
- Page 37 CANADA (IC) Operation is subject to the L’exploitation est autorisée aux La operación está sujeta a las dos following two conditions: deux conditions suivantes : condiciones siguientes: 1. this device does not cause 1. l’appareil ne doit pas produire 1. Este dispositivo no puede causar interference, d’interférences;...
- Page 38 USA (FCC) WARNING: AVERTISSEMENT : ADVERTENCIA: Changes or modifications to this Tout changement ou modification, Hacer cambios o modificaciones unit not expressly approved by the non expressément approuvé en esta unidad sin la expresa party responsible for compliance par la partie responsable de aprobación de la parte responsable could void the user’s authority to la conformité, peut annuler...
- Page 39 WARRANTY GARANTIE GARANTÍA Artika For Living Inc. is proud to offer Artika For Living Inc. est fière de vous Artika For Living Inc. se enorgullece de you a five-year (5) limited warranty offrir une garantie limitée de cinq (5) ofrecerle una garantía limitada de cinco on manufacturing defects from the ans contre tout défaut de fabrication, à...
- Page 40 Artika For Living Inc. 1756, 50 Avenue 1-866-661-9606 Montréal (Lachine), Québec support@artika.com Canada H8T 2V5 www.artika.com Customer Service Service à la clientèle Atención al cliente Monday to Friday Lundi au vendredi Lunes a viernes 9 am - 5 pm EST 9 h à...
Need help?
Do you have a question about the Skylight Breeze FAB-BL and is the answer not in the manual?
Questions and answers