Subscribe to Our Youtube Channel
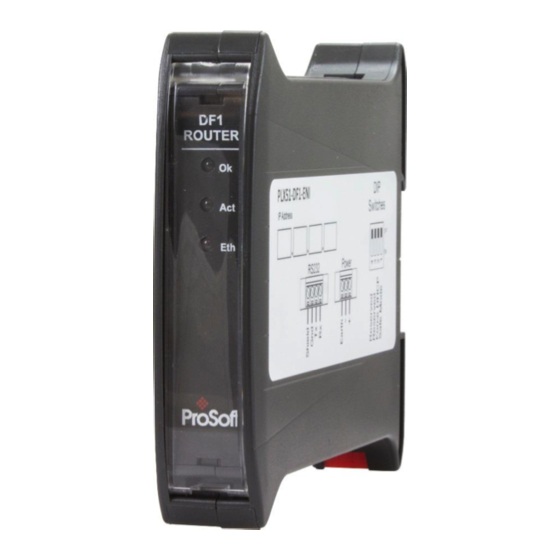
Summary of Contents for ProSoft Technology PLX51-DF1-ENI
- Page 1 PLX51-DF1-ENI DF1 Router RSLogix500 Programming of SLC500/MicroLogix via PLX51-DF1-ENI December, 2017 TECHNICAL NOTE...
-
Page 2: Table Of Contents
Additional Information ....................3 Application Description ...................... 5 Setup ..........................7 3.1. Serial Cable Wiring ...................... 7 3.2. PLX51-DF1-ENI Setup ....................8 3.3. SLC500 Setup (RSLogix 500) ..................9 3.4. RSLinx Setup ......................10 Uploading EDS File from Module ..................10 Manually Installing the EDS File .................. -
Page 3: Preface
Preface PREFACE 1.1. PURPOSE OF THIS DOCUMENT This document assists you in the setup of the PLX51-DF1-ENI to allow remote RSLogix 500 programming of an SLC/MicroLogix PLC. 1.2. ADDITIONAL INFORMATION The following resources contain additional information that can assist you with the module installation and operation. - Page 4 Page 4 of 19...
-
Page 5: Application Description
Application Description APPLICATION DESCRIPTION The ProSoft PLX51-DF1-ENI can be used to enable multiple modern Ethernet devices to communicate to legacy SLC500 and MicroLogix devices via their DF1 serial ports. In the application example below, a remote RSLogix 500 programming station can communicate with, and program an SLC500 PLC. - Page 6 Page 6 of 19...
-
Page 7: Setup
Setup SETUP The following sections describe the installation and configuration of the required devices in the network. 3.1. SERIAL CABLE WIRING The serial cable pinout is shown in the figure below: 2 – S IGURE ERIAL ABLE PINOUT Page 7 of 19... -
Page 8: Plx51-Df1-Eni Setup
Setup 3.2. PLX51-DF1-ENI SETUP The PLX51-DF1-ENI must be configured in Bridge mode, as shown below. 3 – DF1 G IGURE ENERAL ONFIGURATION In the Serial-DF1 settings, the protocol must be set to Full Duplex. The BAUD Rate, Parity and Error Detection must match that of the SLC device (as configured using RSLogix 500). -
Page 9: Slc500 Setup (Rslogix 500)
Setup 3.3. SLC500 SETUP (RSLOGIX 500) Using RSLogix500, the DF1 serial port must be configured to match that of the PLX51-DF1- ENI’s serial port settings with respect to BAUD rate, Parity and Error Detection. NOTE: The DF1 Full Duplex must be selected, and the Duplicate Packet Detect option must be removed. -
Page 10: Rslinx Setup
Setup 3.4. RSLINX SETUP The PLX51-DF1-ENI’s EDS file must be registered on the programming PC. This can be achieved in two ways: Uploading the EDS file from the PLX51-DF1-ENI online, or Downloading the EDS file from the ProSoft website and manually registering it. - Page 11 IGURE THERNET DDRESS If the PLX51-DF1-ENI is powered and connected on the network, it appears in the RSLinx RSWho browse window. Note that the device icon is a yellow question mark, as the EDS file has not yet been registered.
- Page 12 If RSLinx is running as a service, make sure the service is shut- down completely before restarting. After restarting RSLinx, the PLX51-DF1-ENI appears in the RSWho browser. It also shows the underlying DF1 Port and, when expanded, shows the underlying SLC500.
-
Page 13: Manually Installing The Eds File
EDS F ANUALLY NSTALLING THE To install the PLX51-DF1-ENI’s EDS file manually, it must first be downloaded from the ProSoft website: www.prosoft-technology.com The EDS file and associated icon are zipped in a single file. Save the file to your local hard drive and unzip the file. - Page 14 Setup Use the Browse button to navigate to the folder where the EDS file was unzipped, and select the EDS file. 15 – EDS R IGURE EGISTRATION 16 – EDS F IGURE ELECT Page 14 of 19...
- Page 15 Setup Follow the prompts and select the Next button to complete the EDS file registration. 17 – EDS R IGURE EGISTRATION OMPLETE NOTE: Depending on the RSLinx revision, RSLinx may need to be shut down and restarted. If RSLinx is running as a service, make sure the service is shut down completely before restarting.
-
Page 16: Rslogix 500
In RSLogix500 under the Comms menu, select System Comms. 18 – S IGURE YSTEM OMMUNICATION In the Communications window, browse to the SLC500 device under the PLX51-DF1-ENI, and select Online. Upload or Download as required. 19 – S IGURE ELECT... -
Page 17: Support, Service & Warranty
Support, Service & Warranty 4. SUPPORT, SERVICE & WARRANTY 4.1. CONTACTING TECHNICAL SUPPORT ProSoft Technology, Inc. is committed to providing the most efficient and effective support possible. Before calling, please gather the following information to assist in expediting this process:... - Page 18 Support, Service & Warranty Europe / Middle East / Africa Asia Pacific Regional Office Regional Office Phone: +33.(0)5.34.36.87.20 Phone: +603.7724.2080 europe@prosoft-technology.com asiapc@prosoft-technology.com Languages spoken: French, English Languages spoken: Bahasa, Chinese, English, Japanese, REGIONAL TECH SUPPORT Korean support.emea@prosoft-technology.com REGIONAL TECH SUPPORT support.ap@prosoft-technology.com Middle East &...
-
Page 19: Warranty Information
Phone: +54.911.4565.8119 scone@prosoft-technology.com Languages spoken: Spanish, English 4.2. WARRANTY INFORMATION For complete details regarding ProSoft Technology’s TERMS & CONDITIONS OF SALE, WARRANTY, SUPPORT, SERVICE AND RETURN MATERIAL AUTHORIZATION INSTRUCTIONS, please see the documents at: www.prosoft-technology.com/legal Documentation is subject to change without notice.


Need help?
Do you have a question about the PLX51-DF1-ENI and is the answer not in the manual?
Questions and answers