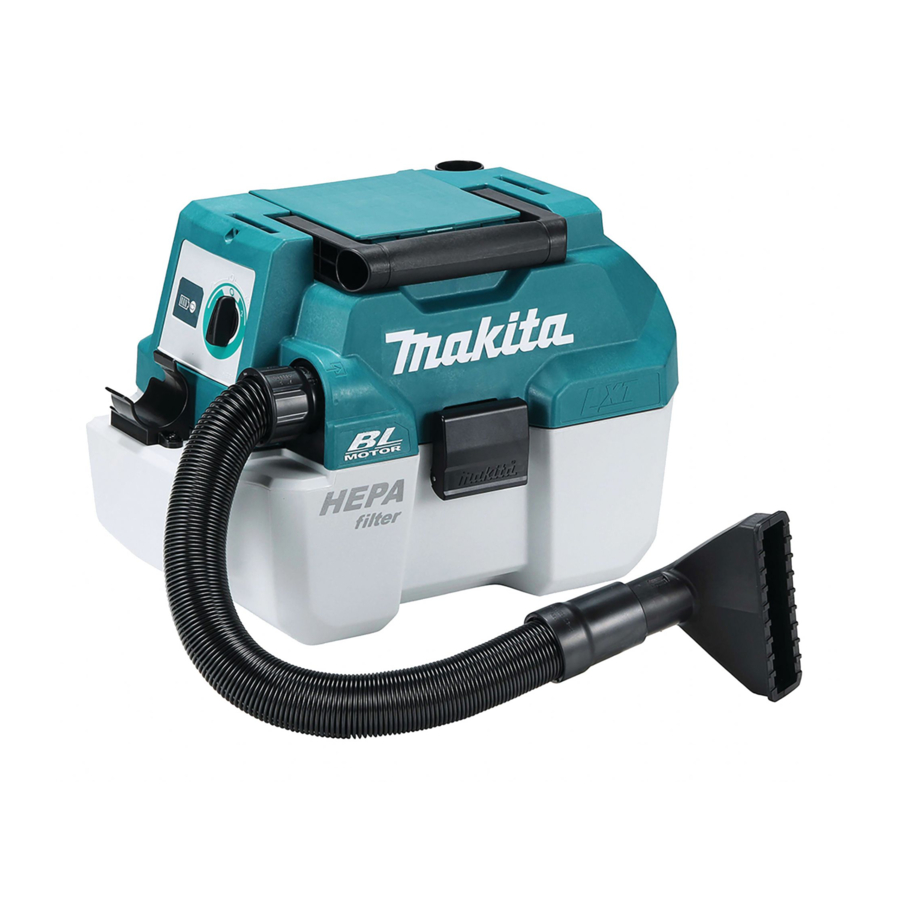
Makita DVC750L Instruction Manual
Cordless portable vacuum cleaner
Hide thumbs
Also See for DVC750L:
- Instruction manual (93 pages) ,
- Instruction manual (69 pages) ,
- Instruction manual (37 pages)
Table of Contents
Advertisement
Quick Links
Advertisement
Table of Contents

Related Manuals for Makita DVC750L


Summary of Contents for Makita DVC750L
- Page 1 INSTRUCTION MANUAL Cordless Portable Vacuum Cleaner DVC750L Read before use.
-
Page 2: Specifications
If the tool is not used for a long period of time, the battery must be removed from the tool. • Do not short the battery cartridge. • See the chapter “MAINTENANCE” for the appropriate details of precautions during user maintenance. SPECIFICATIONS Model: DVC750L Maximum air volume Normal (1) 1.3 m /min High (2) 1.6 m... -
Page 3: Intended Use
Only for EU countries NOTE: The declared vibration total value(s) has been Ni-MH Due to the presence of hazardous com- Li-ion measured in accordance with a standard test method ponents in the equipment, waste electrical and may be used for comparing one tool with another. and electronic equipment, accumulators NOTE: The declared vibration total value(s) may also and batteries may have a negative impact... - Page 4 Never vacuum up toxic, carcinogenic, combusti- When not in use, always store the cleaner indoors. ble or other hazardous materials such as asbes- 28. Wet filters and the interior part of the liquid tos, arsenic, barium, beryllium, lead, pesticides, container shall be dried before storage. or other health endangering materials.
- Page 5 Do not expose battery cartridge to water causing fires, personal injury and damage. It will or rain. also void the Makita warranty for the Makita tool and A battery short can cause a large current charger. flow, overheating, possible burns and even a Tips for maintaining maximum breakdown.
-
Page 6: Functional Description
FUNCTIONAL DESCRIPTION CAUTION: Always be sure that the tool is switched off and the battery cartridge is removed before adjusting or checking function on the tool. Installing or removing battery cartridge CAUTION: Always switch off the tool before installing or removing of the battery cartridge. CAUTION: Hold the tool and the battery car- tridge firmly when installing or removing battery... -
Page 7: Overload Protection
Indicating the remaining battery Indicator lamps Remaining capacity capacity Lighted Blinking 75% to 100% 50% to 75% 25% to 50% 0% to 25% Charge the battery. The battery may have malfunctioned. NOTE: Depending on the conditions of use and the ► 1 . -
Page 8: Connecting The Hose
According to your work need, you can choose two types ASSEMBLY of the suction power; normal "1" or high "2". To start the cleaner, set the switch lever to "1" or "2" side. To turn off the cleaner, set the switch lever to "O" side. CAUTION: Always be sure that the tool is switched off and the battery cartridge is removed before carrying out any work on the tool. -
Page 9: For Blowing
For blowing Connecting the tool Insert the hose to blower outlet and turn it clockwise Optional accessory until it clicks. To connect the tool, connect the end of the hose to the tool's extraction outlet. Depending on the tool, you may need the optional joint 22-38 or the front cuff 24. -
Page 10: Operation
When storing the hose, loop it on the tool and fix it with OPERATION the hook as illustrated. Using as a vacuum cleaner NOTICE: Use the HEPA filter when picking up dry dust. NOTICE: If you continue to pick up water with the HEPA filter, the suction power may be reduced. In that case dry the HEPA filter. Use the wet filter (optional accessory) when pick- ing up water repeatedly. -
Page 11: Using As A Blower
NOTICE: Never use gasoline, benzine, thinner, alcohol or the like. Discoloration, deformation or cracks may result. To maintain product SAFETY and RELIABILITY, repairs, any other maintenance or adjustment should be performed by Makita Authorized or Factory Service Centers, always using Makita replacement parts. 11 ENGLISH... - Page 12 Turn the HEPA filter/wet filter counterclockwise To install the HEPA filter/wet filter, place and twist and pull out of the tank cover. it clockwise so that the securing lips are firmly locked in the tank cover. ► 1 . Tank cover 2. HEPA filter 3. Tank ► 1 . Tank cover 2. HEPA filter 3. Securing lip 4. Tank To remove dust adhering to the HEPA filter/wet filter, shake the frame bottom quickly several times. Mount the tank cover and lock it. Occasionally wash the HEPA filter/wet filter in water NOTE: The filter wear out in course of time. It is rec- and rinse, and if HEPA filter, dry thoroughly in the shade ommended to have some spares for them.
-
Page 13: Optional Accessories
Mount the tank cover and lock it. OPTIONAL ACCESSORIES CAUTION: These accessories or attachments are recommended for use with your Makita tool specified in this manual. The use of any other accessories or attachments might present a risk of injury to persons. Only use accessory or attachment for its stated purpose. - Page 16 Makita Europe N.V. Jan-Baptist Vinkstraat 2, 3070 Kortenberg, Belgium Makita Corporation 3-11-8, Sumiyoshi-cho, Anjo, Aichi 446-8502 Japan 885666D221 www.makita.com 20201224...
Need help?
Do you have a question about the DVC750L and is the answer not in the manual?
Questions and answers