Table of Contents
Advertisement
Available languages
Available languages
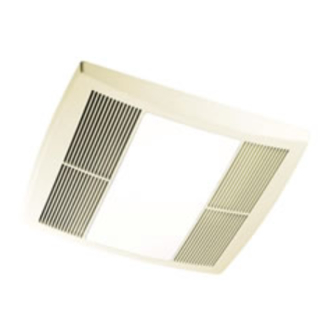
MODEL QTRE090FL
FAN / LIGHT / NIGHT LIGHT
READ AND SAVE THESE INSTRUCTIONS
WARNING
TO REDUCE THE RISK OF FIRE, ELECTRIC SHOCK, OR IN-
JURY TO PERSONS, OBSERVE THE FOLLOWING:
1. Use this unit only in the manner intended by the manufac-
turer. If you have questions, contact the manufacturer at the
address or telephone number listed in the warranty.
2. Before servicing or cleaning unit, switch power off at service
panel and lock the service disconnecting means to prevent
power from being switched on accidentally. When the service
disconnecting means cannot be locked, securely fasten a
prominent warning device, such as a tag, to the service panel.
3. Installation work and electrical wiring must be done by a quali-
fied person(s) in accordance with all applicable codes and
standards, including fire-rated construction codes and stan-
dards.
4. Sufficient air is needed for proper combustion and exhaust-
ing of gases through the flue (chimney) of fuel burning equip-
ment to prevent backdrafting. Follow the heating equipment
manufacturer's guideline and safety standards such as those
published by the National Fire Protection Association (NFPA),
and the American Society for Heating, Refrigeration and Air
Conditioning Engineers (ASHRAE), and the local code au-
thorities.
5. When cutting or drilling into wall or ceiling, do not damage
electrical wiring and other hidden utilities.
6. Ducted fans must always be vented to the outdoors.
7. Acceptable for use over a tub or shower when connected to a
GFCI (Ground Fault Circuit Interrupter) - protected branch cir-
cuit.
8. This unit must be grounded.
CAUTION
1. For general ventilating use only. Do not use to exhaust hazard-
ous or explosive materials and vapors.
2. This product is designed for installation in ceilings up to a 12/12
pitch. Duct connector must point up. DO NOT MOUNT THIS
PRODUCT IN A WALL.
3. To avoid motor bearing damage and noisy and/or unbalanced
impellers, keep drywall spray, construction dust, etc. off power
unit.
4. Please read specification label on product for further informa-
tion and requirements.
Installer: Leave this manual with the homeowner.
CLEANING & MAINTENANCE
For quiet and efficient operation, long life, and attractive appear-
ance - lower or remove grille and vacuum interior of unit with the
dusting brush attachment.
The motor is permanently lubricated and never needs oiling. If
the motor bearings are making excessive or unusual noises,
replace the motor with the exact service motor. The impeller
should also be replaced.
OPERATION
The fan, light, and night light can be operated separately. Use a
3-function wall control. Do not use a dimmer switch to operate
the light. See "Connect Wiring" for details.
WARRANTY
BROAN-NUTONE THREE YEAR LIMITED WARRANTY
Broan-NuTone warrants to the original consumer purchaser of its prod-
ucts that such products will be free from defects in materials or workman-
ship for a period of three years from the date of original purchase. THERE
ARE NO OTHER WARRANTIES, EXPRESS OR IMPLIED, INCLUDING,
BUT NOT LIMITED TO, IMPLIED WARRANTIES OF MERCHANTABIL-
ITY OR FITNESS FOR A PARTICULAR PURPOSE.
During this three-year period, Broan-NuTone will, at its option, repair or
replace, without charge, any product or part which is found to be defective
under normal use and service.
THIS WARRANTY DOES NOT EXTEND TO FLUORESCENT LAMP
STARTERS AND TUBES. This warranty does not cover (a) normal main-
tenance and service or (b) any products or parts which have been subject
to misuse, negligence, accident, improper maintenance or repair (other
than by Broan-NuTone), faulty installation or installation contrary to rec-
ommended installation instructions.
The duration of an implied warranty is limited to the three-year period as
specified for the express warranty. Some states do not allow limitation on
how long an implied warranty lasts, so the above limitation may not apply
to you.
BROAN-NUTONE'S OBLIGATION TO REPAIR OR REPLACE, AT
BROAN-NUTONE'S OPTION, SHALL BE THE PURCHASER'S SOLE
AND EXCLUSIVE REMEDY UNDER THIS WARRANTY. BROAN-
NUTONE SHALL NOT BE LIABLE FOR INCIDENTAL, CONSEQUEN-
TIAL OR SPECIAL DAMAGES ARISING OUT OF OR IN CONNECTION
WITH PRODUCT USE OR PERFORMANCE. Some states do not allow
the exclusion or limitation of incidental or consequential damages, so the
above limitation may not apply to you.
This warranty gives you specific legal rights, and you may also have other
rights, which vary from state to state. This warranty supersedes all prior
warranties.
To qualify for warranty service, you must (a) notify Broan-NuTone at the
address or telephone number stated below, (b) give the model number
and part identification and (c) describe the nature of any defect in the
product or part. At the time of requesting warranty service, you must present
evidence of the original purchase date.
Broan-NuTone LLC, 926 West State Street, Hartford, WI 53027
(1-800-637-1453)
MODEL QTRE090FL
Page 1
Advertisement
Table of Contents

Related Manuals for NuTone QTRE090FL


Summary of Contents for NuTone QTRE090FL
- Page 1 This warranty supersedes all prior warranties. To qualify for warranty service, you must (a) notify Broan-NuTone at the address or telephone number stated below, (b) give the model number and part identification and (c) describe the nature of any defect in the product or part.
-
Page 2: Typical Installations
TYPICAL INSTALLATIONS Housing mounted to I-joists. Use I-joist spacer block (provided). Housing mounted to joists. Housing mounted to truss. MODEL QTRE090FL PLAN THE INSTALLATION ROOF CAP 4-IN. ROUND DUCT 4-IN. ROUND Purchase ELBOW separately The unit will operate most quietly and efficiently when located where the shortest possible duct run and minimum number of elbows will be needed. -
Page 3: Connect Wiring
Connect wires as shown in wiring diagrams. INSTALL GRILLE 6. Finish ceiling. Install ceiling material. Cut out around housing. 7. Attach grille to housing. Squeeze grille springs and insert them into slots on each side of housing. MODEL QTRE090FL Page 3... -
Page 4: Service Parts
99260423 Nut, Hex #8-32 (2 req’d) 99111293 Spacer (2 supplied) Order service parts by “Part No.” - not by “Key No.” MODEL QTRE090FL SERVICE NOTE To remove Blower Assembly: Unplug motor (7). Remove screw (4) from motor plate (9) flange. -
Page 5: Limpieza Y Mantenimiento
(PERO SIN LIMITARSE A) GARANTÍAS IMPLÍCITAS DE COMERCIALIZACIÓN O IDONEIDAD PARA UN PROPÓSITO PARTICULAR. Durante este período de tres años, Broan-NuTone, a su criterio, reparará o reemplazará, sin cargo alguno, cualquier pieza o producto que se encuentre defectuoso bajo condiciones normales de uso y servicio. -
Page 6: Instalaciones Típicas
INSTALACIONES TÍPICAS Montaje de la cubierta en viguetas "I". Utilice un taco separador de viguetas "I" (suministrado). Montaje de la cubierta en viguetas. Montaje de la cubierta en una armadura. MODELO QTRE090FL PLANIFICACIÓN DE LA INSTALACIÓN TAPA DE TECHO * CONDUCTO REDONDO DE 4 PULG. -
Page 7: Conexión Eléctrica
INSTALE LA REJILLA 6. Termine el cielo raso. 7. Acople la MODELO QTRE090FL Extienda el cableado de la casa de 120 V CA al lugar de la instalación. Utilice una conexión aprobada por UL para afianzar el cableado de la casa a la placa de cableado. Conecte los cables tal como se ilustra en los diagramas de cableado. -
Page 8: Piezas De Repuesto
(junto a la lengüeta) y haga girar el destornillador. 8-32 (se requieren 4) 6 a 11) 13 y 14) 8-32 (se requieren 2) MODELO QTRE090FL Página 8 LENGÜETA 99043798A...
Need help?
Do you have a question about the QTRE090FL and is the answer not in the manual?
Questions and answers