
Subscribe to Our Youtube Channel
Related Manuals for iiNet BizPhone Premium T48U


Summary of Contents for iiNet BizPhone Premium T48U
- Page 1 BizPhone Small Business Phone System Premium T48U IP Phone User Guide Confidential...
-
Page 2: Table Of Contents
Contents Welcome ............................... 4 Overview ............................... 5 Hardware Component Instructions ....................5 Icon Instructions ..........................6 LED Instructions ..........................7 Screens .............................. 8 Entering Characters on T48U ......................9 General Settings ..........................11 Language ............................. 11 Time and Date ..........................11 Audio Settings .......................... - Page 3 Call Transfer ............................ 24 Blind Transfer ..........................24 Semi-Attended/Attended Transfer.................... 24 Three-Way Conference ........................25 Holding or Resuming a Conference Call..................25 Muting or Unmuting a Conference Call ..................25 Ending a Conference Call ......................25 Voice Mail ............................25 Listen to Voice Mails ........................
-
Page 4: Welcome
Welcome to your iiNet BizPhone service! If this is the first time you are using the iiNet BizPhone Premium handset, please refer first to the iiNet BizPhone T48U Quick Startup Guide to assemble and start up your handset. The BizPhone Quick Startup Guide is available on the BizPhone Resources page at www.iihelp.iinet.net.au/BizPhone_Support_Resources. -
Page 5: Overview
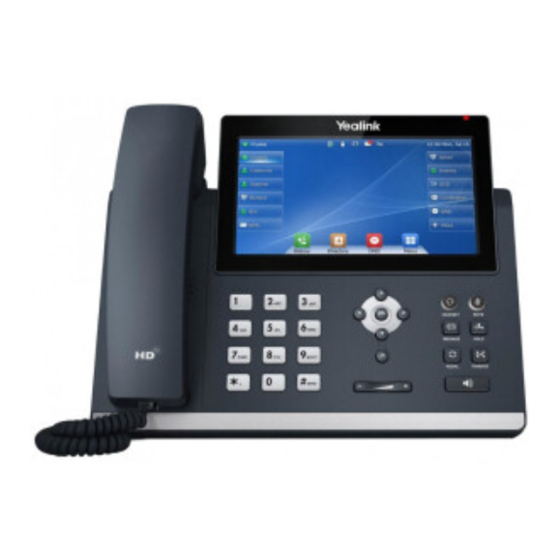
Overview Hardware Component Instructions The main hardware of the BizPhone Premium T48UIP phone are the LCD screen and the Keypad. Hardware component instructions of the BizPhone Premium T48U IP phone are: Item Description Power LED Indicator Indicates call status, message status, and phone’s system status. -
Page 6: Icon Instructions
• Access History and Directory respectively. OK Key Confirms actions or answers incoming calls. Cancel Key Confirms actions or rejects incoming calls. Volume Key Adjusts the volume of the handset, headset, and speaker. Provides the digits, letters, and special characters in context-sensitive Keypad applications. -
Page 7: Led Instructions
Line Key Icons Icon indicators associated with line Icons Description Icons Description The private line is registered The shared/bridged line is registered successfully successfully Register failed Registering (Flashing) DND is enabled on this line Call forward is enabled on this line Icon indicators associated with line key features Icons Description... -
Page 8: Screens
Solid red for 0.5s and off for 3s alternatively The phone enters power-saving mode. Screens Idle Screen Name Description Display the default account, feature status icons. And the time. The Status Bar status icons are displayed when features are activated. Display the information associated with the line keys and feature keys Line Key on the phone. -
Page 9: Entering Characters On T48U
Entering Characters on T48U The T48U phones provide an onscreen keyboard, phone keypad and dial pad to enter data. Keypad and dial pad provide the standard key layout, which enables users to use existing or familiar key positions. Using the Onscreen Keyboard 1. - Page 10 Using the Phone Keypad You can use the keypad on your phone or dial pad to enter the data. The phone keypad only provides digits keys, # key, and * key, and the dial pad provides digit keys and special characters. You can tap to switch to the onscreen keyboard.
-
Page 11: General Settings
Customising Your Phone General Settings Backlight You can change the brightness of the phone screen during phone activity and inactivity. The brightness automatically changes after the phone has been idle for a specific time. You can change the screen backlight and time in the following settings: Active Level: The brightness level of the phone screen when the phone is active. -
Page 12: Audio Settings
Audio Settings Volume You can adjust the volume of the ringer, media, and audio during a call. Press the Volume key Ring Tones You can choose a ring tone for all incoming calls. 1. Navigate to Menu > Basic > Sound > Ring Tones > Common. 2. - Page 13 Deleting Contact Groups When you delete a contact group, the contacts in the group will not be deleted. You can view the contacts in All Contacts list. 1. Select Directory or navigate to Menu > Directory. 2. Tap Settings and select the desired group. 3.
- Page 14 Deleting a Contact You can delete any contact from the Local Directory. 1. Select Directory or navigate to Menu > Directory. 2. Select the desired contact group or All Contacts. 3. Tap > Delete. The phone prompts you to delete the contact or not. 4.
-
Page 15: Blacklist
Blacklist Incoming calls from the Blacklist are rejected automatically. You can store up to 30 contacts in the blacklist to block unwanted callers. Adding a Blacklist Contact You can add a blacklist contact on the phone to prevent someone from calling you. 1. -
Page 16: Call History Management
Moving a Blacklist Contact to the Local Directory You can move a blacklist contact to a Local Directory. Incoming calls from this contact will not be rejected automatically. 1. Tap Directory > Blacklist. 2. Tap after the desired entry. 3. Select All Contacts from the Group drop-down menu. 4. - Page 17 4. Edit the contact information. 5. Select Save. Deleting History Records Deleting a Call Record You can delete any call record from the call history list. 1. Press History or navigate to Menu > History. 2. Select the desired list. 3.
-
Page 18: Basic Call Features
Basic Call Features Placing Calls You can user your phone to place calls in many ways easily. Placing a Call from the Dialer The Dialer enables you to enter a number to place a call, and it displays a list of previously place calls or contacts in your directory. -
Page 19: Redialling A Number
When the phone is idle, you can press the Speed Dial key to call a contact quickly. Placing a Call Back to the Last Incoming Number You can redial the last incoming number quickly by using a ReCall key. 1. Navigate to Menu > Features > Dsskey. 2. -
Page 20: Answering Calls
Answering Calls Answering a Call When you receive an incoming call, the phone rings and the screen displays the information of the incoming call. You can choose to answer the incoming call. Do one of the following: • Pick up the handset. •... -
Page 21: Switching Among The Handset, Speakerphone And Headset Modes
Switching among the Handset, Speakerphone and Headset Modes You can select the desired mode before placing a call or can alternate among Speakerphone, headset, and handset modes during a call. When using the speakerphone or the headset, the LED indicator glows green. During the call, pick up the handset, press the Speakerphone key , or press the HEADSET key. -
Page 22: Call Hold/Resume
Call Hold/Resume You can place an active call on hold and resume the call when you are ready. When you place a call on hold, the held party may hear the music played by its server. Holding a Call Press the HOLD key or select Hold during a call. The phone ignores engaged audio device (handset or headset) and plays beep in the Speakerphone (hands-free) mode by default. -
Page 23: Do Not Disturb (Dnd)
Do Not Disturb (DND) You can enable DND to reject incoming calls automatically when you do not want to be interrupted. 1. Navigate to Menu > Features > DND. 2. Turn on DND. 3. Select Save. The DND icon appears in the status bar. The phone also prompts you that DND is enabled. Deactivating DND You can deactivate DND when you are ready to resume receiving calls again. -
Page 24: Deactivating Call Forward
The call forward icon appears in the status bar. The phone also prompts you that call forward is enabled. Deactivating Call Forward You can deactivate the call forward when you no longer want to forward you calls. 1. Navigate to Menu > Features > Call Forward. 2. - Page 25 Three-Way Conference The T48U IP phone supports up to 3 parties (including yourself) in a conference call. 1. Place a call to the first party. 2. Select Conference (Conf) to place a new call. The active call is placed on hold. 3.
- Page 26 Note: Your voice portal passcode is emailed to you with your BizPhone Service Completion Advice. If you do not receive a voice portal passcode, please contact your system administrator. P a g e | Confidential...
Need help?
Do you have a question about the BizPhone Premium T48U and is the answer not in the manual?
Questions and answers