
Related Manuals for TeraBee TB-3DCAM-8060-USB

Summary of Contents for TeraBee TB-3DCAM-8060-USB
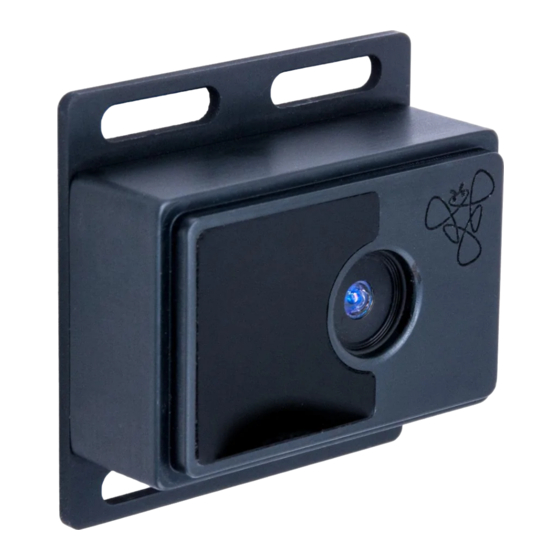
- Page 1 User Manual for Terabee 3Dcam 80x60 Technical support: support@teraranger.com Sales and commercial support: teraranger@terabee.com...
-
Page 2: Table Of Contents
Table of contents 1 . Introduction 1.1 About Terabee 3Dcam 80x60 1.2 Technical Specifications 2. Package contents 3. Mechanical integration 3.1 Mechanical design and mounting 4. Installation guide 4.1 Hardware setup 4.2 Software setup for Windows 4.2.1 SDK installation 4.2.2 Streaming depth data on Windows 4.3 Software setup for Linux (Debian-based) -
Page 3: Introduction
Our compact ToF camera comes with an SDK containing all logic to operate your camera, and a visualization tool for quick tests on your PC. Setup your Terabee 3Dcam 80x60 in no time and stream depth data via USB interface on Windows or Linux OS. An SDK and OpenNI framework code library is available to kick-start your application development. -
Page 4: Technical Specifications
Weight Use Environment Indoors Dimensions 54 x 53 x 24mm Supporting OS Windows, Linux Software Terabee SDK OpenNI 2.2 based, C/C++, Python, ROS package Conformity CE; RoHS Copyright © Terabee 2019 Terabee, 90 Rue Henri Fabre 01630, St Genis-Pouilly, France (next to CERN) -
Page 5: Package Contents
The product package (Figure 2) contains the following items: ● Terabee 3Dcam 80x60 camera ● USB 2.0 Micro-B (Y cable) ● Software development kit (available for download on the Terabee 3Dcam 80x60 product page, Downloads section) Figure 2. Product package contents Copyright ©... -
Page 6: Mechanical Integration
The bottom casing (flat) part includes four slots for mounting the camera using M4 screws. You can mount the Terabee 3Dcam 80x60 using the following two methods: (1) front-panel mount using the long M4 screw slots or (2) for a more discreet and integrated look use the back-panel mounting shoulder in the front side of the camera. - Page 7 Figure 4. Front-panel mounting example Figure 5. Back-panel mounting example Copyright © Terabee 2019 Terabee, 90 Rue Henri Fabre 01630, St Genis-Pouilly, France (next to CERN) 7/17...
- Page 8 When choosing a place for mounting, please consider the following recommendations: ● Terabee 3Dcam 80x60 is developed for use in indoor environments, using the camera in outdoor conditions (in direct sunlight) can reduce its performance ● Choose a place which is in accordance with the optical constraints listed below ●...
-
Page 9: Installation Guide
4. Installation guide 4.1 Hardware setup The Terabee 3Dcam 80x60 is shipped with a USB 2.0 Micro Y cable to provide an appropriate amount of power to the camera. Please note that using only one cable may affect camera performance. -
Page 10: Software Setup For Windows
4.2 Software setup for Windows 4.2.1 SDK installation An SDK is available for download on the Terabee website, providing users with drivers for communicating with the camera, OpenNI code library and a visualization tool. Terabee 3Dcam 80x60 SDK is compatible with OpenNI 2.2 frameworks. -
Page 11: Streaming Depth Data On Windows
OpenNI compatible devices, including depth, RGB and IR cameras. Hence some of the functionality/features might not be supported for the Terabee 3Dcam 80x60. In order to stream depth data on your PC, please launch NIViewer in the newly created TerabeeDemo folder. -
Page 12: Software Setup For Linux (Debian-Based)
SDK installation file by following this link: Terabee 3Dcam 80x60 SDK (available in the downloads section of the Terabee 3Dcam 80x60 product page on the Terabee website). The package contains the OpenNI2.2 version of the SDK for both x64 and x86 architectures. -
Page 13: Streaming Depth Data On Linux
After successful installation, the terminal output should display the following data: OpenNI and the Terabee 3Dcam driver are now installed on your PC. As a next step, please install dependencies as described in the following paragraph, in order for the SDK to function. - Page 14 Press “1” on your keyboard to display cameras depth image in full screen. Press “?” on your keyboard to display all shortcut keys and their corresponding functions. Copyright © Terabee 2019 Terabee, 90 Rue Henri Fabre 01630, St Genis-Pouilly, France (next to CERN) 14/17...
-
Page 15: Switching Between Range Modes
This photo corresponds to the depth images shown. 5. Switching between range modes Terabee 3Dcam 80x60 offers 2 operating range modes. You can select between: ● Close range mode (0.2m to 1.2m) ● Standard mode (1.2m to 4m) Standard mode is set as default. To switch between operating range modes, you will need to edit the “ModuleConfig.json”... -
Page 16: Start Developing Your Application
6.1 OpenNI 2 C++ sample code To get you started, Terabee has made available a list of C++ sample codes available on GitHub. These samples will illustrate how to initialize Terabee 3Dcam 80x60 and access depth data from it using OpenNI 2.2 frameworks. Here is a list of available Terabee... - Page 17 Copyright © Terabee 2019 Terabee, 90 Rue Henri Fabre 01630, St Genis-Pouilly, France (next to CERN) 17/17...
Need help?
Do you have a question about the TB-3DCAM-8060-USB and is the answer not in the manual?
Questions and answers