Advertisement
Quick Links
Advertisement

Related Manuals for Hobie Livewell V2


Summary of Contents for Hobie Livewell V2
- Page 1 Livewell V2 Manual...
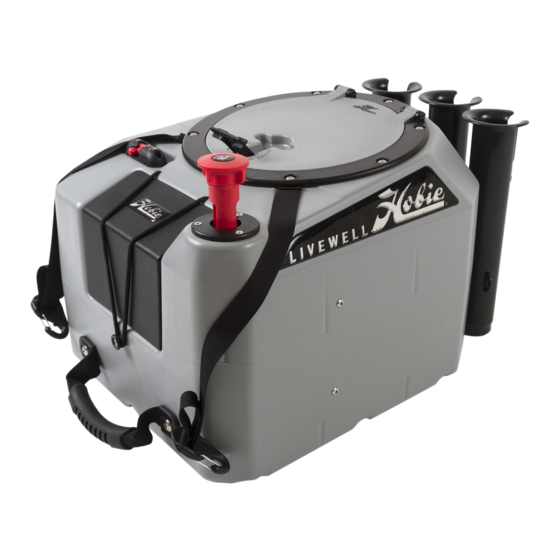
- Page 2 2 | Parts List 1. Livewell Tank Assembly 2. Intake Tube 3. Intake Ziptie 4. Drain Tube Level Clip 5. Charger 6. Battery 7. Pump Cap...
- Page 3 Charging and Connecting Power | 3 hobiecat.com Plug in your charger and connect the charger cable to the battery. The battery will take about 8-10 hours to fully charge. A green light indicates a full charge has been reached. Remove the battery cover on the Livewell and plug the battery into the tank connector as...
- Page 4 4 | Intake Installation Note: Small adjustment to the tube length and orientation may need to be made before use. Follow instructions on page 6 for adjusting the intake tube. Align the tabs on intake connector with the tank connector on the bottom of the tank.
- Page 5 Plugging Into Boat | 5 hobiecat.com Plug the Livewell intake and drain tube into the cargo scuppers, making sure the opening on the intake is facing the bow. Note that the ProAngler 17T has two different plug-in locations for Livewells and may be arranged as shown below.
- Page 6 6 | Intake Tube Adjustment Because every model is slightly different, you may have to modify the length of the intake tube. Perfect Too Short Too Long If needed, adjust the clear tube on the intake connector so the opening of the intake screen faces towards the bow of the kayak.
- Page 7 Tank Level Adjustment | 7 hobiecat.com To adjust the water level, remove the internal tank partitions using the finger slot to help release the divider from the buttons. Attach the drain tube level clip over the middle hole if you want to fill the tank to the maximum capacity.
-
Page 8: Filling The Tank
8 | Using the Tank Filling the tank Turn the red drain handle clockwise, and push down to engage the drain tube. Turn on the pump. The pump needs to be primed for water to flow into the Livewell. Propel the kayak forward at a swift speed. -
Page 9: Draining The Tank
Using the Tank | 9 hobiecat.com Draining the Tank Turn the pump off Turn the drain tube counter- clockwise and pull up to open the drain. Once the drain is all the way up, turn it slightly to the left or right to hold the tube in the up/open position. - Page 10 10 | Optional Rod Holder Installation The Livewell comes with three pre-installed rod holders. More rod holders can be purchased and installed using the pre-marked drill locations as a template. +2: Revolution 11, Standard: Sport, Oasis, +4: Compass Revolution 13, Quest Tandem Island 11, Quest 13, Adventure Island...
- Page 11 Optional Rod Holder Installation | 11 hobiecat.com Install the mounting screw into the bottom slotted hole on the rod holder and push the rubber washer into place. This will help stabilize the screw in during installation. Thru-bolt the rod holder to the tank so that the nuts are tight.
- Page 12 Hobie Cat Company Holding Company Oceanside, California, USA 1-800-HOBIE-49 Hobie Cat Australasia Subsidiary Huskisson, New South Wales, Australia 1-800-4-HOBIE Hobie Cat Europe Subsidiary Toulon, France +33(0)494 08 78 78 Hobie Kayak Europe Independent Distributor Stellendam, The Netherlands +31(0)187 499 440...
Need help?
Do you have a question about the Livewell V2 and is the answer not in the manual?
Questions and answers