Advertisement
Quick Links
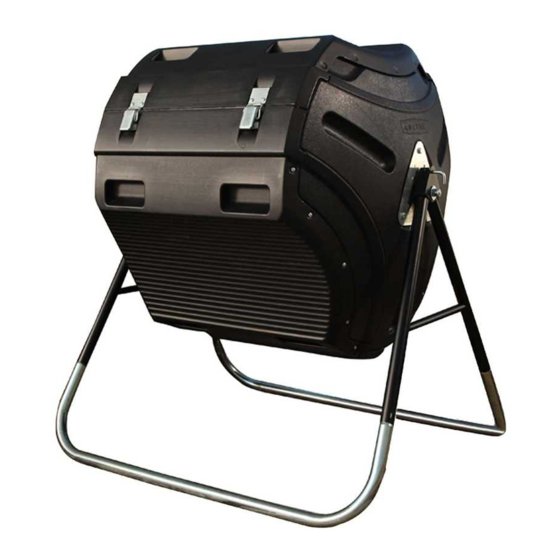
80-GALLON
ROTATING COMPOSTER
MODEL 60058
BEFORE ASSEMBLY:
• Assemble on a level surface
• At least 2 people recommended for setup
• Ensure all hardware and parts are included and free of
damage.
GET ASSEMBLY HELP
WATCH THE INSTRUCTIONAL VIDEOS ON YOUTUBE.
Scan the code, or search http://go.lifetime.com/Lifetime 80 Gallon Rotating Composter Full AV
ADDITIONAL ASSEMBLY HELP
TOOLS REQUIRED
QUESTIONS?
Call: 1-800-225-3865
7:00 am–5:00 pm (Monday–Friday) MST
and 9:00 am–1:00 pm Saturday MST
(English, Français, Español)
For assembly help, scan:
or search
1201167
in the BILT app.
®
CONTACT LIFETIME
CUSTOMER SERVICE:
Live Chat: www.lifetime.com/customerservice
(click on "LIVE CHAT" tab)
For Customer Service in mainland Europe:
E-mail: cs@lifetimeproducts.eu
ASSEMBLY INSTRUCTIONS
Pour le français, voir la page 2. Para el español, ver la página 3.
MODEL# AND PRODUCT ID
Model Number: 60058
Product ID:
TABLE OF CONTENTS
Icon Legend...............................4
Warnings y Notices.....................5
Parts Identifi er............................6
Frame Assembly..........................7
Bin Assembly............................11
Cleaning y Care........................31
Registration.........................32
Warranty..............................33
(you will need both when contacting us)
Advertisement

Related Manuals for Lifetime 60058


Summary of Contents for Lifetime 60058
- Page 1 • Ensure all hardware and parts are included and free of damage. GET ASSEMBLY HELP WATCH THE INSTRUCTIONAL VIDEOS ON YOUTUBE. Scan the code, or search http://go.lifetime.com/Lifetime 80 Gallon Rotating Composter Full AV ADDITIONAL ASSEMBLY HELP For assembly help, scan: or search 1201167 in the BILT app.
-
Page 2: Instructions D'assemblage
OBTENIR DE L’AIDE AVEC L’ASSEMBLAGE REGARDER DES VIDÉOS INSTRUCTIVES SUR YOUTUBE. Scanner le code, ou chercher http://go.lifetime.com/Lifetime 80 Gallon Rotating Composter Full AV POUR DE L’AIDE SUPPLÉMENTAIRE AVEC L’ASSEMBLAGE L’ A S S E M B L E R A V E C B I L T Pour de l’aide avec l’assemblage, scanner :... -
Page 3: Instrucciones De Ensamblaje
OBTENER AYUDA CON EL ENSAMBLAJE VER LOS VÍDEOS INSTRUCTIVOS EN YOUTUBE. Escanear el código, o buscar http://go.lifetime.com/Lifetime 80 Gallon Rotating Composter Full AV AYUDA ADICIONAL CON EL ENSAMBLAJE E N S A M B L A R L O C O N B I LT... - Page 4 ICON LEGEND / LÉGENDE DES ICÔNES / SIGNIFICADO DE LOS ÍCONOS • Indicates special heed should be taken when reading. • Indique qu’une attention spéciale doit être portée à la lecture. • Indica que uno debe prestar atención al leer. •...
- Page 5 WARNINGS & NOTICES / AVERTISSEMENTS ET AVIS / ADVERTENCIAS Y AVISOS English: • Failure to follow these warnings may result in serious injury or property damage and will void warranty. • To ensure safety, do not attempt to assemble this product without following the instructions carefully. •...
- Page 6 PARTS IDENTIFIER / IDENTIFICATEUR DES PIÈCES / IDENTIFICADOR DE PIEZAS PARTS / PIÈCES / PIEZAS Metal Parts / Pièces en métal Piezas de metal BII (x2) BIH (x2) Plastic Parts / Pièces en plastique Piezas de plástico BHM (x2) BHN (x3) BHP (x2) BHQ (x1) Hardware /...
- Page 7 FRAME ASSEMBLY / ASSEMBLAGE DE LA CHARPENTE / ENSAMBLE DEL ARMAZÓN HARDWARE REQUIRED / QUINCAILLERIE REQUISE / HERRAJE REQUERIDO Hardware / Quincaillerie Herraje ABU (x2) BIN (x1) BIX (x1) ADJ (x2) BHJ (x4) BIJ (x2) PARTS REQUIRED / PIÈCES REQUISES / PIEZAS REQUERIDAS Metal Parts / Pièces en métal Piezas de metal...
- Page 8 Repetir este paso para la segunda pata. ensamblaje en esta sección. http://go.lifetime.com/Lifetime 80 Gallon Rotating Composter Sec1 • Secure the two Legs to the A-Frames using four (4) Screws (BHJ) at the locations shown. You must use a drill for this step.
- Page 9 SECTION 1 (CONTINUED) / SECTION 1 (SUITE) SECCIÓN 1 (CONTINUACIÓN) TOOLS AND HARDWARE REQUIRED / OUTILS ET QUINCAILLERIE REQUIS INSTRUMENTAL Y HERRAJE REQUERIDOS BIN (x1) BIX (x1) • Slide the Spring (BIN) over the Locking Pin (BIX) as shown. • Faire glisser le ressort (BIN) sur la goupille de verrouillage (BIX) comme illustré.
- Page 10 SECTION 1 (CONTINUED) / SECTION 1 (SUITE) SECCIÓN 1 (CONTINUACIÓN) TOOLS AND HARDWARE REQUIRED / OUTILS ET QUINCAILLERIE REQUIS INSTRUMENTAL Y HERRAJE REQUERIDOS 7/16 in/po (11 mm) ABU (x2) ADJ (x2) BIJ (x2) • Attach the Frame Brackets (BIJ) to the A-Frames as shown. Tighten securely, but do not overtighten. •...
- Page 11 BIN ASSEMBLY / ASSEMBLAGE DU BAC / ENSAMBLE DEL BARRIL HARDWARE REQUIRED / QUINCAILLERIE REQUISE / HERRAJE REQUERIDO Hardware / Quincaillerie Herraje BHK (x38/40) BTK (x6) BHO (x6) BIR (x6) ADW (x38/40) AAN (x6) ADM (x2) AKH (x1) BIK (x2) BIL (x2) BIO (x4) BIM (x2)
- Page 12 BIN ASSEMBLY / ASSEMBLAGE DU BAC / ENSAMBLE DEL BARRIL PARTS REQUIRED / PIÈCES REQUISES / PIEZAS REQUERIDAS Large Parts / Grandes pièces Piezas grandes BHM (x2) BHN (x3) BHQ (x1) BHP (x2) TOOLS REQUIRED / OUTILS REQUIS / INSTRUMENTAL REQUERIDO 3/4 in/po (19 mm) (ARA) 1/8 in/po (3 mm) 1/2 in/po (13 mm), 3/4 in/po (19 mm)
- Page 13 • En caso de tener problemas con esta sección, seguir el código que aparece abajo para ver un video sobre el ensamblaje en esta sección. http://go.lifetime.com/Lifetime 80 Gallon Rotating Composter Sec2 • Drill holes through the divots of only two Panels (BHN) at the locations shown. Do not drill through the third Panel; it will be the Lid.
- Page 14 SECTION 2 (CONTINUED) / SECTION 2 (SUITE) SECCIÓN 2 (CONTINUACIÓN) TOOLS AND HARDWARE REQUIRED / OUTILS ET QUINCAILLERIE REQUIS INSTRUMENTAL Y HERRAJE REQUERIDOS ARA (x1) • Drill holes through the divots of both Side Panels (BHM) at the locations shown. Ensure the Drill Bit (ARA) is perpendicular to the surface of the Panel.
- Page 15 SECTION 2 (CONTINUED) / SECTION 2 (SUITE) SECCIÓN 2 (CONTINUACIÓN) TOOLS AND HARDWARE REQUIRED / OUTILS ET QUINCAILLERIE REQUIS INSTRUMENTAL Y HERRAJE REQUERIDOS 1/2 in/po (13 mm) AAN (x6) BHO (x6) BIR (x6) • Attach a Mounting Plate (BHP) to both Side Panels using the hardware provided. •...
- Page 16 SECTION 2 (CONTINUED) / SECTION 2 (SUITE) SECCIÓN 2 (CONTINUACIÓN) TOOLS AND HARDWARE REQUIRED / OUTILS ET QUINCAILLERIE REQUIS INSTRUMENTAL Y HERRAJE REQUERIDOS BIO (x2) 2 3/4 in/po (7 cm) BIK (x2) BIP (x2) BIL (x2) • Assemble the hardware as shown. Do this step twice. •...
- Page 17 SECTION 2 (CONTINUED) / SECTION 2 (SUITE) SECCIÓN 2 (CONTINUACIÓN) TOOLS AND HARDWARE REQUIRED / OUTILS ET QUINCAILLERIE REQUIS INSTRUMENTAL Y HERRAJE REQUERIDOS 3/4 in/po (19 mm) 3/4 in/po (19 mm) ADM (x2) BIO (x4) BIM (x2) • Attach a Side Panel to both A-Frames using the hardware provided. •...
- Page 18 SECTION 2 (CONTINUED) / SECTION 2 (SUITE) SECCIÓN 2 (CONTINUACIÓN) TOOLS AND HARDWARE REQUIRED / OUTILS ET QUINCAILLERIE REQUIS INSTRUMENTAL Y HERRAJE REQUERIDOS • Turn the Side Panel so the ventilation hole in the side is in the position indicated. Lock the Panel in place. •...
- Page 19 SECTION 2 (CONTINUED) / SECTION 2 (SUITE) SECCIÓN 2 (CONTINUACIÓN) TOOLS AND HARDWARE REQUIRED / OUTILS ET QUINCAILLERIE REQUIS INSTRUMENTAL Y HERRAJE REQUERIDOS • Turn the second Side Panel to match the first. Place the Ventilation Tube (BHQ) into the two ventilation holes. •...
- Page 20 SECTION 2 (CONTINUED) / SECTION 2 (SUITE) SECCIÓN 2 (CONTINUACIÓN) TOOLS AND HARDWARE REQUIRED / OUTILS ET QUINCAILLERIE REQUIS INSTRUMENTAL Y HERRAJE REQUERIDOS BTK (x6) • Insert two (2) Plugs (BTK) into the holes in each of the three (3) Panels (BHN) as indicated. •...
- Page 21 SECTION 2 (CONTINUED) / SECTION 2 (SUITE) SECCIÓN 2 (CONTINUACIÓN) TOOLS AND HARDWARE REQUIRED / OUTILS ET QUINCAILLERIE REQUIS INSTRUMENTAL Y HERRAJE REQUERIDOS ADW (x10) BHK (x10) 2.10 • Set one of the two (2) Panels (BHN) you drilled in Step 2.1 onto the two Side Panels. Align the holes along the edges, and insert the Screws (ADW) with an electric drill until they are flush with the Panel.
- Page 22 SECTION 2 (CONTINUED) / SECTION 2 (SUITE) SECCIÓN 2 (CONTINUACIÓN) TOOLS AND HARDWARE REQUIRED / OUTILS ET QUINCAILLERIE REQUIS INSTRUMENTAL Y HERRAJE REQUERIDOS ARA (x1) BJC (x2) 2.11 2.11 • Attach two Brackets (BJC) to the end of the second of the two (2) Panels (BHN) you drilled in Step 2.1 (Fig. 1). Then, attach the two Brackets to the Panel attached in Step 2.10 (Fig.
- Page 23 SECTION 2 (CONTINUED) / SECTION 2 (SUITE) SECCIÓN 2 (CONTINUACIÓN) TOOLS AND HARDWARE REQUIRED / OUTILS ET QUINCAILLERIE REQUIS INSTRUMENTAL Y HERRAJE REQUERIDOS ADW (x14) BHK (x14) 2.11 2.12 • Align the holes along the edges, and insert the Screws (ADW) with an electric drill until they are flush with the Panel.
- Page 24 SECTION 2 (CONTINUED) / SECTION 2 (SUITE) SECCIÓN 2 (CONTINUACIÓN) TOOLS AND HARDWARE REQUIRED / OUTILS ET QUINCAILLERIE REQUIS INSTRUMENTAL Y HERRAJE REQUERIDOS ARA (x1) ADW (x2) BHK (x2) BJA (x2) 2.11 2.13 • Open the Latches (BJA) and set the curved lips in the recesses of the Panel as shown. Secure with Screws (ADW) and Nuts (BHK).
- Page 25 SECTION 2 (CONTINUED) / SECTION 2 (SUITE) SECCIÓN 2 (CONTINUACIÓN) TOOLS AND HARDWARE REQUIRED / OUTILS ET QUINCAILLERIE REQUIS INSTRUMENTAL Y HERRAJE REQUERIDOS ADW (x4) ARA (x1) BHK (x4) BIY (x2) 2.11 2.14 • Set the curved lips of the Hinge Pins (BIY) in the recesses of the Panel as indicated. Secure with Screws (ADW) and Nuts (BHK).
- Page 26 SECTION 2 (CONTINUED) / SECTION 2 (SUITE) SECCIÓN 2 (CONTINUACIÓN) TOOLS AND HARDWARE REQUIRED / OUTILS ET QUINCAILLERIE REQUIS INSTRUMENTAL Y HERRAJE REQUERIDOS ARA (x1) ADW (x4) BHK (x4) BJB (x2) 2.11 2.15 • Set the curved lips of the Hinges (BJB) in the recesses of the Panel as shown (this is the Panel you didn’t drill in Step 2.1).
- Page 27 SECTION 2 (CONTINUED) / SECTION 2 (SUITE) SECCIÓN 2 (CONTINUACIÓN) TOOLS AND HARDWARE REQUIRED / OUTILS ET QUINCAILLERIE REQUIS INSTRUMENTAL Y HERRAJE REQUERIDOS ARA (x1) ADW (x4) BIZ (x2) BHK (x4) 2.11 2.16 • Turn the Panel 180°, and set the curved lips of the Latch Hooks (BIZ) in the recesses of the Panel as shown (again, this is the Panel you didn’t drill in Step 2.1).
- Page 28 • Deslizar las bisagras sobre los pernos de bisagra como se muestra, y cerrar la tapa. Entonces, cerrar los cerrojos. • To view our video How to Compost, scan the code or go to http://go.lifetime.com/howto • Pour voir notre vidéo Comment faire du compost, scanner le code ou visiter http://go.lifetime.com/howto...
- Page 29 NOTES / REMARQUES / NOTAS...
- Page 30 NOTES / REMARQUES / NOTAS...
-
Page 31: Cleaning And Care
Congratulations on your Lifetime ® product purchase. By following the instructions below, your new Lifetime product should provide you with years of service and enjoyment. The polyethylene panels are stain and solvent resistant. Most stains can be removed using a mild soap and a soft-bristled brush. - Page 32 à des tiers, et ne leur permettra pas d’utiliser vos données personnelles à leurs propres fi ns. Nous vous invitons à lire notre politique de confi dentialité à www.lifetime.com (en anglais seulement) ENREGISTRER CE PRODUIT aujourd’hui! REGISTRAR EL PRODUCTO EN LÍNEA EN WWW.LIFETIME.COM...
- Page 33 7. This warranty is expressly in lieu of all other warranties, expressed or implied, including warranties of merchantability ® or fi tness for use to extent permitted by Federal and state law. Neither Lifetime Products, Inc., nor any representative assumes any other liability in connection with this product. This warranty gives you specifi c legal rights, and you may also have other rights which vary from state to state.
- Page 34 DISPONIBLES OU SONT OBSOLÈTES 1. Les composteurs Lifetime ® sont garantis à l’acheteur d’origine contre tous défauts de matériau ou de fabrication pendant une durée de 5 ans à partir de la date d’achat d’origine. Le mot « défauts » signifi e des défectuosités qui empêchent l’utilisation du produit.
- Page 35 PIEZAS NO ESTÁN DISPONIBLES O SON OBSOLETAS. 1. El comprador original recibe la garantía de que los composteros Lifetime ® estarán libres de defectos de material o de mano de obra por un período de 5 años a contar desde la fecha de la compra original. La palabra “defectos” se defi ne como imperfecciones que perjudican el uso del producto.
- Page 36 ® MEJORAR LA COMPRA DE LIFETIME AGREGANDO ACCESORIOS U OTROS MARAVILLOSOS PRODUCTOS Para comprar accesorios u otros productos de Lifetime®, visitarnos en: www.lifetime.com O marcar al 1-800-424-3865 De lunes hasta viernes 7:00 h–17:00 h Horario Éstandar de la Montaña (MST) y sábados 9:00 h–13:00 h (MST)
Need help?
Do you have a question about the 60058 and is the answer not in the manual?
Questions and answers