Table of Contents
Advertisement
Quick Links
Advertisement
Table of Contents
Troubleshooting

Related Manuals for Phantom Shadow RODI-40 Manual

Summary of Contents for Phantom Shadow RODI-40 Manual
-
Page 3: Table Of Contents
TABLE OF CONTENTS Overview .......................... 5 Main Components ......................5 Benefits of Pure Water ...................... 5 General Description and Operation ..................6 Manual System Description ..................6 Powerd System Description ..................6 Auto System Description .................... 6 “Pump Controller - Quick Start Basics” Information ............ 7 How to use the Pump Controller ................ -
Page 7: Overview
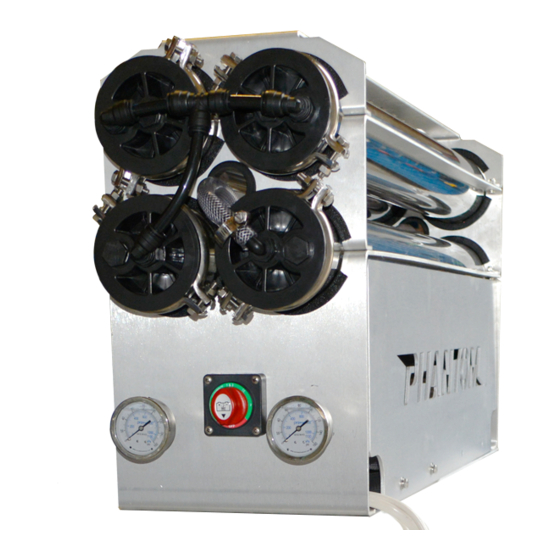
Overview This manual covers the six configurations offered by Phantom Window Works. 1. Phantom Shadow RODI-40 Manual 2. Phantom Shadow RODI-40 Powered 3. Phantom Shadow RODI-40 Auto 4. Phantom Shadow RODI-80 Manual 5. Phantom Shadow RODI-80 Powered 6. Phantom Shadow RODI-80 Auto The Shadow is our only pure water system that is mounted over the top of the tank. -
Page 8: General Description And Operation
General Description and Operation Manual System Description The manual version has a water-in port and a water-out port. It fills the tank underneath it with water. The user supplies their own pump to draw the water from the unit. Powered System Description The powered version has two 12 volt pumps. -
Page 9: Pump Controller - Quick Start Basics" Information
3. To start filling the pure water storage tank simply press and hold the up and down buttons briefly. 4. This will activate the pump allowing water to fill the pure water storage tank until the float switch detects that the tank is full and it will automatically turn off. - Page 10 Step 1. Wiring Connect the pump controller in accordance with this diagram. NOTE: Only fit the fuse once all connections are made. Battery Pump Level Switch Fuse 30A Sensor Fuse 30A Autofill Solenoid Valve Install fitting on the RO outlet or DI outlet. Battery Pump Make sure correct fuse is fitted inline.
- Page 11 Step 2. Set Up - Auto Calibrate Connect your hose and brush to the pump. Turn on the controller by pressing the up or down button. Keep the button held until the display lights up. Press up until the display shows 30. Press and hold the up and enter buttons to calibrate.
- Page 12 Set Up - TDS Cut-Off *** Very Important *** When the TDS value rises above the TDS cut-off setting, the pump will be stopped. The controller will display the following alternating messages: indicating a high TDS level has stopped the system. The controller will turn the pump back on to resume pumping if the TDS level drops below the TDS cut-off value.
- Page 13 Press enter to set. The next setting is Fill Delay. Fdy is the time delay in minutes from the tank reaching full and the filling re-starting should the water level drop. You can set this delay from 0-10 minutes with the up and down buttons.
- Page 14 Step 3. Operation Press up or down to set a suitable flow of water. Press enter (PUMP 1 only) to display the current battery voltage. To monitor water temperature (in degrees centigrade) press enter repeatedly until tp is displayed. Press enter again to monitor TDS reading. A TDS reading greater than 50ppm will display HI (high).
- Page 15 The tank can be filled when the unit is on (even when pumping) or when the unit is turned off. While the solenoid valve is on and the tank is filling, the display will flash FIL. To manually stop the tank filling press and hold the up and down buttons again. The display will stop showing FIL.
-
Page 16: Fob Overview
Fob Overview Step 1. Fob Overview Before you can use your fob it must be paired with its controller. Please see step 3 for details. Start/Stop Pump Decrease Press once to stop Each press will pump. Whole LED reduce pump flow segment lights to by 10. - Page 17 Step 2. Fob Charging Your fob will indicate when it needs charging by lighting two LEDs. To Charge Plug in micro USB phone charger or similar to the charging connector. Charging LED is red when charging. Charging LED is green when charged.
- Page 18 Now press ALL three buttons on the controller at the same time. If the pairing is successful the LED segments will stop circling and the ‘Fob’ will disappear from the controller display. Your fob should now operate the controller as described in 1.
-
Page 19: Maintenance Of System
SPECIAL NOTE FOR VAN OWNERS: When maintain- ing or replacing your cartridges you may need to remove the top Phantom bracket to expose the cartridge housings. This will allow you to rotate the cartridge housing upwards to give clearance to remove and replace your cartridge. -
Page 20: How To Protect Your Hoses
How to Protect your hoses UV protect your hoses by applying Armour All or similar UV product on hoses to avoid sun damage. Clean hoses at least weekly, run hoses through rag dampened with Armour All while rolling the hose onto reel. Care, Maintenance and Replacement of Cartridges Carbon Cartridge Carbon Cartidge is a 40”... -
Page 21: Troubleshooting
Troubleshooting Plumbing Most leaks can be resolved by reseating the quick connect fittings OR tightening the hose clamps. Reseating is accomplished by removing the poly pipe from the quick connect fitting and reinserting it. The collar on the quick connect fitting must be fully depressed to release the poly pipe. -
Page 22: Pump Is Cycling On And Off Rapidly
HARD reset of the Fob 1. Connect the USB charging lead and charge for at least 3-5 hours. 2. Open the back of the fob. There is a white plug connection to the battery. 3. Gently disconnect the Fob battery by squeezing the connector plug tabs. 4. -
Page 24: Recommended Parts To Keep On Hand
Recommended Parts to Keep on Hand (2) RO Filters (1) DI Filter (1) Carbon Filter Fuses 30 AMP (standard) (2) Pressure gauges Silicone grease (for repeting cartridges) 12-Volt 5 GPM Pump Pressure switch for 12-Volt pump Hose clamps O Ring Charging and Care of Your Batteries Deep cycle batteries require daily charging. -
Page 25: System Weight Estimator
Blend 3D 50 1151 Blend 3D 100 Blend 6X 50 Blend 6X 100 Rinse DC Plus 50 1019 Rinse DC Plus 100 Phantom Shadow RODI 50 1069 Phantom Shadow RODI 100 Power Wash 50 1145 Power Wash 100 Power Washer Alone Reels *Dry weights are reels alone. - Page 26 Blend 3D 50 1151 Blend 3D 100 Blend 6X 50 Blend 6X 100 Rinse DC Plus 50 1019 Rinse DC Plus 100 Phantom Shadow RODI 50 1069 Phantom Shadow RODI 100 Power Wash 50 1145 Power Wash 100 Power Washer Alone Reels *Dry weights are reels alone.
-
Page 27: Warranty
Warranty does not cover consum- ables such as cartridges. If a warranty claim needs to be made, claims should be filed with the distributor from which you purchased your Phantom Window Works product. The distributor will contact Phantom Window Works for warranty parts to repair or replace the broken or defective component.
Need help?
Do you have a question about the Shadow RODI-40 Manual and is the answer not in the manual?
Questions and answers