Advertisement
Quick Links
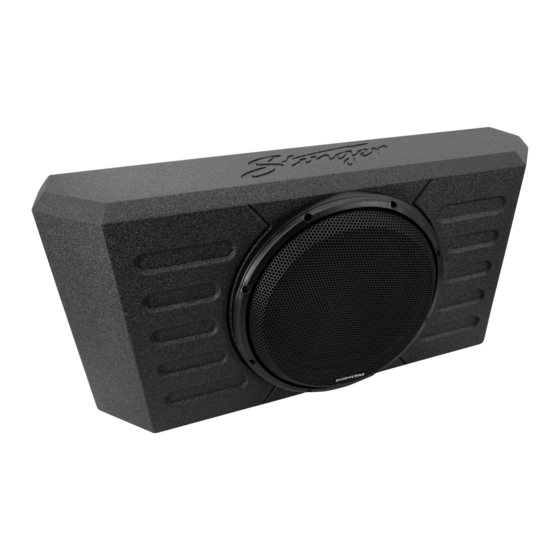
TXJWB12
®
12" TAILGATE MOUNTED ENCLOSURE
FOR JEEP WRANGLER JL / JLU / JK / JKU
®
INSTALLATION GUIDE
NOTE! Read this installation guide thoroughly before disassembling or modifying
the vehicle. Installation of this product requires technical skill, experience and
specialized tools. If in doubt, it's recommended to have it professionally installed
by an authorized Stinger or Phoenix Gold Dealer.
A video installation guide is available at:
https://stingerelectronics.com/products/txjwb12
Advertisement

Related Manuals for Phoenix Gold Stinger TXJWB12


Summary of Contents for Phoenix Gold Stinger TXJWB12
- Page 1 NOTE! Read this installation guide thoroughly before disassembling or modifying the vehicle. Installation of this product requires technical skill, experience and specialized tools. If in doubt, it’s recommended to have it professionally installed by an authorized Stinger or Phoenix Gold Dealer. A video installation guide is available at: https://stingerelectronics.com/products/txjwb12...
-
Page 2: Installation Notes
INSTALLATION NOTES The TXJWB12 is designed to mount to both Wrangler JK and Wrangler JL tailgates. There are two different hardware packs included and this guide covers both types of mounting. For JK/JKU models equipped with a factory subwoofer, only compatible if removed. ... - Page 3 JL HARDWARE M6 FLANGED HEX HEAD BOLT (2) M6 FLAT HEAD BOLT (2) BOTTOM L BRACKETS (2) FOAM BRACKET PAD (2) 75mm / 2.95in Length 60mm / 2.36in Length M6 METAL WASHER (2) M6 RUBBER WASHERS (2) SPACER - 13mm Diameter (2) M6 SPLIT LOCK WASHER (2) 18mm / .71in Diameter 18mm / .71in Diameter...
- Page 4 JK HARDWARE M6 FLANGED HEX HEAD BOLT (5) M6 METAL WASHER (4) M6 RUBBER WASHERS (4) M6 SPLIT LOCK WASHER (4) 40mm / 1.57in Length 18mm / .71in Diameter 18mm / .71in Diameter M6 HEX HEAD BOLT (2) M8 HEX HEAD NUT (2) M6 TOOTH LOCK WASHER (2) M6 RIVET NUT INSERTS (5) 40mm / 1.57in Length...
- Page 5 Contents Section Page JL Installation without TrailRail JL Installation with TrailRail JK Installation Specifications JL INSTALLATION (WITHOUT TRAILRAIL) With the speaker removed and the enclosure face down, remove the two 4mm allen hex screws from the bottom panel. These screws will be reused to install the enclosure.
- Page 6 JL INSTALLATION (WITHOUT TRAILRAIL) Using a nylon panel tool or similiar, remove the tailgate door panel. With the door panel face down on a soft surface, drill four 13mm holes at the locations indicated. NOTE: The marks shown are molded into the plastic. Drill center of markings.
- Page 7 JL INSTALLATION (WITHOUT TRAILRAIL) Run a suitable length of speaker wire into the tailgate following the factory wire harness. Route the speaker wire through a vent opening on the left side of the door panel. Reinstall the door panel by aligning the retaining clips and then pushing to fully seat all the clips...
- Page 8 JL INSTALLATION (WITHOUT TRAILRAIL) Connect the speaker wire to the terminals. Positve (+) is Red and Negative (-) is Black. Route the speaker wire in the lower channel. NOTE: This step is most easily accomplished with help, or another means of supporting the enclosure at the correct elevation.
- Page 9 JL INSTALLATION (WITHOUT TRAILRAIL) A. Place the sheet of poly-fill inside the enclosure along the back and side areas. B. Connect the speaker leads inside the enclosure to either of the speaker terminals on the speaker. Positve (+) is Red and Negative (-) is Black.
- Page 10 JL INSTALLATION (WITH TRAILRAIL) Remove the three Torx T40 screws from the Trail Rail and remove the Trail Rail. Using a nylon panel tool or similiar, remove the tailgate door panel.
- Page 11 JL INSTALLATION (WITH TRAILRAIL) With the door panel face down on a soft surface, drill two 13mm holes at the locations indicated. NOTE: The marks shown are molded into the plastic. Drill center of markings. Run a suitable length of speaker wire into the tailgate following the factory wire harness.
- Page 12 JL INSTALLATION (WITH TRAILRAIL) Install the Trail Rail using one of the removed Torx T40 screws in the center mounting hole. Install two 27mm Spacers in the top hole locations. Install two 45mm Spacers in the bottom hole locations. Using 4mm allen bolt, attach the L Brackets with the tapered hole facing the mounting bolt.
- Page 13 JL INSTALLATION (WITH TRAILRAIL) Connect the speaker wire to the terminals. Positve (+) is Red and Negative (-) is Black. Route the speaker wire in the lower channel. NOTE: This step is most easily accomplished with help, or another means of supporting the enclosure at the correct elevation.
- Page 14 JL INSTALLATION (WITH TRAILRAIL) 3.10 A. Place the sheet of poly-fill inside the enclosure along the back and side areas. B. Connect the speaker leads inside the enclosure to either of the speaker terminals on the speaker. Positve (+) is Red and Negative (-) is Black.
- Page 15 JK INSTALLATION Starting along the bottom, use a nylon panel tool or similiar to remove the trim panel from the tailgate. Align and tape the template to the tailgate panel using the four reference points indicated. Center punch the four hole locations and remove the template.
- Page 16 JK INSTALLATION If a rivet nut setter is not available, follow the directions below for each of the four holes: A. Insert a R1 rivet nut into the hole. B. Slide an W2 metal washer, a N1 spacer nut and a W4 tooth lock washer onto one of the B4 bolts.
- Page 17 JK INSTALLATION A. Apply the Foam Strip over the factory wire harness running across the tailgate using the double sided tape. B. Run a suitable length of speaker wire into the tailgate following the factory wire har- ness. Connect the speaker wire to the terminals.
- Page 18 JK INSTALLATION A. Place the sheet of poly-fill inside the enclosure along the back and side areas. B. Connect the speaker leads inside the enclosure to either of the speaker terminals on the speaker. Positve (+) is Red and Negative (-) is Black. NOTE: Ensure the pre-installed speaker terminal jumper wires stay connected when connecting...
-
Page 19: Specifications
SPECIFICATIONS Model Number TXJWB12 Speaker Model P-TX12D4 Subwoofer Size 12” Voice Coil Dual 4 ohm DC Resistance (Re) 2 ohm Sensitivity 1W/M (SPL) 87 dB Frequency Response 20Hz - 250Hz RMS Power 400 watts Peak Power 800 watts Speaker Displacement 0.06 cu ft / 1.82 Ltr Speaker Weight 12.5 lbs... -
Page 20: Limited Warranty
Limited Warranty Stinger warrants this product to be free of defects in materials and workmanship for a period of one (1) years from the original date of purchase. This warranty is not transferable and applies only to the original purchaser from an authorized Stinger dealer in the United States of America only.
Need help?
Do you have a question about the Stinger TXJWB12 and is the answer not in the manual?
Questions and answers