Table of Contents
Advertisement
Quick Links
Advertisement
Table of Contents

Related Manuals for Funsnap DIVA

Summary of Contents for Funsnap DIVA
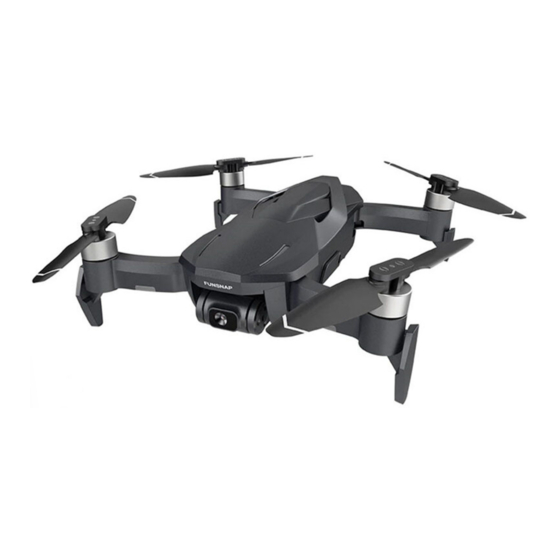
- Page 1 DIVA Quick Start Guide V1.0...
-
Page 2: Table Of Contents
Contents Product pro le Introduction Product Documentation Download FUNSNAP 2 APP Aircraft Components Intelligent Battery Aircraft Status Indicator Propellers Gimbal and Camera Remote Controller Components Charging Powering On / O Remote Controller Status Indicator Using the Remote Controller Optimal Transmission Range... - Page 3 Appendix Speci cations Post-sales Information...
-
Page 4: Product Pro Le
The system facilitates a smooth ight experience with its excellent position hold and altitude hold capabilities both indoors and outdoors. DIVA’s intelligent battery system gives a ight time of up to 30 minutes. The 13MP high de nition camera shoots videos up to 4k (UHD), supporting up to 60 FPS frame rate (only under 1080P). -
Page 5: Download Funsnap 2 App
Download FUNSNAP 2 APP System requirements: iOS 9.0 and above, or Android 5.0 and above. Android Google Play... -
Page 6: Aircraft
Aircraft Components ① Power Button ⑧ Foldable landing Supports ② Intelligent Battery ⑨ Front Aircraft Status Indicator (Front LEDs) ③ Battery Level Indicator ⑩ Rear Aircraft Status Indicator (Rear LEDs) ④ Gimbal and Camera MicroSD Card Slot ⑤ Motors MicroUSB Port ⑥... - Page 7 LED1 LED2 LED3 LED4 The Current Power 75%~100% 50%~75% 25%~50% 0%~25% Charging Battery Ensure the batteries are fully charged before ights. Intelligent batteries should only be charged using the o cial power adapters provided by FUNSNAP...
- Page 8 Connect the power adapter to AC power (110V – 240V, 50 / 60 Hz). Connect the Intelligent battery to the power adapter. When charging is normal, the battery level indicator blinks in cycles. When the battery is fully charged, all battery indicator LEDs will light o .
-
Page 9: Aircraft Status Indicator
Aircraft Status Indicator Front LEDs Below are the 7 states that can be displayed through the red LEDs at the front of the aircraft: No Wi-Fi connection (connection failure or connection loss) Blinking quickly Low battery voltage Blinking slowly IMU horizontal calibration in progress Blinking quickly Compass calibration Phase 1 Blinking slowly... -
Page 10: Gimbal And Camera
The four propellers on DIVA are located at the front left side, front right side, rear left side and rear right side of the main body respectively. The front left propeller and the rear right propeller are clockwise (CW) propellers, while the front right propeller and the rear left propeller are counter-clockwise (CCW) propellers. - Page 11 4k (UHD) videos, supporting up to 60 FPS frame rate (only under 1080P). It also supports 12MP photos as well as time-lapse, panorama view and earth view. Photos and videos can be previewed from the FUNSNAP 2 APP. Supported SD Cards 16GB SanDisk Extreme, Lexar 633x.
-
Page 12: Remote Controller
Remote Controller Components ① Power Button ⑦ Control Stick Protection Cap ② Battery Level Indicator ⑧ Mobile Device Clamps ③ Status Indicator ⑨ Take-o / Land Button ④ Return to Home (RTH) Button ⑩ Shutter / Record Button ⑤ Right Control Stick Gimbal Dial ⑥... -
Page 13: Powering On / O
Powering On / O To power on/o the remote controller, rst press the power button once, then press again and hold the power button for 3 seconds. Remote Controller Status Indicator To check the battery level when the battery is o , short press the power button, then the battery level indicator will display the current battery level. - Page 14 Mode 1 Left Stick Right Stick Forward Turn Left Turn Right Left Down Backward Mode 2 Left Stick Right Stick Forward Turn Right Left Turn Left Backward Down Neutral position: The center position of the stroke of the sticks. Amount of De ection: The amount of de ection of the control stick with respect to the neutral position.
-
Page 15: Optimal Transmission Range
forward and down to y backward. The larger the amount of de ection, the faster the aircraft will move forward / backward. If the stick stays in the neutral position, the aircraft will not move forward / backward. The roll channel controls the aircraft’s roll. Move the right stick left to y left and right to y right. -
Page 16: Funsnap 2 App
FUNSNAP 2 APP Activating Device The DIVA devices should be activated before use for the rst time. To activate the DIVA devices, connect DIVA App to the devices. Upon successful connection, an activation prompt will pop up on the DIVA APP. - Page 17 Flight Screen In air GPS STOP 1. Back to home screen Tap to go back to home screen. 2. Aircraft status indicator Displays ight status and various warning information. Device not connected 3. Flight parameters Displays aircraft altitude, distance (under GPS mode) and speed.
- Page 18 8. System settings Tap to enter system settings to set geofencing, control stick rates or rmware updates. 9. Shooting modes Tap to switch between photo mode and video mode. 10. Shutter / record button Tap to start / stop shooting photos or recording videos. 11.
- Page 19 Map screen In air GPS 1. Mobile device location Displays the current location of the mobile device. 2. Aircraft location Displays the current location of the aircraft. 3. Waypoint The number indicates the sequence of the waypoint. The arrow indicates the heading of the aircraft over that waypoint. To relocate the waypoint, long press and drag it to a desired position.
-
Page 20: Using Camera
Time-lapse mode can be selected from the camera setting page when in video mode. Photo / Video Photo taking and video recording can be done on the FUNSNAP 2 APP ight screen. Camera Settings When taking videos, the resolution can be changed at the settings menu. - Page 21 Firmware Update Precautions *Ensure the battery levels of the aircraft and the remote controller are both above 50% before updates. *Do not switch o the remote controller / app / aircraft, or operate the remote controller while update is in progress. *A prompt will appear on the APP upon successful rmware update.
-
Page 22: Flight
Flight Flight Environment Requirement Do not y above grounds that are monochromatic without any textures. Calibration IMU Horizontal Calibration Extend all arms and landing supports. Place the aircraft on a still and level surface. Tap ‘horizontal calibration’ on the APP. The red LEDs will start blinking until calibration is completed. -
Page 23: Hover Flight Modes
Phase 2: When the front LEDs start to blink quickly, keep the aircraft nose pointing upward and rotate the aircraft by 3 turns until the front LEDs become solid. Then the calibration process is complete. *Note: If the front LEDs start to blink slowly during phase 2, it means that the calibration does not pass. -
Page 24: Taking O / Landing
Adequate lighting and grounds with clearly visible textures are required. B. GPS mode: Enabled when aircraft receives su ciently strong satellite signal with adequate positional accuracy. The app will give a prompt when the aircraft enters GPS mode, while the aircraft tail light becomes solid. -
Page 25: Basic Ight Operations
Basic ight operations Stick Controls Under optical ow mode, the stick controls the aircraft roll / pitch angle. (The maximum tilt angle is limited to 18 degrees). Under GPS mode, the stick controls the aircraft ight speed. (The maximum ight speed is 10 m/s under sport mode, 4 m /s under normal mode and 2 m/s under tripod mode). - Page 26 Follow: the aircraft points its head towards the location of the mobile device and starts following the mobile device with constant position relative to the followed object. Waypoint: the aircraft follows a series of waypoints planned in the APP. Note that when planning the waypoints, obstacles along the waypoints must be avoided.
- Page 27 Appendix Sensor 1/3” CMOS FOV: 81.5° Format Equivalent: 28 mm Camera Lens Aperture: f/2.0 Shooting Range: 1.2 m to ∞ Image Size 4000 x 3000 pix 4K(UHD 3840 x 2160)/15FPS Video Recording Camera 2.7K(2704X1520)/30FPS Modes 1080P/30FPS,1080P/60FPS Max Video Bitrate 100Mbps Supported File System FAT32 JPEG...
- Page 28 GPS + GLONASS GPS Mode Aircraft Vertical:±0.1m / VIO,±0.5m /GPS Hovering Accuracy Range Horizontal:±0.1m / VIO,±1.5m /GPS 0º~ -90º Pitch 30º~ -30º Gimbal Roll Max Control Speed (tilt) 120°/s 2250mAh Capacity Voltage 13.0V LiPo 3S Battery Type 13.05V Max Charging Voltage Battery Energy 27Wh...
- Page 29 DIVA Drone x1 Remote control x1 Smart battery x1 Propeller (Clockwise x4) &Propeller (anticlockwise x4) Long Joystick x2 Propeller Screw x8 Charger x1 USB x1...
- Page 30 Battery Safety Instructions...
- Page 31 Read the Battery Safety Instructions carefully before charging the iDol rechargeable lithium polymer battery.Follow the instructions herein strictly. Warning 1. The lithium polymer cells in this battery use volatile materials.Im- proper use of this battery may cause re, damage to property or personal injury.
- Page 32 3. Do not charge the battery close to combustible or ammable materials or liquids. 4. Never leave charging batteries unattended to prevent accidents. 5. If there is a re, disconnect the chargers power immediately and extinguish the re following the correct method. 6.
- Page 33 9.If the battery is submerged in water place it in a safe open area and stay away from it until the battery is air dried. The battery may not be used again and as such and should be discarded. Follow the proper recycling method and local laws &...
- Page 34 metal necklaces or other metal objects. 7. Transport the battery within the temperature range of 23 ± 5 ° C. 8. Do not transport damaged batteries. When you need to transport the battery make sure to discharge the battery until it is around 50% capacity.
- Page 35 Disclaimer and Safety Information...
- Page 36 These documents are included in the product package and are also available online on the FUNSNAP website at http://www.- fun-snap.com. The information in this document a ects your safety and your legal rights and responsibilities.
- Page 37 same time, this product complies with the basic requirement’s stipulated in 1999/5/EC and other related directives. It is forbidden to modify or change this product without permission so as to avoid harmful interference being emitted from the product. The manufacture is not responsible for any consequence’s or problems that may arise due to modi cations made to this product.
- Page 38 speeds. When running there is a certain level of danger that must be taken into account. Failure to do so may lead to personal injury or property damage. 3. When using this product, stay away from dangerous environments such as airports, railways, highways, high-rise buildings and suspended wires. 4.
- Page 39 Warranty Card Product Name User Name Product Serial Number Contact Phone Number Dealer Date of purchase Contact number Maintenance Recordst Repair Date Fault and Repair Conditions The following conditions are not covered by thewarranty: 1. Failure or damage due to transportation, loading and unloading the product after purchase.
- Page 40 Please visit www.fun-snap.com to get detailed warranty terms and after-sales service policies. Funsnap Technology Co., Ltd., reserves the right to modify the contents of the above policies and articles without prior announcement. For the latest version please visit the o cial website.
Need help?
Do you have a question about the DIVA and is the answer not in the manual?
Questions and answers