Advertisement
Quick Links
Assembly Instructions
72D2ALBNL (Dual Mount Curved Rod)
Para instrucciones en español y francés, comience en la página 17.
Pour les instructions espagnoles et françaises, commencez à la page 17.
Before You Begin:
Thank you for purchasing this product. Please identify all parts and hardware
pieces before you begin. When laying out parts, place them on a soft surface
to prevent scratching.
If any pieces are missing, call our Toll Free Number 1-800-892-3986 between
8:00AM-5:00PM EST Monday through Friday.
Pg 1 of 32
MCS 10/16/2019
For Spanish and French instructions, start on page 17.
www.zennahome.com
IS072D2-I
Advertisement

Related Manuals for Zenna Home 72D2ALBNL


Summary of Contents for Zenna Home 72D2ALBNL
- Page 1 Assembly Instructions 72D2ALBNL (Dual Mount Curved Rod) For Spanish and French instructions, start on page 17. Para instrucciones en español y francés, comience en la página 17. Pour les instructions espagnoles et françaises, commencez à la page 17. Before You Begin: Thank you for purchasing this product.
- Page 2 Cleaning Note: Cleaning with a dry cloth may be sufficient, but for other stains or marks wipe gently with a damp cloth. DO NOT use strong detergents or abrasive cleaners, they may damage the surface of this product. Tools Needed - not included ®...
-
Page 3: List Of Parts
List of Parts Before assembling, make sure that the tube assemblies (C) is at the shortest position by twisting the end of the tube in the OPPOSITE DIRECTION of the arrow stickers. 1 in. Mounting Bracket 7/8 in. Mounting Bracket 7/8 in. -
Page 4: List Of Hardware
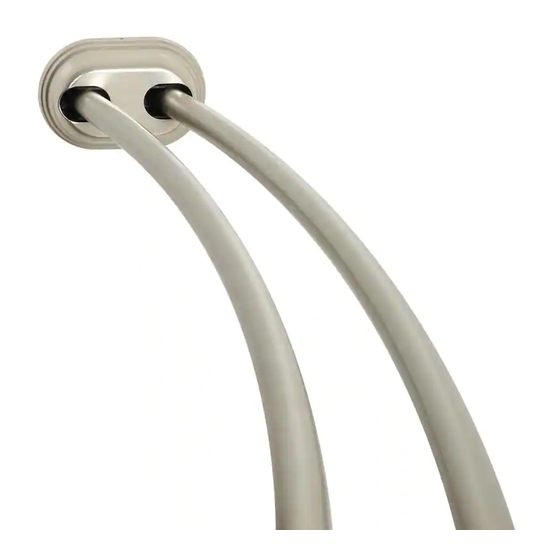
List of Hardware Plastic Ring Mounting Bracket Screw Threaded Insert Rod Set Screw Large Hex Wrench Small Hex Wrench Drywall Anchor Mounting Screw Pg 4 of 32 www.zennahome.com IS072D2-I... - Page 5 Permanent Installation - For Tension Mount Installation go to page (12) Step 1 - Attaching the Mounting Brackets. • With the arrows on the mounting bracket for the 7/8 in. diameter tube (C) pointing UP and DOWN, fasten the 7/8 in. diameter tube assemblies (C) to the mounting bracket for the 7/8 in. diameter tube (B) using the mounting bracket screw (2) and threaded insert (3).
- Page 6 Permanent Mount Step 2 - Installing the End Caps. • Position mounting bracket (B) with arrows pointing upwards and downwards, as shown. • Slide the end cap (E) onto the tubes (C). NOTE: Do not attach the end cap to the mounting bracket. •...
- Page 7 Permanent Mount Step 3 - Installing the Plastic Ring. • NOTE: ASSEMBLE ON A SMOOTH FLAT SURFACE. • Insert plastic ring (1) into the end of the 1 in. diameter tube (D), fig 1. • Repeat for the other 1 in. diameter tube (D). •...
- Page 8 Permanent Mount Step 4 - Measure the space between the walls. • Measure the space between the walls of the bathtub or shower where your rod assembly will be installed. • NOTE: Please write down your measurement below, you will need this later. Measurement between walls: Step 5 - Extending the 7/8 in.
- Page 9 Permanent Mount Step 6 - Installing the Rod Assembly in its final location. • Secure the shower rod to the walls by twisting the end of the 7/8 in. diameter tube assemblies (C) away from you, until snug. • Make sure rod is level and adjust as needed. •...
- Page 10 Permanent Mount Step 7 - Installing Wall Anchors. • Drill the 2 marked spots for each mounting bracket (A) and (B) . • Insert drywall anchors (7) into wall, as shown. NOTE: If needed, using a hammer, lightly tap drywall anchors (7) into wall.
- Page 11 Permanent Mount Step 8 - Installing the Rod Assembly in its final location. • Secure the shower rod to the walls by twisting the end of the REAR tube assembly (C) away from you, until snug. • Repeat for the FRONT tube assembly (C), as shown. NOTE: Make sure rod is level. •...
- Page 12 Tension Mount Installation - For Permanent Mount Installation go to page (5) Step 1 - Attaching the Mounting Brackets. • With the arrows on the mounting bracket for the 7/8 in. diameter tube (C) pointing UP and DOWN, fasten the 7/8 in.
- Page 13 Tension Mount Installation Step 2 - Installing the End Caps. • Slide the end cap (E) onto the 7/8 in. diameter tube assemblies (C). • Snap the end cap (E) to the mounting bracket for the 7/8 in. diameter tubes (B). •...
- Page 14 Tension Mount Installation Step 3 - Installing the Plastic Ring. • NOTE: ASSEMBLE ON A SMOOTH FLAT SURFACE. • Insert plastic ring (1) into the end of the 1 in. diameter tube (D), fig 1. • Repeat for the other 1 in. diameter tube (D). •...
- Page 15 Tension Mount Installation Step 4 - Measure the space between the walls. • Measure the space between the walls of the bathtub or shower where your rod assembly will be installed. • NOTE: Please write down your measurement below, you will need this later. Measurement between walls: Step 5 - Extending the 7/8 in.
- Page 16 Tension Mount Installation Step 6 - Installing the Rod Assembly in its final location. • Secure the shower rod to the walls by twisting the end of the REAR tube assembly (C) away from you, until snug. • Repeat for the FRONT tube assembly (C), as shown. NOTE: Make sure rod is level. •...
-
Page 17: Advertencia De Seguridad
Instrucciones de Ensamblado / Instructions de montage 72D2ALBNL (Tubo curvado de doble montaje / Double mont courbé) ADVERTENCIA DE SEGURIDAD: Asegúrese de que está haciendo una instalación en un entorno limpio, seco y seguro. NO SE PARE EN EL REBORDE DE LA BAÑERA. - Page 18 Nota de limpieza: Remarque sur le nettoyage : La limpieza con un paño seco puede ser Le nettoyage à l’aide d’un chiffon sec suficiente, pero para otras manchas o marcas, peut suffire, mais pour d’autres taches ou limpie suavemente con un paño húmedo. marques, essuyer à...
- Page 19 Lista de Partes / Liste des pièces Antes de ensamblarlo, Avant le montage, asegúrese de que los conjuntos de tubo (C) s’assurer que les assemblages de tube (C) estén en la posición más corta girando el se trouvent dans la position la plus courte en extremo del tubo en la DIRECCIÓN OPUESTA faisant tourner l’extrémité...
- Page 20 Continuación de lista de partes / Liste des pièces, suite Anillo de plástico Bague en plastique Tornillo del soporte de montaje Vis pour plaque de montage Inserto roscados Douille filetée Tornillo de presión del cortinero Vis de pression pour tringle Llave Allen hexagonal grande Grande clé...
- Page 21 Instalación permanente Installation permanente Para instalación de montaje con tensión Pour des instructions sur le montage par vaya a la página (28) tension, reportez-vous à la page (28) Paso 1 - Fijación de los soportes de montaje. Étape 1 - Fixer les supports de montage. •...
-
Page 22: Instalación Permanente
Instalación permanente Installation permanente Paso 2 - Instalación de las tapas de Étape 2 - Installer les couvercles d’extrémité. los extremos. • Coloque el soporte de montaje (B) con flechas apuntando • Poser le support de montage (B), les flèches orientées hacia arriba y hacia abajo, como se muestra. - Page 23 Instalación permanente Installation permanente Paso 3 - Instalación del anillo de plástico. Étape 3 - Installer la bague en plastique. • NOTA: ENSAMBLE SOBRE UNA SUPERFICIE LISA Y PLANA. • REMARQUE : MONTER SUR UNE SURFACE LISSE ET PLANE. • Inserte el anillo de plástico (1) en el extremo del tubo de •...
- Page 24 Instalación permanente Installation permanente Paso 4 - Medición del espacio entre las Étape 4 - Mesurer l’espace entre les murs. paredes. • Mida el espacio entre las paredes de la bañera o ducha • Mesurer l’espace entre les murs de la baignoire ou de la donde se instalará...
- Page 25 Instalación permanente Installation permanente Paso 6 - Instalación del conjunto de la Étape 6 - Installer l’assemblage de tige barra en su ubicación final. dans son emplacement final. • Asegure la barra de ducha a las paredes girando el • Fixer la tige de douche aux murs en faisant tourner extremo de los conjuntos de tubo de 7/8 de pulgada de l’extrémité...
- Page 26 Instalación permanente Installation permanente Paso 7 - Instalación de los anclajes de pared. Étape 7 - Installer les ancrages muraux. • Perfore los 2 puntos marcados para cada soporte de • Percer les 2 points indiqués pour chaque support de montaje (A) y (B).
- Page 27 Instalación permanente Installation permanente Paso 8 - Instalación del conjunto de la Étape 8 - Installer l’assemblage de tige barra en su ubicación final. dans son emplacement final. • Asegure la barra de ducha a las paredes girando el • Fixer la tige de douche aux murs en faisant tourner extremo del conjunto de tubo POSTERIOR (C) hasta que l’extrémité...
- Page 28 Instalación para montaje con tensión Installation de montage Pour des instructions sur le montage Para instalación de montaje con tensión permanent, reportez-vous à la page (21) vaya a la página (21) Paso 1 - Fijación de los soportes de montaje. Étape 1 - Fixer les supports de montage.
- Page 29 Instalación para montaje con tensión Installation de montage Paso 2 - Instalación de las tapas de los Paso 2 - Installer les couvercles d’extrémité. extremos. • Deslice la tapa del extremo (E) sobre el conjunto de tubo • Faire glisser le couvercle d’extrémité (E) sur l’assemblage de 7/8 de pulgada de diámetro (C).
- Page 30 Instalación para montaje con tensión Installation de montage Paso 3 - Instalación del anillo de plástico. Étape 3 - Installer la bague en plastique. • NOTA: ENSAMBLE SOBRE UNA SUPERFICIE LISA Y PLANA. • REMARQUE : MONTER SUR UNE SURFACE LISSE ET PLANE. •...
- Page 31 Instalación para montaje con tensión Installation de montage Paso 4 - Medición del espacio entre las Étape 4 - Mesurer l’espace entre les murs. paredes. • Mida el espacio entre las paredes de la bañera o ducha • Mesurer l’espace entre les murs de la baignoire ou de la donde se instalará...
- Page 32 Instalación para montaje con tensión Installation de montage Paso 6 - Instalación del conjunto de la Étape 6 - Installer l’assemblage de tige barra en su ubicación final. dans son emplacement final. • Asegure la barra de ducha a las paredes girando el •...
Need help?
Do you have a question about the 72D2ALBNL and is the answer not in the manual?
Questions and answers