Advertisement
Quick Links
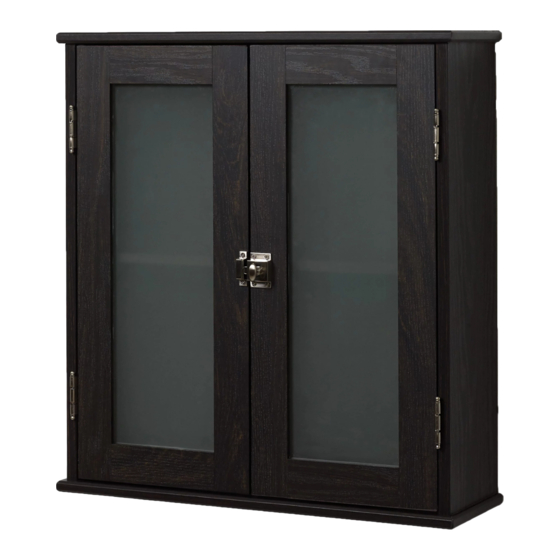
Model
E9834CH (Espresso)
Before You Begin:
Thank you for purchasing this product. Please identify all parts and hardware
pieces before you begin. When laying out parts, place them on a soft surface
to prevent scratching.
If any pieces are missing, call our Toll Free Number 1-800-892-3986 between
8:00AM-5:00PM EST Monday through Friday.
Para instrucciones en español y francés, comience en la página 17.
Pour les instructions espagnoles et françaises, commencez à la page 17.
Pg 1 of 32
For Spanish and French instructions, start on page 17.
MCS
11/04/2019
(800) 892-3986
IS98340-I
Advertisement

Subscribe to Our Youtube Channel
Related Manuals for Zenna Home E9834CH


Summary of Contents for Zenna Home E9834CH
- Page 1 Model E9834CH (Espresso) Before You Begin: Thank you for purchasing this product. Please identify all parts and hardware pieces before you begin. When laying out parts, place them on a soft surface to prevent scratching. If any pieces are missing, call our Toll Free Number 1-800-892-3986 between 8:00AM-5:00PM EST Monday through Friday.
-
Page 2: Before You Begin
Before You Begin: Thank you for purchasing this product. Please identify all parts and hardware pieces before you begin. When laying out parts, place them on a soft surface to prevent scratching. If any pieces are missing, call our Toll Free Number 1-800-892-3986 between 8:00AM-5:00PM EST Monday through Friday. -
Page 3: List Of Parts
List of Parts Top Panel Bottom Panel Left Side Panel Right Side Panel Hanging Rail Adjustable Shelf Left Door Right Door Back Panel (800) 892-3986 IS98340-I Pg 3 of 32... -
Page 4: List Of Hardware
List of Hardware Large Screw Cambolt Dowel x 16 Hinge Screw Hinge Latch Assembly Screw Latch Knob Assembly Latch (800) 892-3986 IS98340-I Pg 4 of 32... - Page 5 List of Hardware - continued Shelf Clip x 18 Nail Screw Cover Sticker Cam Sticker Magnet Magnet Screw Magnet Strike Magnet Strike Screw Wall Anchor Mounting Screw (800) 892-3986 IS98340-I Pg 5 of 32...
- Page 6 Step 1 - Installing Cams into the Hanging Rail. • Insert cams (3) into the hanging rail (E), as shown. NOTE the direction of the cams (3). NOTE the direction of the cams (3). unfinished edge mounting holes unfinished edge NOTE the direction of the cams (3).
- Page 7 Step 2 - Installing Cams into the Side Panels. • Attach the cambolts (2) to the side panels (C and D), as shown. • Insert dowels (4) into the side panels (C and D), as shown. • Insert cams (3) into the top side panels (C and D), as shown. NOTE: the direction of the cams (3). NOTE the direction of the cams (3).
- Page 8 Step 3 - Installing Dowels into the Bottom Panel. • Attach the dowels (4) into the bottom panel (B), as shown. unfinished edge Step 4 - Attaching the Magnet to the Top Panel. • Attach the cambolts (2) and dowels (4) to the top panel (A), as shown. •...
- Page 9 Step 5 - Attaching the Top Panel. • Attach the hanging rail (E) to the side panels (C and D), as shown. • Then attach the top panel (A) to the side panels (C and D), as shown. • Tighten cams (3) in the side panels (C and D) and hanging rail (E) by turning them CLOCKWISE approximately a half turn or until snug.
- Page 10 Step 6 - Attaching the Bottom Panel. • Attach the bottom panel (B) to the side panels (C and D), as shown. unfinished edge (800) 892-3986 IS98340-I Pg 10 of 32...
- Page 11 Step 7 - Attaching the Back Panel. • Lay unit face down on floor. • With the seam side of back panel (I) facing up attach to the back of the unit, as shown. • NOTE: Make sure the mounting holes are at the top, as shown. x 18 mounting holes Helpful Hint:...
- Page 12 Step 8 - Installing Hinges. • Attach two hinges (6) to left door (G), as shown. DO NOT OVERTIGHTEN HINGE SCREWS (5)! • Attach the magnet strike (16) to door (G), as shown. DO NOT OVERTIGHTEN MAGNET STRIKE SCREW (17)! •...
- Page 13 Step 9 - Installing the Latch Assembly. • Attach the latch knob assembly (8) and the latch (9) to the doors (G and H), as shown. • NOTE: DO NOT OVERTIGHTEN LATCH ASSEMBLY SCREWS (H7)! (800) 892-3986 IS98340-I Pg 13 of 32...
- Page 14 Step 10 - Attaching the Doors. RECOMMEND • Attach doors (G and H) to the side panels (C and D), as shown. NOTE: DO NOT OVERTIGHTEN RECOMIENDA HINGE SCREWS (5)! RECOMMANDÉ • Apply cam stickers (13) to cams (3) and screw cover stickers (12) to large screws (1). 12 x 4 (800) 892-3986 IS98340-I...
- Page 15 Step 11 - Hinge Adjustments. • Horizontal Adjustment, (in and out). • Vertical Adjustment, (up and down). (800) 892-3986 IS98340-I Pg 15 of 32...
- Page 16 Step 12 - Mounting the unit to the wall. RECOMMEND WARNING: BEFORE CUTTING OR DRILLING INTO ANY WALL SURFACE, VERIFY THE LOCATION OF ELECTRICAL, PLUMBING AND GAS LINES. CUTTING ANY OF THESE MAY CAUSE SERIOUS INJURY. • For safety reasons, it is imperative to use a stepladder. •...
-
Page 17: Antes De Que Empiece
Modelo / Modèle E9834CH (Espresso / Espresso) Antes de que empiece: Muchas gracias por comprar este producto. Identifique todas las piezas y las piezas de ferretería antes de comenzar. Al distribuir las piezas, colóquelas sobre una superficie suave para evitar que se rayen. - Page 18 Antes de que empiece: Muchas gracias por comprar este producto. Identifique todas las piezas y las piezas de ferretería antes de comenzar. Al distribuir las piezas, colóquelas sobre una superficie suave para evitar que se rayen. Si faltaran piezas, llame a nuestro número gratuito 1-800-892-3986 entre las 8:00 a.m.- 5:00 p.m., hora del este, de lunes a viernes.
- Page 19 Lista de Partes / Liste des pièces Paneles superior e inferior Panneau supérieur et inférieur Panel lateral Panneau inférieur Panel lateral izquierdo Panneau latéral gauche Panel lateral derecho Panneau latéral droit Riel colgante Rail de suspension Repisa regulable Étagère amovible Puerta izquierda Porte gauche Puerta derecha...
- Page 20 Lista de piezas de tornillería / Liste des pièces de montage Tornillo grands Vis longue Perno para levas Boulon à cames Leva Came Clavija Goujon Tornillo para bisagras x 16 Vis pour charnière Bisagra Charnière Tornillo del ensamble de cierre Vis de loquet Ensamble de la perilla de cierre Bouton de loquet...
- Page 21 Lista de piezas de tornillería continuada / Liste des pièces de montage, suite Sujetadore para Repisa Attache pour étagères Clavo x 18 Clou Adhesivo para cubierta de tornillo Pastille autocollante cache-vis Adhesivo para leva Pastille autocollante cache-came Imán Aimant Tornillo para imán As pour aimant Contrachapa de imán Gâche d’aimant...
- Page 22 Paso 1: instalar las levas en el riel colgante. Étape 1-installation des cames dans le rail suspendu. • Inserte las levas (3) dentro del riel colgante (E), como se • Insérez des cames (3) dans le rail de suspension (E), ilustra.
- Page 23 Paso 2: instalar las levas en los paneles laterales. Étape 2-installation des cames dans les panneaux latéraux. • Fije los pernos de levas (2) a los paneles laterales • Fixez les boulons à came (2) aux panneaux latéraux superiores (C y D), como se ilustra supérieurs (C et D), comme illustré.
- Page 24 Paso 3: instalar las clavijas en la en el panel inferior. Étape 3-installation des chevilles dans les panneaux inférieurs. • Fije las clavijas (4) dentro del panel inferior (B), como • Insérez des goujons (4) dans le panneau inférieur (B), se ilustra.
- Page 25 Paso 5: sujetar el panel superior. Étape 5-raccordement du panneau supérieur. • Fije el riel colgante (E) a los paneles laterales (C y D), • Fixez le rail de suspension (E) aux panneaux latéraux (C et D), como se ilustra. comme illustré.
- Page 26 Paso 6: sujetar el panel inferior. Étape 6-raccordement du panneau inférieur. • Fije el panel inferior (B) a los paneles laterales (C y D), • Fixez le panneau inférieur (B) aux panneaux latéraux (C et D), como se ilustra. comme illustré. Borde Sin Acabado Bord non fini (800) 892-3986...
- Page 27 Paso 7: sujetar panel posterior. Étape 7-raccordement du panneau arrière. • Coloque la unidad hacia abajo sobre el piso. • Placez le meuble à l’envers sur le sol. • Con el lado de la unión del panel posterior (I) hacia arri- •...
- Page 28 Paso 8: instalar las bisagras. Étape 8-installation des charnières. • Coloque dos bisagras (6) a la puerta izquierda (G), como • Fixez deux charnières (6) à la porte gauche (G), comme se ilustra. ¡NO APRIETE LOS TORNILL0S DE LAS BISAGRAS (5) illustré.
- Page 29 Paso 9: instalar el montaje del pestillo. Étape 9-installation de l’assemblage du loquet. • Fije el ensamble de la perilla de cierre (8) y el cierre (9) • Fixez le bouton de loquet (8) et le loquet (9) aux a las puertas (G y H), como se ilustra. portes (G et H), comme illustré.
- Page 30 Paso 10: sujetar las puertas. Étape 10-raccordement des portes. • Fije las puertas (G y H) a los paneles • Fixez les portes (G et H) aux panneaux RECOMIENDA laterales (C y D), como se ilustra. NOTA: ¡NO latéraux (C et D), comme illustré. REMARQUE : NE RECOMMANDÉ...
- Page 31 Paso 11: ajustes de las bisagras. Étape 11-ajustement des charnières. • Ajuste horizontal, (dentro y fuera). • Réglage horizontal, (dans et hors). • El ajuste vertical, (arriba y abajo). • Réglage vertical, (haut et bas). (800) 892-3986 IS98340-I Pg 31 of 32...
- Page 32 Paso 12: montaje de la unidad en la pared. Étape 12-montage de l’unité au mur. ADVERTENCIA: AVERTISSEMENT : RECOMIENDA ANTES DE CORTAR O TALADRAR EN AVANT DE COUPER OU PERCER TOUTE SURFACE RECOMMANDÉ CUALQUIER SUPERFICIE DE PARED, VERIFIQUE MURALE, VÉRIFIEZ L’EMPLACEMENT DES LA UBICACIÓN DE LOS CONDUCTOS CANALISATIONS ÉLECTRIQUES, SANITAIRES ET ELÉCTRICOS Y LAS TUBERÍAS DE AGUA Y GAS.
Need help?
Do you have a question about the E9834CH and is the answer not in the manual?
Questions and answers