Table of Contents
Advertisement
Quick Links
Advertisement
Table of Contents

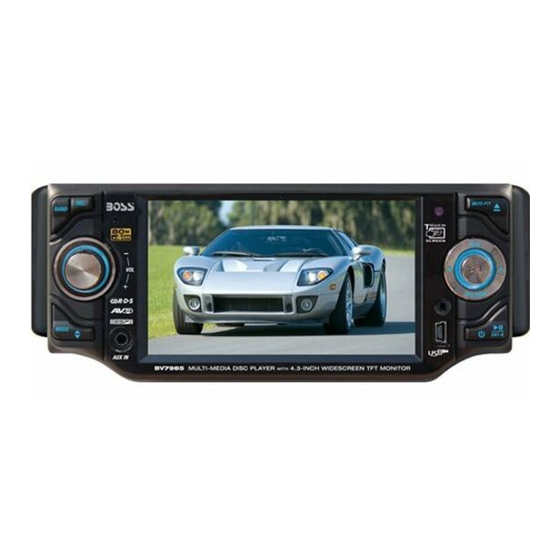
Related Manuals for Boss Audio Systems BV7985


Summary of Contents for Boss Audio Systems BV7985
-
Page 2: Table Of Contents
BV7985 Contents Precautions ... Safety Information... Disc Notes ... Installation ... Detaching the control panel ... Changing the control panel ... Electric Connection ... Remote Control ... Control Panel ... Touch Panel Unit Keys ... Basic Operations TFT Monitor Adjustment ... -
Page 3: Precautions
Precautions THANK YOU FOR PURCHASING THIS CAR DVD PLAYER . Before operating the unit, read this manual thoroughly and keep it handy for future reference . To avoid injury or accident , read the following precautions before installing and operating the unit . ON INSTALLATION DO NOT install any receiver in locations where;... -
Page 4: Safety Information
Safety Information CAUTION: THIS DVD PLAYER IS A CLASS I LASER PRODUCT. HOWEVER THIS DVD PLAYER USES A VISIBLE/INVISIBLE LASER BEAM WHICH COULD CAUSE . HAZARDOUS RADIATION EXPOSURE IF DIRECTED. BE SURE TO OPERATE THE DVD PLAYER CORRECTLY AS INSTRUCTED. USE OF CONTROLS OR ADJUSTMENTS OR PERFORMANCE OF PROCEDURES OTHER THAN THOSE SPECIFIED HEREIN MAY RESULT IN HAZARDOUS RADIATION EXPOSURE.DO NOT OPEN COVERS AND DO NOT... -
Page 5: Disc Notes
Disc Notes Disc formats supported by this player Audio and Video Disc size 12 cm Audio and Video Disc size 12 cm Audio Disc size 12 cm Audio Disc size 12 cm Discs which cannot be played with this player DVD-ROM DVD-R/DVD-RAM CD-G... -
Page 6: Installation
Installation NOTES: Choose the mounting location where the unit will not interfere with the normal driving function of the driver. Before finally installing the unit, connect the wiring temporarily and make sure it is all connected up properly and the unit and the system work properly. Use only the parts included with the unit to ensure proper installation. - Page 7 Installation HEX NUT SPRING WASHER PLAIN WASHER TAPPING SCREW KEY PLATE If you want to take CHASSIS out of the SLIDE BRACKET HOUSING, first remove the PLASTIC COVER of the both sides away, then insert the two KEY PLATE into left and right side of chassis as above illustration. DASH BOARD METAL MOUNTING STRAP...
-
Page 8: Detaching The Control Panel
Installation How To Remove And Install The Front Panel When detaching or attaching the control panel, be careful not to damage the connectors on the back of the control panel and on the panel holder. Detaching The Front Panel Before detaching the control panel, be sure to turn off the power. 1). -
Page 9: Panel Angle Adjustment
Panel Angle Adjustment CHANGING THE CONTROL PANEL ANGLE When you want to change the viewing angle of the operating unit to play, you can touch the on the panel ) repeatedly to select the desired angle as follows: Angle 1 Angle 4 Caution: Do not insert your finger behind the control panel. -
Page 10: Electric Connection
Electric Connection WIRING CONNECTION ANTENNA CONNECTOR IGNITION SWITCH(B+) CHOKE MEMORY YELLOW BACK-UP(B+) BLACK GROUND(B-) FUSE AUTO BLUE ANTENNA FRONT Lch SPK. REAR Lch SPK. Note: The (B-) parking brake wire must be connected in order for video images to appear on the monitor. If the wire has not been correctly connected, the message “PARKING BRAKE”... -
Page 11: Remote Control
Remote Control Press this button to view the clock time. Press again to return to normal 1.CLK display mode. Press repeatedly to cycle through the various modes: 2.MODE RADIO > DISC > AUX IN. 3.STOP Press once to pause playback. Press PLAY/PAUSE to resume playback. Please note: if you press STOP twice, playback will start at the beginning of the disc. -
Page 12: Preparing The Remote Control
Remote Control When playing a DVD, pressing this button will open the TITLE 18.TITLE/PBC (Playback Control menu which is recorded on the DVD. When playing a VCD disc, mode), press this button to create a PBC (Playback Control) menu for AP (Auto-Program the disc to assist in making playback selections. -
Page 13: Control Panel
Control Panel Key Functions Touch Panel Touch Screen Key : (Angle) : Changing the viewing angle of the operating unit . 2.TA : Turning pre-switching for traffic announcements on and off . (For RDS) 3. AF : Switch on and off and alternative frequency. -
Page 14: Unit Keys
Control Panel Unit Keys : 1.REL BUTTON Press this button to release the front panel for removal . Refer to see page 7. (POWER On/Off )BUTTON Press this button to switch the device on. WELCOME appears in the display. Press it again to switch the device off. SEE YOU appears in the display. 3.VOL+/ VOL- knob In normal mode, this knob is used to increase or decrease the volume. - Page 15 Control Panel AF [Alternative Frequencies] Longer press the TA/AF button , the AF function is activated. The AF symbol appears in the display . (Longer press it again to cancel this function .) The function about RDS to see page 20 . Note: In Radio mode, press and hold the SEL knob for a long time to access the selection menu: REG ON/REG OFF, PI MUTE/PI SOUND, AF ON/AF OFF .
- Page 16 Control Panel BUTTONS (TUNE, SEEK, TRACK, SKIP UP/DOWN) a) In DISC, USB mode: if you wish to jump forwards or backwards press the SEL button (4) briefly in direction. (Note: in DVD mode, press the SEL button continually twice in direction to skip back one track during playback.) To wind through the tracks keep the SEL button pressed in the for about 2 seconds.
-
Page 17: Basic Operations
Basic Operation POWER On/Off Press it to switch the device ON, press it again to switch the device OFF. Ejecting The Disc Use your singer touch the range on touch screen , the control panel of the unit will swing downwards . Then you can insert the disc or eject the disc . -
Page 18: Tft Monitor Adjustment
Basic Operation TFT Monitor Adjustment During DISC playback, use your finger touch briefly the SEL section on the screen (or press SEL button on front panel to across the Picture selection menu, by repeatedly touch the SEL section, and then touch the VOL+/- (or rotate the VOL+/-) to adjust the selected mode . -
Page 19: Setting Audio Mode
Basic Operation Balance: R 0-10 to L 0-10 . Adjust sound balance between left and right speakers by using VOL + / - Fader: F 0 10 to R 0 -10 . Adjust sound balance between front and rear speakers by using VOL + / VOL - . Setting Audio Modes Touch the screen the DSP range (or press the EQ/LOUD button... -
Page 20: Radio Operations
Radio Operation Listening to the Radio Switching To Radio Mode Touch the MOD range repeat- edly on the screen to select the RADIO mode. (You can also press repeatedly the button to select the RADIO .) the following information will appears\ on the display : FM1 106.30 Touch it to select the other item . -
Page 21: Storing Stations In Memory
Radio Operation To tune in strong-singnal FM Station only (LO/DX function) Touch the LOC section on the touch screen (or press LO/DX button on the remote) to select the LOCAL or DX mode . You can choose between the LOCAL and DX(DISTANCE) mode for local or long-distance traffic news . -
Page 22: Radio Operation
Radio Operation During radio operation in one FM frequency band the search for a traffic announcement station is started automatically (TA SEEK) . If an FM station is being received which transmits the latest traffic announce- ments from time to time, the TP display lights up. -
Page 23: Disc Operations
DISC Operation Basic Operation During the DISC playback, use the finger touch the touch screen , it display will following as bellow : 11-0:44:36 VOL- VOL+ VOL- VOL+ 1.Previous 7.To next page 2.Next 8.Insert or Eject the disc. 3.Pause 9.Volume+(adjustment+) 4.Stop 10.Select 5.Mute... -
Page 24: Disc Operation
DISC Operation Switching the DVD mode Touch the MOD section on the touch screen (or press MOD button ) to select the DISC mode, it display like following : 11-0:44:36 VOL- VOL+ Function setup (different the source the display is different) Stopping Play Touch the screen the press the... -
Page 25: Select Playback Mode
DISC Operation Selecting The Play Modes During the Disc playback, touch the touch screen, it will display the following as below : 11-0:44:36 VOL- VOL+ Touch the section to select . DVD 11-0:44:36 1). Repeat Function FOR DVD : Touch the screen the RPT section (or press longer RPT on remote control) to select REPEAT mode as follow :... -
Page 26: Aux Operation
DISC Operation DISC Search (GOTO) DVD 11-0:44:36 DISC SUBTITLE AUDIO TITLE GOTO GOTO Touch the GOTO section , it display will following as below : Title 01 /01 , Chapter --/15 FOR DVD : Touch the screen the GOTO range GOTO (or press GOTO on the remote ). -
Page 27: On-Screen Display Function
DISC Operation ON-SCREEN DISPLAY FUNCTION During playback, touch the screen the OSD section (or press the OSD on the remote), it will display the following as below : 1. DVD: A.Touch or Press TITLE ELAPSED T 01/01 C 01/38 0:02:06 Title Number, Total Title Number, Chapter Number, Total Chapter Number of this Title of the disc currently being... -
Page 28: Disc Special Functions
DISC Special Functions DVD/VCD Special Function DVD 11-0:44:36 DISC SUBTITLE AUDIO TITLE GOTO 1. Multi-subtitle Language Function (for DVD Only) SUBTITLE During DVD playback. Touch the SUBTITLE section on touch screen(or press the SUBTITLE on the remote) . Each time the button is pressed or touch, number of the subtitle language changes in sequential order. -
Page 29: Setup
Setup USING THE MENU DOLBY ...GENERAL SETUP PAGE... TV Display Angle Mark OSD Lang Spdif Output Captions Screen Saver Last Memor y Go To General Setup Page 1. Touch the section of DVD setup on touch screen (or press the SETUP on the remote .) 2.The SETUP menu is displayed. - Page 30 Setup GENERAL SETUP DOLBY ...GENERAL SETUP PAGE... TV Display Angle Mark Angle Mark OSD Lang Spdif Output Captions Screen Saver Last Memor y Set Angle Mark ANGLE MARK DISPLAY SETUP If it is set to ON, when the multi-angle DVD disc is playing, mark) will appears on the screen;...
-
Page 31: Speaker Setup
Setup GENERAL SETUP DOLBY ...GENERAL SETUP PAGE... TV Display Angle Mark OSD Lang Spdif Output Captions Screen Saver Screen Saver Last Memor y Screen Saver 6.SCR SAVER SETUP Select the SCR SAVER output ON/OFF. DOLBY ...GENERAL SETUP PAGE... TV Display Angle Mark OSD Lang Spdif Output... -
Page 32: Tv Type Setup
Setup --- PREFERENCES PAGE --- DOLBY ...Preference Page... TV Type TV Type Audio OSD Lang Subtitle Disc Menu Parental Password Default Set TV Standard 1.TV TYPE SETUP This player can play discs recorded in either PAL or NTSC format.Select NTSC format, when you connected to NTSC TV.Select PAL format, when you connected to PAL TV.Select AUTO format, the player TV output format... -
Page 33: Defaults Table
Setup --- PREFERENCES PAGE --- Age control DOLBY ...Preference Page... TV Type Audio OSD Lang Subtitle Disc Menu Parental Parental Password Default Set Parental Control 5.PARENTAL Select suitable parental guidance by the cursor buttons and conformed by pressing ENTER button. DOLBY ...Preference Page... -
Page 34: Other Main Operations
Other Main Operation USB Operation (17) Following the diagram below, connect your USB device to the front panel USB port . If it is properly connected, the device will be mounted and start playing automatically. (USB connect line) you can also select the desired item of the USB device The buttons on the remote control, on the device, have the same functions as the touch buttons... -
Page 35: Mp3/Wma/Jpeg Play
Other Main Operation MP3/WMA/JPEG/MPEG4 DISC PLAY 1.When inserting an MP3/WMA/JPEG/MPEG4 disc. Ex: When MP3 file is detected. 00:56 04:07 003/112 woman 1 new ton ..Touch the screen, it will display the following as below : when the parking brake is applied . 10-0:44:36 VOL- VOL+... -
Page 36: Specifications
Specification Supply Voltage: Current Consumption: Signal System: Discs Played: Audio Signal Output: Characteristics: RADIO Section: Frequency Coverage: Sensitivity (S/N = 30 dB): Frequency Coverage: Sensitivity (S/N = 20 dB): Frequency Coverage: Sensitivity (S/N = 20 dB): TFT Monitor: Monitor Screen Size: Number of Pixels: Color System: NOTE: Specifications and design are subject to modification, without notice,... -
Page 37: Trouble Shooting
Trouble Shooting Before going through the check list, check wiring connection. If any of the problems persist after check list has been made, consult your nearest service dealer. SYMPTOM The car ignition switch is No power The fuse is blown. There is already a disc in the player.
Need help?
Do you have a question about the BV7985 and is the answer not in the manual?
Questions and answers