Table of Contents
Advertisement
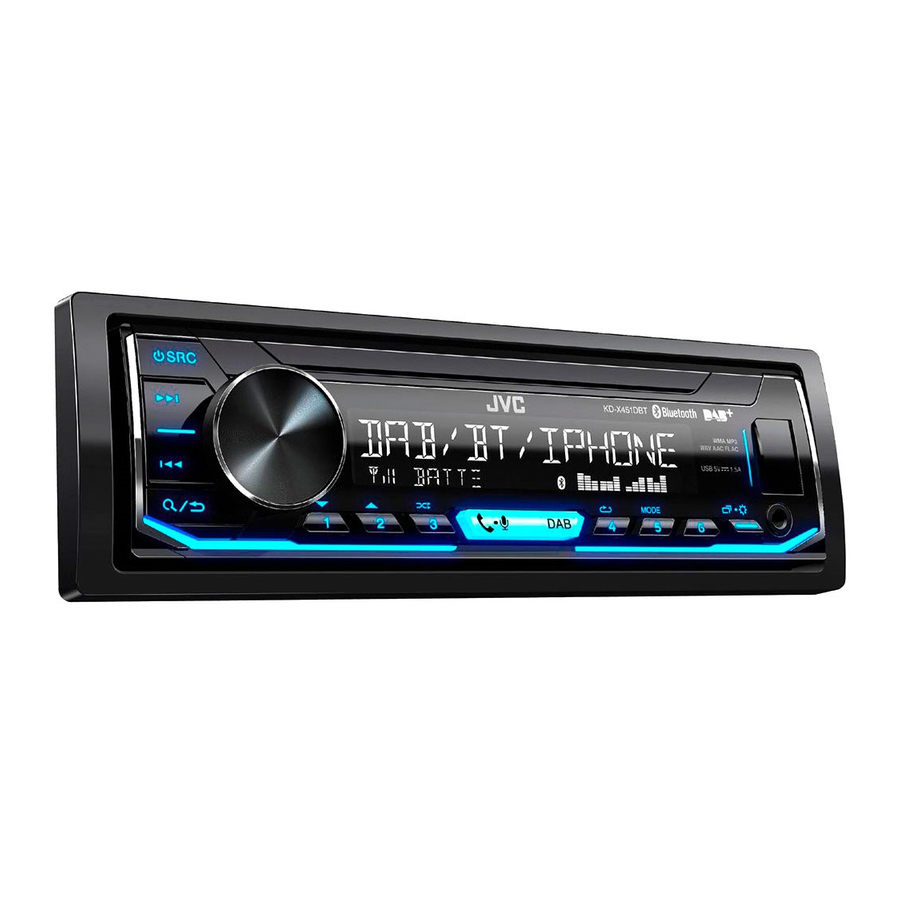
KD-X451DBT
DIGITAL MEDIA RECEIVER
INSTRUCTION MANUAL
RECEPTOR DE MEDIOS DIGITALES
MANUAL DE INSTRUCCIONES
DIGITALE MEDIAONTVANGER
GEBRUIKSAANWIJZING
RECEPTOR MÉDIA DIGITAL
MANUAL DE INSTRUÇÕES
JS_JVC_KD_X451DBT_E_C00.indd 1
JS_JVC_KD_X451DBT_E_C00.indd 1
Data Size:
B6L (182 mm x 128 mm)
Book Size:
B6L (182 mm x 128 mm)
ENGLISH
ESPAÑOL
NEDERLANDS
PORTUGUÊS
B5A-2135-00 [E]
9/6/2017 3:54:49 PM
9/6/2017 3:54:49 PM
Advertisement
Table of Contents

Related Manuals for JVC KD-X451DBT


Summary of Contents for JVC KD-X451DBT
- Page 1 ENGLISH ESPAÑOL NEDERLANDS PORTUGUÊS KD-X451DBT DIGITAL MEDIA RECEIVER INSTRUCTION MANUAL RECEPTOR DE MEDIOS DIGITALES MANUAL DE INSTRUCCIONES DIGITALE MEDIAONTVANGER GEBRUIKSAANWIJZING RECEPTOR MÉDIA DIGITAL MANUAL DE INSTRUÇÕES B5A-2135-00 [E] JS_JVC_KD_X451DBT_E_C00.indd 1 JS_JVC_KD_X451DBT_E_C00.indd 1 9/6/2017 3:54:49 PM 9/6/2017 3:54:49 PM Data Size:...
- Page 2 Informatie over het weggooien van elektrische en elektronische apparatuur en batterijen (particulieren) Dit symbool geeft aan dat gebruikte elektrische, elektronische producten en batterijen niet bij het normale huishoudelijke afval mogen. Lever deze producten in bij de aangewezen inzamelingspunten, waar ze gratis worden geaccepteerd en op de juiste manier worden verwerkt, teruggewonnen en hergebruikt.
- Page 3 For Israel JS_JVC_KD_X451DBT_E_C00.indd ii JS_JVC_KD_X451DBT_E_C00.indd ii 9/6/2017 3:54:50 PM 9/6/2017 3:54:50 PM Data Size: B6L (182 mm x 128 mm) Book Size: B6L (182 mm x 128 mm)
- Page 4 Par la présente, JVCKENWOOD déclare que l’équipement Deste modo, a JVCKENWOOD declara que o equipamento de 3-12, Moriya-cho, Kanagawa-ku, Yokohama-shi, Kanagawa, 221-0022, JAPAN radio « KD-X451DBT » est conforme à la directive rádio “KD-X451DBT” está em conformidade com a Diretiva EU Representative: 2014/53/UE.
- Page 5 JVCKENWOOD ovim izjavljuje da je radio oprema Русский Slovensko Käesolevaga JVCKENWOOD kinnitab, et JVCKENWOOD настоящим заявляет, “KD-X451DBT” u skladu s Direktivom 2014/53/EU. S tem JVCKENWOOD izjavlja, da je radijska oprema „KD-X451DBT“ raadiovarustus on vastavuses Cjeloviti tekst deklaracije Europske unije o что радиооборудование «KD-X451DBT»...
-
Page 6: Table Of Contents
CONTENTS BEFORE USE BEFORE USE IMPORTANT • To ensure proper use, please read through this manual before using this product. It is especially important BASICS that you read and observe Warning and Caution in this manual. GETTING STARTED • Please keep the manual in a safe and accessible place for future reference. 1 Cancel the demonstration Warning 2 Set the clock and date... -
Page 7: Basics
BASICS Faceplate Attach Volume knob Display window Detach How to reset Detach button Reset the unit within 5 seconds after detaching the faceplate. On the faceplate Turn on the power Press • Press and hold to turn off the power. Adjust the volume Turn the volume knob. -
Page 8: Getting Started
F/W UP Vxxx For details on how to update the firmware, visit Turn the volume knob to select [12H] or [24H], then press the knob. <http://www.jvc.net/cs/car/>. To set the date FACTORY RESET YES: Resets the settings to default (except the stored station). ;... -
Page 9: Digital Radio
DIGITAL RADIO GETTING STARTED About DAB (Digital Audio Broadcasting) CLOCK DAB is one of the digital radio broadcasting systems available today. It can deliver digital TIME SYNC ON: The clock time is automatically set using the quality sound without any annoying interference or signal distortion. Furthermore, it can carry Clock Time (CT) data in DAB signal. ;... - Page 10 DIGITAL RADIO Settings in memory Other settings You can store up to 18 services. Press and hold Turn the volume knob to select an item (see the following table), then press the knob. Store a service Repeat step until the desired item is selected/activated or follow While listening to a service...
-
Page 11: Analog Radio
ANALOG RADIO DIGITAL RADIO ON: Allows the unit to temporarily switch to Traffic Information if available (“TI” lights up). ; OFF: Cancels. PTY SEARCH Select a PTY code. (See the PTY code below.) If there is a station broadcasting a program of the same PTY code as you have selected, that station is tuned in. - Page 12 ANALOG RADIO Select a stored station MONO SET ON: Improves the FM reception, but the stereo effect will be lost. ; OFF: Cancels. Press one of the number buttons (1 to 6). (or) NEWS SET * ON: The unit will temporarily switch to News Programme if available. ; Press OFF: Cancels.
-
Page 13: Usb/Ipod/Android
When connecting an Android device, “Press [VIEW] to install JVC MUSIC PLAY APP” is shown. Follow the instructions USB cable * to install the application. You can also install the latest version of JVC MUSIC PLAY application on your Android device (commercially available) before connecting. - Page 14 (via USB input terminal). Preparation: • To return to the previous setting item, press Install the latest version of JVC Remote application on your device before • To cancel, press and hold connecting. For more information, visit <http://www.jvc.net/cs/car/>.
-
Page 15: Spotify
Spotify Preparation: On the faceplate Install the latest version of the Spotify application on your device (iPhone/ Repeat play * Press repeatedly. iPod touch), then create an account and log in to Spotify. • Select [ON] for [SPOTIFY SRC] in [SOURCE SELECT]. ( 4) ALL REPEAT, ONE REPEAT * , REPEAT OFF Random play *... -
Page 16: Bluetooth
BLUETOOTH® BLUETOOTH — Connection Pair and connect a Bluetooth device for the first time Supported Bluetooth profiles Press to turn on the unit. – Hands-Free Profile (HFP) Search and select “KD-X4 DBT” on the Bluetooth device. – Advanced Audio Distribution Profile (A2DP) “BT PAIRING”... - Page 17 • The unit answers the call automatically if [AUTO ANSWER] is set to a selected time. ( 14) – [AUTO PAIRING] is set to [ON]. ( 16) – JVC MUSIC PLAY application is installed on During a call: the Android device ( 9) and [AUTO MODE] is •...
- Page 18 BLUETOOTH® Default: XX On the faceplate MIC GAIN LEVEL –10 to LEVEL +10 (LEVEL –04): The sensitivity of the While having two active calls... microphone increases as the number increased. End current call and Press and hold or the volume knob. NR LEVEL LEVEL –05 to LEVEL+05 (LEVEL 00): Adjust the noise reduction activate held call level until the least noise is being heard during a phone conversation.
- Page 19 BLUETOOTH® Make a call using voice recognition Make a call Press and hold to activate the connected You can make a call from the call history, phonebook, or dialing the number. Call by phone. voice is also possible if your mobile phone has the feature. Speak the name of the contact you want to call or Press to enter Bluetooth mode.
- Page 20 BLUETOOTH® Bluetooth mode settings Bluetooth compatibility check mode Press and hold You can check the connectivity of the supported Turn the volume knob to select an item (see the following table), then press the knob. profile between the Bluetooth device and the unit. Repeat step until the desired item is selected/activated or follow the instructions •...
- Page 21 BLUETOOTH® The connectivity result flashes on the display. BLUETOOTH — Audio “PAIRING OK” and/or “HANDS-FREE OK” * and/ While in BT AUDIO source, you or “AUD.STREAM OK” * and/or “PBAP OK” * can connect to five Bluetooth Compatible audio devices and switch Compatible with Hands-Free Profile (HFP) between these five devices.
- Page 22 ANDROID CONNECTED: You are able to use the application using the Preparation: Android smartphone connected via Bluetooth. Install the latest version of JVC Remote application on your device before ANDROID NOT CONNECTED: No Android device is connected to use the connecting. For more information, visit <http://www.jvc.net/cs/car/>.
-
Page 23: Aux
BLUETOOTH® Internet radio via Bluetooth Use a portable audio player You can listen to Spotify on the iPhone/iPod touch/Android device via Connect a portable audio player (commercially available). Bluetooth on this unit. 3.5 mm stereo mini plug with “L” shaped • Make sure the USB input terminal is not connected to any device. connector (commercially available) Listen to Spotify Portable audio player... -
Page 24: Audio Settings
AUDIO SETTINGS PRO EQ Adjust your own sound settings. • The settings are stored to [USER]. • The settings made may affect the current settings of [EASY EQ]. 62.5HZ LEVEL –09 to LEVEL +09 (LEVEL 00): Adjusts the level to memorize for each source. (Before making an adjustment, select the source you want to adjust.) Press and hold ON: Turns on the extended bass. ;... - Page 25 AUDIO SETTINGS FADER (Not applicable when 3-way crossover is selected.) SOUND EFFECT POSITION R15 to POSITION F15 (POSITION 00): Adjusts the front and SPACE ENHANCE (Not applicable for FM/AM source and DAB source.) rear speaker output balance. SMALL/MEDIUM/LARGE: Virtually enhances the sound space. ; BALANCE * POSITION L15 to POSITION R15 (POSITION 00): Adjusts the left and OFF: Cancels.
- Page 26 AUDIO SETTINGS Speaker output settings Crossover settings [SPK/PRE OUT] (Applicable only if [X ' OVER TYPE ] is set to [2-WAY]) ( 21) Below are the available setting items for 2-way crossover and 3-way crossover. Select the output setting for the speakers [SPK/PRE OUT], based on the speaker connection method.
- Page 27 AUDIO SETTINGS 2-way crossover setting items 3-way crossover setting items SPEAKER SIZE SPEAKER SIZE FRONT SIZE 8CM/10CM/12CM/13CM/16CM/17CM/18CM/ TWEETER SMALL/MIDDLE/LARGE 4×6/5×7/6×8/6×9/7×10 MID RANGE 8CM/10CM/12CM/13CM/16CM/17CM/18CM/4×6/5×7/6×8/6×9 TWEETER SMALL/MIDDLE/LARGE/NONE (not connected) WOOFER * 16CM/20CM/25CM/30CM/38CM OVER/NONE (not connected) REAR * 8CM/10CM/12CM/13CM/16CM/17CM/18CM/4×6/5×7/6×8/ X ' OVER 6×9/7×10/NONE (not connected) TWEETER HPF FRQ 1KHZ/1.6KHZ/2.5KHZ/4KHZ/5KHZ/6.3KHZ/8KHZ/...
- Page 28 AUDIO SETTINGS Digital Time Alignment settings Determining the value for [DISTANCE] and [GAIN] of [DTA SETTINGS] If you specify the distance from the center of the Digital Time Alignment sets the delay time of the speaker output to currently set listening position to every speaker, create a more suitable environment for your vehicle.
-
Page 29: Display Settings
DISPLAY SETTINGS Zone identification for brightness setting Default: XX DISPLAY DIMMER Dim the illumination. OFF: Dimmer is turned off. Brightness changes to [DAY] setting. ON: Dimmer is turned on. Brightness changes to [NIGHT] setting. ( [BRIGHTNESS]) DIMMER TIME: Set the dimmer on and off time. 1 Turn the volume knob to adjust the [ON] time, then press the knob. -
Page 30: References
1 RED/GREEN/BLUE: Select a primary color. For: – Latest firmware updates and latest compatible item list 2 00 to 31: Select the level. – JVC original application Repeat steps 1 and 2 for all the primary colors. NIGHT COLOR – Any other latest information •... - Page 31 REFERENCES About iPod/iPhone About Bluetooth • Via USB input terminal: • Depending on the Bluetooth version of the device, some Bluetooth devices may not be able Made for to connect to this unit. – iPod touch (5th and 6th generation) •...
- Page 32 REFERENCES Change the display information Source name Display information Each time you press , the display information changes. Context title (Date/Clock) * SPOTIFY/SPOTIFY BT Song title (Artist) Song title • If the information is unavailable or not recorded, “NO TEXT”, “NO NAME”, or other Song title (Date/Clock) * (Album name) Playing Time (Date/...
-
Page 33: Troubleshooting
TROUBLESHOOTING Symptom Remedy Symptom Remedy Sound cannot be heard. • Adjust the volume to the optimum level. “UNSUPPORTED DEVICE” • Check whether the connected device is compatible with • Check the cords and connections. appears. this unit and ensure the file systems are in supported formats. - Page 34 The Spotify application is not connected properly, or user unit. ( 27) is not login. End the Spotify application and restart, then Cannot playback at • Make sure JVC MUSIC PLAY APP is installed on the log in to your Spotify account. [AUTO MODE]. Android device. ( 9) No Bluetooth device is •...
-
Page 35: Installation/Connection
INSTALLATION/CONNECTION TROUBLESHOOTING Warning Symptom Remedy • The unit can only be used with a 12 V DC power supply, negative ground. The connected Bluetooth • Check whether the connected Bluetooth audio player • Disconnect the battery’s negative terminal before wiring and mounting. audio player cannot be supports Audio/Video Remote Control Profile (AVRCP). - Page 36 INSTALLATION/CONNECTION Part list for installation Installing the unit (in-dash mounting) (A) Faceplate (B) Trim plate Do the required wiring. ( 33) (C) Mounting sleeve (D) Wiring harness Hook on the top side Orientate the trim Dashboard of plate as illustrated your car before fitting.
- Page 37 INSTALLATION/CONNECTION Wiring connection Front output/3-way crossover: Mid range output Rear/subwoofer output/3-way crossover: Woofer output DAB antenna jack (SMB connector) Microphone input jack When connecting to an external ( 12) amplifier, connect its ground wire to the Fuse (10 A) car’s chassis to avoid damaging the unit. Antenna input terminal (for FM/AM) Connecting the ISO connectors on some VW/ Audi or Opel (Vauxhall) automobiles...
-
Page 38: Specifications
SPECIFICATIONS DAB Frequency Range Band III 174.928 MHz — 239.200 MHz Frequency Response (±1 dB) 20 Hz — 20 kHz Sensitivity –100 dBm Signal-to-Noise Ratio (1 kHz) 105 dB Signal-to-Noise Ratio 80 dB Dynamic Range 90 dB Antenna Connector Type Channel Separation 85 dB Antenna Output Voltage 14.4 V (11 V – 16 V) MP3 Decode Compliant with MPEG-1/2 Audio Layer-3 Antenna Maximum Current... - Page 39 SPECIFICATIONS Maximum Output Power 50 W × 4 or 50 W × 2 + 50 W × 1 (Subwoofer = 4 Ω) Full Bandwidth Power 22 W × 4 (at less than 1 % THD) Speaker Impedance 4 Ω — 8 Ω Preout Level/Load (USB) 2 500 mV/10 kΩ load Preout Impedance ≤ 600 Ω Operating Voltage 14.4 V (10.5 V — 16 V allowable) Maximum Current Consumption 10 A Operating Temperature Range –10°C —...
- Page 40 EXPRESS OR IMPLIED WARRANTIES, INCLUDING, BUT NOT LIMITED TO, THE IMPLIED WARRANTIES OF use of such marks by JVC KENWOOD Corporation is under license. Other trademarks and trade names MERCHANTABILITY AND FITNESS FOR A PARTICULAR PURPOSE ARE DISCLAIMED. IN NO EVENT SHALL are those of their respective owners.
Need help?
Do you have a question about the KD-X451DBT and is the answer not in the manual?
Questions and answers
Radio zeigt dieses an: jvc kd-x451dbt protecting send service. können sie mir helfen?
what are the button deignations NO diagram of them