Table of Contents
Advertisement
Quick Links
Advertisement
Table of Contents

Related Manuals for P.L.LIGHT SYSTEMS HORTILED Top 2.0

Summary of Contents for P.L.LIGHT SYSTEMS HORTILED Top 2.0
- Page 1 HORTILED Top 2.0 ® User and installation manual...
-
Page 3: Table Of Contents
MANUAL FOR END USER AND INSTALLER The HortiLED Top 2.0 is referred to as the "luminaire" in this manual. Thank you for purchasing the HortiLED Top 2.0. This ® An electronic version of this guide is available at manual contains all the information needed to quickly familiarize yourself with the product. -
Page 4: Technical Specifications
6.3A 7.2A The HortiLED TOP 2.0 is designed as a 0-10V sourcing supply, and is compatible with most major environmental control systems that use 0-10V sinking protocols—including: Argus Control Systems, Hoogedoorn Growth Management and Wadsworth Control Systems. Dimming functionality is only enabled when the luminaire is used in combination with dimming versions of the power and/or daisy-chain cords. -
Page 5: Main Components
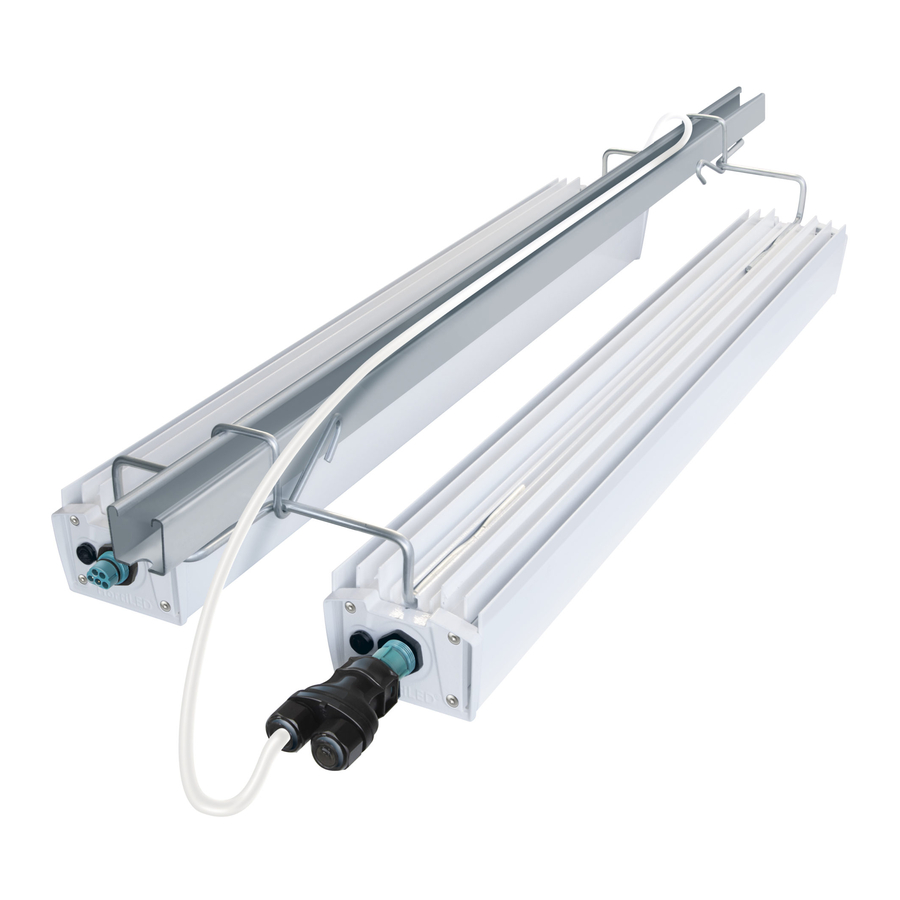
Light Distribution MAIN COMPONENTS The HortiLED Top 2.0 is available in a 120° distribution angle for effective penetrations of light into the crop and for exceptional uniformity across the canopy. non-dimming cord dimming cord Parts list Wieland Connector (Male) Glass Lens 120˚... -
Page 6: Precautions And Safety Instructions
PRECAUTIONARY MEASURES AND INSTALLING THE LUMINAIRE SAFETY INSTRUCTIONS STEP 1: MOUNT LUMINAIRE The luminaire can be mounted to the supporting WARNING structure in multiple ways, the most common options • Always adhere to the local and national building and are shown below: electrical codes when installing or using the luminaire. - Page 7 While still supporting the luminaire from below, OPTION B: Off-Set Bracket Mount push down on brackets until they clip firmly in Place the luminaire (with the glass lens facing place. down) on a cushioned surface to prevent damage. Insert the open ends of the supplied mounting brackets into the mounting channel on either WARNING end of the luminaire at a 45°...
-
Page 8: Non-Dimming: Standalone Applications
STEP 2: COMPLETE ELECTRICAL CONNECTION Place the luminaire (with the glass lens facing Non-dimming Applications — Standalone Units down) on a cushioned surface to prevent damage. power supply cord (non-dimming) Secure two M6 thread fasteners (not supplied) Turn off and lock out the branch circuit. directly to roof structure in desired mounting location. - Page 9 STEP 2: COMPLETE ELECTRICAL CONNECTION WARNING Non-dimming Applications — Daisy Chain ed Units Both connectors on the luminaire must be sealed Hortiled Top luminaires can be “daisy-chained” in series (either with a power cord, daisy-chain connector with connector cables (see chart on page 10 for cord or a cap) once installed.
- Page 10 Daisy-chain connector cables have a 5-pin Continue until daisy chain is complete. female connector on one end, and a 3-pin ATTENTION male connector on the other end. The 3-pin male connector on the cord must be installed Always ensure that cords are: into the corresponding 3-pin female “power •...
-
Page 11: Dimming: Standalone Applications
STEP 2: COMPLETE ELECTRICAL CONNECTION Dimming Applications — Standalone Units The dimming cord will come with a power cord already terminated to the line connections on the 5-pin female Y-connector. The connector will need to be disassembled in order to add the dimming connection. Strip the wires in the dimming cable, per the stripping requirements below. - Page 12 Push the 5-pin female Y-dim connector into the Switch on the branch curcuit. 5-pin male connector on the “power-in” end of the luminaire until firmly engaged. ATTENTION When luminaires are mounted consecutively, the distance between each luminaire must be a dimming minimum of 8.25 in.
-
Page 13: Dimming: Daisy-Chain Applications
STEP 2: COMPLETE ELECTRICAL CONNECTION Dimming Applications — Daisy Chain ed Units Hortiled Top luminaires can be “daisy-chained” in series (see chart on page 12 for maximum number of luminaires per daisy chain). Each string of luminaires will have a main supply cord and daisy-chain connector cords. -
Page 14: Initial Starting
INITIAL STARTING This product may not be discarded as household waste. Dispose of the equipment Switch on the branch cuircuit as a function test. See through a recycling centre that handles Section 6.1 Troubleshooting if the luminaire fails to light electronics and electrical appliances within Canada and the United States of America which use separate collection... -
Page 15: Troubleshooting
TROUBLESHOOTING WARNING Do not open or disassemble the product. Opening the product can prove hazardous and will void the warranty. ATTENTION! In the event that the product is defective or damaged, contact the dealer you purchased the luminaires from, or P.L. Light Systems directly. Never switch on a defective or damaged luminaire. Possible cause? What can you see? What does it mean? - Page 16 P.L. Light Systems 4800 Hinan Drive Beamsville, Ontario Canada, L0R 1B1 T: 905.563.4133 / 1.800.263.0213 (toll free) E: info@pllight.com www.pllight.com...
Need help?
Do you have a question about the HORTILED Top 2.0 and is the answer not in the manual?
Questions and answers