Advertisement
Quick Links
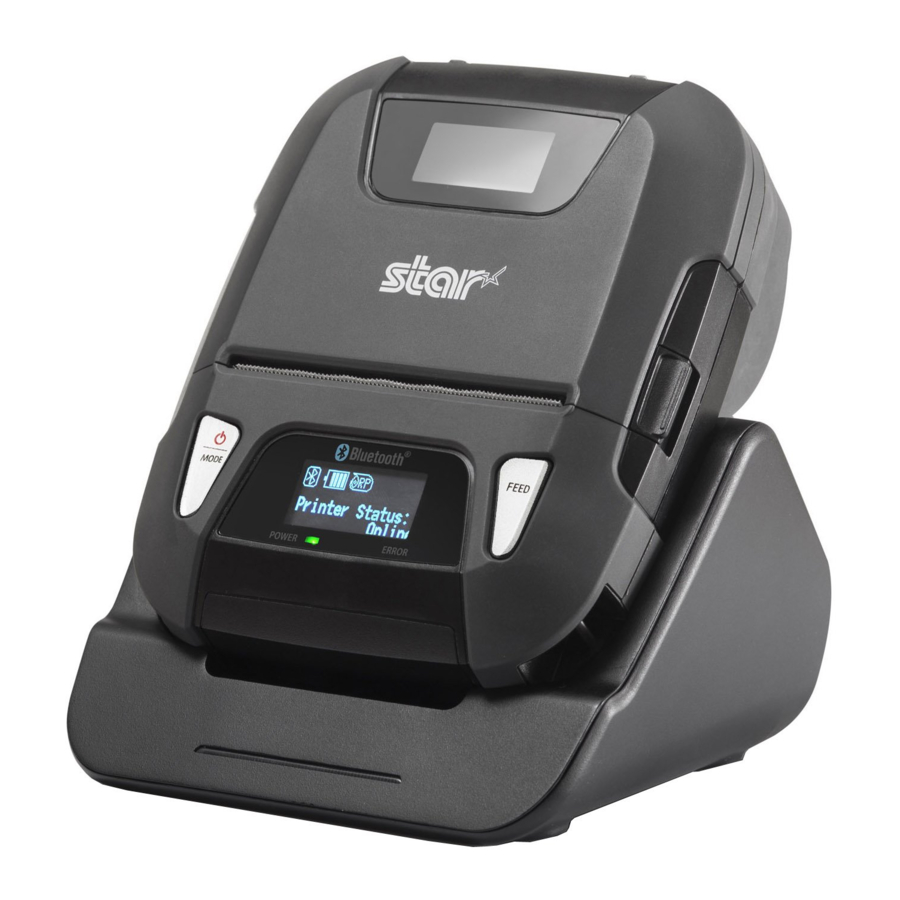
SM - L300 Char g in g Cradle Installation Guide
Information
This installation guide provides information required for
product installation and use. Read the following contents
carefully, before using this product.
Item
Specifications
Rated Voltage
5V
Input Voltage
4.75V - 5.25V
Input Current
1.0A MAX
Output No-load Voltage
4.75V - 5.25V
Output Current
1.0A MAX
Operating Condition
Storage Condition
-20
Charging Condition
(0
This charging cradle is just for charging. (It does not communicate to printer)
*1) When the printer is used in a low temperature environment ( less than 10
degrees), the battery's performance will be diminished, and the amount
of time that you can use the printer for may be reduced.
Components
Charging Cradle
Precautions for Installation and Handling
1. Do not short-circuit at the charging contact part using some
metal parts like clip. This might increase the risk of igniting
and emitting smoke.
2. Be careful to not enter water or any foreign objects into the
charging cradle. This might increase the risk of igniting and
emitting smoke.
3. Do not use this product in places where it is likely to come into
contact with water, oil or other liquids, or in places where there
is a lot of dust or lint in the environment.
4. Avoid placing in direct sunlight and/or locations subject to
excessive heat.
5. Subjecting the product to strong vibration and/or shock can
cause damage.
6. Do not install in unstable and/or non-level locations.
7. Secure sufficient space in the installation area to facilitate easy
usage.
8. Do not use or store in locations subject to high temperatures
and/or humidity.
9. Do not use or store in dusty locations.
Connecting the Cables
USB Cable
Charging via PC
Attach a ferrite core to the USB cable.
Refer to section 11.4 of Product Specifications.
USB Chager
USB charger
Mobile battery charger
USB cigar charger etc.
CAUTION
Use the communication port which certified by USB compliance or
USB charging port.
0
to 45
,20% to 85%RH
℃
℃
( No condensation )
to 60
, 5% to 90%RH
℃
℃
( No condensation )
0
to 45
,20% to 85%RH
( No condensation )
℃
℃
to 10
:Max0.5A
( Recommendation )
℃
℃
SM-L300 Charging Cradle Installation Guide
Installation Guide
( Printer Accessory )
USB Port
Ferrite Core
(Printer Accessory)
( USB chargers are sold separately. )
Battery Charging
Note: If battery is always charged even though it is full, the amount
of time that you can use the printer may be reduced.
*1
Charging Cradle LED display and charging status
LED
Red LED
Green LED
No LED
NOTE
1. The charging time may vary depending on the type of the charger.
Normally, it takes 5 to 6 hours to charge the battery pack.
2. LED display at full charge is different between the printer and the
charging cradle. Please check the LED on the printer to see whe-
ther the charging is complete.
WEEE (Waste Electrical and Electric Equipment)
This marking shown on the product or its literature, indicates that
it should not be disposed of with other household wastes at the
end of its working life.
To prevent possible harm to the environment or human health
from uncontrolled waste disposal, please separate this from other
types of wastes and recycle it responsibly to promote the sustainable reuse
of material resources.
Household users should contact either the retailer where they purchased
this product, or their local government office, for details of where and how
they can take this item for environmentally safe recycling. Business users
should contact their supplier and check the terms and conditions of the
purchase contract. This product should not be mixed with other commercial
wastes for disposal.
In accordance with the requirement of the EU commission,
The manufacturer is :
Star Micronics Co.,Ltd.
20-10 Nakayoshida, Suruga-ku, Shizuoka-shi,
Shizuoka 422-8654 Japan
The importer is :
Star Micronics Europe Ltd.
Star House, Peregrine Business Park, Gomm Road, High Wycombe,
Bucks. HP13 7DL, U.K.
This product complies with E-waste (Management) Rules, 2016.
1. Turn the printer off.
2. Slide the printer into the charging
cradle as shown.
3. Place the printer correctly on a
cradle.
4. Charging begins when the printer
is inserted.
5. When charging is complete, pull
out the printer to remove it.
Status
Charging
Fully Charged
Error / No Power
http://www.starmicronics.com/support/
Advertisement

Related Manuals for Star Micronics SM-L300

Summary of Contents for Star Micronics SM-L300
- Page 1 Red LED Charging Components Green LED Fully Charged SM-L300 Charging Cradle Installation Guide No LED Error / No Power NOTE 1. The charging time may vary depending on the type of the charger. Normally, it takes 5 to 6 hours to charge the battery pack.
- Page 2 SM-L300 チャージングクレードル設置ガイド im00581 はじめに ケーブルを接続する 本書には、本製品の設置および取り扱いに関する大切な情報が への 記載されています。本製品をお使いになる前に必ず本書をお読 ケーブル (プリンターの同梱品) 接続による充電 フェライトコアを ケーブルに取り付けて みください。 ご使用ください。 (製品仕様書の 「11.4項」 参照) 項 目 一 般 仕 様 定格電圧 入力電圧 4.75V-5.25V 入力電流 最大1.0A ポート 出力無負荷電圧 4.75V〜5.25V フェライトコア (プリンターの同梱品) 出力電流 最大 1.0A 充電器 ( 充電器は別売りです)...
Need help?
Do you have a question about the SM-L300 and is the answer not in the manual?
Questions and answers