Advertisement
Quick Links
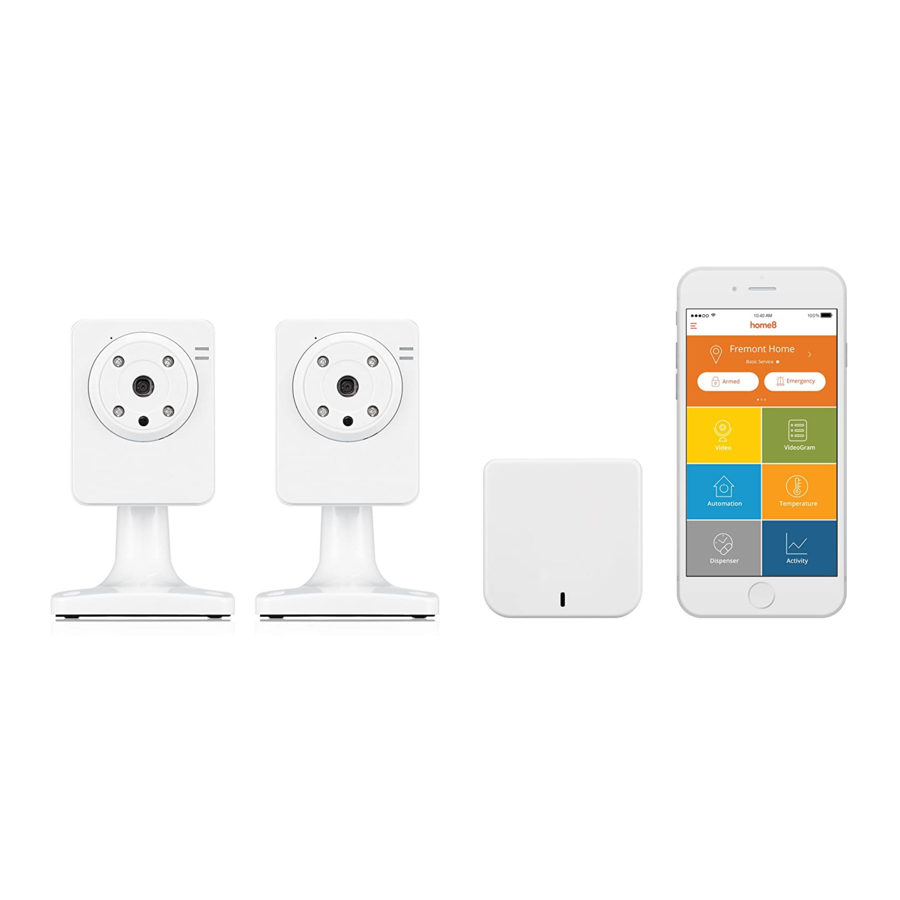
Quickstart Guide | H11011MC
Step 1 : Assemble your device and accessories
Unpack all of your hardware in the same room as your
home router.
Package Contents :
RF Dongle
1
16GB USB Thumbdrive
2
USB Hub
3
Mini-USB to USB Cable
4
System equipped with Oplink and Mivalife components.
Step A: a. Plug in
RF Dongle* and
1
the
USB Hub. Connect the USB Hub to the
3
Hub** using the
* The RF Dongle needs to be in a vertical position.
** The Security Hub needs to be placed on a 3-5ft (0.91-1.52m) high
platform for the best communication signal.
b. Connect
Ethernet Cable between the Security Hub
6
and your home router.
c. Plug in
Power Adapter.
7
Step B: a. During system activation, please keep the
Window sensors and
Security Hub. (less than 10ft away).
Step 3 : Cloud-Device Activation (CDA)
1 . Tap the "Activate Now" button.
(Activation process takes approximately 2 minutes)
Note : When the automatic activation process fails, the app will advise
you to scan the Security Hub QR code, located at the bottom of the
device to continue.
2. When you see "System is ready!", the system CDA is complete.
Quickstart Guide | H11011MC
8
Security Hub
Door + Window
5
8
Ethernet Cable
Sensor
6
Power Adapter
Wi-Fi Camera
7
9
16GB USB Thumbdrive to
2
Mini-USB Cable.
4
8
Wi-Fi Camera close to the
9
99200293MIG V2.1
Step B: b. Insert a battery into the Door + Window Sensor.
c. Connect the included power adapter to the Wi-Fi
Step 2 : Set up your Smartphone
Warning:
Before downloading the Home8 App, please disable the
Auto-Lock feature in your smartphone to avoid sleep mode
interruption.
Security
5
Next:
1 . Connect your Smartphone to a 2.4GHz Wi-Fi.
2. Download the Home8 app from the App Store or Google Play.
3. Follow the steps to create an account.
Door +
4. Follow the instructions for OPU/Shuttle Setup.
Note: 2.4GHz has better Wi-Fi transmission distance and is less prone to
interruption from the obstruction of solid objects.
Step 4 : Test the range of your device
Test the device signal range.
Door + Window Sensor
1 . Take the device to the room you want to use it in.
2. Open the battery cover of the Door + Window sensor.
3. If you get a notification that says your device has been tampered
with, it's in range. Place back the battery cover and mount the
device with the included screws or double-sided tape.
Wi-Fi Camera
Access your Home8 app, tap on the Video, wait until you see live
streaming video from the app, it is connected to the system.
Take the large piece (sensor) and push the small tab on the back plate
outward with slight force. Slide the back plate upward. Remove the back plate
and insert a battery into each Door + Window Sensor set.
Camera and plug it in.
Application Note:
1 . Please mount the Door + Window
Sensor in a vertical/upright position.
Placing either piece on the frame and
the other on the moving part is your
decision.
2. To create proper contact, ensure the
tops of the two pieces line up. The
spacer is used in situations where the
smaller piece needs to be elevated to
the larger piece to ensure proper
contact.
Fremont Home
Fremont Home
Basic Service
Video
VideoGram
Video
Automation
Temperature
Automation
Dispenser
Activity
Dispenser
Quickstart Guide | H11011MC
Basic Service
VideoGram
Temperature
Activity
Quickstart Guide | H11011MC
Advertisement

Related Manuals for HOME8 ActionView


Summary of Contents for HOME8 ActionView
- Page 1 2. When you see "System is ready!”, the system CDA is complete. Wi-Fi Camera Access your Home8 app, tap on the Video, wait until you see live streaming video from the app, it is connected to the system. Fremont Home...
- Page 2 Multiple location video monitoring and alarms can be aggregated to the home8 smartphone app, and you can swipe the mobile screen for more videos. For more IP camera options, please visit home8alarm.com/store...
Need help?
Do you have a question about the ActionView and is the answer not in the manual?
Questions and answers