
Subscribe to Our Youtube Channel
Related Manuals for PITT Drum


Summary of Contents for PITT Drum
- Page 1 Montagehandleiding Installation instructions Notice de montage Montageanleitung Instrucciones de instalación Manuale per l’utente Top Side INTS2019-1-PC/NL-EN-FR-DE-ES-IT EU...
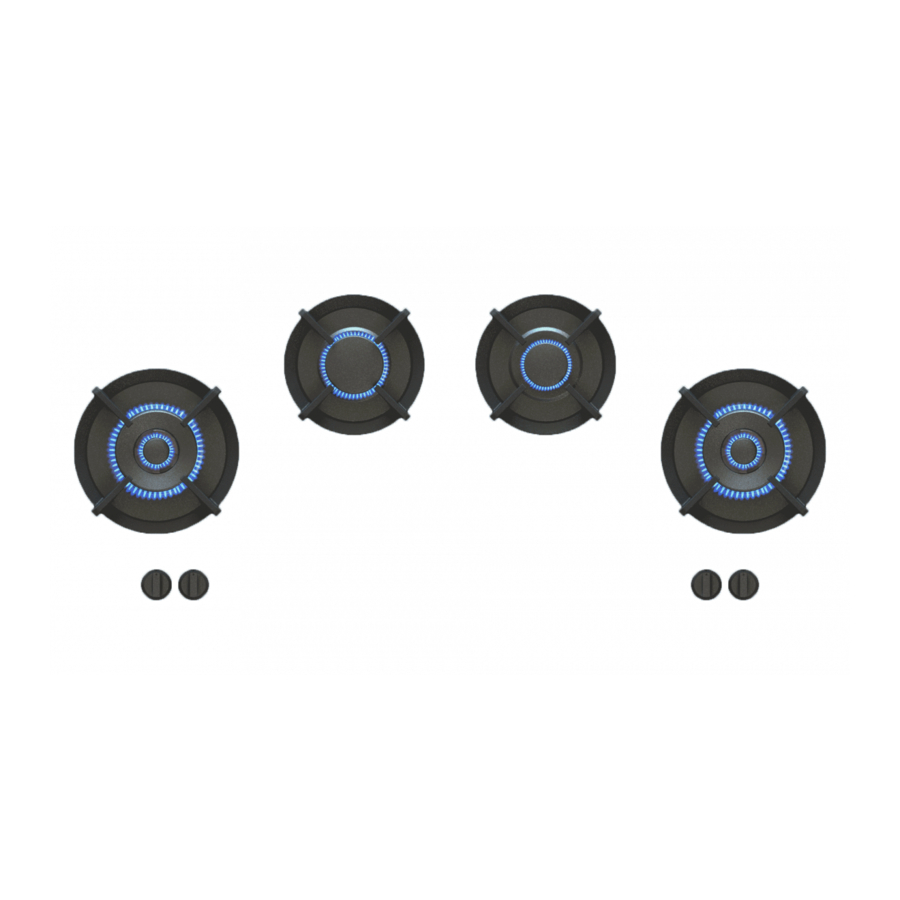
- Page 2 Montagehandleiding Top Side 1. Overzichtsweergave van de verschil- 2. Druk de afdichtingring voorzichtig 3. Overzicht van de stelschroeven. Deze 10. Let op: de plakstrip onder de afdich- 11. Schuif de unit voorzichtig in positie: 12. Druk de knoppen stevig op de lende onderdelen.
-
Page 3: Installation Instructions
– 4 mm. * Minimale afstand van 80 mm 3. Plaats de ondersteuningsbalk tussen de kast, en positioneer 4. Positioneer de ondersteuningsbalk zo, dat de stelschroeven, deze tegen de onderzijde van de PITT cooking unit. LET OP ®... - Page 4 Installation instructions Top Side 1. Overview of components. 10 Do not separate the protective film 11. Gently shift the unit into a position 2. Gently push the sealing ring around 3. Overview of the set screws, divided 12. Firmly press down the control knobs in 3 groups that will be referred to later from the adhesive strip for the next where all gas tab pins are in the center of...
- Page 5 ® connection and the electricity block are freely accessible. POSITIONING, SEE STEP 4. Notice de montage 6. Push the beams firmly against the underside of the PITT ® 5. Push the beams firmly against the underside of the PITT ®...
- Page 6 Notice de montage Top Side 10 Ne pas enlever la bande de protection 11. Déplacez doucement l’unité à la posi- 12. Positionnez toutes les coques 1. Présentation des composants 2. Pressez doucement la bague 3. Présentations des vis de réglage, pour les prochaines étapes! tion où...
- Page 7 * Distance minimale de 80 mm 3. Placez la latte de soutien entre l’armoire et positionnez-la 4. Mettez la barre de soutien de manière à ce que les vis de contre le dessous de l’appareil de cuisson PITT VÉRIFIEZ BIEN ®...
-
Page 8: Wichtiger Hinweis
Montageanleitung Top Side 1. Übersicht der Einzelteile. 10. Die Schutzfolie nicht trennen von dem 11. Das Gerät in Position verschieben, in 2. Den Dichtungsring vorsichtig über den 3. Übersicht über die Stellschrauben, in 12. Die Bedienknöpfe auf den GasHahn drei Gruppen aufgeteilt. Klebestreifen für die nächsten Schritte! der alle Gashahn Stifte in der Mitte der Rand der Hitzeschutzabdeckung drücken. - Page 9 Schrankinnenseite - 4 mm. * Mindestabstand von 80 mm 3. Setzen Sie den Stützbalken in den Schrank ein, und positio- 4. Positionieren Sie den Stützbalken so, dass die nieren Sie ihn an der Unterseite des PITT Kocheinheit. ACHTEN ® Stellschrauben, sowie der Gas- und Stromanschluss frei SIE AUF DIE POSITIONIERUNG, SIEHE SCHRITT 4! zugänglich sind.
- Page 10 Instrucciones de instalación Top Side 1. Vista general de los componentes del 10. No despegar la película protectora de 11. Deslice suavemente y sitúe la unidad 2. Monta suavemente el anillo de sellado 3. Vista general de los tornillos de fija- 12.
- Page 11 3. Ponga la barra de soporte en medio del armario y colóquela 4. Coloque la barra de soporte de forma que los tornillos de contra la parte inferior de la unidad PITT® cooking. ¡ATENCIÓN ajuste, la conexión de gas y el bloque eléctrico sean de libre AL POSICIONAMIENTO, VEA PASO 4! acceso.
- Page 12 Istruzioni di installazione Top Side 10. Le manopole di comando sono 11. Far scorrere delicatamente l’unità in Panoramica dei componenti. 2. Applicare con cura la guarnizione sul 3. Panoramica del set viti, divise in 3 12. Inserire le manopole premendo gruppi, a cui faremo riferimento nei composte da due parti: la manopola e una posizione dove tutti i perni delle...
- Page 13 * Distanza minima di 80 mm 3. Inserisci la barra di supporto nel mobile e posizionala contro 4. Posiziona la barra di supporto in modo che le viti di fis- la parte inferiore dell’unità di cottura PITT ATTENZIONE AL ®...
- Page 14 Note Note...
- Page 15 Made in Holland PITT cooking Nederland ® Damzigt 54 3454 PS De Meern The Netherlands T: +31 (0)88 088 70 70 F: +31 (0)88 088 70 71 www.pittcooking.com...
Need help?
Do you have a question about the Drum and is the answer not in the manual?
Questions and answers