Advertisement
Quick Links
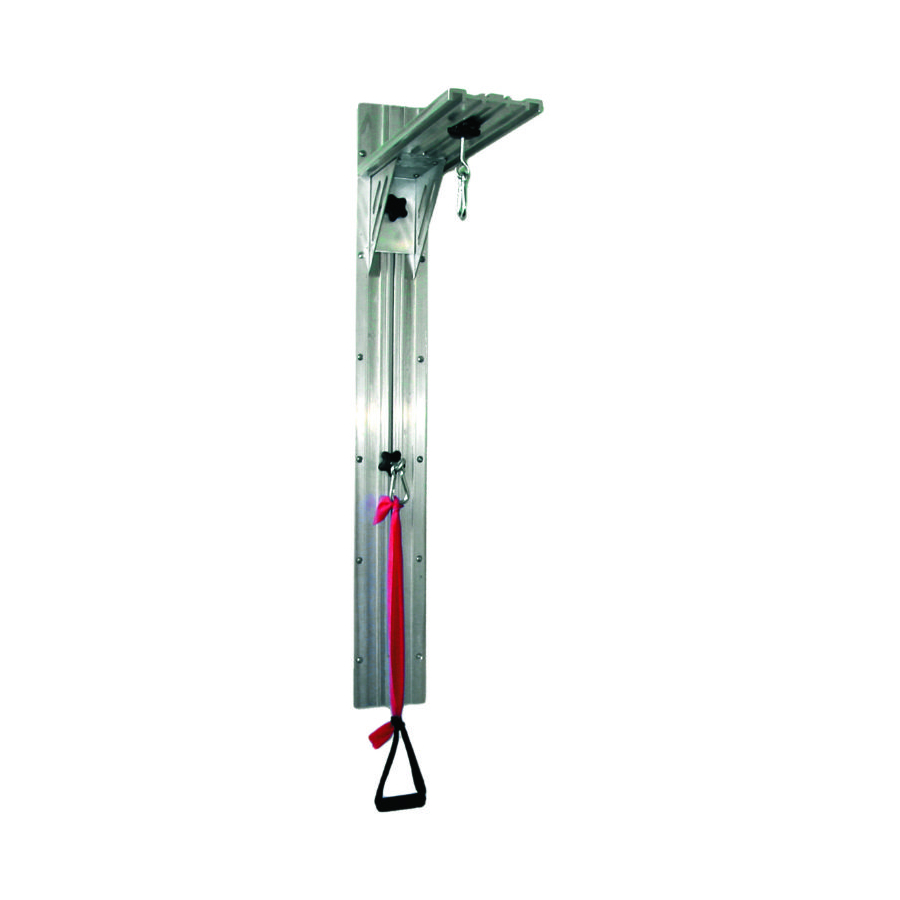
WalSlide™ Exercise Station Instructions
Assemble Vertical Wall Section (VWS)
Parts
A
C
B
direction. Place VWS in
between slider (C) and eyeslot
assembly (E, D). Hold (C)
in center groove on backside of the VWS and insert
(E,D) through center slit and screw it into (C). Tighten
finished assembly by turning the top of the eye bolt (D)
with pliers.
Lock pulley assembly into place along VWS by twisting
knob (E). Attach hook (A) by opening clasp and
inserting through eyeslot (D).
Use
To slide pulley up and down center guide, simply loosen hook assembly by twisting knob (E), move to desired
height, and tighten to lock in place. Slide (optional) HTS to desired height along WalSlide™ by loosening knob-
screw (B), sliding HTS to desired height, and tightening knob-screw. Attach band, tubing, tubing with handles,
bow-tie, or pulley system to eye-bolt. Perform exercise by stretching band or tubing. Vary length of band/tubing
or color to change resistance. Many exercises can be performed in the seated position. You can put a chair in
front WalSlide™ unit.
Installation
Attach to wall by using the screws appropriate to your wall type, through the
¼ inch holes along the edges of the WalSlide™.
Warning
• Consult with physician or therapist before starting a new exercise regime.
• If band/tubing is punctured or torn, do not use; replace immediately.
• Make sure unit is firmly attached to wall.
• Make sure horizontal overhead section is securely attached to vertical wall
section before each use.
• Do not hang from horizontal section.
Fabrication Enterprises Inc.
PO Box 1500
White Plains, NY 10602 (USA)
tel: 1-914-345-9300 • 800-431-2830
fax: 1-914-345-9800 • 800-634-5370
www.Fab-Ent.com
Your WalSlide™ consists of the Vertical Wall Section (VWS) and the parts above.
You might have the optional Horizontal Top Section (HTS) and accessories. Knob-
screw (B) only comes with HTS.
D
Thread eye bolt (D) through knob (E) until unit ½ inch of eyebolt sticks out
bottom of knob (see figure A). The knob and eye bolt must face the same
E
C
Figure a
eyeslot Assembly
E
Assemble and Attach optional
Horizontal Top Section (HTS)
D
(1) Follow the above assembly direction for the
VWS to attach the pulley assembly to the HTS.
(2) Attach HTS to VWS:
• Hold HTS flush against VWS by fitting the
triangle shaped bracket into grooves on front side
of VWS.
• Hold slider (C) in center groove on backside of
VWS.
• Insert knob-screw (B) through hole in triangle
shaped bracket, through center slit of VWS and
into slider (C).
• Slide HTS along center groove to desired height
and tighten by turning knob-screw (B).
Authorized CE representative:
RMS UK Ltd.
28 Trinity Road
Nailsea, Somerset BS48 4NU (UK)
ver 12/12
Advertisement

Related Manuals for Fabrication Enterprises WalSlide CanDo

Summary of Contents for Fabrication Enterprises WalSlide CanDo
- Page 1 ¼ inch holes along the edges of the WalSlide™. Warning • Consult with physician or therapist before starting a new exercise regime. • If band/tubing is punctured or torn, do not use; replace immediately. • Make sure unit is firmly attached to wall. • Make sure horizontal overhead section is securely attached to vertical wall section before each use. • Do not hang from horizontal section. Fabrication Enterprises Inc. Authorized CE representative: PO Box 1500 RMS UK Ltd. White Plains, NY 10602 (USA) 28 Trinity Road tel: 1-914-345-9300 • 800-431-2830 Nailsea, Somerset BS48 4NU (UK) ver 12/12 fax: 1-914-345-9800 •...
- Page 2 4 Foot CanDo® WalSlide™ 6 inches drawing scale: 1 inch = 6 inches 4.875” holes are 1/4 inch diameter, 1/2 inch from the sides drawing is approximate Complete WalSlide Exersie Stations and Accessories • 10-5096 Complete, 3 feet • 10-5097 Complete, 4 feet • 10-5098 Complete, 5 feet • 10-5099...