Axis P3343 Installation Manual
Drop ceiling mount
Hide thumbs
Also See for P3343:
- Installation manual (96 pages) ,
- User manual (57 pages) ,
- Datasheet (4 pages)

Related Manuals for Axis P3343


Summary of Contents for Axis P3343
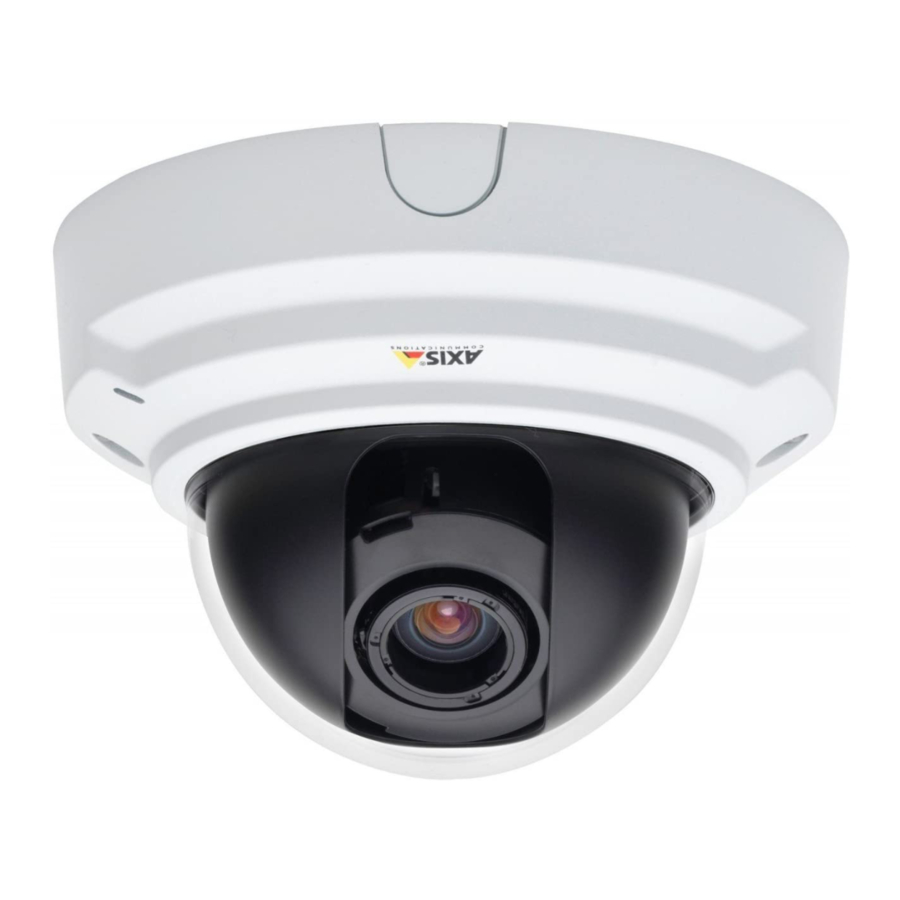
- Page 1 INSTALLATION GUIDE Drop Ceiling Mount AXIS P3343 Network Camera AXIS P3344 Network Camera...
-
Page 2: Equipment Modifications
If you are connected to the Internet, you can: • find answers to resolved problems in the FAQ database. Search by product, category, or phrases • report problems to Axis support by logging in to your private support area. -
Page 3: Installation Steps
This installation guide provides instructions for installing the drop ceiling mount for the AXIS P3343 and AXIS P3344 Network Cameras. Please read through the entire guide before proceeding with the installation. For all other aspects of using the Axis network camera, please see the Installation Guide and User’s Manual, available from www.axis.com/techsup Installation steps •... -
Page 4: Package Contents
Page 4 Drop Ceiling Mount Installation Guide Package contents • 1 Plastic dome cover • 1 Ceiling bracket • 1 Drop Ceiling Mount Installation Guide (this document) • 1 Hole template • 1 Safety wire & M4x6 screw Plastic dome cover Captive screws Ceiling bracket... -
Page 5: Specifications
Drop Ceiling Mount Installation Guide Page 5 Specifications • Total weight (camera plus ceiling mount): 0.9kg (2.0lb) • Plastic dome cover diameter: 191mm (7.5”) • Ceiling hole (ceiling bracket top) diameter: 162mm (6.4”) • Cable hole for gasket (2 holes) diameter: 21mm (0.8“) •... - Page 6 Page 6 Drop Ceiling Mount Installation Guide Install the Drop Ceiling Mount 1. If possible, remove the ceiling tile in which the drop ceiling mount is to be fitted. 2. Use the supplied template to mark the position for the 162mm (6.4”) hole in the ceiling tile. Remove the protective paper, fix to ceiling tile and cut around the template.
- Page 7 Drop Ceiling Mount Installation Guide Page 7 4. Remove the black foam gasket from the cable hole, fit it around the network cable, and replace the foam gasket and network cable back into the cable hole. Network cable Cable hole Foam gasket 5.
- Page 8 Page 8 Drop Ceiling Mount Installation Guide 6. Tighten the support arm screws using a torx 20 screwdriver head. Alternate screw holes (4x) Support arm screws Notes: • If your ceiling is not between 10-60mm (0.4” - 2.4”), or if you are not using the support arms, you can also secure the ceiling bracket into place using the four alternate screw holes.
- Page 9 Drop Ceiling Mount Installation Guide Page 9 7. Connect the network cable to the camera, and then snap the camera into place in the ceiling bracket. Network cable Camera holder 8. Using the camera’s installation guide, adjust the camera’s lens before you attach the plastic dome cover.
- Page 10 Page 10 Drop Ceiling Mount Installation Guide 10. Place the plastic dome cover over the ceiling bracket and tighten it into place using a resitorx 20 (i.e., tamper proof) screwdriver to tighten the captive screws into place. Captive screws...
-
Page 11: Procédure D'installation
Le présent guide fournit des instructions d’installation pour le kit de montage pour faux-plafond pour les caméras réseau AXIS P3343 et AXIS P3344. Veuillez lire l’intégralité du guide avant de procéder à l’installation. Pour toute autre instruction d’utilisation de la caméra réseau Axis, veuillez consulter le guide d’installation et le manuel de l’utilisateur, disponibles sur le site www.axis.com/techsup... -
Page 12: Contenu De L'emballage
Page 12 Guide d’installation du kit de montage pour faux-plafond Contenu de l’emballage • 1 Couvercle de dôme en plastique • 1 Support pour installation au plafond • 1 Guide d’installation du kit de montage pour faux-plafond (le présent document) •... -
Page 13: Caractéristiques Techniques
Guide d’installation du kit de montage pour faux-plafond Page 13 Caractéristiques techniques • Poids total (caméra + kit de montage) : 0,9 kg • Diamètre du couvercle de dôme en plastique : 191 mm • Diamètre du trou au plafond (partie supérieure du support) : 162 mm •... - Page 14 Page 14 Guide d’installation du kit de montage pour faux-plafond Installation du kit de montage pour faux-plafond 1. Retirez, si possible, la plaque de plafond sur laquelle le kit de montage doit être fixé. 2. Utilisez le modèle fourni pour marquer l’emplacement du trou de 162 mm dans la plaque de plafond.
- Page 15 Guide d’installation du kit de montage pour faux-plafond Page 15 4. Retirez le joint en mousse noir du trou de câble, disposez-le autour du câble réseau puis replacez le joint en mousse et le câble réseau dans le trou de câble. Câble réseau Trou de câble Joint en mousse...
- Page 16 Page 16 Guide d’installation du kit de montage pour faux-plafond 6. Serrez les vis du bras de support à l’aide d’un tournevis torx 20. Autres trous de vis (x4) Vis du bras de support Remarques : • Si l’épaisseur de votre plafond n’est pas comprise entre 10 et 60 mm ou si vous n’utilisez pas les bras de support, vous pouvez également fixer le support pour plafond à...
- Page 17 Guide d’installation du kit de montage pour faux-plafond Page 17 7. Connectez le câble réseau à la caméra, puis insérez la caméra dans le support. Câble réseau Support de caméra 8. Réglez l’objectif de la caméra en suivant les instructions de son guide d’installation, avant de fixer le couvercle du dôme en plastique.
- Page 18 Page 18 Guide d’installation du kit de montage pour faux-plafond 10. Placez le couvercle du dôme en plastique sur le support de montage et serrez-le à l’aide d’un tournevis resitorx 20 (pour vis inviolables) et de vis imperdables. imperdables...
- Page 19 Hängedecken Dieses Handbuch enthält Anweisungen zur Anbringung der Halterung für Hängedecken für die Netzwerk-Kameramodelle AXIS P3343 und AXIS P3344. Bitte lesen Sie zunächst das Handbuch vollständig durch, bevor Sie mit der Installation beginnen. Alle weiteren Hinweise zur Verwendung der Axis Netzwerk-Kamera finden Sie im Installationshandbuch und im Benutzerhandbuch, die auf unserer Website unter www.axis.com/...
- Page 20 Seite 20 Installationsanleitung für die Halterung für Hängedecken Paketinhalt • 1 Kunststoff-Kuppelabdeckung • 1 Deckenhalterung • 1 Installationsanleitung für die Halterung für Hängedecken (dieses Dokument) • 1 Kreisschablone • 1 Sicherheitsdraht und M4x6-Schraube Kunststoff-Kuppelabdeckung unverlierbare Schrauben Deckenhalterung (unten) 4 alternative Schraublöcher LOGOTYPE-Pfeil Schrauben für...
-
Page 21: Spezifikationen
Installationsanleitung für die Halterung für Hängedecken Seite 21 Spezifikationen • Gesamtgewicht (Kamera plus Deckenhalterung): 0,9 kg • Durchmesser der Kunststoff-Kuppelabdeckung: 191 mm • Durchmesser des Lochs in der Decke (Deckenhalterung oben): 162 mm • Durchmesser der Kabeldurchführung für Dichtung (2 Löcher): 21 mm •... - Page 22 Seite 22 Installationsanleitung für die Halterung für Hängedecken Installation der Halterung für Hängedecken 1. Wenn möglich, nehmen Sie die Deckenplatte ab, in der die Halterung für Hängedecken angebracht werden soll. 2. Markieren Sie mithilfe der mitgelieferten Schablone die Position des 162-mm-Lochs in der Deckenplatte.
- Page 23 Installationsanleitung für die Halterung für Hängedecken Seite 23 4. Entfernen Sie die schwarze Schaumstoffdichtung aus der Kabeldurchführung, legen Sie sie um das Netzwerkkabel und führen Sie sie zusammen mit dem Netzwerkkabel wieder in die Kabeldurchführung. Netzwerkkabel Kabeldurchführung Schaumstoffdichtung 5. Platzieren Sie die Deckenhalterung in der Decke und positionieren Sie die LOGOTYPE-Etiketten an der für das Logo auf der Kunststoffabdeckung vorgesehenen Stelle.
- Page 24 Seite 24 Installationsanleitung für die Halterung für Hängedecken 6. Ziehen Sie die Schrauben der Haltevorrichtung mit einem Torx-Schraubenzieher für Torx 20- Schrauben fest. 4 alternative Schraublöcher Schrauben für Haltevorrichtung Hinweise: • Wenn die Deckenstärke nicht 10 - 60 mm beträgt oder Sie die Haltevorrichtungen nicht verwenden, können Sie die Deckenhalterung mithilfe der vier alternativen Schraublöcher befestigen.
- Page 25 Installationsanleitung für die Halterung für Hängedecken Seite 25 Nachdem Sie die Schrauben der Haltevorrichtungen festgezogen haben, sind die Haltevorrichtungen entlang der Decke ausgeklappt und arretieren somit die Deckenhalterung an der richtigen Position. Haltevorrichtungen 7. Schließen Sie das Netzwerkkabel an der Kamera an und lassen Sie anschließend die Kamera in der Deckenhalterung einrasten.
- Page 26 Seite 26 Installationsanleitung für die Halterung für Hängedecken 9. Bringen Sie die schwarze Schutzabdeckung in der Kunststoff-Kuppelabdeckung durch Drehen in Übereinstimmung mit der Kameraposition. schwarze Schutzabdeckung 10. Platzieren Sie die Kunststoff-Kuppelabdeckung auf der Deckenhalterung und befestigen Sie sie, indem Sie die unverlierbaren Schrauben mit einem Resitorx 20-Schraubenzieher zur manipulationsgeschützten Befestigung festziehen.
-
Page 27: Procedura Di Installazione
Guida all'installazione della staffa per il montaggio su soffitti mobili Questa guida spiega come installare la staffa per il montaggio delle telecamere di rete AXIS P3343 e AXIS P3344 su un soffitto mobile. Leggere tutta la guida prima di procedere con l'installazione. - Page 28 Pagina 28 Guida all'installazione della staffa per il montaggio su soffitti mobili Contenuto della confezione • 1 Copertura a cupola in plastica • 1 Staffa per il montaggio su soffitto • 1 Guida all'installazione della staffa per il montaggio su soffitti mobili (questo documento) •...
-
Page 29: Dati Tecnici
Guida all'installazione della staffa per il montaggio su soffitti mobili Pagina 29 Dati tecnici • Peso totale (telecamera e supporto per il montaggio su soffitto): 0,9 kg • Diametro della copertura a cupola in plastica: 191 mm • Diametro del foro sul soffitto (lato superiore della staffa per il montaggio sul soffitto): 162 •... - Page 30 Pagina 30 Guida all'installazione della staffa per il montaggio su soffitti mobili Installazione della staffa per il montaggio su soffitti mobili 1. Se possibile, rimuovere dal soffitto mobile il pannello in cui deve essere installata la staffa per il montaggio. 2.
- Page 31 Guida all'installazione della staffa per il montaggio su soffitti mobili Pagina 31 4. Rimuovere la guarnizione nera in materiale espanso dal foro del cavo, posizionarla attorno al cavo di rete e reinserire la guarnizione in materiale espanso e il cavo di rete nel foro del cavo. Cavo di rete Foro del cavo Guarnizione in...
- Page 32 Pagina 32 Guida all'installazione della staffa per il montaggio su soffitti mobili 6. Serrare le viti del braccio di supporto utilizzando un cacciavite con testa Torx 20. Fori per le viti alternativi (4) Viti del braccio di supporto Note • Se lo spessore del soffitto non è compreso tra 10-60 mm o se non si utilizzano i bracci di supporto, è possibile anche fissare in posizione la staffa per il montaggio su soffitto utilizzando i quattro fori per le viti alternativi.
- Page 33 Guida all'installazione della staffa per il montaggio su soffitti mobili Pagina 33 Dopo il serraggio delle viti, è necessario stendere i bracci di supporto lungo il soffitto e fissarli ai lati della staffa di montaggio per sostenere e mantenere in posizione la staffa per il montaggio su soffitti mobili.
- Page 34 Pagina 34 Guida all'installazione della staffa per il montaggio su soffitti mobili 9. Ruotare lo schermo di protezione nero all'interno della copertura a cupola in plastica in modo da allinearlo con la posizione della telecamera. Schermo di protezione nero 10. Posizionare la copertura a cupola in plastica sopra alla staffa di montaggio e fissarla in posizione serrando le viti prigioniere con un cacciavite Resitorx 20 (a prova di manomissione).
-
Page 35: Pasos Para La Instalación
Esta guía de instalación incluye instrucciones para instalar el montaje del techo falso en las cámaras de red AXIS P3343 y AXIS P3344. Lea toda la guía antes de iniciar la instalación. Para otras cuestiones relacionadas con el uso de la cámara de red Axis, consulte la Guía de instalación y el Manual del usuario, disponibles en www.axis.com/techsup. -
Page 36: Contenido Del Paquete
Página 36 Guía de instalación del montaje del techo falso Contenido del paquete • 1 cubierta de plástico del domo • 1 soporte para el techo • 1 Guía de instalación del montaje del techo falso (este documento) • 1 plantilla del agujero •... -
Page 37: Especificaciones
Guía de instalación del montaje del techo falso Página 37 Especificaciones • Peso total (cámara y montaje del techo): 0,9 kg (2,0 libras) • Diámetro de la cubierta plástica del domo: 191 mm (7,5”) • Diámetro del agujero del techo (parte superior del soporte para el techo): 162 mm (6,4”) •... - Page 38 Página 38 Guía de instalación del montaje del techo falso Instalación del montaje del techo falso 1. Si es posible, retire el azulejo del techo donde se instalará el montaje del techo falso. 2. Utilice la plantilla proporcionada para marcar la posición del agujero de 162 mm (6,4”) en el azulejo.
- Page 39 Guía de instalación del montaje del techo falso Página 39 4. Retire la junta de espuma negra del agujero del cable, colóquela alrededor del cable de red y vuelva a colocar la junta de espuma y el cable de red en el agujero del cable. Cable de red Agujero del cable Junta de espuma...
- Page 40 Página 40 Guía de instalación del montaje del techo falso 6. Apriete los tornillos para el brazo de soporte con un destornillador torx 20. Agujeros para los tornillos alternativos (4x) Tornillos para el brazo de soporte Notas: • Si el techo no tiene entre 10 y 60 mm (0,4” y 2,4”) o si no utiliza los brazos de soporte, también puede fijar el soporte del techo en su sitio mediante los cuatro agujeros de los tornillos alternativos.
- Page 41 Guía de instalación del montaje del techo falso Página 41 Una vez apretados los tornillos para el brazo de soporte, los brazos de soporte se despliegan en el techo y se fijan con los laterales del soporte del techo para asegurar que el montaje del techo falso quede colocado y sujeto.
- Page 42 Página 42 Guía de instalación del montaje del techo falso 9. Gire el revestimiento de protección negro del interior de la cubierta de plástico del domo para que coincida con la posición de la cámara. Revestimiento de protección negro 10. Coloque la cubierta de plástico del domo por encima del soporte del techo y apriétela con un destornillador resitorx 20 (por ejemplo, de alta resistencia) para fijar los tornillos cautivos en su lugar.
- Page 44 Ver.1.00 Installation Guide Printed: August 2009 Drop Ceiling Mount for AXIS P3343/AXIS P3344 Part No. 36241 © Axis Communications AB, 2009...
Need help?
Do you have a question about the P3343 and is the answer not in the manual?
Questions and answers