Table of Contents
Advertisement
Quick Links
Advertisement
Table of Contents

Related Manuals for AxelTech OXYGEN 3000

Summary of Contents for AxelTech OXYGEN 3000
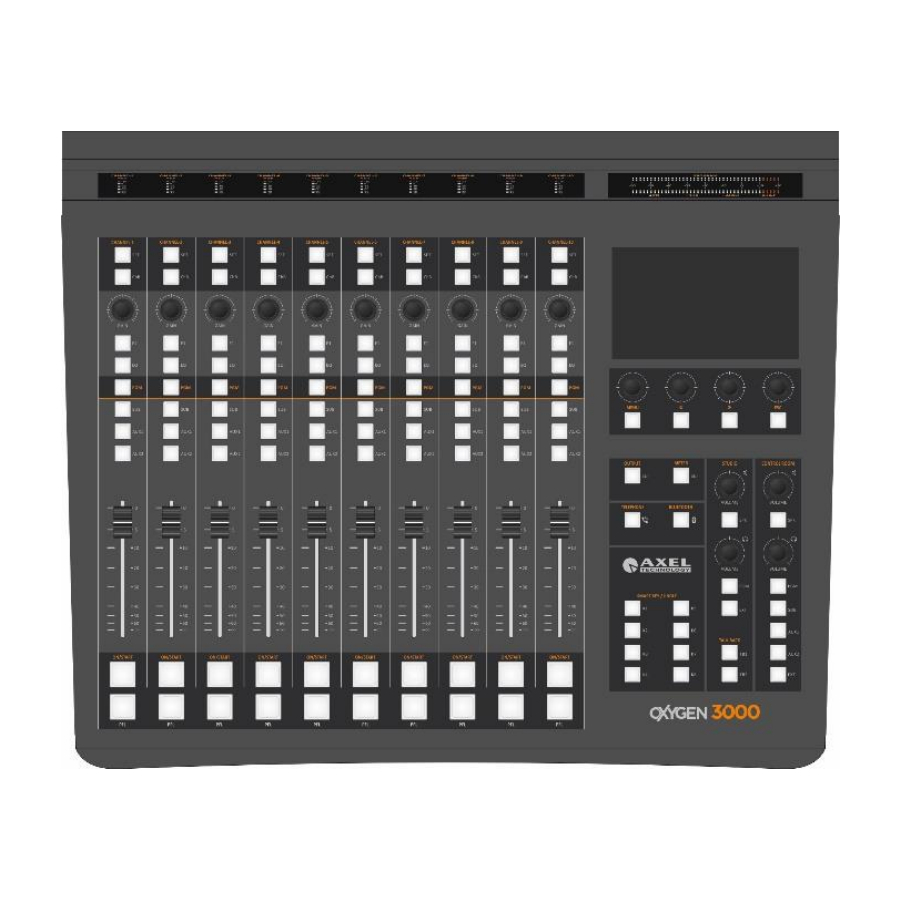
- Page 1 USER MANUAL OXYGEN 3000 WEB PAGE (Rev. 1.1) axeltechnology.com...
-
Page 2: Table Of Contents
Prodotto · User Manual · ENG SUMMARY SUMMARY INTRODUCTION HOME PAGE – DASHBOARD SETTINGS GENERAL 3.1.1 SERVICES 3.1.2 ACCESS CODE 3.1.3 COMMUNICATIONS 3.1.4 GPIO AUDIO 3.2.1 INPUTS 3.2.2 OUPUTS 3.2.3 SETTINGS SERVICE CONFIGURATION 4.1.1 SAVE YOUR CONFIGURATION 4.1.2 RESTORE YOUR CONFIGURATION 4.1.3 EXECUTE A FACTORY RESET SOFTWARE... -
Page 3: Introduction
In the Service section, on the other hand, all the operations related to saving, loading the console configuration and the factory reset functionality are collected. To enter in the Oxygen 3000 - Web Page, type the console IP Address in the URL bar of your browser as shown by the following picture:... -
Page 4: Home Page - Dashboard
Prodotto · User Manual · ENG 2. HOME PAGE – DASHBOARD The first Dashboard page is the following one: 3. SETTINGS The Settings section is divided in 2 subsections: GENERAL AUDIO In GENERAL section it will be possible to start the updating process, to change the console IP Address, to set the GPIO commands, the internal clock and the light and display configurations.. -
Page 5: General
Prodotto · User Manual · ENG GENERAL 3.1.1 SERVICES From the SERVICES section the user is able to enter in the SOFTWARE submenu. 3.1.1.1 SOFTWARE In the SOFTWARE subsection, type the desired customized name for the console in DESCRIPTION parameter. Below you can read for important information about your firmware currently installed and all of its sub-parts. -
Page 6: Access Code
Prodotto · User Manual · ENG 3.1.2 ACCESS CODE You can decide to lock the surface controls of your console. Set here the unlocking Code1 and Code2 to unlock it again. You can decide to lock the console after the minutes set in the parameter Unlock time. - Page 7 Prodotto · User Manual · ENG 3.1.3.1 TCP-IP From this subsection you can define the most general TCP-IP parameters: DHCP: Select YES to enable DHCP Select NO to disable DHCP MAC: this parameter shows you the console MAC Address. GATEWAY: type your gateway IP Address DNS: if available type your DNS IP Address 3.1.3.2 ADDRESS 1 / ADDRESS 2 You can assign 2 different IP Addresses to the console.
- Page 8 Prodotto · User Manual · ENG 3.1.3.3 TIME&DATE From this subsections you can define some parameters connected with the time&date displaying and format. If you are provided by NTP server, you can also type here its IP Address. Current Time: click on this field and type for the desired Current Date and Current Time. You can decide the Date format and the Time format in the following 2 parameters Date Format: The selectable Date formats are DD/MM/YYYY or MM/DD/YYYY Time Format: The selectable Time formats are 24h or AM/PM (12h)
- Page 9 Prodotto · User Manual · ENG 3.1.3.4 LIGHT&DISPLAY By this submenu you can manage all the lights of your buttons, VuMeters and the Display. GENERAL / BUTTON LIGHT Button dimmer: adjust the button dimmer of the console by moving the cursor to your left to decrease intensity, by moving the cursor to your right to increase it.
- Page 10 Prodotto · User Manual · ENG PFL color: Between availables, assign here the desired color for the PFL active state. Will be also affected by this change: active output BUSS for all the channels: PGM, SUB, AUX1, AUX2. active METER in MAIN section. Menu color: Between availables, assign here the desired color for the MENU button and all of the squared button below SETTINGS |GENERAL...
- Page 11 Prodotto · User Manual · ENG VuMeter dimmer: adjust the VuMeter dimmer of the console by moving the cursor to your left to decrease intensity, by moving the cursor to your right to increase it. 0 is the maximum VuMeter dimmer. All the console VuMeters will be affected by this change.
- Page 12 Prodotto · User Manual · ENG DISPLAY Display Dimmer: adjust the display dimmer of the console by moving the cursor to your left to decrease intensity, by moving the cursor to your right to increase it. 0 is the maximum dimmer light. LCD Layout: You can select between HOME 1 and HOME 2 HOME 1 (clock and station logo…) HOME 2 (CR counter, ST counter, clock and station logo…)
-
Page 13: Gpio
Prodotto · User Manual · ENG 3.1.4 GPIO From GPIO commands connected to the related pins. AUDIO This section is divided in INPUT, OUTPUT and SETTINGS: The parameters are exactly the same as explained into the Oxygen 3000 official manual SETTINGS |AUDIO... -
Page 14: Inputs
Prodotto · User Manual · ENG 3.2.1 INPUTS The Inputs are divided in the following subsections: 3.2.1.1 MIC/MONO THE MIC/MONO are divided in the following subsections: Available General Settings for Microphone input channels are: Phantom 48V Preamp Spk-cut Onair light Private mic TB mic F1 mode... - Page 15 Prodotto · User Manual · ENG Private mic TB mic F1 mode Gain Bal/pan AUX-1 AUX-2 Button light Fader bar light Custom name Phase You can set EQ parameters for the selected microphone by pressing: SETTINGS |AUDIO...
- Page 16 Prodotto · User Manual · ENG 3.2.1.2 STEREO The Stereo inputs are divided in following subsections: Available General Settings for STEREO input channels are: Mode Gain Bal/pan AUX-1 AUX-2 Button light Fader bar light Custom name Phase You can set EQ parameters for the selected Stero line by pressing: 3.2.1.3 DIGITAL The Digital inputs are divided in following subsections: Available General Settings for DIGITAL input channels are:...
- Page 17 Prodotto · User Manual · ENG 3.2.1.4 TEL/BT The Tel/Bt are divided in following subsections: Available General Settings for TELEPHONE channels are: F1 mode Gain TX Gain Bal/pan AUX-1 AUX-2 Button light Fader bar light Custom name Phase You can set EQ parameters for the selected TELEPHONE channels by pressing: 3.2.1.5 TONE GEN.
-
Page 18: Ouputs
Prodotto · User Manual · ENG 3.2.2 OUPUTS The Outputs are divided in the following subsections: 3.2.2.1 ANALOG The ANALOG outputs are divided in following subsections: Available General Settings for all of these Analog Output BUSS are: Source Mode Gain In AUX1, AUX2, REC1 and REC2 source menu you are free to decide to replicate another output BUSS. - Page 19 Prodotto · User Manual · ENG 3.2.2.3 MONITOR The MONITOR outputs are divided in following subsections: The SPEAKER monitors are divided in following subsections: Available General Settings for the SPK-CRM (Control Room Speakers) are: Talkback Max lev out Gain Cut-att-mode Source Mute Available General Settings for the SPK-STUDIO (Studio Speakers) are:...
-
Page 20: Settings
Prodotto · User Manual · ENG Talkback StudioSource Max lev out Gain Source Mute Available General Settings for the HDP-STUDIO (Studio Headphones) are: Linked mode Talkback Studio Source Max lev out Gain Source Mute 3.2.3 SETTINGS The Audio Settings are divided in the following subsections: 3.2.3.1 GENERAL Available Settings of the General section are: EXT. -
Page 21: Service Configuration
Prodotto · User Manual · ENG 3.2.3.2 VJ PRO MODE Available VJ PRO MODE settings are: CtrlSource Source1 Source2 BusSource 4. SERVICE CONFIGURATION The first Configuration section allows you to: save the whole console configuration in all of its parameters restore the whole console configuration previously saved execute a factory reset on the console SERVICE |CONFIGURATION... -
Page 22: Save Your Configuration
Prodotto · User Manual · ENG 4.1.1 SAVE YOUR CONFIGURATION The configuration file will be saved into the plugged USB key. The USB are the ones squared in the following picture: The configuration file will be saved into the console SD CARD. The configuration file will be saved locally in the current PC. -
Page 23: Restore Your Configuration
Prodotto · User Manual · ENG 4.1.2 RESTORE YOUR CONFIGURATION The console configuration will be restored from a configuration file saved into the plugged USB key. The USB are the ones squared in the following picture: Select between the available .json configuration files: The configuration file will be restored from a configuration file saved into the console SD CARD. -
Page 24: Execute A Factory Reset
Prodotto · User Manual · ENG The console configuration will be restored by one of the configuration files previously saved into the local computer that you are currently use. Select between the available .json configuration files. 4.1.3 EXECUTE A FACTORY RESET By pressing this button the console will be factory resetted. -
Page 25: Software
Prodotto · User Manual · ENG SOFTWARE The Software section allows you to know if there is a new firmware to be installed into the console. Press the CHECK RELEASE button: If a new available firmware is found, by pressing the following button you will proceed with its download and installation: You will see the progress bar of the download as shown by the following image: After the download will be completed, you will see the progress bar of the file preparing process:... -
Page 26: Remoter
Prodotto · User Manual · ENG REMOTER The Remoter section refers to the Oxygen Remoter application: By here you can know: the latest available software version which clients are currently connected to the remoter You can proceed downloading the latest OxygenRemoter.exe setup file from the following link: https://www.axeltechnology.com/Public/OxygenRemoter/OxygenRemoterSetup.exe and after the download you can proceed with its installation. -
Page 27: Logs
Prodotto · User Manual · ENG LOGS The Logs section allows you to read and download the desired date of the console Log: Press to open the calendar: After the desired date selection you can easily read all the console Logs as shows by the following picture: SERVICE |LOGS... -
Page 28: Web Login
Prodotto · User Manual · ENG Press: to export the Log File in .txt format: WEB LOGIN By this section you can change the Password for the Login to this Web Page. SERVICE |WEB LOGIN... -
Page 29: Logout
Prodotto · User Manual · ENG 5. LOGOUT By clicking on you will be able to LogOut from the browser WebPage. You will be automatically redirected to the Login page: 6. REDUCE MENU The left orange menu will be hided as shown in the following picture: To go back to the Web Page with the Extended Menu press LOGOUT |WEB LOGIN...
Need help?
Do you have a question about the OXYGEN 3000 and is the answer not in the manual?
Questions and answers