
Related Manuals for Onan MDKBH Series


Summary of Contents for Onan MDKBH Series
- Page 1 Caution: This document contains mixed page sizes (8.5 x 11 or 11 x 17), which may affect printing. Please adjust your printer settings according to the size of each page you wish to print.
- Page 2 Service Manual MDKBH 981-0542 11-05 Redistribution or publication of this document, by any means, is strictly prohibited.
- Page 3 California Proposition 65 Warning Diesel engine exhaust and some of its constituents are known to the State of California to cause cancer, birth defects, and other reproductive harm. Redistribution or publication of this document, by any means, is strictly prohibited.
-
Page 4: Table Of Contents
Table of Contents SECTION PAGE SAFETY PRECAUTIONS ........... . . 1. -
Page 5: Section Page
SECTION PAGE 4. PERIODIC MAINTENANCE ..........Periodic Maintenance Schedule . - Page 6 SECTION PAGE 9. GENSET CONTROL ............Overview .
-
Page 7: Safety Precautions
SAFETY PRECAUTIONS Thoroughly read the OPERATOR’S MANUAL • Do not work on the genset when mentally or before operating the genset. Safe operation and physically fatigued or after having consumed top performance can only be obtained when alcohol or drugs. equipment is operated and maintained proper- •... - Page 8 Parts Catalog. They must be pur- created by fuel spill, leak, etc. The owners and chased from Onan and be installed in accor- operators of the genset are solely responsible for dance with the genset Service Manual by operating the genset safely.
- Page 9 Redistribution or publication of this document, by any means, is strictly prohibited.
-
Page 10: Introduction
Critical Parts Index of the genset Parts Catalog. They must be pur- chased from Onan and be installed in accor- dance with the genset Service Manual by those who are trained and experienced in marine gen- set service. -
Page 11: Emissions Label
If you are unsure that the installation, use, maintenance or service of your genset is authorized, you should seek assistance from an approved Onan dealer. California genset users may use Table 1-1 as an aid in locating information about the California Air Re- sources Board requirements for emissions control. -
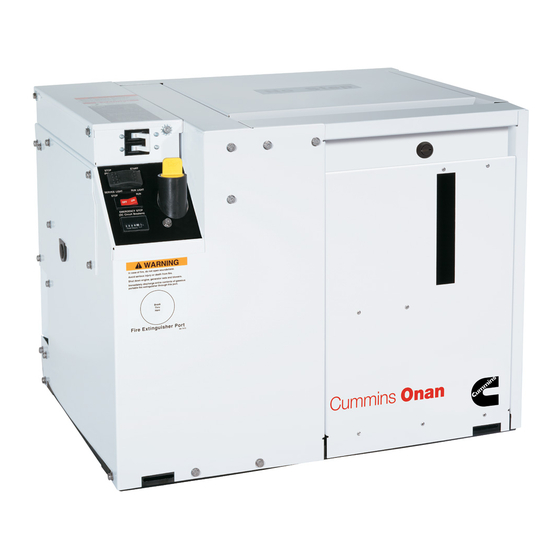
Page 12: Control Panels
2. Control Panels LOCAL CONTROL PANEL Emergency Stop Switch Refer to Figure 2-1. In an emergency push the switch to OFF. Push it to ON after all necessary repairs to the genset and Control Switch connected equipment have been made. Starting: Push and Hold START to preheat, crank Line Circuit Breaker and start the genset. -
Page 13: Digital Display
DIGITAL DISPLAY The e-Series Digital Display has an LCD screen with 4 navigation buttons, 3 status lamps, a START button and a STOP button (Figure 2-2). Turning On the Display Touch any button to turn on the Display, which will initialize and attempt to establish communications with the genset controller. - Page 14 Genset Status Screens Genset status is displayed on 3 screen pages (Fig- ure 2-3). GEN STATUS PG1 appears when the Dis- play is turned on. Press the double arrows [ ] to toggle between the 3 screen pages. The Status line on PG1 will display the word Prim- ing, Starting, Running, Stopped or Volt Adj.
- Page 15 Fault Screens If a fault shutdown occurs the ALARM status lamp will blink and the LCD screen will display the Fault Number, a description of the Fault and the hour in total genset running time when the Fault occurred (Figure 2-4). Refer to TABLE 11-1. TROUBLE- SHOOTING GENSET FAULTS to diagnose and correct the problem.
- Page 16 Displaying Last 5 Faults FROM FAULT, FIG. 2-3 To display any of the last five faults, press the FAULT button on any GEN STATUS screen. Then press the HIST button on the FAULT screen (Figure 2-5). The FAULT HISTORY screen will display the last Fault Number, a description of the Fault and the hour in total genset running time when the fault oc- curred.
- Page 17 Screen Brightness and Contrast FROM SCREEN, FIG. 2-3 To adjust the brightness and contrast of the LCD screen and status lamps, go to the SCREEN AD- JUST screen by pressing SCREEN on any GEN STATUS screen. Press NEXT to select Brightness or Contrast.
- Page 18 Configuring Genset Controller Using Digital Display A replacement controller must be configured to match the genset. See shutdown due to INVALID GENSET CONFIGURATION—CODE NO. 37 (p. 11-12). Also, the Digital Display hour meter should be reset to match the control panel hour me- ter (p.
- Page 19 Redistribution or publication of this document, by any means, is strictly prohibited.
-
Page 20: Operation
3. Operation FUEL Diesel fuel is combustible and can WARNING cause severe personal injury or death. Do not smoke near fuel tanks or fuel-burning equip- ment or in areas sharing ventilation with such equipment. Keep flames, sparks, pilot flames, electrical arcs and switches and all other sources of ignition well away. -
Page 21: Engine Coolant
ENGINE COOLANT Ethylene Glycol antifreeze is con- WARNING sidered toxic. Dispose of it according to local regulations for hazardous substances. Use the best quality ethylene glycol antifreeze solu- tion available. It should be fully formulated with rust inhibitors and coolant stabilizers. A 50/50 mixture of water and ethylene glycol is recommended to pro- °... -
Page 22: Pre-Start Checks
STARTING THE GENSET EXHAUST GAS IS DEADLY. WARNING engine exhaust contains carbon monoxide; an The genset can be started and stopped from the odorless, colorless, poisonous gas that can genset control panel or remote control panel. cause unconsciousness and death. Symptoms 1. -
Page 23: Loading The Genset
LOADING THE GENSET may be necessary to run fewer loads under such conditions. How much equipment load can be powered de- NO-LOAD OPERATION pends upon the genset power rating. The genset will shut down or its AC output circuit breakers will trip if Keep no-load operation to a minimum. -
Page 24: Resetting Line Circuit Breakers
RESETTING LINE CIRCUIT BREAKERS STORING THE GENSET Proper storage is essential for preserving top gen- If the genset line circuit breaker trips (p. 2-1), or a set performance and reliability when the genset circuit breaker in the power distribution panel of the cannot be exercised regularly and will be idle for boat, either a circuit shorted or too many loads were more than 120 days. - Page 25 Redistribution or publication of this document, by any means, is strictly prohibited.
-
Page 26: Periodic Maintenance
3. Check for slippage, cracking and wear (pump drive belt only). 4. There is no zinc anode to replace. 5. Must be performed by a trained and experienced mechanic (Onan Distributor/Dealer) in accordance with the engine and gen- set Service Manuals Redistribution or publication of this document, by any means, is strictly prohibited. -
Page 27: General Inspection
GENERAL INSPECTION vided (see Installation Manual), open the sea cock for the water drain hose. Inspect the genset before the first start of the day Check for and replace hoses that leak or are dam- and after every eight hours of operation. aged. -
Page 28: Checking Engine Oil Level
CHECKING ENGINE OIL LEVEL OIL FILL NECK WITH PLUG AND ATTACHED State and federal agencies have de- WARNING DIPSTICK termined that contact with used engine oil can cause cancer or reproductive toxicity. Avoid skin contact and breathing of vapors. Use rub- ber gloves and wash exposed skin. -
Page 29: Changing Engine Oil And Filter
4. Spin off the old oil filter with a filter wrench and wipe off the filter mounting surface. (A filter wrench is available from Onan.) Remove the old gasket if it does not come off with the filter. 5. Apply a film of oil to the filter gasket and partly fill the filter with oil so that it reaches engine parts sooner at startup. -
Page 30: Draining/Replacing The Fuel Filter
DRAINING/REPLACING THE FUEL FILTER 1. Disconnect the negative (–) cable at the battery to prevent the engine from starting and close any fuel supply and return valves. Accidental or remote starting can WARNING cause severe personal injury or death. Discon- 2. -
Page 31: Maintaining The Engine Cooling System
MAINTAINING THE ENGINE COOLING Draining and Cleaning Cooling System SYSTEM Accidental or remote starting can WARNING cause severe personal injury or death. Discon- Refer to Table 4-1 for scheduled maintenance. nect the negative (–) cable from the battery to prevent the engine from starting. Cooling System Overview The engine is cooled by a pressurized, closed-loop Hot coolant spray can cause severe... - Page 32 HEAT EXCHANGER RAW WATER PRESSURE CAP & HOSE BARB TO CONNECT EXHAUST CLEANOUT COVER FLOW SENSOR COOLANT FILL NECK COOLANT RECOVERY TANK MANIFOLD & COOLANT RESERVOIR THERMOSTAT COULD BE HOUSING CONNECTED TO EXTERNAL SIPHON BREAK AT THIS POINT—SEE COOLANT INSTALLATION PUMP MANUAL BLOCK...
- Page 33 Replacing the Thermostat Accidental or remote starting can WARNING cause severe personal injury or death. Discon- nect the negative (–) cable from the battery to prevent the engine from starting. Hot coolant spray can cause severe WARNING burns. Let the engine cool before releasing the pressure cap or removing the drain cap.
- Page 34 Adjusting V-Belt Tension REMOVE THESE 7 SCREWS Accidental or remote starting can WARNING cause severe personal injury or death. Discon- nect the negative (–) cable at the battery to pre- vent the engine from starting. See Table 4-1 for scheduled inspection or replace- ment.
- Page 35 Replacing the Raw Water Pump Impeller TENSION LOOSEN THESE Accidental or remote starting can WARNING ADJUSTING 2 HOSE CLAMPS cause severe personal injury or death. Discon- BOLT nect the negative (–) cable at the battery to pre- vent the engine from starting. See Table 4-1 for scheduled replacement.
- Page 36 6. Remove the 4 pump cover screws (Figure 4-9) and remove the impeller and O-ring. Use two pliers to grip vanes on opposite sides if the im- peller is difficult to remove. It will be necessary to check for and cleanout pieces of the impeller O-RING from the heat exchanger and exhaust elbow if vanes have broken off.
- Page 37 Heat Exchanger Accidental or remote starting can WARNING FLOW SENSOR MOUNTING BOLT cause severe personal injury or death. Discon- (1 OF 4) nect the negative (–) cable from the battery to prevent the engine from starting. The heat exchanger has a cleanout cover and drain plug (Figure 4-10).
-
Page 38: Enclosure, Drip Pan And Mounting System
5. Enclosure, Drip Pan and Mounting System ENCLOSURE PANELS Back Panel Accidental or remote starting can WARNING This panel is secured by 5 screws along its left edge cause severe personal injury or death. Before (looking from the back), 3 along its right edge and 7 removing a panel or access door, disconnect on its back. -
Page 39: Drip Pan And Mounting System
Right Side Panel AC Output Box The AC output box is secured by 4 screws in the The main panel is secured by 5 screws, 1 near each bottom of the box. The genset grounding screw and corner and 1 near the center. The smaller panel is standoff insulator are for generator, load and secured by 3 screws. - Page 40 FRONT ENGINE SUPPORT BRACKET VIBRATION ISOLATION MOUNT (3) GENERATOR END BELL SUPPORT BRACKET DRIP RUBBER NOISE PLUGS FIGURE 5-2. DRIP PAN AND MOUNTING SYSTEM Redistribution or publication of this document, by any means, is strictly prohibited.
- Page 41 Redistribution or publication of this document, by any means, is strictly prohibited.
-
Page 42: Engine And Accessories
6. Engine and Accessories MAJOR ENGINE SERVICE Accidental or remote starting can WARNING LINE UP THESE MARKS cause severe personal injury or death. Before WHEN SETTING FUEL removing a panel or access door, disconnect INJECTION TIMING the negative (–) cable at the battery to prevent the engine from starting. -
Page 43: Intake Resonator Assembly
INTAKE RESONATOR ASSEMBLY clamps will not touch the insulation on the access door. Accidental or remote starting can Before installing the second resonator cham- WARNING cause severe personal injury or death. Before ber, make sure that: removing a panel or access door, disconnect •... -
Page 44: Exhaust Manifold
EXHAUST MANIFOLD Figure 6-4 illustrates how the exhaust system is as- sembled. Remove the front and top access doors and the right side panel for access (Page 5-1). Accidental or remote starting can WARNING cause severe personal injury or death. Before removing a panel or access door, disconnect Use new manifold and mixer gaskets when re- the negative (–) cable at the battery to prevent... -
Page 45: Fuel System
FUEL SYSTEM 2. Prime the genset by pushing the Start/Stop switch to STOP(Prime) and holding it there for Accidental or remote starting can the duration of the test. It should not take longer WARNING cause severe personal injury or death. Before than 1-1/2 minutes to fill a 1 liter container removing a panel or access door, disconnect (2/3 liter per minute). -
Page 46: Glow Plugs
GLOW PLUGS check for B+ at relay socket terminal 30, for continuity between terminal 87 and the glow Refer to engine Workshop Manual 981-0533 when plugs and for continuity between terminal 86 replacing the glow plugs (Figure 6-5). and B– (ground). Clean and tighten connec- tions and replace wiring as necessary. - Page 47 GLOW PLUGS CLAMP WIRE HOSE FROM PUMP MUST CROSS OVER HOSE TO ENGINE FOR THE QUICK PUMP TEST, PINCH HERE TO CUT OFF BYPASS FUEL FLOW NOISE SEAL OIL FILL ASSEMBLY SUPPLY FUEL LIFT PUMP FUEL RETURN FILTER FIGURE 6-5. FUEL SYSTEM AND GLOW PLUGS Redistribution or publication of this document, by any means, is strictly prohibited.
-
Page 48: Governor Actuator
GOVERNOR ACTUATOR (against the fuel rack return spring). It should rotate smoothly about 1/2 inch (12 mm) and re- turn smoothly. Accidental or remote starting can WARNING cause severe personal injury or death. Before A. If the governor binds or catches, re- removing a panel or access door, disconnect move the bearing carrier and stator and the negative (–) cable at the battery to prevent... - Page 49 SPRING, SHAFT, BEARING ASSEMBLY SNAP-ON COVER SPRING LEG MUST CATCH UNDERNEATH FUEL RACK RETURN SPRING ROTOR RETAINER RING ROTOR BEARING CARRIER SHAFT TERMINALS BASE STATOR FIGURE 6-6. GOVERNOR ACTUATOR Redistribution or publication of this document, by any means, is strictly prohibited.
- Page 50 Assembly / Disassembly base when removing it from the engine for engine service. Stator: Remove the front and top access doors for Adjusting Speed Control Lever Stop access (Page 5-1). To remove the stator, discon- nect the 2 actuator leads and remove the cover and The actuator speed control lever stop (Figure 6-7) 4 stator screws.
- Page 51 Adjusting High-Idle Speed This adjustment involves operating WARNING the genset with enclosure panels removed that guard against moving parts that can cause se- vere personal injury or death. Keep your hands away from the engine belt and pulleys. High-idle speed must be checked each time an ac- tuator base is reinstalled or replaced.
-
Page 52: Starter
STARTER are available for rebuilding the starter. Torque the mounting bolts to 29 lb-ft (39 N-m). Make sure start- er B+ is connected to genset B+. Accidental or remote starting can WARNING cause severe personal injury or death. Before Negative (Ground) Connection removing a panel or access door, disconnect the negative (–) cable at the battery to prevent Before installing the starter motor, make sure that... - Page 53 Redistribution or publication of this document, by any means, is strictly prohibited.
-
Page 54: Generator Drive
7. Generator Drive OVERVIEW ible coupling. The generator pulley is center-bolted to the tapered end of the rotor shaft. The pulley must The engine drives the generator by means of a 6-rib be removed to remove the generator rotor from the “Poly-Vee”... -
Page 55: Inspecting Drive And Bearings
INSPECTING DRIVE AND BEARINGS with a wrench.) Torque the center bolt to 45 lb-ft (60 N-m) when reassembling. Make sure to install Accidental or remote starting can the generator inlet air duct before installing the WARNING cause severe personal injury or death. Before pulley. -
Page 56: Generator
8. Generator OVERVIEW rotor windings through the brush block assembly. The rotor shaft is supported on both ends by sealed These are 2-bearing, belt-driven, 2-pole revolving- ball bearings. The drive belt pulley and fan are cen- field generators with brushes and slip rings (Fig- ter-bolted to the tapered rotor ends. - Page 57 END BELL SUPPORT BRACKET BRUSH BLOCK ASSEMBLY END BELL WAVE WASHER O-RING SLIP RINGS ROTOR STATOR O-RING THROUGH BOLTS (4) LEADS, GROMMET & CLIP NOTE: ON SKEWED STATORS, (STRAIGHT STATOR SHOWN) THE THROUGHBOLTS MUST COME THROUGH THE SLOTTED RATHER THAN ROUND HOLES FOR PROPER ALIGNMENT OF END BELL, STATOR AND ADAPTER.
-
Page 58: Servicing The Generator
(Onan PN 524-0118 or equiva- 9. Pull the generator end bell straight out. Ex- lent). Make sure the wave washer is in place in the amine the bearing bore and replace the end bell end bell and that the O–rings are in place in the... -
Page 59: Servicing Brushes And Slip Rings
SERVICING BRUSHES AND SLIP RINGS Accidental or remote starting can WARNING cause severe personal injury or death. Before removing a panel or access door, disconnect the negative (–) cable at the battery to prevent the engine from starting. Brush Block Access: For access to the brush block, remove the enclosure front / left side assembly (Page 5-1) or swing it out to the left. -
Page 60: Testing Generator Windings
TESTING GENERATOR WINDINGS Testing the Rotor Field Resistance Test: Disconnect field leads F1 and F2 from controller A1 by pulling green connec- tor P3 and measure resistance across pins 7 and 8. If resistance is not as specified in Table 8-1: 1. - Page 61 Redistribution or publication of this document, by any means, is strictly prohibited.
-
Page 62: Genset Control
CAUTION for testing Control Board connections during troubleshooting can damage pin sockets by Up to three Onan e-Series Digital Displays (Fig- spreading or dislodging the contact wiper arms, ure 2-1) may be connected to the genset for opera- resulting in an open or intermittent electrical tor control and monitoring. - Page 63 CONTROL 2-POLE CIRCUIT SWITCH BREAKER EMERGENCY GENSET CONNECTORS SWITCH CB1 CONTROLLER P1, P2 & P3 RELAYS K3 AND K4 HOUR METER BATTERY CHARGING OPTIONAL NIM WITH REGULATOR A1 CONNECTOR HARNESS WITH HEAT SINK FIGURE 9-1. GENSET CONTROLLER AND ITS MOUNTING Redistribution or publication of this document, by any means, is strictly prohibited.
- Page 64 Major Functions of Genset Controller Stop: Touch the control switch to STOP (Prime). The controller: Initialization: Control initialization consists of 1. Disables output voltage. checking memory (RAM, ROM, EEPROM) and genset configuration. 2. Deenergizes the fuel lift pump and governor ac- tuator.
- Page 65 REMOTE DIGITAL DISPLAYS VESSEL AND/OR CONTROL SWITCHES MONITORING SYSTEM B+, DISPLAY, START/STOP, RS485 WAKE (B+)* NIM* J1939 OR SMART CRAFT CUSTOMER CONNECTIONS CONFIGURATION, HZ & DC VOLT SELECT ELECTRIC FUEL PUMP GOVERNOR ACTUATOR K4 (START) GENSET CONTROL BOARD K3 (GLOW PLUGS) ENGINE SENSORS ENGINE BATTERY CHARGER...
-
Page 66: Optional Remote Digital Display
OPTIONAL REMOTE DIGITAL DISPLAY Accidental or remote starting can WARNING AMBER cause severe personal injury or death. Before removing a panel or access door, disconnect GREEN the negative (–) cable at the battery to prevent the engine from starting. See DIGITAL DISPLAY (p. 2-2) regarding function. See Page A-1 for connections. -
Page 67: Engine Oil Pressure Sender (E1)
ENGINE OIL PRESSURE SENDER (E1) Accidental or remote starting can WARNING cause severe personal injury or death. Before removing a panel or access door, disconnect the negative (–) cable at the battery to prevent COOLANT the engine from starting. TEMPERATURE SENDER E2 The oil pressure sender is threaded into the side of the block (Figure 9-4). -
Page 68: High Exhaust Temperature Switch (S5)
HIGH EXHAUST TEMPERATURE SWITCH (S5) Accidental or remote starting can WARNING cause severe personal injury or death. Before removing a panel or access door, disconnect the negative (–) cable at the battery to prevent the engine from starting. The high exhaust temperature switch is bolted to the ear on the side of the water/exhaust mixer (Fig- RAW WATER ure 9-5). -
Page 69: Network Interface Module (Nim)
(Figure 9-6). Make sure a replacement board is configured the same as the old one. Note: For SAE J1939 applications, see Onan Publica- tion D-3315, Supported Messages on SAE J1939. This is the basis for the software interface between the genset controller and the remote boat monitor. -
Page 70: Reconfiguring Voltage And Frequency
10. Reconfiguring Voltage and Frequency “AS MANUFACTURED” BLOCK ON NAMEPLATE The genset was set up and adjusted at the factory for the frequency and voltage stated in the “As Manufactured” block on the nameplate (Fig- ure 10-1). If it is necessary to reconfigure voltage and/or frequency for the application, follow the in- structions in this section. -
Page 71: Adjusting Voltage Using Control Switch
ADJUSTING VOLTAGE USING CONTROL 2. Rapidly press START 6 times during the first minute after startup to put the genset controller SWITCH into voltage adjust mode. The green status 1. Start the genset and let voltage and frequency lamp will blink rapidly and the Display will indi- stabilize for 5 to 10 seconds. -
Page 72: Troubleshooting
11. Troubleshooting TROUBLESHOOTING WITH STATUS LAMP To troubleshoot the genset use TABLE 11-1. TROUBLESHOOTING GENSET FAULTS in con- If a fault shutdown occurs, the amber status lamp on junction with the e-Series Digital Display or blinking the control switch will repeatedly blink sets of 3, 4, 5 of the control switch status lamp. - Page 73 TABLE 11-1. TROUBLESHOOTING GENSET FAULTS @@@@ Some genset service procedures present hazards that can result in severe personal WARNING injury or death. Only trained and experienced service personnel with knowledge of fuels, electricity, and machinery hazards should perform genset service. See Safety Precautions. Accidental or remote starting can cause severe personal injury or death.
- Page 74 TABLE 11-1. TROUBLESHOOTING GENSET FAULTS (CONT.) @@@@ Some genset service procedures present hazards that can result in severe personal WARNING injury or death. Only trained and experienced service personnel with knowledge of fuels, electricity, and machinery hazards should perform genset service. See Safety Precautions. Accidental or remote starting can cause severe personal injury or death.
- Page 75 TABLE 11-1. TROUBLESHOOTING GENSET FAULTS (CONT.) @@@@ Some genset service procedures present hazards that can result in severe personal WARNING injury or death. Only trained and experienced service personnel with knowledge of fuels, electricity, and machinery hazards should perform genset service. See Safety Precautions. Accidental or remote starting can cause severe personal injury or death.
- Page 76 TABLE 11-1. TROUBLESHOOTING GENSET FAULTS (CONT.) @@@@ Some genset service procedures present hazards that can result in severe personal WARNING injury or death. Only trained and experienced service personnel with knowledge of fuels, electricity, and machinery hazards should perform genset service. See Safety Precautions. Accidental or remote starting can cause severe personal injury or death.
- Page 77 TABLE 11-1. TROUBLESHOOTING GENSET FAULTS (CONT.) @@@@ Some genset service procedures present hazards that can result in severe personal WARNING injury or death. Only trained and experienced service personnel with knowledge of fuels, electricity, and machinery hazards should perform genset service. See Safety Precautions. Accidental or remote starting can cause severe personal injury or death.
- Page 78 TABLE 11-1. TROUBLESHOOTING GENSET FAULTS (CONT.) @@@@ Some genset service procedures present hazards that can result in severe personal WARNING injury or death. Only trained and experienced service personnel with knowledge of fuels, electricity, and machinery hazards should perform genset service. See Safety Precautions. Accidental or remote starting can cause severe personal injury or death.
- Page 79 TABLE 11-1. TROUBLESHOOTING GENSET FAULTS (CONT.) @@@@ Some genset service procedures present hazards that can result in severe personal WARNING injury or death. Only trained and experienced service personnel with knowledge of fuels, electricity, and machinery hazards should perform genset service. See Safety Precautions. Accidental or remote starting can cause severe personal injury or death.
- Page 80 TABLE 11-1. TROUBLESHOOTING GENSET FAULTS (CONT.) @@@@ Some genset service procedures present hazards that can result in severe personal WARNING injury or death. Only trained and experienced service personnel with knowledge of fuels, electricity, and machinery hazards should perform genset service. See Safety Precautions. Accidental or remote starting can cause severe personal injury or death.
- Page 81 TABLE 11-1. TROUBLESHOOTING GENSET FAULTS (CONT.) @@@@ Some genset service procedures present hazards that can result in severe personal WARNING injury or death. Only trained and experienced service personnel with knowledge of fuels, electricity, and machinery hazards should perform genset service. See Safety Precautions. Accidental or remote starting can cause severe personal injury or death.
- Page 82 TABLE 11-1. TROUBLESHOOTING GENSET FAULTS (CONT.) @@@@ Some genset service procedures present hazards that can result in severe personal WARNING injury or death. Only trained and experienced service personnel with knowledge of fuels, electricity, and machinery hazards should perform genset service. See Safety Precautions. Accidental or remote starting can cause severe personal injury or death.
- Page 83 TABLE 11-1. TROUBLESHOOTING GENSET FAULTS (CONT.) @@@@ Some genset service procedures present hazards that can result in severe personal WARNING injury or death. Only trained and experienced service personnel with knowledge of fuels, electricity, and machinery hazards should perform genset service. See Safety Precautions. Accidental or remote starting can cause severe personal injury or death.
- Page 84 TABLE 11-1. TROUBLESHOOTING GENSET FAULTS (CONT.) @@@@ Some genset service procedures present hazards that can result in severe personal WARNING injury or death. Only trained and experienced service personnel with knowledge of fuels, electricity, and machinery hazards should perform genset service. See Safety Precautions. Accidental or remote starting can cause severe personal injury or death.
- Page 85 TABLE 11-1. TROUBLESHOOTING GENSET FAULTS (CONT.) @@@@ Some genset service procedures present hazards that can result in severe personal WARNING injury or death. Only trained and experienced service personnel with knowledge of fuels, electricity, and machinery hazards should perform genset service. See Safety Precautions. Accidental or remote starting can cause severe personal injury or death.
-
Page 86: Specifications
12. Specifications GENERATOR: 2-Bearing, 2-Pole Rotating Field, Microprocessor Regulated. Rating on Genset Nameplate FUEL CONSUMPTION: 60 Hz: Full Load 0.60 gph (2.3 liter/hr) Half Load 0.35 gph (1.3 liter/hr) 50 Hz: Full Load 0.50 gph (1.9 liter/hr) Half Load 0.29 gph (1.1 liter/hr) Engine/Generator Speed: 60 Hz 2900/3600 rpm... - Page 87 Redistribution or publication of this document, by any means, is strictly prohibited.
-
Page 88: Wiring Diagram
0098-8371 WIRING DIAGRAM Redistribution or publication of this document, by any means, is strictly prohibited. -
Page 89: Generator Connection Diagram
0098-8374 GENERATOR CONNECTION DIAGRAM Redistribution or publication of this document, by any means, is strictly prohibited. -
Page 90: Control Wiring Harness
338-4625 CONTROL WIRING HARNESS Redistribution or publication of this document, by any means, is strictly prohibited.
Need help?
Do you have a question about the MDKBH Series and is the answer not in the manual?
Questions and answers