Advertisement
Quick Links
Thank you for choosing eLEDing!
This product is designed to provide long lasting superior illumination by using environment-friendly Solar-Hybrid, Lithium-based energy
technologies. US, European, China and international patents granted and pending worldwide. All rights reserved. Users must read this manual
before installation, comply with local standard and regulations of construction & electrical/electronic projects, follow the safety guidelines to
prevent any possible accidents, incident and/or injuries. Consult experienced contractor/installer and electrical technicians for assistance.
One Step Setup (Just 1 Click!)
Recommend
to charge 1
day before
Push
installation,
switch in OFF
Switch
position
SMART lighting profile
(Fig.2 & 3)
Recommend for areas
with busy traffic and
sufficient sunlight all
year round.
Intelligence Power Management (IPM) system : monitor & adjust power consumption
Switch to
If low power
AUTO Mode
(20% left)
Lighting Profile Setup & Battery Change: open the bottom cover (Fig. 2)
Battery change: unplug the old battery and replace it with the new battery. Noted that the battery plug only fit in one way.
VR1: adjust dimming brightness (can be adjusted from 5-50% of max brightness, turn clockwise to increase brightness)
VR2: adjust sensor range (can be adjusted from 10 - 50 ft, turn counterclockwise to decrease sensitivity range)
Notes: increasing dimming brightness & sensitivity may reduce the length of illumination period, especially during winter time
Installation Guidelines
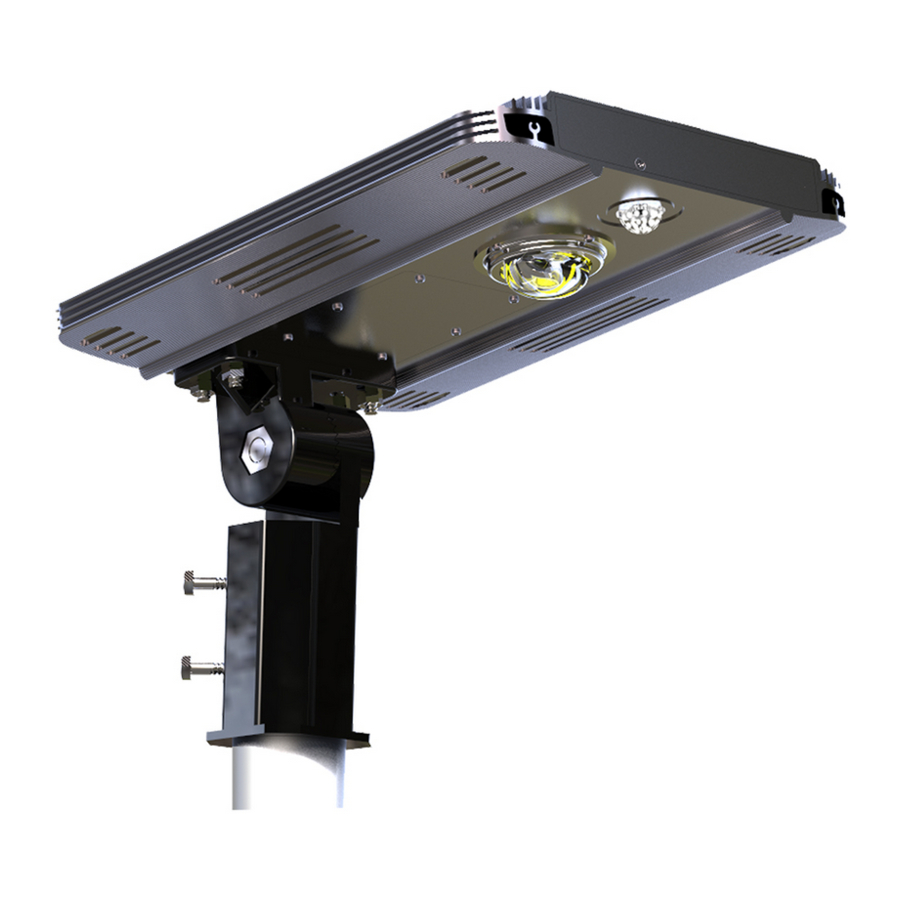
1. Securely mount the unit on the light pole or wall, adjust the light head direction and angles based on your need (Fig.4)
2. Solar Panel must be mounted in a non-obstructed position that allows at least 5-6 hours direct sunlight all year round. For most of the North
America projects, adjust the tilt of the solar panel at 25°- 45° degrees based on your actual location. If you are close to equator's location, a flat
installation (light head is parallel to the ground) will be enough.
The solar panel can be pointed to east, west and south but definitely not to north.
For northern hemisphere installations, a south-facing position is best and visa-versa for southern hemisphere installation.
Optional AUX DC power sources can be used as back-up power source or charging enhancement device, to give the light a quick charge before
installation or during low power due to critical weather (Fig. 1).
3. Solar Panel Maintenance: Use soft, wet cloth to clean the solar panel periodically (at least once a one year) to avoid energy output reduction
resulted from accumulated dust. Clean accumulated snow ASAP during snowing season.
Fig.1
ON/OFF
AUX for:
External solar panel
USB Adaptor 12-24V, 2A
Power Bank
Fig.4
light
5-min walk
5-10 sec
blink
test mode
Light On
once
If
Yes
Light ON
Motion
No
Light OFF
Default
Full brightness
Setting
After 3 hours
Dimming brightness
Motion
until dawn
detected
Yes
ON with full
Motion
brightness
No
Light OFF
Fig.3
EE Systems Group Inc.
12346 Valley Blvd, #A, El Monte, CA 91732 Phone Number: 1-877-579-3889 Fax: 626-452-9194 Web: www.eleding.com/www.eesgi.com
Yes
Light
Daytime?
OFF
5 min
No
When
nighttime
Light turns ON
comes
If change lighting profile
SMART 1 Mode
Put Jumper 2 at Close
position
Motion
come to full
detected
brightness
NO
Critical Reserve
Full Charge
(10% left)
Yes
Back to SMART Mode
VR2: adjust sensor range
eLEDing
/ EE800W-SH series
®
Solar Powered LED Smart Street/Parking Lot Lighting
One Year Limited Warranty
EESGI guarantees this product to be free from defects in material &
workmanship for (1) year.
This warranty does not apply to damage from misuse or incorrect installation/
connection.
This warranty does not cover accessories, bulbs, batteries, high voltage
accidents, alterations, unauthorized use or repair, neglect, misuse, abuse,
damages or defects resulting from normal wear and tear (including chips,
fading scratches, abrasions or discoloration due to usage or sun exposure), or
failure to follow instructions for care and maintenance, fire, flood, and Acts of
God.
This warranty does not include liability for incidental or consequential
damages.
EESGI is not responsible for any damages in excess of the retail purchase
price of the product under any circumstances. The consumer is responsible
for the installation of, removal of, and reinstallation of the product.
SMART 2 Mode
Recommend for
high-latitude, long
winter areas with
Dusk to Dawn with
low traffic.
dimming brightness
Yes
ON with half
Motion
brightness
No
Light OFF
VR1: adjust dimming brightness
(Patented Technology)
After Full
Charge
Fig.2
Select lighting
profile:
unscrew &
remove the
cover, use
jumper 2
Battery
Connect
Plug
Rev: 04192018
Advertisement

Related Manuals for eLEDing EE800W-SH Series


Summary of Contents for eLEDing EE800W-SH Series
- Page 1 2 Fig.3 Power Bank Battery Connect Plug Fig.4 VR2: adjust sensor range VR1: adjust dimming brightness EE Systems Group Inc. (Patented Technology) Rev: 04192018 12346 Valley Blvd, #A, El Monte, CA 91732 Phone Number: 1-877-579-3889 Fax: 626-452-9194 Web: www.eleding.com/www.eesgi.com...
- Page 2 FCC Part 15 Class B and ICES-003:2004 Fig 7. Mounting Height & Diameter of Area Coverage (ft) (Patented Technology) EE Systems Group Inc. Rev: 04192018 12346 Valley Blvd, #A, El Monte, CA 91732 Phone Number: 1-877-579-3889 Fax: 626-452-9194 Web: www.eleding.com/www.eesgi.com...
Need help?
Do you have a question about the EE800W-SH Series and is the answer not in the manual?
Questions and answers