
Related Manuals for Blaupunkt IVDP-01


Summary of Contents for Blaupunkt IVDP-01
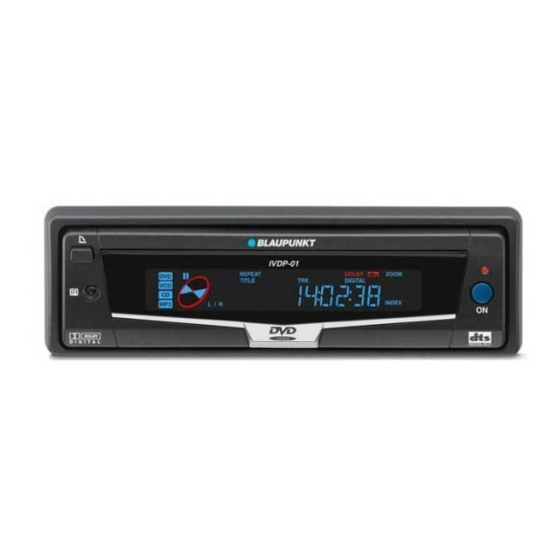
- Page 1 In Car Video IVDP-01 Operating and installation instructions http://www.blaupunkt.com...
-
Page 2: Table Of Contents
Safety instructions ... 36 Functions ... 38 About discs ... 38 Fitting ... 40 DIN front fitting (Method A) ... 41 DIN rear fitting (Method B) ... 42 Removable front cover ... 43 Electrical connections ... 45 Remote control ... 46 Main functions ... -
Page 3: Safety Instructions
The Blaupunkt editors are constantly working on making the operating instructions clearer and easier to und- erstand. However, if you still have any questions on how to operate the equipment, please contact your dealer or the telephone hotline for your country. - Page 4 Servicing by an authorised Service Centre Do not attempt to dismantle this preci- sion equipment or to repair it yourself. Please have the equipment serviced at one of the Service Centres on the list included with this product. Fitting Mount the equipment so that it has a horizontal orientation.
-
Page 5: Functions
FUNCTIONS Compatible with PAL DVD (Video CD) and NTSC DVD (Video CD) You can use this equipment to replay discs that were recorded in either PAL or NTSC-TV format. All the functions that are important for DVD replay, including an MPEG2 de- coder, video D/A converter and audio decoder have been integrated into a sin- gle LSI chip designed for this equip-... - Page 6 • Do not keep discs in any of the following places: 1. Where there exposed to direct sunshine. 2. Dirty, dusty or damp locations. 3. Close to the vehicle’s heating system. 4. On the seats or the instrument panel. Disc cleaning Wipe the surface with a soft cloth.
-
Page 7: Fitting
ABOUT DISCS Handling new discs with uneven edges • The inner and outer edges of a new disc may not be perfectly smooth. • When a disc with uneven edges is inserted, it may not locate correctly, making it impossible to play. •... -
Page 8: Din Front Fitting (Method A)
DIN front/rear fitting DIN front/rear fitting of this equipment can either be carried out from the front (normal DIN front mounting) or from the rear (DIN rear mounting, using the threaded screw holes in the side of the housing). The exact procedure can be understood from the following assem- bly diagrams. -
Page 9: Din Rear Fitting (Method B)
FITTING Removing the equipment 1. Frame 2. Reach with your fingers into the slot at the front of the frame, and pull the frame off. (To replace the frame, put the side that has the slot downwards, and insert it.) 3. -
Page 10: Removable Front Cover
FITTING 2. Bolt 3. Standard radio mounting clip 4. Instrument panel or fascia 5. Hook (remove this part) Note: The fitting housing, the outer cladding and the collar are not used for fitting by method B. REMOVABLE FRONT COVER The front cover is removed as follows: 1. - Page 11 REMOVABLE FRONT COVER Protective case Front cover 4. Push the front metal plate into the main housing. You will hear a click. The front cover is replaced as follows: 1. First insert the right-hand side of the front cover into the main housing and then push in its left side until you hear it click into place.
-
Page 12: Electrical Connections
AUDIO-L VIDEO AUDIO-R ATTENTION: The main unit is connected to an exter- nal remote receiver, whose function corresponds to that of the remote sen- sor IR G on the front cover. ELECTRICAL CONNECTIONS MAIN DVD UNIT (REAR VIEW) SPDF digital output Input (Toslink) AUDIO-L... -
Page 13: Remote Control
REMOTE CONTROL POWER POWER button for switching the equipment ON or OFF. Numerical buttons. Button for adjusting the brightness of the VFD display. Stop button to finish play. Fast forward button reverse DISPLAY POWER REPEAT A / V SKIP ENTER SKIP SUBTITLE AUDIO... - Page 14 TITLE Open the TITLE contained in on the DVD disc. DISPLAY Button for hiding or displaying the status line during play. REPEAT Switch between repeat modes (REPEAT, REPEAT 1 and RE- PEAT OFF). < Button for pausing and restarting play. Switch between DVD player and external AUDIO/VIDEO.
-
Page 15: Main Functions
MAIN FUNCTIONS Inserting a DVD/VCD/CD 1. Turn the vehicle’s ignition key to the ACC position. 2. Press the ON button E. (OPEN) button F so 3. Press the that the front cover opens slowly for- ward. 4. Insert the disc with the printed side upwards. - Page 16 Stop play - If the STOP button is pressed for a short time, play will be stopped, and if the PLAY button is pressed, replay will start again. - If you press the STOP button twice, the player will stop and return to the first section / chapter.
-
Page 17: The Reset Button
MAIN FUNCTIONS 1. The REPEAT function is not active for VCD 2.0 (with PBC). ILL (illumination) Press the ILL button to adjust the illu- mination of the VFD display in the fol- lowing sequence. Brightness levels Selecting a higher level will increase the brightness of the VFD display. -
Page 18: On-Screen Display Function
On-screen display function Press the DISPLAY button during play in order to show the contents of the in- serted disc on the screen. Examples: 1) Press the DISPLAY button once: TITLE 01/03 CHAPTER 00:02:25 The title number, the total number of titles, the chapter number and the total number of chapters under this title for the disc currently being... -
Page 19: Multiple Language Audio Function
MAIN FUNCTIONS Each time the DISPLAY button is pressed, the screen display changes as follows: SINGLE ELAPSED elapsed time) Multiple language audio function For DVD Press the AUDIO button during play. Each time the button is pressed the number of the replay language changes in sequence. -
Page 20: Multi-Angle Function (Dvd Only)
Multi-angle function (DVD only) Press the ANGLE button during play. Each time the button is pressed the number of the camera perspective changes in sequence. Note: - The camera perspective numbers vary from one disc to another. - This function is only available on discs in which scenes have been recorded from different perspectives. - Page 21 MAIN FUNCTIONS Note: 1) The values mentioned above can not be changed for an MP3 disc. 2) It is not possible to increase the values beyond the point at which the total of the contrast and brightness values is 29. 3) Do not select excessively high values of contrast and bright- ness.
-
Page 22: Initial Setup
Setup - main screen GENERAL SETUP SPEAKER SETUP DOLBY DIGITAL SETUP PREFERENCE EXIT SETUP 1. Press the SETUP button while the equipment is in stop mode. (Press the STOP button twice to be certain that the equipment is in stop mode.) 2. -
Page 23: General Setup
GENERAL SETUP General setup TV DISPLAY TV TYPE PIC MODE ANGLE MARK OSD LANG SPDIF CAPTIONS MAIN PAGE TV Screen Video Material Normal Pan Scan Letter-box 16:9 TV DISPLAY setup You can choose the appropriate picture format here (4:3 or 16:9) according to the picture format of the connected TV. - Page 24 General setup TV DISPLAY TV TYPE PAL (USA:NTSC) PIC MODE NTSC ANGLE MARK OSD LANG SPDIF CAPTIONS MAIN PAGE Setting the TV TYPE You can use this player to replay discs that were recorded either in PAL or in NTSC format. Choose NTSC if the equipment is con- nected to a TV that requires NTSC coded signals.
- Page 25 GENERAL SETUP General setup TV DISPLAY TV TYPE PIC MODE ANGLE MARK OSD LANG SPDIF CAPTIONS MAIN PAGE Setting the ANGLE MARK display If set to ON, the angle signal appear on the screen when a multi-an- gle DVD disc is played. The signal is not displayed if OFF is chosen.
- Page 26 General setup TV DISPLAY TV TYPE PIC MODE ANGLE MARK OSD LANG SPDIF CAPTIONS MAIN PAGE SPDIF setting Choose whether the SPDIF video out- put is ON or OFF. GENERAL SETUP TV DISPLAY TV TYPE PIC MODE ANGLE MARK OSD LANG SPDIF CAPTIONS MAIN PAGE...
-
Page 27: Loudspeaker Setup
GENERAL SETUP Loudspeaker setup DOWN MIX MAIN PAGE You can activate the audio output from the DOLBY AC3 5.1 DOWNMIX for 2- channel mode here. Use the cursor keys to select the de- sired LOUDSPEAKER connection. Selection of LT/RT to activate the compatible Dolby Surround output. - Page 28 Dolby setup OP MODE DUAL MONO STEREO CH1-MONO CH2-MONO MIX-MONO DUAL MONO Dual mono replay is only available for Dolby digital programmes with 1+1 au- dio code mode. Stereo replay 1+1 programme CH1 for the left-hand channel, CH2 for the right hand channel.
-
Page 29: Recommended Settings
GENERAL SETUP Recommended settings LANGUAGE SUBTITLE DISC MENU LOCALE PARENTAL PASSWORD DEFAULT MAIN PAGE LANGUAGE selection Use the cursor buttons to choose the desired replay language. ENGLISH FRENCH SPANISH CHINESE JAPANESE Language selection for SUBTITLES Use the cursor buttons to choose the language in which the SUBTITLES should be given. - Page 30 Recommended settings LANGUAGE SUBTITLE DISC MENU ENGLISH LOCALE FRENCH PARENTAL SPANISH PASSWORD CHINESE DEFAULT JAPANESE MAIN PAGE Language selection for the DISC MENU Use the cursor buttons to choose the desired language for the disc menu. GENERAL SETUP LANGUAGE SUBTITLE DISC MENU CHINA LOCALE...
-
Page 31: Parental Control Function
GENERAL SETUP Recommended settings LANGUAGE SUBTITLE DISC MENU LOCALE PARENTAL PASSWORD DEFAULT MAIN PAGE PARENTAL CONTROL FUNCTION Use the cursor buttons to select the desired parental control level, and con- firm it by pressing the ENTER button. 3 PG 4 PG 13 6 PG-R 7 NC-17 8 ADULT... - Page 32 Recommended settings LANGUAGE SUBTITLE DISC MENU LOCALE PARENTAL PASSWORD DEFAULT RESET MAIN PAGE Factory settings (RESET) Choose the RESET button option to re- turn the equipment to the factory set- tings. GENERAL SETUP...
- Page 33 GENERAL SETUP DEFAULT GENERAL SETUP Speaker Setup Dolby Digital Setup Preference TV DISPLAY NORMAL / PS TV TYPE PAL (USA:NTSC) PIC mode AUTO Angle mark OSD LANGUAGE SPDIF Language English Subtitle English DISC menu English Locale Parental Password 3308...
-
Page 34: Technical Data
Operating voltage: +12 V (11 V-16 V), test voltage 14.4 V, negative earth Current consumption: Less than 2.0 A Operating temperature: -15° C to +60° C Signal system: Mixed video signal 1.0 Vp-p, 75 Ω RCA socket Supported disc types: 1. - Page 35 09-435 99236 01-4010 7320 01-89583 8394 01-576 9473 01-4598830 02-369 6464 40 2085 023-565 6331 66-817 157 01-2185 11111 916-467952 08-7501810 01-8471650 02-6130 0514 01-324 8756 022-8771260 0212-3460040 708-6817188 +604-6413 640 Blaupunkt GmbH CM/PSS - 8 622 403 174 WWW: http://www.blaupunkt.com...
Need help?
Do you have a question about the IVDP-01 and is the answer not in the manual?
Questions and answers