
Summary of Contents for DataLocker DL4 FE
- Page 1 DL4 FE Encrypted External Hard Drive - v1.49/6.5.0 - User Guide User Guide DL4 FE (FIPS Edition) FIPS 140-2 level 3 Common Critera Certified Encrypted External Hard Drive © 2021 DataLocker Inc. All rights reserved.
-
Page 2: Table Of Contents
DL4 FE Encrypted External Hard Drive - v1.49/6.5.0 - User Guide Contents At A Glance Introduction .......... - Page 3 Using ZoneBuilder ..........Reformat Using DataLocker Control Panel ......
-
Page 4: At A Glance
Windows, Linux, and macOS. The DL4 FE has been designed for FIPS 140-2 Level 3 and is being tested by an accredited NIST lab. The product is in process for certification and is officially listed by NIST. DL4 FE is also in process to achieve Common Criteria cPP certification. -
Page 5: Getting Started
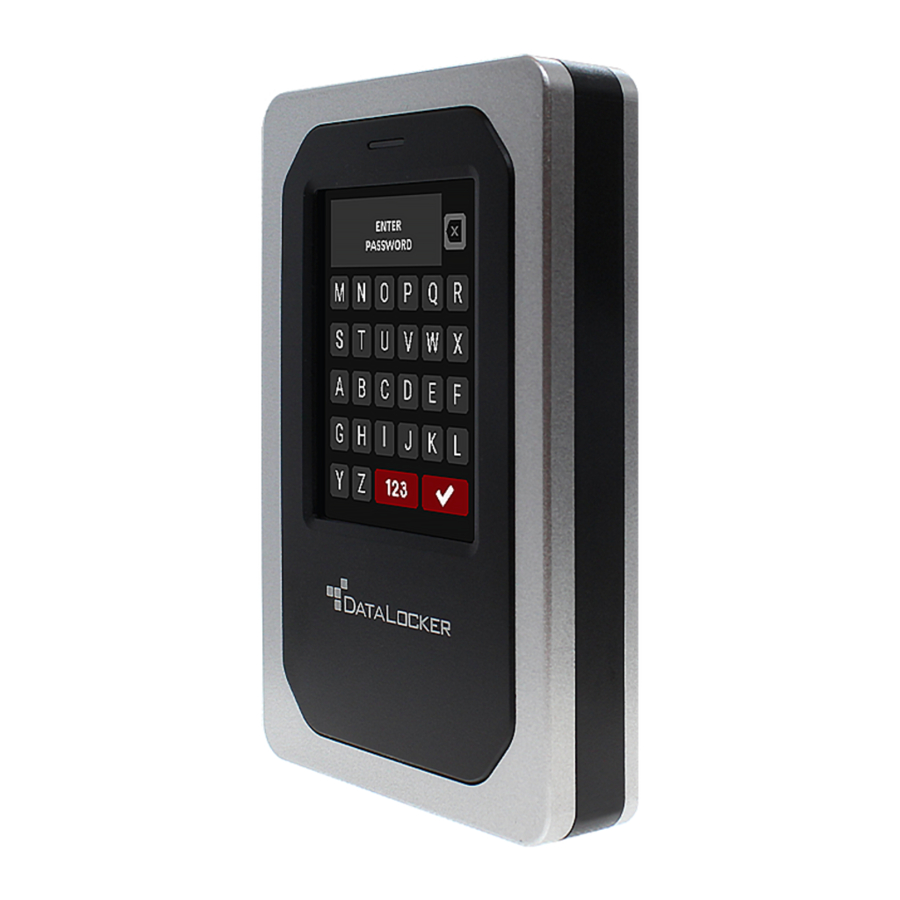
DL4 FE Encrypted External Hard Drive - v1.49/6.5.0 - User Guide Getting Started Tap with precision to input data The DL4 allows you to navigate its durable screen very accurately using a pointy, non-puncturing object of any material as a stylus. You can use the tip of your finger, a retracted ballpoint pen, or even the edge of a plastic card, making input available and stable in any situation. -
Page 6: Product Specifications
DL4 FE Encrypted External Hard Drive - v1.49/6.5.0 - User Guide • Use a strong password and be sure to remember it. Remote password resets can be enabled if the device is managed by SafeConsole. • Use the correct file system based on your operating system and file needs. See... -
Page 7: Initializing And Connecting Your Dl4
Initializing and Connecting Your DL4 1. Connect the DL4 to your computer with the included USB cable. 2. The device will display “PERFORMING SELF TEST” and then will display a DataLocker loading screen. 3. You will then be prompted to create a password. Tap OK to continue. - Page 8 7. After the device successfully connects, the DL4 will show the Unlocked and Connected- screen with a Lock and Disconnect option available. A volume labeled “DataLocker” will be mounted to the computer and be available for use. You can now work with the device as if it was standard storage device in your computer.
-
Page 9: Disconnecting Your Dl4
The best practice is to use your operating system’s Safely Remove Hardware or Eject function before you power down or detach the DataLocker DL4 from the host system. This will also help prevent damage to the disk. -
Page 10: Additional Windows Configuration Changes
DL4 FE Encrypted External Hard Drive - v1.49/6.5.0 - User Guide macOS Users a. Click the Eject button that corresponds with the DataLocker DL4 b. Drag the drive to the trashcan in the macOS dock. Note: The trash can will transition to an eject button while dragging the drive. -
Page 11: Disabling Windows 10 Selective Suspend
DL4 FE Encrypted External Hard Drive - v1.49/6.5.0 - User Guide Disabling Windows 10 Selective Suspend 1. In the search box on the taskbar, type control panel. 2. Click and Open Control Panel. 3. Click on Hardware and Sound. 4. Click on Power Options. -
Page 12: Formatting Your Dl4 On Windows
DL4 FE Encrypted External Hard Drive - v1.49/6.5.0 - User Guide Formatting Your DL4 on Windows 1. Connect the DL4 to the computer and log in. See Initializing and Connecting your DL4 more information. 2. In the search box on the taskbar, type control panel. -
Page 13: Formatting Your Dl4 On Macos
DL4 FE Encrypted External Hard Drive - v1.49/6.5.0 - User Guide 9. You will be warned that all data will be erased and asked if you would like to continue. Click When finished, your DL4 will available under This PC. - Page 14 DL4 FE Encrypted External Hard Drive - v1.49/6.5.0 - User Guide 3. Select the unformatted DL4 disk. 4. Click the Erase tab at the top of the screen. 5. Rename the disk label to “DataLocker” and choose a file system.
-
Page 15: Linux Compatibility And Configuration
DL4 FE Encrypted External Hard Drive - v1.49/6.5.0 - User Guide 8. Click Done. Your formatted DL4 should now appear under Devices. Linux Compatibility and Configuration The DL4 is platform independent, capable of being run with 100% compatibility on most systems. -
Page 16: Features
DL4 FE Encrypted External Hard Drive - v1.49/6.5.0 - User Guide Features Administrator Menu • Tap the -icon when you have unlocked the DL4 to access the Administrator Menu. • Your configurations are saved when you connect the DL4. Menu Option... -
Page 17: User Menu
DL4 FE Encrypted External Hard Drive - v1.49/6.5.0 - User Guide Menu Option Details Auto-lock Time Modify length of time before your device automatically locks. Touch sounds Enable or disable touch sounds. Brightness Change the level of brightness for your device’s touch screen. -
Page 18: Using The Administrator Menu
DL4 FE Encrypted External Hard Drive - v1.49/6.5.0 - User Guide 2. Enter your password on the “ENTER PASSWORD” screen and tap the -button. 3. Tap the -icon to enter the Onboard Menu. NOTE: After entering the password the connect screen is briefly shown for 10 seconds. To enter the onboard administrator menu, you will need to tap the -icon quickly. -
Page 19: Set User
DL4 FE Encrypted External Hard Drive - v1.49/6.5.0 - User Guide Set User This allows the administrator to either Enable or Disable a user role. When a user password is cre- ated your DL4 will show a login selection screen upon the next DL4 connection. If User is selected upon login, your DL4 will force the user to create a user unlock password. - Page 20 DL4 FE Encrypted External Hard Drive - v1.49/6.5.0 - User Guide 5. Your DL4 will go back to the administrator menu. Proceed to connect the DL4 to confirm your setting and then lock, and power off. On the next power on the role selection will be available.
-
Page 21: Safeconsole
DL4 FE Encrypted External Hard Drive - v1.49/6.5.0 - User Guide Access User data as an Admin 1. Power on. 2. Select Admin role, unlock with admin password. 3. Connect. User data is accessible on the private partition. Assist a user that forgot their password The scalable method for remote password resets with an audit trail is available when managing DL4 with SafeConsole. - Page 22 DL4 FE Encrypted External Hard Drive - v1.49/6.5.0 - User Guide A. Zeroize - Tap Zeroize Drive from the administrator menu and follow the on screen steps. B. Factory Initialize - Tap & hold Zeroize Drive in the administrator menu for 5 seconds. Your device will show a “Factory Initialize”...
- Page 23 DL4 FE Encrypted External Hard Drive - v1.49/6.5.0 - User Guide 4. When your DL4 shows the “Confirm Delete all drive data?” prompt, tap Continue. Selecting Cancel will cancel the Zeroize process. 5. Upon successfully completing the Zeroize process, you will see “Please initialize and reformat the drive”.
-
Page 24: Self Destruct
DL4 FE Encrypted External Hard Drive - v1.49/6.5.0 - User Guide NOTE: You must now follow the initialization process as shown in the Initializing and Connecting Your section of this manual. Self Destruct The self destruct action helps prevent brute force attacks by triggering when an individual inputs an incorrect password too many times. -
Page 25: Password Complexity
DL4 FE Encrypted External Hard Drive - v1.49/6.5.0 - User Guide Deleted asset B.Destroy Data (default) A.Destroy Device Administrator Password Deleted Deleted and DL4 cannot be used anymore User Password Deleted and Disabled Deleted and DL4 cannot be used anymore... -
Page 26: Touch Sounds
DL4 FE Encrypted External Hard Drive - v1.49/6.5.0 - User Guide Touch Sounds The DL4 touch sounds are enabled by default. To disable these sounds, follow these steps: 1. Tap the Touch Sounds feature from the administrator menu. 2. Tap the Disable button. -
Page 27: Touch Calibration
Calibration. It is possible to enter the Touch Calibration without entering a password. Tap & hold the screen for exactly 5 seconds (use a timer if needed) when the DataLocker logo with a progress bar under it is displayed during startup. Follow the Touch Calibration steps. -
Page 28: Using The User Menu
DL4 FE Encrypted External Hard Drive - v1.49/6.5.0 - User Guide Using the User Menu Once inside the User menu, the back button can be used to navigate back to the connect screen. The back button can also be used to save and exit out of any of the option menus to get back to the User menu. -
Page 29: Touch Sounds
DL4 FE Encrypted External Hard Drive - v1.49/6.5.0 - User Guide Touch Sounds The DL4 touch sounds are enabled by default. To disable these sounds, follow these steps: 1. Tap the Touch Sounds feature from the user menu. 2. Tap the Disable button. -
Page 30: Generating A Silentkill Code
DL4 FE Encrypted External Hard Drive - v1.49/6.5.0 - User Guide Generating a SilentKill Code 1. Enter the administrator password and navigate to the administrator menu. See Accessing the Onboard Administrator or User Menu. 2. Tap and hold the Change Password option for 5 seconds and then release. - Page 31 DL4 FE Encrypted External Hard Drive - v1.49/6.5.0 - User Guide 3. Upon launch, the “Device Setup” page should appear. 4. Enter the SafeConsole Connection Token provided by your SafeConsole administrator and confirm the EULA. Click Activate. 5. Your device will connect to the SafeConsole server.
-
Page 32: Using A Safeconsole Managed Device
Manually Locking your DL4 1. Click Lock in the bottom left-hand corner of the DataLocker Control Panel to safely lock your device. You can also use the keyboard shortcut: CTRL + L (Windows only), or right click the DataLocker Icon in the system tray and click Lock Device. -
Page 33: Standalone Logins
NOTE: Changing this setting in the Control Panel will be reflected on the DL4 onboard menu and vice versa. 1. Unlock your device and click Settings on the menu bar in the DataLocker Control Panel. 2. Click Preferences in the left sidebar. - Page 34 On the next unlock of your DL4, you can select Standalone after you input your password to unlock in Standalone mode. When in Standalone mode, the Unlocker partition will not be mounted to the host computer and the DataLocker Control Panel will not need to be executed. 1. Connect you DL4 and log in.
-
Page 35: Password Reset
1. Plug in and log into your DL4. Tap Connect. Run the Unlocker.exe. 2. Check the Read-Only Checkbox below the Unlock button. 3. Click Unlock. The DataLocker Control Panel will appear with the text Read-Only Mode at the bottom. To unlock the device in Read-Only Mode from the device: 1. -
Page 36: Editing The Applications List
1. Unlock your device. The DataLocker Control Panel will appear with the Applications List se- lected by default. 2. If the DataLocker Control Panel is already open, click Applications on the menu bar to view the Applications List. Do one of the following: •... -
Page 37: Using Zonebuilder
DL4 FE Encrypted External Hard Drive - v1.49/6.5.0 - User Guide • It will report and delete any detected malware. • (Optional) If your SafeConsole has enabled quarantine, it may quarantine any malware it finds. See Restoring or Deleting a Quarantined File for more information. -
Page 38: Reformat Using Datalocker Control Panel
Important: Before you reformat the device, back up your files to a separate location. To reformat a device: 1. Unlock your device and click Settings on the menu bar of the DataLocker Control Panel. 2. Click Tools on the left sidebar. -
Page 39: Device Information
• Operating System and System administrative Privileges • Management Console NOTE: You can click one of the information buttons on the Device Info page to visit the DataLocker website or access more information about legal notices or certifications for DataLocker products. -
Page 40: Getting Help
DL4 FE Encrypted External Hard Drive - v1.49/6.5.0 - User Guide Getting Help The following resources provide more information about DataLocker products. Please contact your Help Desk or System administrator if you have further questions. • support.datalocker.com: Information, knowledgebase articles, and video tutorials •... -
Page 41: Notices
The information contained in this document represents the current view of DataLocker on the issue discussed as of the date of pub- lication. DataLocker cannot guarantee the accuracy of any information presented after the date of publication.
Need help?
Do you have a question about the DL4 FE and is the answer not in the manual?
Questions and answers