Table of Contents
Advertisement
Quick Links
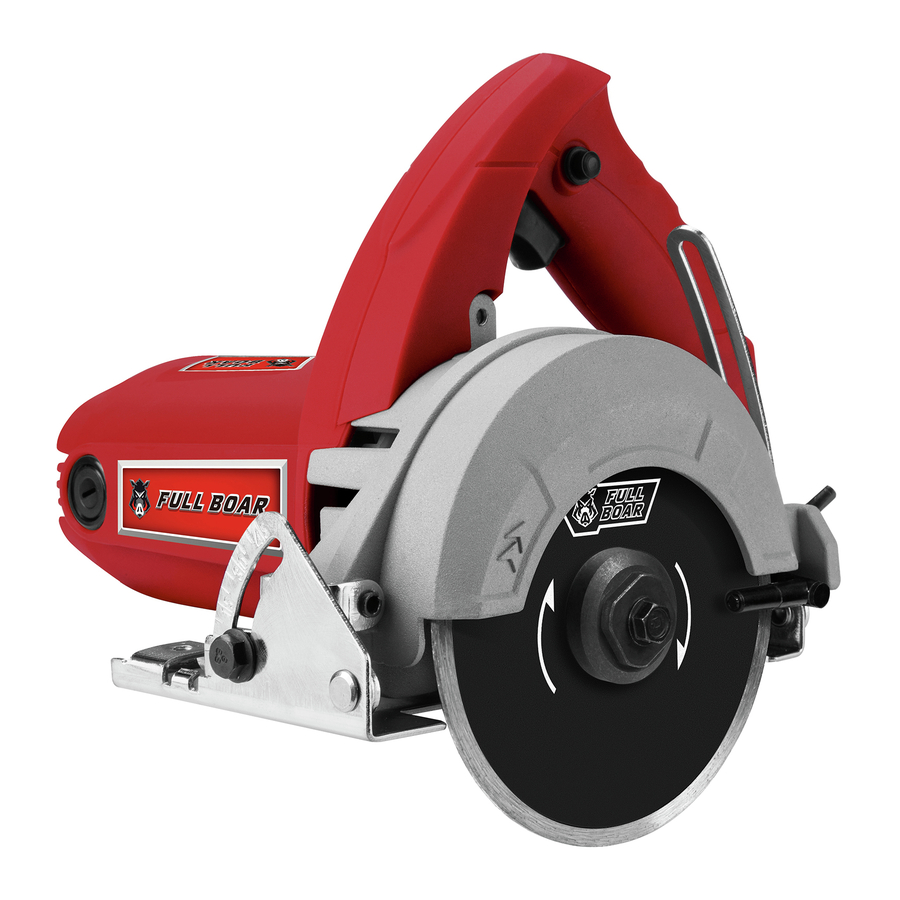
KNOW YOUR PRODUCT
125MM
TILE CUTTER
• 950W MOTOR
• VARIABLE CUTTING
DEPTHS
• BEVEL CUTS
INSTRUCTION MANUAL
WARNING: Read all safety warnings and all instructions. Failure to follow the
warnings and instructions may result in electric shock, fire and/or serious injury.
Save all warnings and instructions for future reference.
0820
Advertisement
Table of Contents

Summary of Contents for Full Boar FBWDTC-17125
- Page 1 KNOW YOUR PRODUCT 125MM TILE CUTTER • 950W MOTOR • VARIABLE CUTTING DEPTHS • BEVEL CUTS INSTRUCTION MANUAL WARNING: Read all safety warnings and all instructions. Failure to follow the warnings and instructions may result in electric shock, fire and/or serious injury. Save all warnings and instructions for future reference.
-
Page 2: Specifications
SPECIFICATIONS - MODEL NO. FBWDTC-17125 Mains voltage: 220-240V ~ 50Hz Input power: 950W No load speed: ≤12,000 min¯¹ Blade: Ø125 x Ø20 mm Threaded spindle: Bevel cuts: 0 – 45° Cutting depth max.: 37 mm IP rating: IPX0 Weight (tool only): 2.9 kg... -
Page 3: Table Of Contents
TABLE OF CONTENTS SPECIFICATIONS............Page 02 KNOW YOUR PRODUCT........... Page 02 INTRODUCTION............Page 04 SAFETY INSTRUCTIONS........... Page 04 SET-UP & PREPARATION........... Page 09 OPERATION.............. Page 12 MAINTENANCE............Page 14 DESCRIPTION OF SYMBOLS........Page 15 CONTENTS..............Page 15 WARRANTY..............Page 16... -
Page 4: Introduction
INTRODUCTION Congratulations on purchasing a Full Boar 125mm Tile Cutter. The Full Boar Tile Cutter FBWDTC-17125 is designed for cutting tiles, pavers, bricks and concrete with the use of water. It should never be used for the cutting of wood or metal. - Page 5 GENERAL POWER TOOL SAFETY WARNINGS WARNING! Read all safety warnings and instructions. Failure to follow all instructions listed below may result in electric shock, fire and/or serious injury. The term “Power Tool” in all of the warnings listed below refers to your mains operated (corded) power tool or battery operated (cordless) power tool.
- Page 6 GENERAL POWER TOOL SAFETY WARNINGS (cont.) d. Remove any adjusting key or wrench before turning the power tool on. A wrench or a key left attached to a rotating part of the power tool may result in personal injury. e. Do not overreach. Keep proper footing and balance at all times. This enables better control of the power tool in unexpected situations.
- Page 7 TILE CUTTER SAFETY WARNINGS a) The guard provided with the tool must be securely attached to the power tool and positioned for maximum safety, so the least amount of wheel is exposed towards the operator. Position yourself and bystanders away from the plane of the rotating wheel. The guard helps to protect operator from broken wheel fragments and accidental contact with wheel.
- Page 8 TILE CUTTER SAFETY WARNINGS (cont.) p) Regularly clean the power tool’s air vents. The motor’s fan will draw the dust inside the housing and excessive accumulation of powdered metal may cause electrical hazards. q) Do not operate the power tool near flammable materials. Sparks could ignite these materials.
-
Page 9: Set-Up & Preparation
SET-UP & PREPARATION WARNING! Ensure the tool is switched off and disconnected from the power supply and completely stopped before performing any of the following operations. Fitting & removing the blade (13) WARNING! When mounting and replacing blade (13), it’s recommended to wear protective gloves. - Page 10 SET-UP & PREPARATION (cont.) KNOW YOUR PRODUCT Installing the wet cutting attachment 1. Loosen the wing nut (20) and move the base plate (22) down. 2. Attach the wet cutting attachment (18) to the tool using a screwdriver (not provided) (fig.
- Page 11 SET-UP & PREPARATION (cont.) Depth of cut adjustment 1. To adjust the blade (13) to the desired cutting depth, loosen the wing nut (20) and move the base plate (22) up or down (fig. 6). Note: For best results, make sure to adjust the depth of cut so that the blade protrudes 4-5 mm beyond the thickness of the material.
-
Page 12: Operation
OPERATION On/off trigger (2) Always firmly hold the tool by handle (4) during operations. The tile cutter is fitted with a lock-off button (1) to avoid accidental start up. 1. First press and hold the lock-off button (1), then squeeze the On/off trigger (2) to start the tool. - Page 13 OPERATION (cont.) Cutting tips • It’s best to cut the material in single pass to prevent chipping. • Make sure the workpiece is securely clamped to a work bench to prevent the workpiece from moving during the cut. • Set the base plate on the workpiece to be cut without the blade (13) making any Fig.
-
Page 14: Maintenance
MAINTENANCE WARNING! Before cleaning your tile cutter or carrying out any maintenance procedure, make sure that the motor is off and the tile cutter disconnected from the power supply to prevent accidental starting. Cleaning • Keep all safety devices, air vents and the motor housing free of dirt and dust as far as possible. -
Page 15: Description Of Symbols
DESCRIPTION OF SYMBOLS Volts. Hertz. Alternating current. Watts. Revolutions or No load speed. reciprocation per minute. Millimetres. Diameter. Double insulated. Regulator compliance mark. Wear ear, eye and breathing Warning! protection. Read instruction manual. Failure to do so could result in personal injury or equipment damage. -
Page 16: Warranty
WARRANTY YOUR WARRANTY FORM SHOULD BE RETAINED BY YOU AT ALL TIMES. IN ORDER TO MAKE A CLAIM UNDER THIS WARRANTY YOU MUST RETURN THE PRODUCT TO YOUR NEAREST BUNNINGS WAREHOUSE (see www.bunnings.com.au or www.bunnings.co.nz for store locations) WITH YOUR BUNNINGS REGISTER RECEIPT. PRIOR TO RETURNING YOUR PRODUCT FOR WARRANTY PLEASE TELEPHONE OUR CUSTOMER SERVICE HELPLINE: Australia 1800 069 486 New Zealand 0508 069 486...


Need help?
Do you have a question about the FBWDTC-17125 and is the answer not in the manual?
Questions and answers