
Subscribe to Our Youtube Channel
Related Manuals for GAS GC-IMS-ODOR

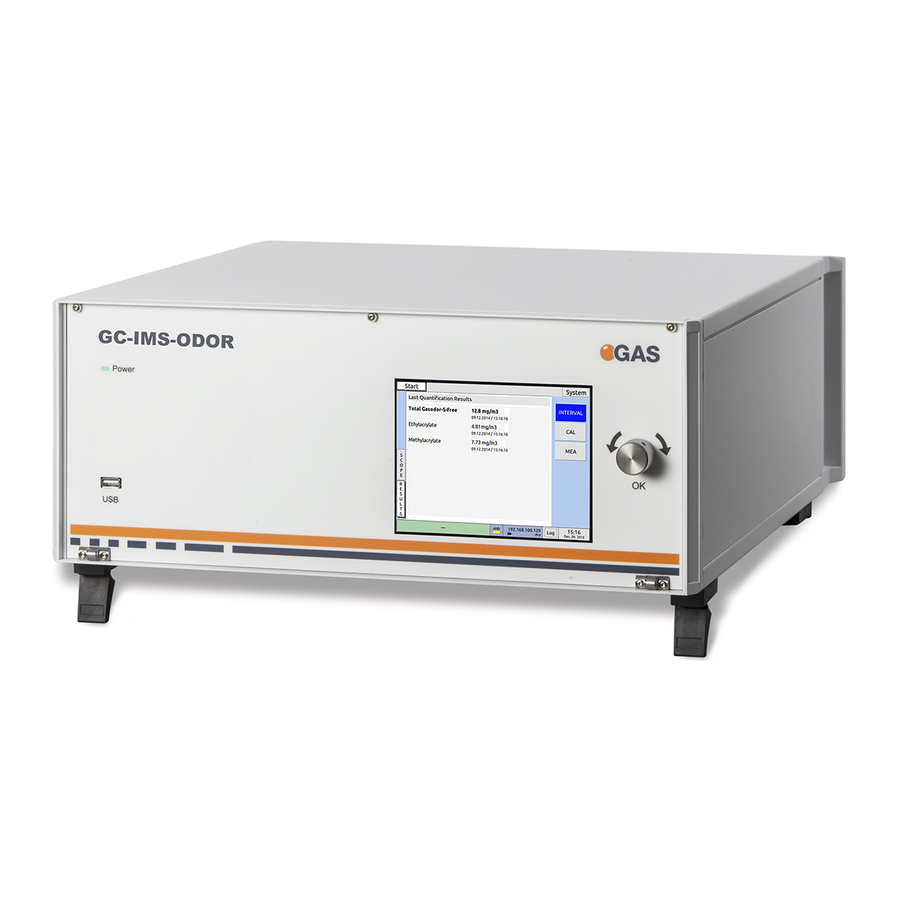
Summary of Contents for GAS GC-IMS-ODOR
- Page 1 GC-IMS-ODOR Quickstart Guide G.A.S. Gesellschaft für analytische Sensorsysteme mbH...
- Page 2 GC-IMS-ODOR – Quickstart Guide Version 1.4.1, April 2021 Valid for GC-IMS-ODOR Firmware- Version 4.0 and higher All data, texts, designs, images and other elements used in this user manual are protected by copyright law. Any infringement may be subject to legal action.
-
Page 3: Table Of Contents
4.1.1 Maintenance ................17 Installation GC-IMS Device ..............18 Installation Requirements ............18 Set-up of the GC-IMS-Odor Instrument ........... 20 Workflow Cleaning ..............23 Workflow Selecting the Application Mode ........24 Workflow: Define Tag Lists (optional) ..........25 Workflow: Set the Output of the Current Loop (optional) ..... 27 Running the instrument .............. -
Page 4: General Information
General Information Information about the Manual INFORMATION! This Quickstart User Manual is an extract of the most important information for installation and initial setup from the User Manual. It is an addition to the User Manual and does not replace the User Manual. This manual describes a safe and adequate handling of the device. -
Page 5: Explanation Of Symbols
Explanation of Symbols Important and safety-relevant references in this manual are characterized by symbols. These indications which are in-line with industrial safety must be respected and followed at any time. INFORMATION This symbol calls information, which are to be considered for efficient and perfect handling of the equipment. - Page 6 Gas Out, Sample gas in Example: References Advanced User Manual, Chapter 5.1 Installation Reguirements Example: Information keep the transport box...
-
Page 7: Scope Of Supply
Scope of Supply Assure that you have received the full scope of supply. If there is any part missing, please contact the GAS-hotline immediately. Standard Scope of Supply GC-IMS-Odor Device (1 piece) Power supply (1 piece) GC-IMS Gas tube Kit •... - Page 8 Molecular sieve 200 ml with 1/8” connections (1 piece) LAN Cable (1 piece) GC-IMS Blind plug Set (5 pieces) (Swagelok 3mm Blind plug with red cap installed on device connectors)
- Page 9 Torx Tool Kit • Torx Srewdriver 8 mm (1 piece) • Torx Srewdriver 10 mm (1 piece) I/O Connector (1 piece) Document Map with Documents and Device User Manuals USB-Stick Box with Software und Documents (1 piece)
- Page 10 Transport box (1 piece) GC-IMS Transport palett (60 x 80 Optional Scope of Supply (only available if ordered) Nitrogen Generator with accessories (example picture)
-
Page 11: Liability And Guarantee
Liability and Guarantee This user manual describes the safe and proper handling of the device. All data and reference within this manual are compiled under the valid regulations, the state-of-the-art as well as G.A.S. experiences of several years. This user manual must be stored together with and close to the device at any time and accessible to all persons, who operate or handle the device at any time. -
Page 12: Return And Disposal
Phone: +49 (0) 231 / 97 42 - 65 50 Fax: +49 (0) 231 / 97 42 - 65 55 support@gas-dortmund.de The telephone hotline is available from monday to friday from 9:00 to 16:00 hours. In urgent cases or if you use fax or email please provide a telephone number for... -
Page 13: Safety
The device and its equipment are not certified for the employment in areas with explosive gas air mixtures. All claims or requirements of any kind against the manufacturer and/or its authorized persons that arise due to damages from a not intended use of the device will be rejected. -
Page 14: Responsibility Of Operator
Responsibility of Operator The device may only be operated in a perfect technical condition. Before putting the device into operation the condition of the device and its equipment must be checked. The information and instructions provided in this manual have to be followed at any time. -
Page 15: Dangers
DANGER When Nitrogen is used as drift gas and helium as carrier gas, ignition of a helium plasma may occur due to the high voltage present in conjunction with a radiation source. This can damage the IMS. -
Page 16: Transport, Packing And Storage
Transport, Packing and Storage Inspection after Transport Check the supply immediately after delivery concerning its completeness and/or transport damages. If you detect externally visible transport damage, do not receive the supply, or only under reservation. State the extent of the damage on the provided delivery note and/or the transportation documents of the feeder. -
Page 17: Storage And Transport
The equipment should be moved only within the provided carrying case. By this means, transport damages can be avoided. The above mentioned values are considered for an instrument transported in its original new packing. WARNING! Protective caps should be put on gas sockets in case the device is stored or transported. -
Page 18: Cleaning And Maintenance
Cleaning and Maintenance Natural aging and the wear of certain components of the equipment require a regular cleaning and maintenance. Cleaning Clean the device only with a dry or easily damp cloth. WARNING! Do not use cleaning agents, which contain solvents, acids or bases. -
Page 19: Installation Gc-Ims Device
• Available space of 600 x 700 x 300 mm (W x D x H) • Ambient temperature of 5 – 40 °C • Humidity: 0-90 % RH, non-condensating Electricity • Electricity supply free of interferences • Power Supply of 230 V ± 10%, 50- 60 Hz ± 1% Gas supply... - Page 20 • Stainless steel pressure reducer adjustable adjustable pressure range of 3 – 6 bar and 3 mm Swagelok connector Safety • Availability of exhaust system for device exhaust gas tubes (Gas out and Sample Gas out) Computer • Computer with current Microsoft Windows operating system •...
-
Page 21: Set-Up Of The Gc-Ims-Odor Instrument
Connect power-supply – Check before that the Power-Switch is turned off. Connect Nitrogen Supply (Gas-Quality or higher) to the Molecular sieve supplied Adjust the Pressure reducer to supply Operating GAS with a pressure between 3 and 5 bar... - Page 22 Connect outlet molecular sieve to the Operating Gas. Connect the gas outlets Sample Out and Gas Out separately to a suitable Exhaust, avoid aspiration (gas-sucking) from the gas-outlets GC-IMS-Odor instrument. Testgas In and Samplegas In pressure Range: from 20 mbar to...
- Page 23 For Output of Result-Values via Current-Loop (0-20-mA Option Current-Loop) connect Current-Loop cabel socket Signal Converter – I/O Ports. View more detailed information in the User-Manual Measurement files and Result Reports can be transferred to a Option Server via LAN. Connect the Ethernet LAN Cable to the RJ45 Socket and to the LAN.
-
Page 24: Workflow Cleaning
Workflow Cleaning Typical View of the Start Page after successful set-up power-up instrument. The instrument would be ready, the key instrument default parameters have almost reached their setpoints (see red arrows) Contamination seen (red circle), inst- rument needs cleaning. Ideally do a Cleaning over night Open: System >... -
Page 25: Workflow Selecting The Application Mode
During the Cleaning Cycle the Cleaning Mode Page is shown. The instrument parameters observed. Temperatures are heated to 100°C. cancle Cleaning Mode Press End. Time remaining indicated Note that after Cleaning it will take 2 h to cool down Default Temperatures Workflow Selecting the Application Mode Open... -
Page 26: Workflow: Define Tag Lists (Optional)
Workflow: Define Tag Lists (optional) It is possible to define Tags which will be added to the measurement files and to the results report. This is optional, if no tags are needed the operator can skip this section Open the Settings Page: System >... - Page 27 Set the Properties of the Tag Lists. Example: Make a Tag a requirement: - Mandatory Allow a manual addition to a Tag – Adding Allowed Open a Tag List for editing the Entries Edit Entries . Add Tags using + Close the Dialogue Box with Close List...
-
Page 28: Workflow: Set The Output Of The Current Loop (Optional)
0-20mA-Current-Loop it is necessary to connect a suitable cable to the Signal Converter – I/O Ports found at the backside of the GC-IMS-Odor Instrument as well as to the chosen Signal Display. Please consult the GC-IMS-Odour User Manual for more information. - Page 29 Use the Value Entry Fields of Calibration: DAC ->Current >to set DAC [0 mA] and DAC which allows calibrating the Currentloop with the Display Unit. In addition it is possible to Define a mA Value which reports an Error as well as to define the Current output during the idle state of the instrument.
-
Page 30: Running The Instrument
Running the instrument Preparations for Measuring Select Start > SCOPE to view the status of the instrument Inspect the Quality of the RIP In case of contamination perform instrument Cleaning (see Workflow Cleaning 5.3 Check for pending Errors _!_ by opening the Error Page Consider to Flush EPC to passivate sampling... - Page 31 Start The EPC3 Flushing Mode. It is also possible to Stop or Cancel he EPC3 Flushing Mode Consult GC-IMS-Odor User Manual for more insights Check in the Status Bar if the desired Application selected and if the System is...
-
Page 32: Workflow: Run A Manual Measurement
Workflow: Run a Manual Measurement Click MEA to start a Manual Measurement. Before the measurement can be startet the user will be prompted to Select File-Tags By Default the Tag List is empty The Start Button is enabled if the Tagging Lists are empty. In Case of Mandatory Tags the user is prompted to select it. - Page 33 During the Measurement, the Operator can observe the progress of the ongoing data acquisition. It also would be possible to Cancel the measurement The Start Page also contains the Results Table. The Table shows the last Quantification Result. Use Clear to delete previous results, Report to transfer the Results as PDF-report to USB or a Remote Server...
-
Page 34: Workflow: Run A Manual Calibration
The purpose of the manual calibration is to fine-tune the calibration the device. One or more substance calibrations are modified in the calibration process. Make sure that an appropriate calibration gas source is connected to the Testgas In socket at the rear of the housing. - Page 35 Select all substances that are present in the connected calibration gas source and should calibrated. Selected substances displayed with Yellow mark. Substances which can not be quantified with the selected Application are greyed out. Enter the concentration of the substance which will be presented by testgas supply.
-
Page 36: Workflow Running Automated Measurements
Introduction to the Interval Mode In the interval mode scheduled measurements and calibrations are performed in a continuous and predefined sequence. The latest release of the GC-IMS-Odor Firmware provides a full flexibility to define the measurement intervals, as well as calibration and cleaning intervals. -
Page 37: Defining Automatic Measurement Schedule
6.4.2 Defining the automatic measurement schedule Carefully plan your Interval schedule, consider the minimum time required for a measurement/calibration and consider the implemented hierarchy of priorities in case of coincidence: Cleaning has priority over Calibration and Calibration has priority over Measurement. During a measurement device component values are dynamically modified. - Page 38 Select in the start dialog Interval Mode › Measurement – Start Time / Every : The start of the the first measurement and the repetition rate can be defined. Example: Defined Start Time and MEA Every 2 hours. The minimum interval time set in Every must be longer than Measurement...
- Page 39 With Calibration > Cleaning it is possible to also enable Cleaning cycles and Cleaning Start time can be defined With Cleaning – Every/ Cleaning Duration Cooldown Duration select the required Timing Example: 13 days after starting the Interval Mode on March 11, 2021 the first cleaning cycle is started at 18:00 for 10 hours, followed by a cool-down of 2 hours.
- Page 40 In the status bar the starting point of the next measurement or calibration and the progress measurement calibration are displayed (1). With Start › Cancel the process can be cancelled (2). During the process, the device parameters can be modified. They are displayed on Start ›...
- Page 41 On Start › RESULTS the result measurement displayed when it has been successful (1). Results can be copied to a connected USB device or a server with Start › RESULTS › Report… (2). The concentration of the main substance is outputted to the current loop.
Need help?
Do you have a question about the GC-IMS-ODOR and is the answer not in the manual?
Questions and answers