Table of Contents
Advertisement
Quick Links
Advertisement
Table of Contents

Related Manuals for Aspes AAC3000


Summary of Contents for Aspes AAC3000
- Page 1 Model:AAC3000 This appliance is intended for domestic use only.
-
Page 2: Table Of Contents
CONTENTS INSTALLATION MANUAL ACCESSORIES INSTALLATION OVERVIEW INDOOR UNIT INSTALLATION OUTDOOR UNIT INSTALLATION DRAIN PIPE INSTALLATION REFRIGERANT PIPE INSTALLATION ELECTRICAL WIRING AIR EVACUATION TEST RUN OWNER'S MANUAL SAFTY PRECAUTIONS PARTS AND FUNCTIONS REMOVE CONTROLLER RECEIVER MAINTENANCE TROUBLESHOOTING DISPOSAL GUIDELINE INFORMATION SERVICING... -
Page 3: Installation Manual
INSTALLATION MANUAL ACCESSORIES NOTE : The air conditioning system comes with the following accessories. Use all of the installation parts and accessories to install the air conditioner. Improper installation may result in water leakage, electrical shock and fire, or cause the equipment to fail. NAME Figure Quantity... -
Page 4: Installation Overview
INSTALLATION OVERVIEW Read The Safety Precaution Install The Indoor Unit Install The Drainage Pipe Install The Outdoor Unit Install The Refrigerant Pipe Electrical Wiring Perform The Test Run Air Evacuation... -
Page 5: Indoor Unit Installation
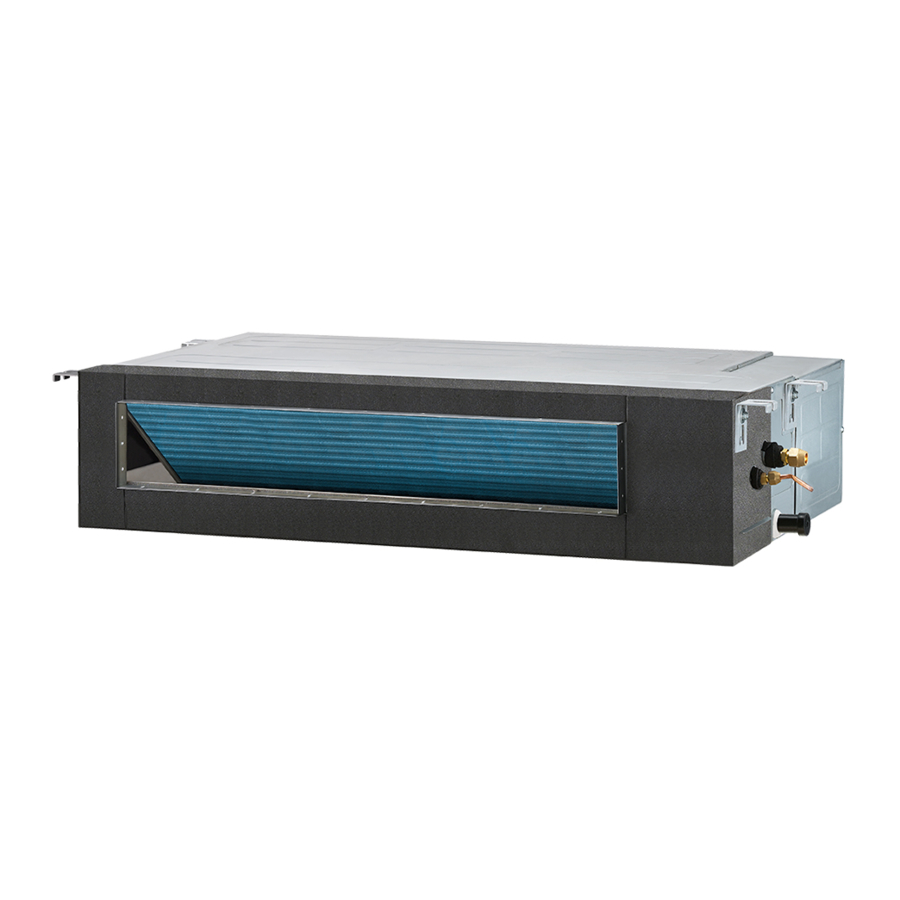
INDOOR UNIT INSTALLATION Indoor Unit Parts Pipe Juntion Mounting Hook Electric Control Box Air Outlet ³ ö · ç ³ ö · ç Drainage Pipe Filter Air Inlet Refrigerant Pipe PRECAUTION WARNING The indoor unit shall be firmly installed on the structure capable of bearing its weight. If the structure is too weak, the unit may fall and cause personal injury, property loss or death DO NOT install the indoor unit in the bathroom or laundry because too much moisture will short circuit the indoor unit and corrode the wiring. - Page 6 Indoor Unit Installation lnstructions Select installation location The indoor unit should be installed in a location that meets the following requirements: There is enough room for installation and maintenance. There is enough room for the connecting pipe and drainpipe. The ceiling is horizontal and its structure can sustain the weight of the indoor unit. The air inlet and outlet are not impeded.
- Page 7 Choice of air return ways The air conditioner should be installed securely; otherwise poor installation may lead to abnormal noises and vibration. This indoor unit is fitted with downward air return, which can be change to its backward counterpart if necessary.
- Page 8 Hang Indoor Unit( For finished concrete bricks) 1 Drill 4 holes 5cm (2") deep at the ceiling hook positions in the internal ceiling. Be sure to hold the drill at a 90 angle to the ceiling. 2 Using a hammer, insert the ceiling hooks into the pre-drilled holes. Secure the bolt using the washers and nuts.
- Page 9 Outlet Air Pipe Installation Generally, we have two types of outlet pipe available, i.e. rectangular or round ones. Rectangular air conduit can be directly connected to air outlet of indoor unit by rivets. For outlet dimensions, see outline drawing of the unit. Round air conduit should be connected to a piece of transitional air conduit before it is connected to air outlet of indoor unit, the other end of it can be separately connected to air conduit window or connected to air conduit window after air flow diversion, and the total length...
- Page 10 NOTE:Ensure sufficient space Air outlet side for installation and repair. (see the picture for details) Canvas tunnel Return air pipe and outlet pipe should be fixed to floor precast slabs by iron stand; in addition, all ports of the air conduit should be tightly sealed by gasket cement, and it is advisable that the edge clearance of return air pipe should be 150mm at least.
-
Page 11: Outdoor Unit Installation
OUTDOOR UNIT INSTALLATION Outdoor Unit Installation Instructions Select installation location The outdoor unit should be installed in a location that meets the following requirements: Keep the outdoor unit as close to the indoor unit as possible. Make sure there is enough space for installation and maintenance. The installation area must be dry and well ventilated. - Page 12 Body Dimensions MODE 18-24K 30-42K 940 338 1250 372 1369 Install Outdoor Unit Fix the outdoor unit with anchor bolts (M10) 600mm 600mm Bolt Bolt 4 pieces for one unit 4 pieces for one unit...
- Page 13 NOTE: The minimum distance between the outdoor unit and walls described in the installation guide does not apply to airtight rooms. Be sure to keep the unit unobstructed In at least two of the three directions (Front,Left,Right). (As shown on the right) Outdoor unit condensed water drainage(Optional) The condensed water and the ice formed in the outdoor unit during heating operation can be drained away thro-...
-
Page 14: Drainpipe Installation
DRAINPIPE INSTALLATION CAUTION Insulate all piping to prevent condensation. Do not pull on the drain strongly, as this may cause it to disconnect. If the drain is bent or installed incorrectly, water may leak and cause the water level switch to fail.In heating mode, the outdoor unit will drain water. Make sure that the drain hose is placed in a suitable area to avoid water damage and slippage due to freezen drain water. - Page 15 Hight static pressure drainage pipe installation Warning: Must install drainpipes according to the following figure , avoiding generating condensed water and leakage water. a.Assemble the main body according to Figure . b.The opening of drainpipes can be installed on the leftside or the right side . Could remove the drainstopper and put it on the left side or the right side.
-
Page 16: Refrigerant Pipe Installation
Refrigerant Piping Connection SAFETY PRECAUTION WARNING All field piping must be completed by certified technicians and must comply with local and national regulations. When installing the refrigeration system, ensure that air, dust, moisture or foreign substances do not enter the refrigerant circuit. Contamination in the system may cause poor operating capacity,high pressure in the refrigeration cycle, explosion or injury. - Page 17 Oil Traps CAUTION 1 If the indoor unit is installed higher than the outdoor unit: If oil flows back into the outdoor unit's compressor, this might cause liquid compression or deterioration of oil return. Oil traps in the rising gas piping can prevent this. An oil trap should be installed every 1 0m (32.Sft) of vertical suction line riser.
- Page 18 Refrigerant Piping Connection lnstructions CAUTION DO NOT install the connecting pipe until both indoor and outdoor units have been installed. 1 If the indoor unit is installed higher than the outdoor unit: Insulate both the gas and liquid piping to prevent water leakage. DO NOT deform pipe while cutting.Be extra carefull not to damage,dent,or deform the pipe while cutting.This will drastically reduce the heating efficiency of the unit Cut pipes...
- Page 19 4.Remove PVC tape from ends of pipe when ready to perform flaring work. 5.Clamp flare form on the end of the pipe. The end of the pipe must extend beyond the flare form. 6.Place flaring tool onto the form. 7.Turn the handle of the flaring tool clockwise until the pipe is fully flared. Flare the pipe in accordance with the dimensions Outside Tightening...
- Page 20 6 After connecting the copper pipes to the indoor unit, wrap the power cable, signal cable and the piping together with binding tape. NOTE: While bundling these items together, DO NOT intertwine or cross the signal cable with any other wiring. Drain pipe outlet should be Heavy-current cable led to a place that can avoid...
-
Page 21: Electrical Wiring
ELECTRIC WIRING SAFETY PRECAUTION WARNING Always disconnect the power supply before working on the unit. All electrical wiring must be done according to local and national regulations. The wiring must be carried out by a certified technician. Improper connection may cause electrical failure, personal injury and fire. - Page 22 Outdoor Unit Wiring WARNING Please turn off the main power of the system before performing any electrical or wiring work CAUTION Please wire in strict accordance with the wiring diagram(found inside the electrical box cover). The refrigerant circuit can become very hot. Keep the interconnection cable away from the copper tube. Prepare The Cable For Connection 1 You must first choose the right cable size before preparing it for connection.
- Page 23 Indoor Unit Wiring Prepare The Cable For Connection 1 Using wire strippers, strip the rubber jacket from both ends of signal cable to reveal about 15cm (5.9") of the wires inside. 2 Strip the insulation from the ends of the wires. 3 Using a wire crimper, crimp u-lugs on the ends of the wires.
-
Page 24: Air Evacuation
AIR EVACUATION Safety Precautions CAUTION Use a vacuum pump with a gauge reading lower than -0.1 MPa and an air discharge capacity above 40L/min. The outdoor unit does not need vacuuming. DO NOT open the outdoor unit's gas and liquid stop valves. - Page 25 8. Insert a hex wrench into the high-pressure valve and open the valve by turning the wrench in a 1 /4 counter clockwise turn. Listen for any gas coming out of the system and close the valve after 5 seconds. Connection pipe nut Valve body Valve stem...
-
Page 26: Test Run
TEST RUN Precaution The test run needs to be performed after the entire system is completely installed. Before performing the test, please confirm the following points: a. The indoor unit and outdoor unit are installed correctly according to the instructions b. -
Page 27: Owner's Manual
OWNER'S MANUAL SAFTY PRECAUTION Read the following " PRECAUTIONS" carefully before installation. The caution items stated here must be followed because these important contents are related to safety. The meaning of each indication used is as below. Incorrect installation due to ignoring of the instruction will cause harm or damage, and the seriousness is classified by the following indications. - Page 28 ! WARNING The appliance disconnection must be incorporated with an all-pole disconnection device in the fixed wiring in accordance with the wiring rules. Any person who is involved with working on or breaking into the refrigerant circuit should hold a current valid certificate from an industry-accredited assessment authority, which authorises their competence to handle refrigerants safely in accordance with an industry recognised assessment specification.
- Page 29 CAUTION Do not operate the air conditioner or remote control with wet hands. This may cause electric shock. When the wind deflector moves, do not touch the air outlet with your hands. Fingers may be pinched or the machine may be damaged. If the air conditioner is used with other heating equipment, please adequately ventilate to avoid insufficient oxygen in the room After prolonged use, please check the indoor unit for damage.
-
Page 30: Parts And Functions
PARTS AND FUNCTIONS Indoor Unit Air Outlet Air Outlet ³ ö · ç ³ ö · ç Refrigerant Pipe Junction Refrigerant Pipe Junction Installation Hook Installation Hook Drainage PIpe Drainage PIpe Air Return Air Return Filter Filter Remote controller Remote controller Remote controller receiver Remote controller receiver Outdoor Unit... - Page 31 Operating condition Noise pollution Use the air-conditioner under the following Install the air conditioner in a place temperature: that can bear its weight in order to operate more quietly. Room Temperature MODE Outdoor Temperature 17 -32 -15 -50 COOL mode Install the outdoor unit in a place (62 -90 ) (5 -122 )
-
Page 32: Remove Controller Receiver
REMOTE CONTROLLER RECEIVER Nixie tube Manual Switch D e f r o s t i n g / preheat light Running light Timing light warning light Display function declaration : LED light the state of running light When powered-on the first time, the running light twinkles, while the nixie tube does not lit. - Page 33 MAINTAINANCE SAFETY PRECAUTION WARNING Make sure all wires are properly connected. Failure to connect the wires according to the instructions may result in electric shock or fire. Make sure to install the drain hose according to the instructions. Otherwise, it may cause leakage and cause personal and property damage Please contact an authorized service technician for repair or maintenance.
-
Page 34: Maintenance
NOTE: For households with animals, you must wipe the grille regularly to prevent animal hair from obstructing the airflow. PREPARATION FOR PERIODS OF NON-USE Maintenance after Extended Non-Use 1. Remove all obstacles in front of the ventilation holes of indoor and outdoor units. 2. -
Page 35: Troubleshooting
TROUBLESHOOTING CAUTION If one of the following conditions occurs, switch off the power supply immediately and contact your dealer for further assistance The operation light continues to flash rapidly after the unit has been restarted. The remote control buttons do not work. The unit continually trips fuses or circuit breakers. - Page 36 Problem Possible Cause Both the indoor When the unit restarts in HEAT mode after defrosting, white mist and outdoor units may be emitted due to moisture generated from the defrosting emit white mist process. The unit may accumulate dust during extended periods of Dust is emitted non-use, which I will be emitted when the unit is turned on.
- Page 37 Problem Possible Cause Solution There's too much or too little Check for leaks and recharge the refrigerant in the system system with refrigerant There is air, incompressible The unit starts Evacuate and recharge the system gas or foreign material in the and stops with refrigerant refrigeration system.
- Page 38 The display content The definition of failure or protection of indoor LED Outdoor fan motor fault Indoor EEPROM fault Water full protection Communication failure between indoor unit and remote controller Inverter module protection Voltage High/Low protection High current protection Outdoor fan protection /Out of step/compressor damaged/insufficient refrigerant High exhaust temperature protection Anti-cold protection when cooling coil high temperature protection when cooling...
-
Page 39: Disposal Guideline
DISPOSAL GUIDELINE This appliance contains refrigerant and other potentially hazardous materials. When disposing of this appliance,the law requires special collection and treatment. DO NOT dispose of this product as household waste or unsorted municipal waste. When disposing of this appliance, you have the following options: Dispose of the appliance at designated municipal electronic waste collection facility. -
Page 40: Information Servicing
Information Servicing 1.Safety Checks Before starting work on systems containing flammable refrigerants, a safety check must be carried out to ensure that the risk of fire is minimized. Before servicing the refrigeration system, observe the following precautions. 2.Work procedure Work should be carried out in accordance with specified procedures to minimize the risk of flammable gas leakage. - Page 41 9. Checks to electrical devices The repair and maintenance of electrical components shall include preliminary safety inspection and component inspection procedures. If there are faults that may endanger safety, do not connect any power source to the circuit until the circuit is satisfactorily handled. If the failure cannot be corrected immediately, but it is necessary to continue the operation, an appropriate temporary solution should be used.
- Page 42 15.Air evacuation When breaking into the refrigerant circuit to make repairs of for any other purpose conventional procedures shall be used, However, it is important that best practice is followed since flammability is a consideration. The following procedure shall be adhered to: remove refrigerant;...
- Page 43 i) Do not exceed the maximum working pressure of the cylinder, even temporarily. j) When the cylinders have been filled correctly and the process completed, make sure that the cylinders and the equipment are removed from site promptly and all isolation valves on the equipment are closed off.
Need help?
Do you have a question about the AAC3000 and is the answer not in the manual?
Questions and answers