Table of Contents
Advertisement
Quick Links
Advertisement
Table of Contents

Related Manuals for Petrust PP005

Summary of Contents for Petrust PP005
- Page 1 PP005 V1.0 EN Wi-Fi Pet Feeder User Manual...
-
Page 2: Table Of Contents
Contents Hardware installa;on and introduc;on ........So?ware Installa;on ............... Add pet feeder via normal mode(EZ mode) ...... Add pet feeder via AP mode ..........Add pet feeder via Auto Scan mode ........Feeding .................. Manual feeding ..............Timed feeding ..............Feeding voice recording ........... -
Page 3: Hardware Installa;On And Introduc;On
Hardware installation and introduction 1.Open the baSery compartment at the boSom of the feeder, insert the Micro USB power cord into the connector at the boSom; and extend the power cord out along the designed wire guide. You can also insert 3 pieces of D cell baSeries which will enable the feeder to work automa;cally according to your scheduled feeding plan even without an external power supply. - Page 4 Note: Due to the wide variety of pet foods on the market, it cannot be guaranteed 100% that the mechanical structure of the feeder will fit all types of pet food. We recommend to use only dry food within 5-15mm in size.
-
Page 5: So?Ware Installa;On
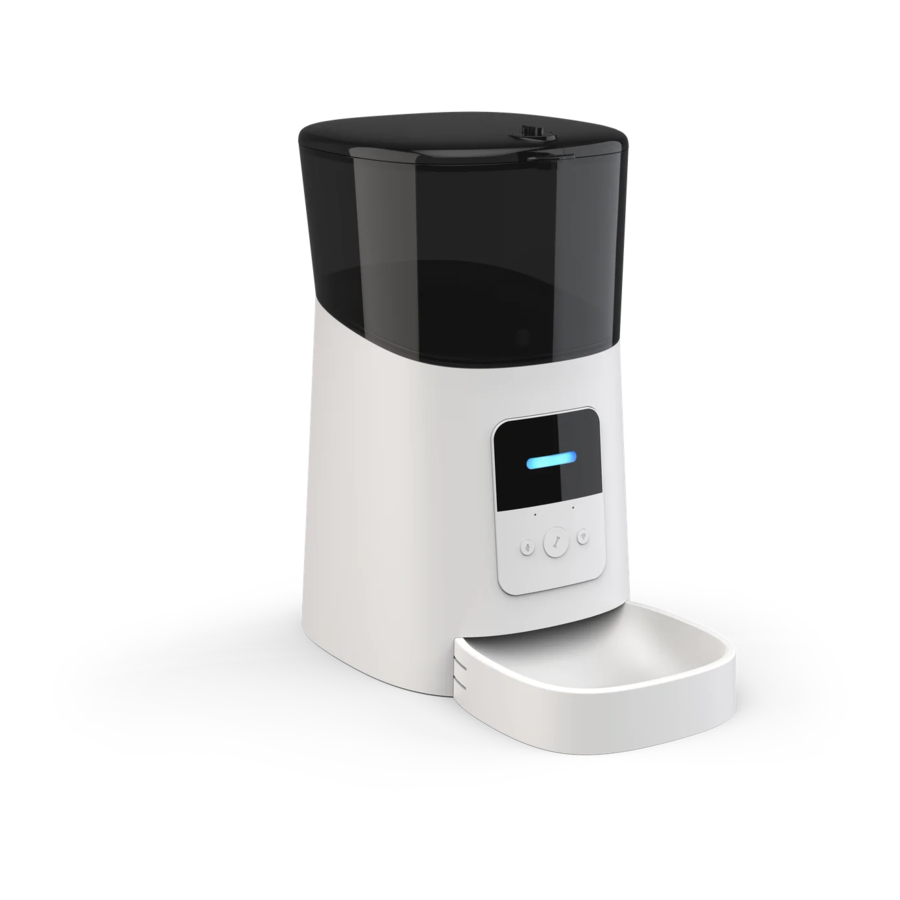
Opera;on panel introduc;on: Indicator LED Buzzer Microphone Recording Wi-Fi Settings Manual Feed Software Installation Add pet feeder via normal mode(EZ mode) 1.Search the App Store or scan the QR code below to download and install Zero. Pet Zero Download Website 1 Download Website 2... - Page 6 2.Run the App, read and agree to the privacy policy, and register a new account or login to a registered account. When you register or login to the account, please choose the correct country or area. 3.When you login, the App will ask you to access certain permissions. These permissions are very important for the App so please allow them.
- Page 7 4.Check whether the indicator LED is flashing RED 2 ;mes per second. If yes, then click Indicator is flashing rapidly to go to the next step. If not, please long press the Wi-Fi Se@ngs buSon for 3 seconds un;l you hear a beep. Then the feeder's indicator LED will flash rapidly. Flashing rapidly Long...
- Page 8 5.If the App asks for the loca;on permission of your mobile phones, please allow it. Then the name of your Wi-Fi network will appear in the textbox automa;cally. Please note that the feeder does not support 5Ghz Wi-Fi networks, only 2.4Ghz networks. Please check that the Wi-Fi name is the name of a 2.4Ghz Wi-Fi network.
-
Page 9: Add Pet Feeder Via Ap Mode
router. 6.The feeder will then try to connect to the Wi-Fi network. When connected, Click Done to complete adding process. If the feeder fails to connect, please check the important no;ce above first. If the feeder s;ll fails to connect, please add the feeder via AP mode by the following instruc;ons below. - Page 10 indicator's flashing status to flashing slowly. 2.Please check the name of the 2.4Ghz Wi-Fi network and enter the password in the same way as in normal mode. Click Confirm and the App will ask you to switch your mobile phone's network to a new network broadcast by the feeder.
-
Page 11: Add Pet Feeder Via Auto Scan Mode
the same as in normal mode covered above. Add pet feeder via Auto Scan mode Please note that in auto scan mode, 100% success rate of connec;ng the feeder to the Wi-Fi network cannot be guaranteed. Choose Auto Scan Mode on the Wi-Fi pet feeder page and enter the correct name and password of the 2.4GHz Wi-Fi network. -
Page 12: Feeding
Feeding Manual feeding 1.Enter feeder's main interface. Click Manual feed. Choose the feeding por;ons and click OK. The feeder will feed immediately. 2.You can also double click the Manual feed buSon on the feeder to feed manually. The feeding amount can be adjusted in the App. Click and set up Feed por;ons using the buSon. -
Page 13: Timed Feeding
disable this func;on. Double click Timed feeding 1.The pet feeder supports the scheduled feeding of exact por;ons at exact ;mes. Click the buSon in App, choose feeding Cme, repeat rules for each day of the week, and feed porCons, then click Save. 2.The feeder supports up to 15 feeding schedules. -
Page 14: Feeding Voice Recording
Feeding voice recording 1.To develop good feeding habits for pets, the feeder supports pre- recording a maximum of 10 seconds of audio, which is played during feeding. 2.Press and hold the record buSon for 3 seconds un;l the feeder makes a “Drip”... -
Page 15: Feeding Records And Alarm
Microphone P r e s s and hold No;ce: a.When the pet feeder is connected by the regular power adapter, the pet feeder recording will be played during feeding. It will play the number of set ;mes(3;mes/4;mes/5;mes) un;l the feeder has finished feeding. - Page 16 3.Machine malfunc;ons include low or empty food storage, low baSery and food jammed in the feeding bucket or feeding tray. 4.When a malfunc;on occurs, a message will appear in the App. And you can check error messages in the message center. Make sure that prompt message (no;fica;on) is enabled.
-
Page 17: Others
Others Basic settings BaOery Status: Shows the status of the baSery. Indicator lights: Turns on/off the indicator when the feeder is connected to the Wi-Fi network. Reboot feeder: Reboots the feeder manually. Advanced settings Click to access the advanced seRngs page. Device informaCon: Check feeder informa;on. - Page 18 Offline NoCficaCon: When the feeder is offline, a no;fica;on will sent to your mobile phone. Share Device: If you want to add the feeder to another mobile phone, register a new account on the new mobile phone, then share the device with the new account.
- Page 19 Battery The back-up baSery is designed as a short-term alterna;ve for when the external power supply is cut. When the pet feeder works on baSery back- up, it will go into sleep mode and some func;ons will be limited: a.When there is baSery supply only, the feeding voice recording will be played only once before feeding the pets.
-
Page 20: Faq
Q1: Why did the feeder fail to connect to my Wi-Fi network? A: Please check the important no;ce on Page 6 for help. You can try to add the feeder via AP mode instead of normal mode and auto scan mode. Q2: Why is the feeding recording only played once or never when I set the recording mulCple Cmes? A: Please press and hold the record buSon to record your voice first.
Need help?
Do you have a question about the PP005 and is the answer not in the manual?
Questions and answers