
Related Manuals for Darwin Fitness EVO40

Summary of Contents for Darwin Fitness EVO40
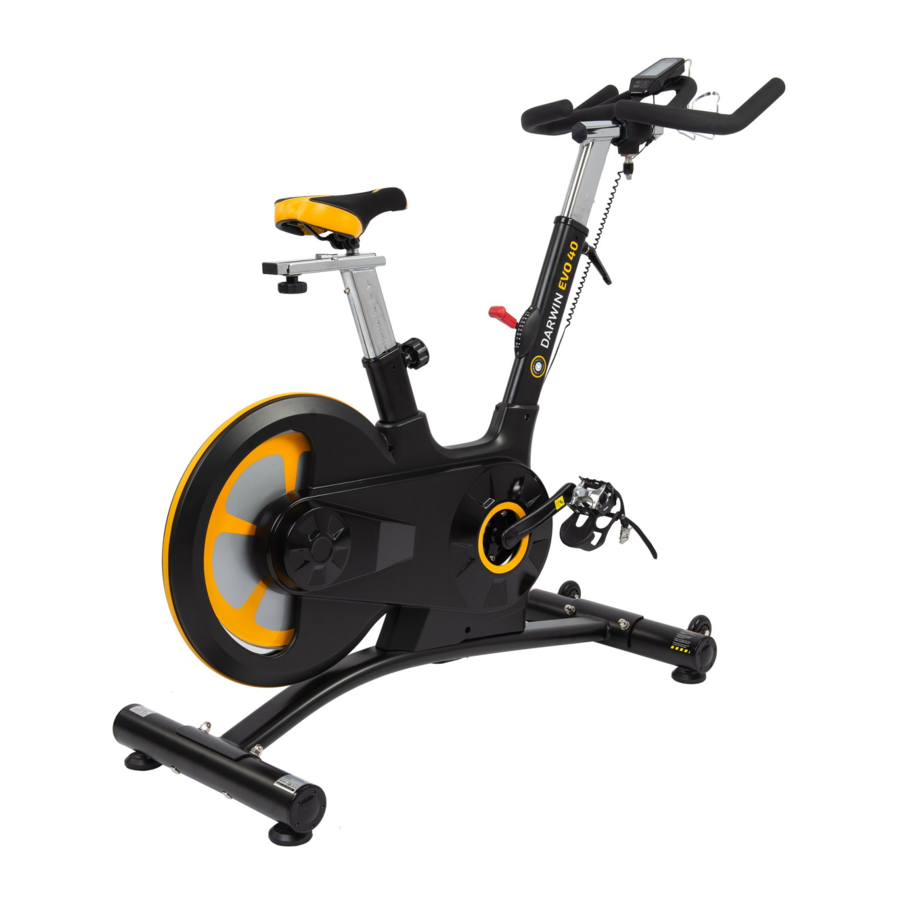
- Page 1 Assembly and Operating Instructions max. 135 kg ~ 60 Min. 51 kg L 141 | B 52 | H 133 DFSC40.01.03 Art. No. DF-SC40 TF TF DF-HT30 DARWIN EVO40...
- Page 2 EVO40...
-
Page 3: Table Of Contents
Content GENERAL INFORMATION Technical Data Personal Safety Set-Up Place ASSEMBLY General Instructions Scope of Delivery Assembly Adjustments 2.4.1 Adjusting the Tension 2.4.2 Using the Emergency Brake Function 2.4.3 Adjusting the Handlebar 2.4.4 Adjusting the Seat OPERATING INSTRUCTIONS Console Display Turn On and Turn Off the Device Training Settings Recovery Troubleshooting... - Page 4 Exploded Drawing WARRANTY CONTACT EVO40...
- Page 5 Dear customer, Thank you for choosing a high-quality equipment of the brand Darwin®. Darwin® offers sports and fitness equipment for the sophisticated home sport and the equipment of fitness studios and business customers. With Darwin® fitness equipment, the focus is on what sport is all about: maximum performance! Therefore, the equipment is developed in close consultation with athletes and sports scientists.
- Page 6 This notice indicates potentially hazardous situations which, if not avoided, will result in death or serious injuries! NOTICE This notice indicates further useful information. Retain these instructions in a safe place for future reference, maintenance or when ordering replacement parts. EVO40...
-
Page 7: General Information
GENERAL INFORMATION Technical Data Weight and dimensions: Product weight (gross, incl. packaging): 55 kg Product weight (net, without packaging): 50.5 kg Packaging dimensions (L x W x H): 116 cm x 24 cm x 97 cm Set-up dimensions (L x W x H): 141 cm x 51.5 cm x 133 cm Maximum user weight: 135 kg... -
Page 8: Personal Safety
Make sure that nobody is within the range of motion of the equipment during training so as not to endanger you or other persons. ࣑ ATTENTION Do not insert any objects of any kind into the openings of the device. EVO40... -
Page 9: Set-Up Place
Set-Up Place WARNING ⚠ Do not place the equipment in main corridors or escape routes. ⚠ CAUTION The training room should be well ventilated during training and not be exposed to any draughts. Choose the place in which to set up the equipment such that there is enough free space/ clearance to the front, the rear and to the sides of the equipment. -
Page 10: Assembly
To prevent damage to the equipment and the floor, assemble the equipment on a mat or packaging board. NOTICE In order to make the assembly as simple as possible, some screws and nuts to be used can already be pre-assembled. Ideally, assemble the equipment at its later set-up place. EVO40... -
Page 11: Scope Of Delivery
Scope of Delivery The scope of delivery consist of the following parts. At the beginning, check whether all parts and tools belonging to the device are included in the scope of delivery and whether damage has occurred. In the event of complaints, the contractual partner must be contacted directly. CAUTION ⚠... -
Page 12: Assembly
Assemble the front stabilizer (15) to the main frame (16) using mit two flat washers (5), two domed nuts (6) and two carriage bolts (3). Assemble the rear stabilizer (4) to the main frame (16) using two flat washers (5), two domed nuts (6) and two carriage bolts (3). EVO40... - Page 13 Step 2: Assembly of the Seat Put the vertical seat post (10) into the oval tube of the main frame (16). Fix the vertical seat post (10) with the spring adjustment knob (7). Now put the seat post (12) on the vertical seat post (10) and fix it with the flat washer (22) and the L shape knob (23).
- Page 14 Attach the bottle holder (78) to the handle bar (18) with two bolts (73). CAUTION ⚠ Make sure that the handlebar is fixed tightly to the handlebar post. Attach the console (72) to the handlebar (18) with four bolts (73) and connect the connectors A1 and A2 with one another. EVO40...
- Page 15 Step 4: Assembly of Pedals The pedals (1 L and 1 R) are marked with „L“ (left) and „R“ (right). Assemble the pedals to their respective crank arms (see figure). Please note that the right pedal needs to be attached in by turning it clockwise and the left pedal counterclockwise.
-
Page 16: Adjustments
Use this safety feature in any emergency situation where you need to get off the indoor cycle or bring the flywheel to a standstill. The lever for adjusting the resistance level (63) is also the emergency brake. If you want to stop the device quickly, press the lever all the way down. EVO40... -
Page 17: Adjusting The Handlebar
2.4.3 Adjusting the Handlebar The handlebar can be adjusted horizontally and vertically. To adjust the handlebar in the vertical position, loosen the L shape knob (19) and pull it backwards. ⚠ CAUTION Make sure that the L shape knob audibly engages in one of the adjustment holes. Let go of the L shape knob (19) again and make sure that it is engaged in one of the pre-drilled holes of the handlebar post (17). -
Page 18: Operating Instructions
4 seconds, the time will be stopped. • Range: 0.00 . 99.99 • Without setting a target, the distance will be counted up. DISTANCE • If a target is set, the distance will be coun- ted backwards. If 0 is reached, a signal sounds. EVO40... - Page 19 • Range: 0 - 9999 • Without setting a target, the calories will be counted up. CALORIES • If a target is set, the calories will be coun- ted backwards. If 0 is reached, a signal sounds. • Range: 0 - 30 to 230 BPM (beats per minute) •...
-
Page 20: Turn On And Turn Off The Device
If no signal occurs when you press the pedals, check the wiring of the cable. NOTICE If you interrupt your training for 4 minutes, the main display turns off. If the console display is abnormal, reinsert the batteries and try again. EVO40... -
Page 21: Storage And Transport
STORAGE AND TRANSPORT General Instructions ࣑ ATTENTION Make sure that the equipment is protected from moisture, dust and dirt in the selected storage location. The storage location should be dry and well ventilated and have a constant ambient temperature between 5°C and 45°C. WARNING ⚠... -
Page 22: Troubleshooting, Care And Maintenance
Position of the chest suitable chest strap (see No pulse display strap incorrect recommended accessories) Batteries empty Reposition chest strap and/or Check if heart rate can moisten electrodes be detected via the hand Change batteries pulse sensors EVO40... -
Page 23: Maintenance And Inspection Calendar
Maintenance and Inspection Calendar To avoid damage from body sweat, the equipment must be cleaned with a damp towel (no solvents!) after each training session. The following routine tasks must be performed at the specified intervals: Part Weekly Monthly Quarterly Half-yearly Yearly Display console... -
Page 24: Recommended Accessories
Of course, you can also contact our customer service: by telephone, e-mail, in one of our branches or via our social media channels. We will be happy to advise you! chest strap floor mat chest strap contact gel silicone spray towels EVO40... -
Page 25: Ordering Spare Parts
10 of this operating manual. NOTICE The serial number of your equipment is unique. It's located on a white sticker. Enter the serial number in the appropriate field. Serial number: Brand / Category: Darwin / Indoor cycle Model Name: EVO40 Article Number: DF-SC40... -
Page 26: Parts List
FLAT WASHER 1 BELT LOCKING KNOB BELT WHEEL L SHAPE KNOB SCREW5 FIXING NUT FIXING SHAFT FIXING TUBE BOLT 3 BOLT FIXING NUT 2 WHEEL BOLT BEARING FIXING NUT 1 BOLT 2 CRANK END CAP FIXING TUBE END CAP 2 BEARING EVO40... - Page 27 FLYWHEEL WOOLLY BLOCK FLYWHEEL SHAFT COMPUTER Six fine-tuning BOLT 3 Fine-tuning pull block SENSOR The brake fixed axis SPRING WASHER 1 FLAT WASHER 2 SPRING WASHER 2 BOLT 2 SCREW 3 The brake block assembly B0TTLE HOLDER RUBBER MAT Sensor wire END CAP2 WASHER 4...
- Page 28 Exploded Drawing EVO40...
- Page 29 WARRANTY Training equipment from Taurus® is subject to strict quality control. However, if a fitness equipment purchased from us does not work perfectly, we take it very seriously and ask you to contact our customer service as indicated. We are happy to help you by phone via our service hotline. Error Descriptions Your fitness equipment is developed for long-term, high-quality training.
- Page 30 For that reason, we also want to resolve your queries quickly and in a straightforward manner. Thus, please always keep your customer number and the serial number of the faulty equipment handy. EVO40...
- Page 31 CONTACT TECHNICAL SUPPORT TECHNICAL SUPPORT & SERVICE TECHNICAL SUPPORT & SERVICE �� �� �� +49 4621 4210-900 80 90 16 50 +33 (0) 172 770033 +49 4621 4210-945 +49 4621 4210-933 �� +49 4621 4210-698 �� �� info@fitshop.dk service-france@fitshop.fr �� technik@sport-tiedje.de ��...
- Page 32 The company employs numerous sports scientists, fitness trainers and competitive athletes. Visit us also on our social media platforms or our blog! EVO40...
- Page 34 EVO40...
- Page 35 TF TF DF-HT30...
- Page 36 DARWIN EVO40...