Table of Contents
Advertisement
Quick Links
Acer Projector
FL8610/LU-P950UT/FL950/
PF-L950UT/LP-620/DL710/
AWU1907/FL8620/LU-
P1000UT/FL1000/PF-
L1000UT/LP-630/DL720/
AWU1906/FL8630/LU-
P1200UT/FL1200/PF-
L1200UT/LP-640/DL730/
Series User's Guide
AWU1905
Copyright © 2020. Acer Incorporated.
All Rights Reserved.
Acer Projector User's Guide
Original Issue: 2/2020
Advertisement
Table of Contents

Related Manuals for Acer FL8610


Summary of Contents for Acer FL8610
- Page 1 Acer Projector FL8610/LU-P950UT/FL950/ PF-L950UT/LP-620/DL710/ AWU1907/FL8620/LU- P1000UT/FL1000/PF- L1000UT/LP-630/DL720/ AWU1906/FL8630/LU- P1200UT/FL1200/PF- L1200UT/LP-640/DL730/ AWU1905 Series User's Guide Copyright © 2020. Acer Incorporated. All Rights Reserved. Acer Projector User's Guide Original Issue: 2/2020...
- Page 2 Serial number: ___________________________________ Date of purchase: ________________________________ Place of purchase: ________________________________ Acer and the Acer logo are registered trademarks of Acer Incorporated. Other companies' product names or trademarks are used herein for identification purposes only and belong to their respective companies.
- Page 3 Information for Your Safety and Comfort Read these instructions carefully. Keep this document for future reference. Follow all warnings and instructions marked on the product. Turning the product off before cleaning Unplug this product from the wall outlet before cleaning. Do not use liquid cleaners or aerosol cleaners.
- Page 4 Use the product only with the supplied power supply cord set. If you need to replace the power cord set, make sure that the new power cord is equivalent to the original supplied power cord. Please contact your local dealer or Acer service center for details.
- Page 5 Product servicing Do not attempt to service this product yourself, as opening or removing covers may expose you to dangerous voltage points or other risks. Refer all servicing to qualified service personnel. Unplug this product from the wall outlet and refer servicing to qualified service personnel when: •...
- Page 6 2.37–3.6 Acer FL8 series Long Throw Zoom Lens 3.53–5.65 1550 mm RG3 Acer FL8 series Ultra Long Throw Zoom Lens 5.52–8.83 1370 mm RG3 • Cinema projectors that have a hazard distance greater than 1 m and emit light into an uncontrolled area where persons may be present should be positioned in accordance with “the fixed projector installation”...
- Page 7 Do not stand the projector on end vertically. It may cause the projector to fall over, causing injury or damage. • This product is capable of displaying inverted images for ceiling mount installation. Only use acer ceiling mount kit for mounting the projector and ensure it is securely installed.
- Page 8 Do not throw this electronic device into the trash when discarding. To minimize pollution and ensure utmost protection of the global environment, please recycle. For more information on the Waste from Electrical and Electronics Equipment (WEEE) regulations, visit http://www.acer-group.com/public/ Sustainability/index.htm...
-
Page 9: Precautions
First Thing First Usage Notes • Turn off the product before cleaning. • Use a soft cloth moistened with mild detergent to clean the display housing. • Disconnect the power plug from AC outlet if the product is not being used for a long period of time. -
Page 10: Table Of Contents
Information for Your Safety and Comfort First Thing First Usage Notes Precautions Introduction Product Features Package Overview Projector Overview Projector Outlook Control Panel Remote Control Layout MHL Feature Introduction Getting Started Installing the Projection Lens Removing the Projection Lens Connecting the Projector Connecting Multiple Sources through HDBaseT Module (Op- tional) Turning the Projector On/Off... - Page 11 Troubleshooting LED & Alarm Definition Listing Specifications Compatibility Modes Regulations and Safety Notices...
-
Page 12: Introduction
• technology • Enables projecting 3D content via DLP Link Technology: Blu-Ray 3D supported • Acer ColorBoost technology delivers vivid, life-like images • High brightness and contrast ratio • Versatile display modes enable optimum performance in any situation • NTSC/PAL/SECAM compatible and HDTV (720p, 1080i, 1080p) supported •... -
Page 13: Package Overview
Package Overview This projector comes with all the items shown below. Check to make sure you have them all. Contact your dealer immediately if any thing is missing. Projector Power cord VGA cable Security card Remote control Quick start guide AAA Battery x 2 (optional) 3G-SDI module... -
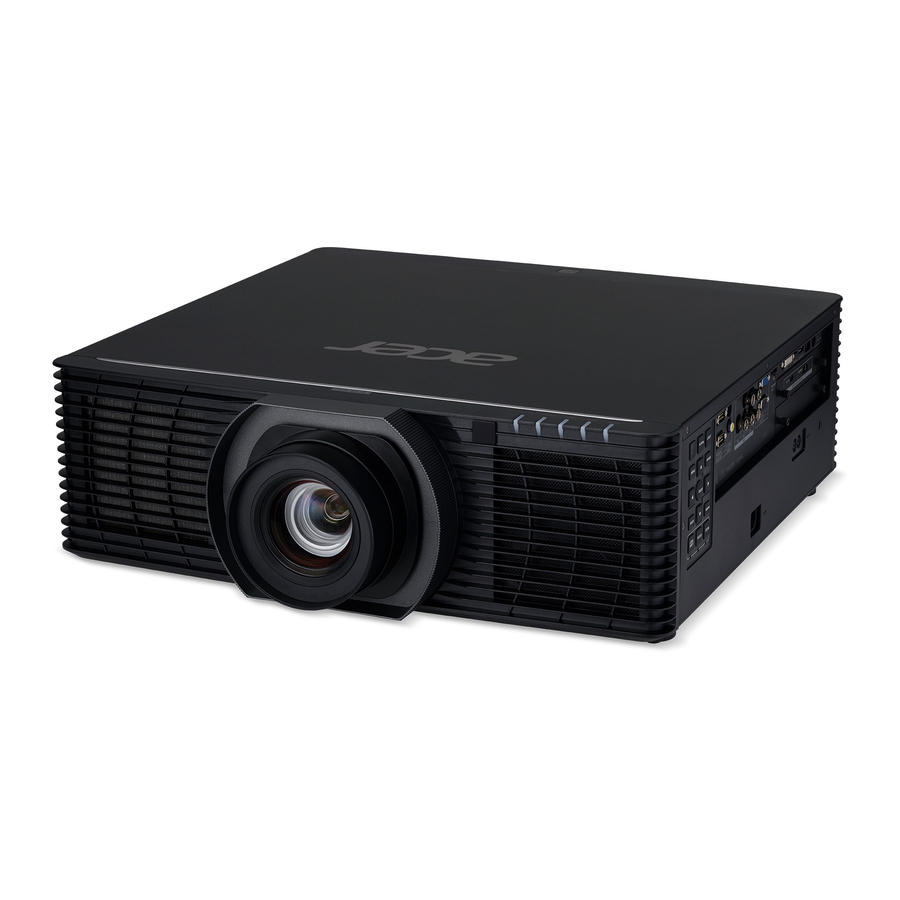
Page 14: Projector Overview
Projector Overview Projector Outlook Front/upper side Description Description Security bar Indicator LED Projection lens (optional) Power key Remote control receiver Control panel Side 10 11 1213 14 1516 Description Description Wired remote control input connector 12 USB connector (Type A) Wired remote control output connector (DC 5V output) RS232 input connector... - Page 15 Note: [A] differs when different lens is installed. Lens installed Acer FL8 series Standard Zoom Lens 594.1 Acer FL8 series Ultra Short Throw Zoom Lens 609.9 Acer FL8 series Short Throw Zoom Lens 611.4 Acer FL8 series Middle Throw Zoom Lens 631.5...
-
Page 16: Control Panel
Control Panel Function Description Refer to the "Turning the Projector On/Off" section. Power key PATTERN Displays the test pattern. MENU Launches the Onscreen Display (OSD) menu, returns to the previous step for the OSD menu operation or exits the OSD menu. ENTER Confirms your selection of items. -
Page 17: Remote Control Layout
Remote Control Layout Function Description Refer to the "Turning the Projector On/Off" section. Video To change source to composite video. To change source to VGA IN. HDMI1 To change source to HDMI. To change source to BNC. S-Video To change source to S-Video. DVI-D To change source to DVI-D. - Page 18 Function Description 15 Zoom Press "Zoom" and the indicator below lights up. Use to adjust the zoom setting. 16 Focus Press "Focus" and the indicator below lights up. Use to adjust the focus setting. 17 Picture Selects the preset picture mode. 18 Pattern Displays the test pattern.
-
Page 19: Mhl Feature Introduction
MHL Feature Introduction Press "SOURCE" for one second to enter or leave the MHL control mode. After entering the MHL control mode, press "RESYNC" to switch between the navigation mode (default) and numeric mode. Description Function Navigation mode Numeric mode SOURCE Long press for one second to enter or leave the MHL control mode. -
Page 20: Getting Started
Acer FL8 series Standard Zoom Lens (MC.JNN11.001) • Acer FL8 series Ultra Short Throw Lens (MC.JNN11.00A) • Acer FL8 series Ultra Short Throw Zoom Lens (MC.JNN11.002) • Acer FL8 series Short Throw Zoom Lens (MC.JNN11.003) • Acer FL8 series Middle Throw Zoom Lens (MC.JNN11.004) •... -
Page 21: Connecting The Projector
Connecting the Projector RS232 VGA/DVI/HDMI Wired remote control DVD player, 3D glasses Video/ Set-top box, S-Video HDTV Output receiver HDTV adapter Smart Display device Description Description 1 Power cord 3 RCA component cable 2 Wired remote control 10 HDMI (MHL) cable 3 RS232 cable 11 DVI cable 4 S-Video cable... -
Page 22: Connecting Multiple Sources Through Hdbaset Module (Optional)
Note: To ensure the projector works well with your computer, please make sure the timing of the display mode is compatible with the projector. Note: Some smart devices require a converter (supplied by the smart device maker) to enable the MHL function. Connecting Multiple Sources through HDBaseT Module (Optional) HDBaseT is a connectivity standard for whole-house and commercial... - Page 23 Note: Avoid using the LAN cable when it is coiled or bundled. Note: Inserting or removing the LAN cable during projection may cause noise. Note: Connectivity with all HDBaseT transmitters on the market is not guaranteed. Note: Some HDBaseT transmitters may not enable correct projection when used to connect source equipment to the projector.
-
Page 24: Turning The Projector On/Off
Turning the Projector On/Off Turning On the Projector Ensure that the power cord and signal cable are securely connected. The Power LED will light red. Turn on the projector by pressing (POWER) on the control panel or on the remote control, and the Power indicator LED will turn blue. Turn on your source (computer, notebook, video player, etc.). -
Page 25: Turning Off The Projector
Turning Off the Projector To turn the projector off, press the power button. This message appears: "Please press power button again to complete the shutdown process" Press the power button again. The LED Power indicator will turn solid red to indicate standby mode. It is now safe to unplug the power cord. -
Page 26: Adjusting The Projected Image
Adjusting the Projected Image Adjusting the Height of the Projected Image The projector is equipped with two elevator feet for adjusting the image height. To raise the image: Use the front Tilt adjusting wheels to raise the image to the desired height and angle. -
Page 27: Optimizing Image Size And Distance
Acer FL8 series Standard Zoom Lens/ Acer FL8 series Middle Throw Zoom Lens/ Acer FL8 series Long Throw Zoom Lens/ Acer FL8 series Ultra Long Throw Zoom Lens [A] differs when different lens is installed. Lens installed Acer FL8 series Standard Zoom Lens 0.6H... - Page 28 -3.7 0.74 -12.15 2.43 12.92 8.08 508.8 20.82 31.22 68.3 102.44 -4.04 0.81 -13.25 2.65 • With Acer FL8 series Ultra Short Throw Zoom Lens Diagonal Screen Size W x H Projection Distance (D) Offset (Hd) length (inch) (feet) (feet)
- Page 29 • With Acer FL8 series Short Throw Zoom Lens Screen Size W x H Projection Distance (D) Offset (Hd) Diagonal length (inch) (feet) (feet) (inch) size of 16:10 Width Height Width Height Wide Tele Wide Tele Min. Min. Screen 1.29 0.81...
- Page 30 • With Acer FL8 series Ultra Long Throw Zoom Lens Screen Size W x H Projection Distance (D) Offset (Hd) Diagonal length (inch) (feet) (feet) (inch) size of Width Height Width Height Wide Tele Wide Tele Min. Min. 16:10 Screen 1.29...
-
Page 31: How To Get A Preferred Image Position By Adjusting Lens Shift
How to Get a Preferred Image Position by Adjusting Lens Shift The projector is equipped with lens shift for adjusting the position of projected image without requiring you to physically move the projector. To shift the lens, use the control panel or remote control, or select "Display settings" > "Lens" on the OSD and adjust the lens. - Page 32 Acer FL8 series Ultra Short Throw Zoom Acer FL8 series Short Throw Zoom Lens Acer FL8 series Middle Throw Zoom Lens Acer FL8 series Long Throw Zoom Lens Acer FL8 series Ultra Long Throw Zoom Lens Acer FL8 series Ultra Short Throw Lens 83.2%...
-
Page 33: User Controls
User Controls Onscreen Display (OSD) Menus The projector has multilingual Onscreen Display (OSD) menus that allow you to make image adjustments and change a variety of settings. Using the OSD menus • To open the OSD menu, press "MENU" on the control panel or remote control. -
Page 34: Image Adjustment
Image Adjustment There are many factory presets optimized for various types of images. • Bright: For brightness optimization. • Standard: For common environment. • Video: For playing video in a bright environment. Display Mode • sRGB: For sRGB standard. • DICOM SIM: For DICOM format files in simulation mode, and not for actual diagnosis. - Page 35 Adjusts the color temperature. At higher color Color temperatures, the screen looks colder; at lower color Temperature temperatures, the screen looks warmer. Use this function to enhance color and reproduce vivid colors. HSG settings • Color: Use key to select a color that you wish to enhance.
-
Page 36: Display Settings
Display settings Use this function to choose your desired aspect ratio. • Auto: Keeps the image with original width-height ratio and maximizes the image to fit native horizontal Aspect Ratio or vertical pixels. • 4:3/16:9/16:10/1.88:1/2.35:1: The image will be scaled to fit the screen and displayed using a 4:3/16:9/16:10/ 1.88:1/2.35:1 ratio. - Page 37 Lens Settings • Lens Lock: Selecting Yes will lock all the functions provide in this menu and the Lens Centering menu. You will not be able to change lens related settings. • Lens Shift: Press to select Normal Speed or Fine Tune to determine how fast you want the lens to move.
- Page 38 Screen Capture Use this function to customize the startup screen. To capture the image that you want to use as the startup screen, follow the instructions below. Before proceeding with the following steps, make sure that the "Keystone" is set to the default value "0".
-
Page 39: Default Adjustment
Default Adjustment Sets a language for the OSD menus. Use to select Language your preferred language. Menu Display Sets the length of time the On Screen Display will remain Time active after your last key press. Menu Position Sets the On Screen Display menu position. •... - Page 40 Schedules automatic shutdown of the projector. VGA Out Selecting "On" enables the function. The projector can output a VGA signal when it is in standby mode and the VGA IN (or VGA IN 1) and VGA OUT sockets are correctly connected to the devices.
- Page 41 Password Protection Select "On" to use the security verification when the turning on the projector. Select "Off" to be able to switch on the projector without a password verification. Change Password Security Settings Sets the password. Lock to User Startup Screen Use this function to lock the Startup Screen and it cannot be changed by the "Start-up Screen"...
- Page 42 Note 3: The Info page shows the projector information and status.
-
Page 43: Options
Options Sets the brightness mode. • Normal: Increases the brightness. Laser Mode • Eco.: Dims the projector light source which will lower power consumption and extend the light source life. • User: Memorize user’s settings. User to adjust the brightness to your desired level. Choose "On"... - Page 44 3D SYNC Use this option to select the appropriate 3D function. • DLP Link: Choose "DLP Link" to use DLP Link 3D Glasses. • External: Choose "External" to use VESA 3D emitter and 3D Glasses. 3D SYNC Output Use this option to select the appropriate 3D sync output method.
- Page 45 HDMI (Video mode) HQFS 3D (480i@60Hz), 576i@50Hz, Frame Packing (1080p@23.98/24Hz, 720p@50/60Hz) Side-by-Side Horizontal (1080i@50/60Hz, 1080p@50/60Hz) Top-and-Bottom (720p@50/60Hz, 1080p@23.97/24Hz, 1080p@50/60Hz) It needs correct settings on graphics card 3D application program for correct 3D display. The SW players, such as Stereoscopic Player and DDD TriDef Media Player can support 3D format files.
-
Page 46: Appendices
Appendices Troubleshooting If you experience a problem with your Acer projector, refer to the following troubleshooting guide. If the problem persists, please contact your local reseller or service center. Image Problems and Solutions Problem Solution No image appears • Make sure all the cables are correctly connected as onscreen described in the "Getting Started"... - Page 47 Partial, scrolling • Press "RESYNC" on the control panel or remote or incorrectly control. displayed image • For an incorrectly displayed image: (For notebooks) • Follow the steps for item 2 (above) to adjust the resolution of your computer. • Press the toggle output settings.
- Page 48 Image is too small • Adjust the zoom lever on the top of the projector. or too large • Move the projector closer to or further from the screen. • Press "MENU" on the control panel or remote control. Go to "Display settings" > "Aspect Ratio" and try different settings.
- Page 49 OSD Messages Condition Message Reminder Message Fan Fail - the system fan is not working. Laser will automatically turn off soon. Projector Overheated - the projector has exceeded its recommended operating temperature and must be allowed to cool down before it is used.
- Page 50 LED & Alarm Definition Listing LED Messages Status1 Status2 Status3 Power LED Temp LED Message Blue Standby Power up Flashing processing Start to move C0 Flashing Flashing Flashing Flashing position C0 position ready Power On (Normal) Shutdown Flashing processing (Cooling) Firmware Download mode Timer Backup...
- Page 51 Status1 Status2 Status3 Power LED Temp LED Message Blue Fan 13 Error Quick Flashing Fan 14 Error Quick Flashing Fan Errors (more Quick than 2 fans) Flashing Color Wheel Flashing Phosphor Wheel 1 Flashing Phosphor Wheel 2 Flashing Liquid Pump 1 Flashing Liquid Pump 2 Flashing...
- Page 52 Specifications The specifications below are subject to change without notice. For final specs, please refer to Acer's marketing documentation. Projection system ™ Resolution Native: WUXGA (1920 x 1200) Maximum: WUXGA (1920 x 1200) (supports reduce blanking only) Computer compatibility Refer to the "Compatibility Modes" section for more information.
- Page 53 Vertical refresh scan rate 24 – 120 Hz Keystone correction • Standard zoom lens/Short throw zoom lens/Middle throw zoom lens/Long throw zoom lens/Ultra long throw zoom lens: +/-30 Degrees (Vertical/Horizontal), Manual • Ultra short throw zoom lens: +/-25 Degrees (Vertical/Horizontal), Manual Digital zoom Audio Lens shift...
- Page 54 Spare parts • Acer HDBaseT module for FL8 series (MC.JNM11.005) • Acer 3G-SDI module for FL8 series * Design and specifications are subject to change without notice.
- Page 55 Compatibility Modes VGA Analog - PC Signal H.Frequency Mode Resolution V.Frequency [Hz] [KHz] 31.47 37.86 640 x 480 37.50 43.27 61.91 35.20 37.88 48.08 SVGA 800 x 600 46.88 53.67 77.43 48.36 56.48 1024 x 768 60.02 68.68 98.96 63.85 1152 x 864 67.50 77.10...
- Page 56 1280 x 768 47.78 WXGA 1280 x 768 60.29 1280 x 768 68.63 HD 720 1280 x 720 45.00 1280 x 800 49.70 WXGA 1280 x 800 - RB 101.6 1440 x 900 55.94 WSXGA+ 1680 x 1050 65.29 acer_16:9 1366 x 768 47.71 1920 x 1080-RB...
- Page 57 UXGA_60 1600 x 1200 Mac G4 640 x 480@60Hz 59.94 31.469 MAC13 640 x 480@67Hz 66.667 Mac G4 800 x 600@60Hz 60.317 37.879 Mac G4 1024 x 768@60Hz 60.004 48.363 MAC19 1024 x 768@75Hz 75.02 60.241 MAC21 1152 x 870@75Hz 75.061 68.681 WXGA_60...
- Page 58 MHL - Video Signal Mode Resolution V.Frequency [Hz] H.Frequency [KHz] 720 x 480 480i 15.73 (1440 x 480) 480p 720 x 480 31.47 720 x 576 576i 15.63 (1440 x 576) 576p 720 x 576 31.25 720p 1280 x 720 45.00 720p 1280 x 720...
- Page 59 3D Timing Input timing 1280 X 720P @ 50Hz Top - and - Bottom 1280 X 720P @ 60Hz Top - and - Bottom HDMI 3D Input 1280 X 720P @ 50Hz Frame packing (with 3D Info 1280 X 720P @ 60Hz Frame packing Frame 1920 X 1080i @ 50 Hz...
- Page 60 Regulations and Safety Notices Declaration of Conformity for EU countries Acer hereby, declares that this projector series is in compliance with the essential requirements and other relevant provisions of Directive 1999/5/EC. Compliant with Russian/Ukraine/Belarus regulatory certification Radio device regulatory notice Note: The regulatory information below is for models with wireless LAN and/or Bluetooth only.
- Page 61 DL730/FL8620/LU-P1000UT/FL1000/PF-L1000UT/ LP-630/DL720/FL8610/LU-P950UT/FL950/PF-L950UT/ LP-620/DL710 We, Acer Incorporated, hereby declare under our sole responsibility that the product described above is in conformity with the relevant Union harmonization legislations as below Directive and following harmonized standards and/or other relevant standards have been applied:...
Need help?
Do you have a question about the FL8610 and is the answer not in the manual?
Questions and answers