Advertisement
Quick Links
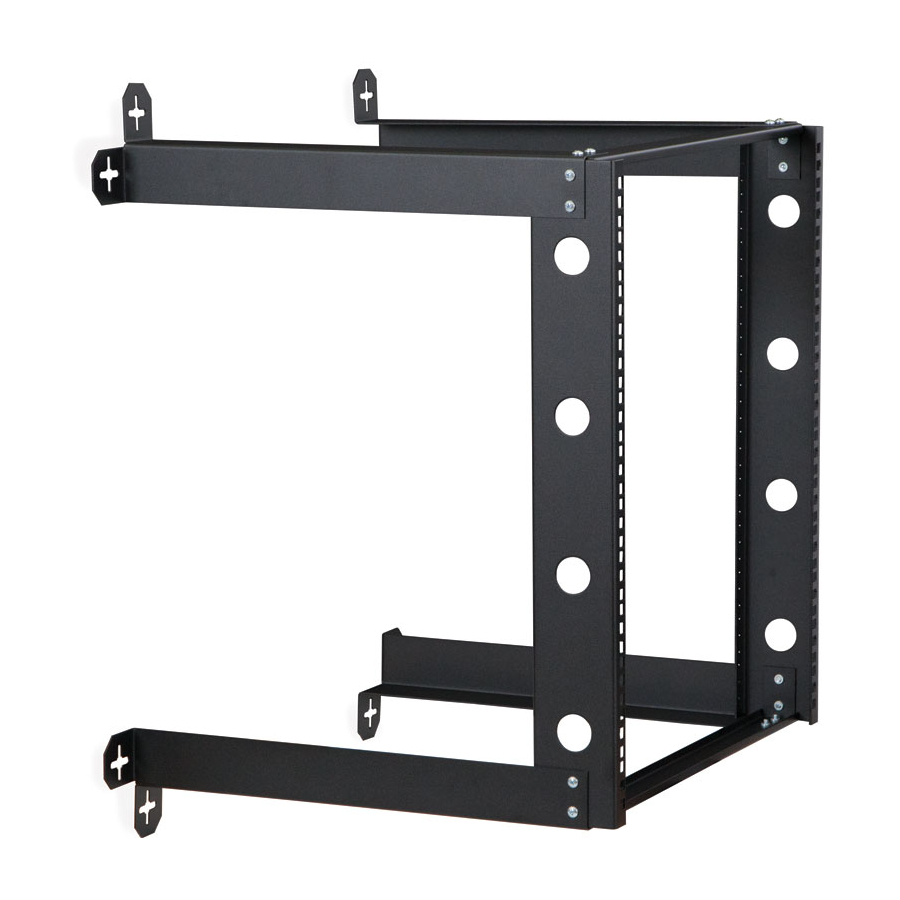
Assembly - Step 3:
Mount rack to wall using appropriate hardware
(not included). Fasten to secure surfaces such as
wall studs to increase weight capacity.
For details about product warranty, please visit
DISCLAIMER: Kendall Howard LLC. endeavors to make this manual accurate and com-
plete. However, Kendall Howard LLC makes no representations or warranties of any
kind, expressed or implied, about whether the use of products contained herein would
infringe any rights or the correctness, accuracy or reliability of the information contained
herein or that said information covers all details, conditions or variations. The information
herein does not provide for every possible contingency in connection with the installation
or use of the product(s). The information contained in this document is subject to change
without notice or obligation. Kendall Howard LLC assumes no responsibility for the
accuracy, completeness or reliability of the information contained in this document. Any
reliance placed on the information is therefore strictly at your own risk.
www.kendallhoward.com
4
I n s t r u c t i o n s / D i r e c t i o n s
V-Line Wall-Mount Rack 21U
#1915-3-300-21
w w w . k e n d a l l h o w a r d . c o m
I N N O V A T O R S I N P R O D U C T D E S I G N
A d d r e s s :
1 0 1 5 2 L i b e r t y L a n e
C h i s a g o C i t y , M i n n e s o t a , 5 5 0 1 3
U n i t e d S t a t e s o f A m e r i c a
P h o n e :
6 5 1 - 2 1 3 - 1 3 3 3
F a x :
8 0 0 - 4 1 8 - 6 8 9 7
1
Advertisement

Related Manuals for Kendall Howard 1915-3-300-21


Summary of Contents for Kendall Howard 1915-3-300-21
- Page 1 I N N O V A T O R S I N P R O D U C T D E S I G N DISCLAIMER: Kendall Howard LLC. endeavors to make this manual accurate and com- plete. However, Kendall Howard LLC makes no representations or warranties of any...
- Page 2 Tools Needed: Assembly - Step 1: Screw Driver Lay Side Rails face down. Align H-Braces at both ends and Corner Brackets on the outside at each corner. Included: *Note: Rack comes in several sizes, but assemble and install in the same way. (2x) H-Brace Assembly - Step 2: (2x) Side Rail...
Need help?
Do you have a question about the 1915-3-300-21 and is the answer not in the manual?
Questions and answers