Table of Contents

Related Manuals for Evenflo Gold Revolve 360


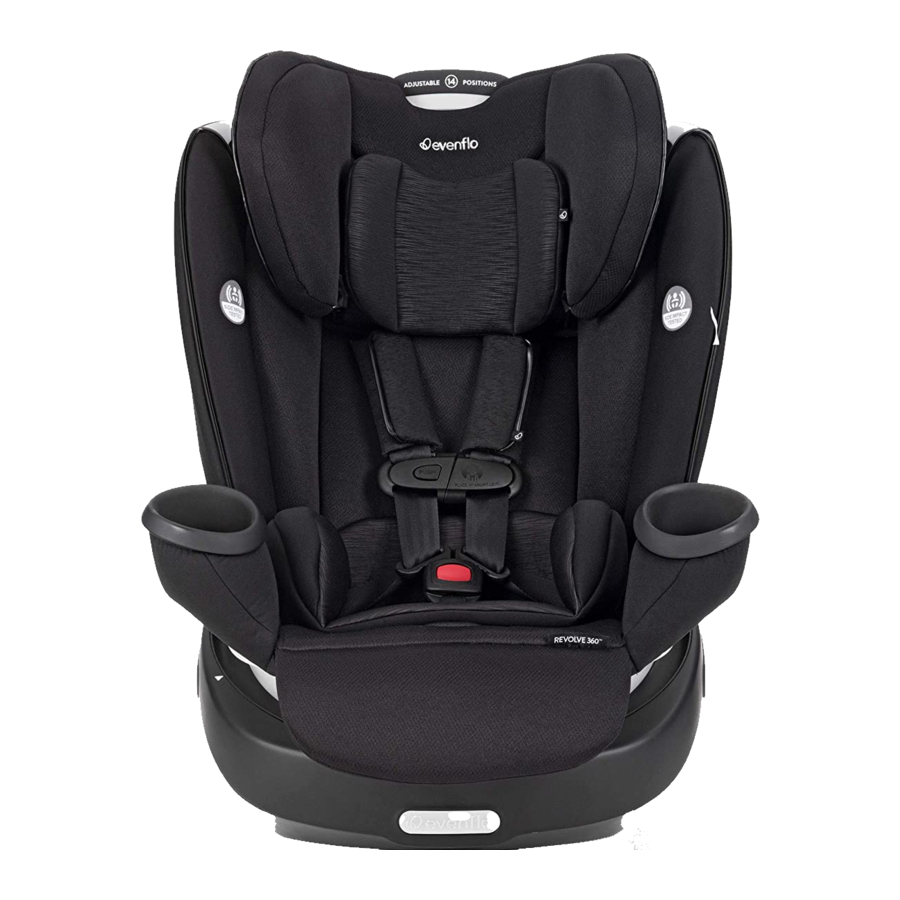
Summary of Contents for Evenflo Gold Revolve 360
- Page 1 3-in-1 Rotating Car Seat Owner's Manual Keep instructions for future use. WARNING: To reduce the risk of serious injury or death, read this owner’s manual prior to installing and using this child restraint. © 2020 Evenflo Company, Inc. 25701580 10/20...
- Page 3 According to the U.S. National Highway Traffic Safety Administration (NHTSA), car seats and boosters provide protection for infants and children in a crash, yet car crashes are a leading cause of death for children. To reduce the risk of SERIOUS INJURY or DEATH, read this owner’s manual and your vehicle owner’s manual before installing and using this child restraint.
- Page 4 Table of Contents IMPORTANT INFORMATION Child Requirements ......................7 Premature Infant Use ....................8 Rear-Facing Mode ....................10 Forward-Facing Mode ..................... 12 Booster Mode ......................14 Warnings ........................16 Motor Vehicle/Aircraft Usage ..................35 Registration and Recall Information ................36 Child Restraint Features ....................
- Page 5 Securing with the Booster ..................104 Removing/Replacing the Seat Cover ................105 Care and Cleaning ....................... 114 Proper Disposal ......................115 Replacement Parts ...................... 116 Recording Model Information and Storing Your Instructions ........118 Evenflo Gold Lifetime Warranty ..................119...
- Page 6 Symbol Legend Alerts you to important information about airbag Airbag Symbol safety. Alerts you to important information about LATCH/UAS Symbol LATCH/UAS safety. Alerts you to important information about Tether Tether Anchor Symbol Anchor safety. Alerts you to important information about Aircraft Symbol aircraft safety.
- Page 7 Child Requirements WARNING! DEATH or SERIOUS INJURY can occur. This child restraint is designed for use by children in both REAR-FACING FORWARD-FACING BOOSTER mode, as well as in mode. To use this child restraint properly, children MUST meet the size and age requirements on the following pages.
- Page 8 Premature Infant Use Premature Infant Use Before using this child restraint for preterm or low birth weight infants, ensure the Child Requirements are met and follow the guidelines in this section. According to NHTSA, a properly installed child restraint reduces the risk of death by over 70% for infants involved in crashes.
- Page 9 Premature Infant Use Premature Infant Use The AAP recommends that appropriate hospital staff observe your infant in the child restraint for a period of 90 to 120 minutes or the duration of travel, whichever is longer. This period of observation must be performed with the infant properly positioned as described in these instructions and with the child restraint placed at an angle that is approved for use in the vehicle.
- Page 10 Child Requirements Rear-Facing Mode CHILD REQUIREMENTS • 1.9 - 18 kg (4 - 40 lbs) • 44 - 101 cm (17 - 40 in) • Top of child’s head is at least 2.5 cm (1 in) or more below the top of the child restraint Headrest or Shell JUST •...
- Page 11 Child Requirements Rear-Facing Mode REAR-FACING installation, Recline Ball should be in correct zone for child size: • White Zone: 1.9 - 9 kg (4 - 20 lbs) • Black Zone: 9.1 - 18 kg (20 - 40 lbs) OPTIONAL: To ensure a better fit for smaller infants, the Body Pillow (pg.
- Page 12 Child Requirements Forward-Facing Mode CHILD REQUIREMENTS • 10 - 29.4 kg (22 - 65 lbs) • 72 - 124 cm (28 - 49 in) • Tops of the child’s ears are at or below the top of the child restraint headrest •...
- Page 13 Child Requirements Forward-Facing Mode When used FORWARD-FACING, make sure the child restraint is in the UPRIGHT position as shown.
- Page 14 Child Requirements Booster Mode CHILD REQUIREMENTS • 18 - 54.4 kg (40 - 120 lbs) • 112 - 144 cm (44 - 57 in) • Tops of the child’s ears are at or below the top of the booster seat headrest •...
- Page 15 Child Requirements Booster Mode When to put your child in a Booster Booster seats raise the child up and help to position the vehicle lap and shoulder belt correctly. When the child is properly restrained in a booster seat, their risk of injury in all types of crashes is reduced, as the lap and shoulder belt provide excellent restraint of the upper and lower torsos.
- Page 16 WARNING! DEATH or SERIOUS INJURY can occur. Airbag Warnings • DO NOT place REAR-FACING child seat on front seat with air bag. • DEATH OR SERIOUS INJURY CAN OCCUR. The back seat is the safest place for children 12 and under. •...
- Page 17 WARNING! DEATH or SERIOUS INJURY can occur. Airbag Warnings • If the rear seat of your vehicle is equipped with side air bags, refer to the following information for proper usage: Vehicles built prior to the 2002 model year: DO NOT use this restraint in a vehicle seating position equipped with a side air bag unless authorized by the vehicle manufacturer.
- Page 18 WARNING! DEATH or SERIOUS INJURY can occur. General Warnings • Failure to follow the REAR-FACING, FORWARD-FACING BOOSTER Child Usage Requirements for this child restraint could result in serious injury or death. (See "Child Requirements" on pgs. 10 - 15). • Failure to follow installation instructions and the instructions and warning labels on product can result in the child striking the vehicle’s interior during a sudden stop or crash.
- Page 19 WARNING! DEATH or SERIOUS INJURY can occur. Location Warnings • ALWAYS read and follow exactly the instructions that accompany your vehicle and child restraint. • According to accident statistics, children are safer when properly restrained in the rear seating positions than in the front seating positions. Generally, the center rear position is safest and should be used if available.
- Page 20 WARNING! DEATH or SERIOUS INJURY can occur. Location Warnings • ONLY use this child restraint on FORWARD-FACING vehicle seats. DO NOT use this restraint with vehicle seats that face the rear or side. • ONLY use this child restraint on vehicle seats with backs that lock into place. •...
- Page 21 WARNING! DEATH or SERIOUS INJURY can occur. Rear-facing Warnings REAR-FACING • Fold-down armrests could pose a hazard to a child in certain types of collisions. Consult your vehicle owner’s manual before installing any REAR-FACING child restraint in front of a fold-down armrest. •...
- Page 22 WARNING! DEATH or SERIOUS INJURY can occur. Forward-facing Warnings • DO NOT USE this Child Restraint FORWARD-FACING if your child is less than 2 years old. • Adjust or remove the vehicle headrest in the seat where the child restraint is to be installed, so the back of the child restraint rests against the vehicle seat back.
- Page 23 WARNING! DEATH or SERIOUS INJURY can occur. Booster Warnings • DO NOT use this booster seat REAR-FACING. • Use ONLY the vehicle’s lap AND shoulder belt system when restraining the child in this booster seat. Never use a booster with only a lap belt, as this could cause serious injuries.
- Page 24 WARNING! DEATH or SERIOUS INJURY can occur. Seat Belt Warnings • ALWAYS read your vehicle owner's manual to determine Retractor what vehicle belts and retractors are used in your vehicle. • ALWAYS lock your vehicle seat belt when installing the car seat in one of the harness modes.
- Page 25 WARNING! DEATH or SERIOUS INJURY can occur. Seat Belt Warnings • DO NOT use this child restraint in a vehicle with seat belts that automatically move along the vehicle frame when the door is opened. • DO NOT use this child restraint in a vehicle equipped with lap belts that only lock during a sudden stop or crash (Emergency Locking Retractor - ELR).
- Page 26 WARNING! DEATH or SERIOUS INJURY can occur. Seat Belt Warnings • DO NOT use with lap/shoulder belts with two retractors. If the vehicle seat belts are not routed and fastened correctly, the child restraint may not protect the child in a crash. •...
- Page 27 WARNING! DEATH or SERIOUS INJURY can occur. Seat Belt Warnings If you have any of these types of vehicle belt systems listed, these are SAFE to use to install your child restraint in the vehicle. Review vehicle owner’s manual for specific instructions on child restraint installation.
- Page 28 WARNING! DEATH or SERIOUS INJURY can occur. Seat Belt Warnings Lap/Shoulder Belt with Locking Latch Plate The lap portion of this belt does not loosen once the belt is buckled. The vehicle belt is tightened by pulling up hard on shoulder belt and feeding the extra webbing into the retractor.
- Page 29 WARNING! DEATH or SERIOUS INJURY can occur. Seat Belt Warnings LOCKING CLIP USE • If your vehicle was built prior to model year 1996, and has a lap/shoulder belt that is equipped with an emergency Locking Clip locking retractor (ELR) AND sliding latch plate, you MUST installed properly use a Locking Clip.
- Page 30 WARNING! DEATH or SERIOUS INJURY can occur. LATCH/UAS Warnings LATCH and UAS are acronyms for Lower Anchors Vehicle Top Tether Anchor Points and Tethers for CHildren (USA) and Universal Anchorage System (Canada), and refer to a pair of fixed Lower Anchors (or bars) and a Top Tether anchor that are built into your vehicle, in vehicles built after September 1, 2002.
- Page 31 WARNING! DEATH or SERIOUS INJURY can occur. LATCH/UAS Warnings Center installation in a non-standard LATCH/UAS position: Center installation of this child restraint is permitted using inner Lower Anchor Bars from the outside seating positions if: 1. your vehicle manual allows such installation; and 2.
- Page 32 WARNING! DEATH or SERIOUS INJURY can occur. LATCH/UAS Warnings • DO NOT use the lower anchors of the child restraint anchorage system (LATCH/UAS system) to attach this child restraint when restraining a child REAR-FACING weighing more than 15.9 kg (35 lbs) or 18 kg (40 lbs) FORWARD-FACING with the internal harnesses of the child restraint.
- Page 33 WARNING! DEATH or SERIOUS INJURY can occur. LATCH/UAS Warnings • ALWAYS be sure that the Lower Anchor Connectors are attached to the vehicle lower anchor bars by pulling hard on the Lower Anchor Connectors. If they are not attached, the Lower Anchor Connector assembly will not secure your child restraint.
- Page 34 WARNING! DEATH or SERIOUS INJURY can occur. Additional Warnings • DO NOT use the cup holder to store cans or hard cups. DO NOT place any cups that contain hot liquids in the cup holder. • DO NOT use the cup holder for storage while the seat is being rotated. •...
- Page 35 Motor Vehicle/Aircraft Usage Regulatory Notice: This child restraint system meets all applicable requirements of Federal Motor Vehicle Safety Standard (FMVSS) 213. When used WITH the internal harness and properly installed pursuant to these instructions, this restraint is certified for use only in passenger and multi- purpose passenger motor vehicles, buses and trucks equipped with either lap belts only or lap/shoulder belt systems.
- Page 36 Registration and Recall Information Recall Information for US Customers • Child restraints could be recalled for safety Consumer: Just fill in your name and address and e-mail address. reasons. You must register this restraint to Your Name be reached in a recall. Send your name, Your Street Address address, email address if available, and the City...
- Page 37 Registration and Recall Information Public Notice for Canadian Customers • Child restraints could be recalled for safety reasons. CANADIAN RESIDENTS ONLY DOMICILIES DU CANADA SEULEMENT PRODUCT REGISTRATION CARD You must register this restraint to be reached in a recall. CARTE D'ENREGISTREMENT DU PRODUIT 1.
- Page 38 Child Restraint Features Front View 1. Adjustable Headrest 2. Head Pillow (REAR-FACING Only) 3. Seat Pad 4. Body Pillow (REAR-FACING Only) 5. Buckle 6. Buckle Strap 7. Harness Release Button (under flap) 8. Harness Adjustment Strap 9. Seat Removal Instructions (under flap, see pgs.
- Page 39 Child Restraint Features Rear View 16. Rotation Handles (one each side) 17. Recline Adjuster (see pg. 41) 18. Level Indicator (see pg. 40) 19. Rotation Lock Indicator 20. Lower Anchor Assembly 21. Headrest Height Adjustment Handle 22. Tether Strap (stored) (see pg.
- Page 40 Child Restraint Features Level Indicator Belt Path & LockStrong™ Vehicle Belt Installation Instalación con cinturón del vehículo Tighten lap/ Route Tighten shoulder belt Open lap belt Close Ruta Apreta cinturón and lock Abre Cinturón para para regazo y regazo hombro Cierre y bloquear 25809059 10/20...
- Page 41 Child Restraint Features Tether Strap Tether Strap User Guide Storage and Recline Adjuster Stored User Guide Storage Recline Adjuster Unstored...
- Page 42 Child Restraint Features Seat Rotation WARNING! DEATH or SERIOUS INJURY can occur. NEVER use this child restraint in a vehicle seating position where it cannot be secured tightly. A loosely installed child restraint will not protect your child in a crash. When properly installed, the Revolve360 rotates in its base, making it easy to safely load and unload your child.
- Page 43 Child Restraint Features Seat Rotation WARNING! DEATH or SERIOUS INJURY can occur. THE ROTATED POSITION IS FOR LOADING AND UNLOADING YOUR CHILD IN FORWARD-FACING REAR-FACING MODE ONLY! This child restraint is not designed to protect your child in a crash when the Rotation Lock Indicator is RED. The Revolve360 MUST BE LOCKED for proper use when the vehicle is moving.
- Page 44 Child Restraint Features Adjustable Buckle Strap As your child grows, you will need to change the Buckle Strap position. The Buckle Strap should ALWAYS be as close to but NEVER underneath your child's bottom. 1. Remove Body Pillow if used. 2.
- Page 45 Child Restraint Features Height Adjustable Headrest The seat has a Headrest that automatically adjusts harness height without the need to re-thread it. To adjust, lift the Headrest Height Adjustment Handle at the top of the Headrest and move to one of the 14 locked positions.
- Page 46 Child Restraint Features Cup Holders Cup holders are removable and dishwasher safe (top rack only). To remove, rotate the cup holder toward the interior of the seat shell and pull up to release. To re-install: 1. Align tabs on base of cup holder with slots on Child Restraint and push down into slots.
- Page 47 Child Restraint Features Body Pillow REAR- The optional Body Pillow is for FACING use ONLY and, when placed in the restraint as shown, helps support your child. When using the lower headrest/ harness positions, make sure the bottom of the headrest flap is folded behind the body pillow flap as shown.
- Page 48 Child Restraint Features Head Pillow The optional head pillow is for REAR- FACING use ONLY. The head pillow helps support your child's head. To install, insert the tabs on the head pillow into the slots on the headrest and attach hook-and-loop fasteners to back of headrest.
- Page 49 Child Restraint Features Tether Strap A Tether reduces child restraint movement in a crash and helps to achieve a tight installation. ALWAYS USE A TETHER STRAP FOR HARNESS INSTALLATION. Tether anchor locations vary from vehicle to vehicle and some typical locations are shown here.
- Page 50 Child Restraint Features Harness Strap Pads and Harness Covers The Harness Straps on this Child Restaint are equipped with Harness Strap Pads that are permanently attached. Harness Covers are optional for added comfort and removeable for cleaning. To install Harness Cover, secure hook-and- loop fastener to rear of Harness Strap Pad and wrap Harness Cover around pad as shown.
- Page 51 Child Restraint Features Lower Anchor Connectors Removing the Lower Anchor Connector Your child restraint is equipped with Mini Latch™ Lower Anchor To remove the Lower Anchor Connector Connectors. from storage, pull the red Lower Anchor Connector Release Strap and pull the Connector out of the storage compartment.
- Page 52 Child Restraint Features Lower Anchor Connectors Loosening the Lower Anchor Connector To loosen the Lower Anchor Connector, press down on the Adjuster button and pull to lengthen the strap. Storing the Lower Anchor Connector Lower Anchor Connectors MUST be stored when not in use. Loose Connectors could seriously injure vehicle occupants in the event of a crash.
- Page 53 Installing and Removing the Child Restraint from the Base Installing the Child Restraint to the Base To install the Child Restraint to the Base: 1. Lift the legrest flap and locate the arrow on the underside of the seat pad. 2.
- Page 54 Installing and Removing the Child Restraint from the Base Removing the Child Restraint from the Base To remove the Child Restraint from the Base: 1. Lift up on one of the two Rotation Levers at either side of the Headrest and rotate the seat shell until the arrow on the underside of the seat pad aligns with the arrow on the...
- Page 55 Lap/Shoulder Belt (Rear-Facing and Forward-Facing) Installing Lap/Shoulder Belt (Preferred Method) ALWAYS USE A TETHER STRAP FOR HARNESS INSTALLATION. 1. BEFORE installing Child Restraint, make sure vehicle is on level ground. 2. Before placing Child Restraint in vehicle, remove Seat Shell from Base (see pg.
- Page 56 Lap/Shoulder Belt (Rear-Facing and Forward-Facing) Installing Lap/Shoulder Belt (Preferred Method) 3. Remove Tether from tether storage position under the Base and place the Base in an approved rear vehicle seating location. 4. Locate the Tether Anchor in your vehicle and loosely attach the Tether Hook to the Tether Anchor.
- Page 57 Lap/Shoulder Belt (Rear-Facing and Forward-Facing) Installing Lap/Shoulder Belt (Preferred Method) 5. Squeeze handle on LockStrong™ belt tensioner until lock indicator turns RED, then lift up on belt tensioner to allow access to the belt path. 6. Route lap/shoulder belt through belt path opening on window side of base and feed through opposite belt path opening.
- Page 58 Lap/Shoulder Belt (Rear-Facing and Forward-Facing) Installing Lap/Shoulder Belt (Preferred Method) 7. Secure lap portion of belt under tabs in blue belt path guide, then pull up on shoulder belt from center of base to remove slack, making sure not to overtighten.
- Page 59 Lap/Shoulder Belt (Rear-Facing and Forward-Facing) Installing Lap/Shoulder Belt (Preferred Method) NEVER place vehicle belt over LockStrong™, even in a vehicle with longer buckle stalks. This will prevent proper operation of the Child Restraint. Some vehicle lap/shoulder belts have a plastic button or extra fold of webbing on the belt.
- Page 60 Lap/Shoulder Belt (Rear-Facing and Forward-Facing) Installing Lap/Shoulder Belt (Preferred Method) 9. Grab Base near belt path as shown and pull side to side and front to back to make sure Base is installed tightly. Base should not move more than 2.5 cm (1 in) side to side or front to back at the Belt Path on the Child Restraint.
- Page 61 Lap/Shoulder Belt (Rear-Facing and Forward-Facing) Installing Lap/Shoulder Belt (Preferred Method) NEVER install this Child Restraint using a non-locking vehicle lap/ shoulder belt. NOTE: Refer to your vehicle Owner’s Manual for information. 11. Pull the Tether Adjuster Strap to tighten. 12. Install Seat Shell to Base (pg. 53), move seat shell to the appropriate REAR-FACING FORWARD-...
- Page 62 Lap/Shoulder Belt (Rear-Facing and Forward-Facing) Installing Lap/Shoulder Belt (Preferred Method) WARNING! DEATH or SERIOUS INJURY can occur. Failure to properly recline the child restraint could increase the child’s risk of death or serious injury. Infants may have difficulty breathing when in an upright seated position.
- Page 63 Lap/Shoulder Belt (Rear-Facing and Forward-Facing) Removing Lap/Shoulder Belt 1. Remove Seat Shell from Base (see pg. 54). 2. Unbuckle the lap/shoulder belt and open the Lockstrong™.
- Page 64 Lap/Shoulder Belt (Rear-Facing and Forward-Facing) Removing Lap/Shoulder Belt 3. Remove lap/shoulder belt from belt path and close Lockstrong™. 4. Disconnect tether. a. Press Adjuster Release Button. b. Lengthen the Tether Strap. c. Unhook the Tether Strap from the Tether Anchor. d.
- Page 65 Lap Belt Only (Rear-Facing and Forward-Facing) Installing Lap Belt ALWAYS USE A TETHER STRAP FOR HARNESS INSTALLATION. 1. BEFORE installing Child Restraint, make sure vehicle is on level ground. 2. Before placing Child Restraint in vehicle, remove Seat Shell from Base (see pg.
- Page 66 Lap Belt Only (Rear-Facing and Forward-Facing) Installing Lap Belt 3. Remove tether from tether storage position under the Base and place the Base in an approved rear vehicle seating location. 4. Locate the Tether Anchor in your vehicle and loosely attach the Tether Hook to the Tether Anchor.
- Page 67 Lap Belt Only (Rear-Facing and Forward-Facing) Installing Lap Belt 5. Squeeze handle on LockStrong™ belt tensioner until lock indicator turns RED, then lift up on belt tensioner to allow access to the belt path. 6. Route lap belt through belt path opening on window side of base and feed through opposite belt path opening.
- Page 68 Lap Belt Only (Rear-Facing and Forward-Facing) Installing Lap Belt 7. Secure lap belt under tabs in blue belt path guide, then pull up on free end of belt to remove slack, making sure not to overtighten. 8. After tightening Lap Belt, secure the free end of the lap belt under the LockStrong™.
- Page 69 Lap Belt Only (Rear-Facing and Forward-Facing) Installing Lap Belt 9. Apply pressure to fully close the LockStrong™. The lock indicator will turn GREEN when fully closed. NOTE: If belt tensioner does not fully close (lock indicator still RED), open the LockStrong™ and try loosening the lap belt slightly.
- Page 70 Lap Belt Only (Rear-Facing and Forward-Facing) Installing Lap Belt 10. Grab Base near belt path as shown and pull side to side and front to back to make sure Base is installed tightly. Base should not move more than 2.5 cm (1 in) side to side or front to back at the Belt Path on the Child Restraint.
- Page 71 Lap Belt Only (Rear-Facing and Forward-Facing) Installing Lap Belt 11. Pull the Tether Adjuster Strap to tighten. 12. Install Seat Shell to Base (pg. 53), move seat shell to the appropriate REAR-FACING FORWARD- FACING position based on the child’s size (see pgs. 10 and 12), and lock into position.
- Page 72 Lap Belt Only (Rear-Facing and Forward-Facing) Installing Lap Belt WARNING! DEATH or SERIOUS INJURY can occur. Failure to properly recline the child restraint could increase the child’s risk of death or serious injury. Infants may have difficulty breathing when in an upright seated position.
- Page 73 Lap Belt Only (Rear-Facing and Forward-Facing) Removing Lap Belt 1. Remove Seat Shell from Base (see pg. 54). 2. Unbuckle the lap belt and open the Lockstrong™.
- Page 74 Lap Belt Only (Rear-Facing and Forward-Facing) Removing Lap Belt 3. Remove lap belt from belt path and close Lockstrong™. 4. Disconnect tether. a. Press Adjuster Release Button. b. Lengthen the Tether Strap. c. Unhook the Tether Strap from the Tether Anchor. d.
- Page 75 LATCH/UAS (Rear-Facing and Forward-Facing) Installing LATCH/UAS WARNING! DEATH or SERIOUS INJURY can occur. REAR-FACING: DO NOT install by this method for a child weighing more than 15.9 kg (35 lbs). FORWARD-FACING: DO NOT install by this method for a child weighing more than 18 kg (40 lbs).
- Page 76 LATCH/UAS (Rear-Facing and Forward-Facing) Installing LATCH/UAS 2. Before placing Child Restraint in vehicle, remove Seat Shell from Base (see pg. 54). 3. Remove LATCH/UAS anchors from storage locations on back side of base. Remove each connector by pulling out on red release strap.
- Page 77 LATCH/UAS (Rear-Facing and Forward-Facing) Installing LATCH/UAS 4. Remove tether from tether storage position under the Base and place the Base in an approved rear vehicle seating location. 5. Locate the Tether Anchor in your vehicle and loosely attach the Tether Hook to the Tether Anchor.
- Page 78 LATCH/UAS (Rear-Facing and Forward-Facing) Installing LATCH/UAS 6. Squeeze handle on LockStrong™ belt tensioner until lock indicator turns RED, then lift up on belt tensioner to allow access to the belt path. 7. Attach LATCH/UAS Connectors to vehicle Lower Anchor Bars. Connectors will make an audible CLICK when attached.
- Page 79 LATCH/UAS (Rear-Facing and Forward-Facing) Installing LATCH/UAS 8. Push Base against vehicle seat back. Tension LATCH/UAS Strap by pulling on loop until snug, making sure not to overtighten. 9. After tightening LATCH/UAS, secure excess strap under the LockStrong™. 10. Apply pressure to fully close the LockStrong™.
- Page 80 LATCH/UAS (Rear-Facing and Forward-Facing) Installing LATCH/UAS 11. Grab Base near belt path as shown and pull side to side and front to back to make sure Base is installed tightly. Base should not move more than 2.5 cm (1 in) side to side or front to back at the Belt Path on the Child Restraint.
- Page 81 LATCH/UAS (Rear-Facing and Forward-Facing) Installing LATCH/UAS 12. Pull the Tether Adjuster Strap to tighten. 13. Install Seat Shell to Base (pg. 54), move seat shell to the appropriate REAR-FACING FORWARD- FACING position based on the child’s size (see pgs. 10 and 12), and lock into position.
- Page 82 LATCH/UAS (Rear-Facing and Forward-Facing) Installing LATCH/UAS WARNING! DEATH or SERIOUS INJURY can occur. Failure to properly recline the child restraint could increase the child’s risk of death or serious injury. Infants may have difficulty breathing when in an upright seated position. Make sure they recline enough for their head to lie back comfortably and safely.
- Page 83 LATCH/UAS (Rear-Facing and Forward-Facing) Removing LATCH/UAS 1. Remove Seat Shell from Base (see pg. 54). 2. Disengage LATCH/UAS connectors on both sides of Restraint by pulling Red Release Straps, then open Lockstrong™.
- Page 84 LATCH/UAS (Rear-Facing and Forward-Facing) Removing LATCH/UAS 3. Store LATCH/UAS anchors in storage locations on back side of base. CLICK! 4. Disconnect tether. a. Press Adjuster Release Button. b. Lengthen the Tether Strap. c. Unhook the Tether Strap from the Tether Anchor. d.
- Page 85 Booster Mode (Forward-Facing Only) Converting to Booster Mode 1. Loosen harness straps by pushing the harness release button on the front of the seat. At the same time, pull harness straps to extend completely. 2. Unfasten the chest clip and buckle.
- Page 86 Booster Mode (Forward-Facing Only) Converting to Booster Mode 3. Lift up headrest pad and push the shoulder straps into the sidewings as shown. 4. Disconnect hook-and-loop connectors attaching seat pad to back pad.
- Page 87 Booster Mode (Forward-Facing Only) Converting to Booster Mode 5. Remove Head and Body Pillow if installed, then pull seat pad forward and remove buckle through bottom of seat pad to access seat pan. 6. Grasp the bottom of the Buckle Strap and twist it to align with the lengthwise slot in the seat pan.
- Page 88 Booster Mode (Forward-Facing Only) Converting to Booster Mode Slide the Buckle Strap toward the front slot and push back on the strap to angle the buckle anchor up through the slot. 7. Store Buckle Strap in pocket located behind legrest flap.
- Page 89 Booster Mode (Forward-Facing Only) Converting to Booster Mode 8. Replace Seat Pad and resecure hook-and-loop fasteners to Back Pad, then continue with "Installing the Booster" on page 90.
- Page 90 Booster Mode (Forward-Facing Only) Installing the Booster WARNING! DEATH or SERIOUS INJURY can occur. ALWAYS secure the booster seat with the vehicle seat belt or lower anchors when not occupied. An unsecured booster seat can fly into and injure other occupants in the event of a crash.
- Page 91 Booster Mode (Forward-Facing Only) Installing the Booster 2. Before placing Child Restraint in vehicle, remove Seat Shell from Base (see pg. 54). 3. Remove LATCH/UAS anchors from storage locations on back side of base. Remove each connector by pulling out on red release strap.
- Page 92 Booster Mode (Forward-Facing Only) Installing the Booster 4. Squeeze handle on LockStrong™ belt tensioner until lock indicator turns RED, then lift up on belt tensioner to allow access to the belt path. 5. Attach LATCH/UAS Connectors to vehicle Lower Anchor Bars. Connectors will make an audible CLICK when attached.
- Page 93 Booster Mode (Forward-Facing Only) Installing the Booster 6. Push Base against vehicle seat back. Tension LATCH/UAS Strap by pulling on loop until snug, making sure not to overtighten. 7. After tightening LATCH/UAS, secure excess strap under the LockStrong™. 8. Apply pressure to fully close the LockStrong™.
- Page 94 Booster Mode (Forward-Facing Only) Installing the Booster 9. Install Seat Shell to Base (pg. 53), move seat FORWARD-FACING, and lock into position. Confirm that the seat is in a locked position by checking indicator.
- Page 95 Securing the Child with Harness WARNING! DEATH or SERIOUS INJURY can occur. • NEVER secure child in Child Restraint with child dressed in bulky or heavy clothing. Heavy clothing can prevent Harness from being properly tightened around the child. • NEVER secure child in Child Restraint with child wrapped in a blanket. To keep child warm, place a blanket over the child AFTER you have properly secured and tightened Harness around the child.
- Page 96 Securing the Child With Harness 2. If Chest Clip is closed: a. Press red button on Harness Buckle to release Buckle Tongues. b. Separate Chest Clip and spread Harness Straps apart. 3. Place child in Child Restraint with child's back and bottom flat against the Restraint.
- Page 97 Securing the Child With Harness 4. Adjust the Headrest height (see pg. 45) so that the Harness Straps are positioned properly. NOTE: If using the lower Headrest/Harness positions, make sure to tuck the excess Headrest Flap up behind the Headrest Pad. The Headrest Flap is designed with three fold lines to allow for partial or full storage behind the...
- Page 98 Securing the Child With Harness REAR-FACING Position the Harness JUST Straps BELOW the child's shoulders. NOTE: Child's Head MUST be 2.5 cm (1 in) or more below the top of the Headrest or shell, whichever is higher. FORWARD-FACING Position the Harness Straps JUST ABOVE...
- Page 99 Securing the Child With Harness 5. Fasten buckle by inserting one tongue at a time into the Harness Buckle listening for an audible CLICK. Pull up firmly on both Buckle Tongues to make sure they are securely latched. CLICK! CHECK that the Buckle functions properly and is kept free of dirt and debris.
- Page 100 Securing the Child With Harness 7. Push Chest Clip down away from the child's neck and towards the Harness Buckle. 8. Pull up on both shoulder straps to remove all slack from the child's hips.
- Page 101 Securing the Child With Harness 9. While holding the Chest Clip so it does not ride up into the child's neck, slowly pull Harness Adjuster Strap to tighten Harness Straps until Harness is snug on child. A snug strap should not allow any slack.
- Page 102 Securing the Child With Harness 11. To loosen Harness, firmly press down the Harness Release Button while pulling forward on both Harness Straps at shoulder level. 12. To remove child, press center buttons on Chest Clip and Harness Buckle and pull them apart.
- Page 103 Securing the Child in Booster Mode How is a Booster Seat Used? Using a booster seat is very similar to buckling yourself into the vehicle: • Read the instruction manuals for both the booster seat and the vehicle before you start. •...
- Page 104 Securing the Child in Booster Mode Securing with the Booster The shoulder belt MUST Tops of the child’s ears pass through shoulder belt are at or below the top guide and the belt guide of the booster seat should be even with or headrest.
- Page 105 Removing/Replacing the Seat Cover To Remove the Seat Cover: 1. Push and hold the harness release button while pulling on the harness straps. 2. Raise headrest and remove elastic straps from around headrest adjustment handle.
- Page 106 Removing/Replacing the Seat Cover 3. Remove elastic straps from vehicle belt guides and slide headrest pad over headrest. 4. Pull the harness strap out of the opening in the headrest pad, and remove headrest pad from seat.
- Page 107 Removing/Replacing the Seat Cover 5. Lower the headrest. On the back of the car seat, pull fabric at the top down to release plastic tabs. 6. Locate flap on front side of the seatpad behind headrest and slide down to disconnect hooks from shell.
- Page 108 Removing/Replacing the Seat Cover 7. Lift up on back pad from rear of seat and pull out from around rotation handles on top of seat shell. 8. Disconnect the hook-and-loop connectors in the lower part of back pad, and remove back pad from around top of shell.
- Page 109 Removing/Replacing the Seat Cover 9. Remove fabric binding from around lower vehicle belt guides. 10. Push buckle and harness adjustment strap throughs slot in seat. Remove seat pad from seat. NOTE: It is not necessary to remove the cup holders in order to remove the seat pad.
- Page 110 Removing/Replacing the Seat Cover To Replace the Seat Cover: 1. Lower the headrest. 2. Starting from the top of the seat, place the back pad around the upper seat shell, making sure to secure the two plastic tabs on the back of the seat.
- Page 111 Removing/Replacing the Seat Cover 4. Tuck the plastic tabs located just above the lower vehicle belt guides on either side of the seat into the channel around the perimeter of the seat. Continue by tucking back pad into channel and around rotation handles until completely resecured.
- Page 112 Removing/Replacing the Seat Cover 6. Pull seat pad over seat base. Pull harness adjustment strap through slot at front of seat pad, then pull Buckle Strap through appropriate slot in seat (see pg. 44). NOTE: It is not necessary to remove the cup holders in order to replace the seat pad.
- Page 113 Removing/Replacing the Seat Cover 8. Raise the headrest and replace headrest pad, making sure to tuck the edges in around the shoulder belt guide. 9. Replace the elastic straps at the back of the headrest and around the shoulder belt guides. NOTE: Pull the elastic into the belt guide and up around the channel of the belt guide to snap the elastic...
- Page 114 Care and Cleaning • DO NOT lubricate or immerse in water the LATCH/UAS connectors, the buckle, or any other part of this child restraint, unless rinsing is permitted, as stated on the back of the buckle for your restraint. • Plastic and metal parts may be wiped clean with TIP! mild soap and water and dried with a soft cloth.
- Page 115 Proper Disposal When this child restraint reaches the expiration date found on the date of manufacture label, Evenflo encourages you to dispose of it properly. Most components of this child restraint are recyclable. 1. Remove all fabric and padding. 2. Remove all screws and disassemble the restraint. 3.
- Page 116 Replacement Parts To order replacement parts you can order online at www.evenflo.com or contact ParentLink at 1-800-233-2229. When you contact us, please have the product model number and date of manufacture (found on the back of the child restraint). Base Assembly Buckle Body Pillow and Head Pillow Cupholder (Left or Right)
- Page 117 Replacement Parts Harness Covers LATCH Strap Headrest Pad Seat Pad...
- Page 118 Recording Model Information and Storing Your Instructions For future reference, record the model number of your child restraint AND the date of manufacture below. Model Number: Date of Manufacture: _________________________ _________________________ After reading and following these instructions, store user guide as shown in pocket on rear of Child Restraint.
- Page 119 Evenflo Gold Lifetime Warranty Applicable in the United States and Canada Only. Registration in the Evenflo Gold Lifetime Warranty means that for the life of this Gold product, Evenflo warrants to the original purchaser who registers online (“Registrant”) this Gold product against material irregularity. Evenflo’s sole obligation under this warranty shall be, at Evenflo’s option, to repair or replace...
- Page 120 Evenflo Gold Lifetime Warranty By simply registering your Evenflo Gold Car Seat online within 3 months of purchase, you, the Registrant, will have access to the following Gold Lifetime Warranty benefits: • Lifetime Warranty - Through the expiration date of your Gold Car Seat, Evenflo warrants this Gold product to the Registrant against material irregularities.
- Page 121 Evenflo Gold Lifetime Warranty This warranty is effective in the United States and Canada only. This warranty is not transferable and extends only to the original purchaser who registered in the Evenflo Gold Lifetime Warranty. If your Gold Car Seat is damaged due to the following, the Gold Lifetime Warranty does not apply: •...
- Page 122 USA, Canada: 1-800-233-2229, 8 AM to 5 PM E.T.
Need help?
Do you have a question about the Revolve 360 and is the answer not in the manual?
Questions and answers
We can't figure out how to foam inserts for the head rest covering (the adjustable piece) go in.
To fit the foam inserts for the headrest covering of the Evenflo Revolve 360 car seat, first reinsert the foam into the front edge of the car seat. Then raise the headrest and slide the soft goods into position.
This answer is automatically generated