Table of Contents
Advertisement
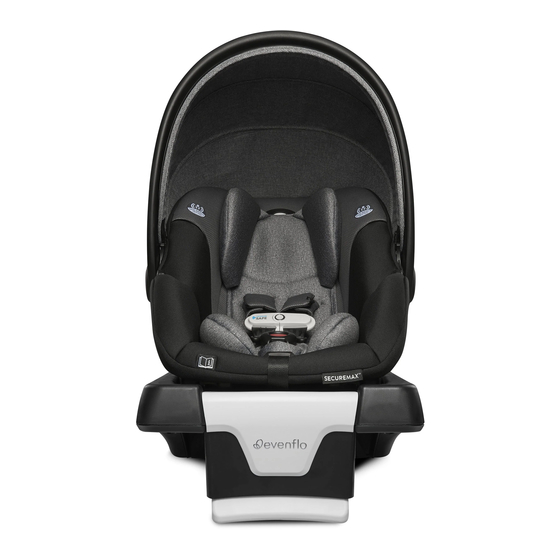
SECUREMAX
SMART REAR-FACING
INFANT CAR SEAT
OWNER'S MANUAL
KEEP FOR FUTURE USE.
Rear-facing*
1.8 to 15.8 kg
(4 to 35 lbs)
43 to 81 cm
(17 to 32 in.)
*See page 6 for complete
requirements.
WARNING
To reduce the risk of serious injury or
death, read this owner's manual prior to
installing and using this child restraint.
©2018 Evenflo Company, Inc.
TM
25701480 11/18
Advertisement
Table of Contents

Related Manuals for Evenflo Gold SECUREMAX


Summary of Contents for Evenflo Gold SECUREMAX
- Page 1 SECUREMAX SMART REAR-FACING INFANT CAR SEAT OWNER’S MANUAL KEEP FOR FUTURE USE. Rear-facing* 1.8 to 15.8 kg (4 to 35 lbs) 43 to 81 cm (17 to 32 in.) *See page 6 for complete requirements. WARNING To reduce the risk of serious injury or death, read this owner’s manual prior to...
- Page 2 More children are killed every year as U.S. Regulatory Notice passengers in car crashes than by any other This child restraint meets all the requirements of type of injury. Federal Motor Vehicle Safety Standard 213. To reduce the risk of SERIOUS INJURY or DEATH, read this owner’s manual and your vehicle owner’s manual before installing and using this child Symbol Legend...
-
Page 3: Table Of Contents
Table of Contents (TOC) Installing the Carrier with the Child Requirements ..........6 Vehicle Seat Belt ..........68 Premature Infant Use ..........8 Adjusting the Recline ........... 70 Warnings .............. 10 Checking the Recline with Base ......71 LATCH Warnings ........... 22 Placing Your Child in the Carrier ...... -
Page 4: Child Requirements
Child Requirements CHILD REQUIREMENTS Rear-facing Use Warning: Failure to follow these Child • No restraint can guarantee absolute protection from Requirements could result in serious injury or injury in every crash. death. • 1.8 to 15.8 kg (4 to 35 lbs) •... -
Page 5: Premature Infant Use
Premature Infant Use Premature Infants recommended by the AAP be conducted for all infants born • DO NOT use this or any other child restraint with a premature earlier than 37 weeks and all newborn infants who weigh infant until after consulting your doctor. Premature infants less than 5 lb at birth before their first car trip to check for may have difficulty breathing when in a sitting position. -
Page 6: Warnings
WARNING! DEATH or SERIOUS WARNING! DEATH or SERIOUS INJURY can occur. INJURY can occur. General Warnings • NEVER leave child unattended. • DO NOT use child restraint if it is damaged, • Child restraints should be used only for travel. broken, or missing parts. - Page 7 WARNING! DEATH or SERIOUS WARNING! DEATH or SERIOUS INJURY can occur. INJURY can occur. Air Bag Warnings DO NOT place rear-facing child • DO NOT use this restraint in the front seat of seat on front seat with air bag. a vehicle equipped with an air bag.
- Page 8 WARNING! DEATH or SERIOUS WARNING! DEATH or SERIOUS INJURY can occur. INJURY can occur. Location Warnings • ONLY use this child restraint on vehicle seats with • ALWAYS read and follow exactly the instructions backs that lock into place. that accompany your vehicle and child restraint. •...
- Page 9 WARNING! DEATH or SERIOUS WARNING! DEATH or SERIOUS INJURY can occur. INJURY can occur. Vehicle Seat Belt Warnings • DO NOT use this child restraint in a vehicle with seat belts that • ALWAYS read your vehicle automatically move along the owner's manual to determine Retractor vehicle frame when the door is...
- Page 10 WARNING! DEATH or SERIOUS WARNING! DEATH or SERIOUS INJURY can occur. INJURY can occur. Vehicle Seat Belt Warnings (cont.) • This child restraint must be securely belted to the vehicle, even when it is unoccupied, since in • DO NOT use with lap/shoulder belts a crash an unsecured child restraint system may with two retractors.
- Page 11 WARNING! DEATH or SERIOUS WARNING! DEATH or SERIOUS INJURY can occur. INJURY can occur. Vehicle Seat Belt Warnings (cont.) Lap/Shoulder Belt with Locking Latch Plate If you have any of these types of vehicle belt systems The lap portion of this belt does not listed, these are SAFE to use to install your child loosen once the belt is buckled.
-
Page 12: Latch Warnings
WARNING! DEATH or SERIOUS WARNING! DEATH or SERIOUS INJURY can occur. INJURY can occur. Center installation in a non-standard LATCH LATCH /UAS Warnings position: Vehicle Top Tether Anchor What is LATCH? Center installation of this child restraint is permitted Points ( Forward-Facing only) LATCH is an acronym using inner Lower Anchor Bars from the outside for (Lower Anchors and... - Page 13 DEATH or SERIOUS DEATH or SERIOUS WARNING! WARNING! INJURY can occur. INJURY can occur. LATCH /UAS Warnings - continued LATCH /UAS Warnings • NEVER attach two lower anchor assembly • The LATCH system is intended to be used ONLY connectors to one vehicle lower anchor bar. as described in these instructions.
- Page 14 The child’s movements can cause • Use ONLY the SecureMax convenience base with the child restraint to slide and fall. the SecureMax carrier. The SecureMax carrier WILL • The canopy is not intended to provide UV NOT LOCK safely into any other convenience base protection.
-
Page 15: Safe Practices
Safe Practices For Recall Information for U.S. Customers • Everyone rides buckled up or the vehicle • Child restraints could be recalled for safety does not go. Make no exceptions for adults or reasons. You must register this restraint to be FOR YOUR CHILD'S CONTINUED SAFETY children. -
Page 16: Motor Vehicle/Aircraft Usage
For Recall Information for U.S. Customers Motor Vehicle/Aircraft Usage • For recall information call the U.S. Government’s When used with the internal harness Vehicle Safety Hotline at 1-888-327-4236 and properly installed pursuant to these (TTY:1-800-424-9153), instructions, or go to: http://www.NHTSA.gov this restraint is certified for use only in passenger and multi-purpose Check with... -
Page 17: Base Features
Base Features Base Features SecureMax Base 1. Recline foot adjustment button 2. Recline foot 3. SafeZone Load leg (Not available on all models) 4. SafeZone Load leg adjustment buttons (Not available on all models) 5. SafeZone Load leg storage compartment... -
Page 18: Child Seat Features
Child Seat Features Child Seat Features Lap belt guides Harness buckle Handle adjustment button Base attachment hooks Harness buckle strap Stroller attachment buttons Seat pad Harness adjustment Carrier release handle * Not all features are Canopy button Harness strap available on all models. Handle Harness adjustment Waist strap slots... -
Page 19: Using The Handle
Using the Handle Installing the Canopy ALWAYS make sure the handle is securely locked in To attach canopy, insert the the upright carrying position (1) before carrying. canopy bow into the canopy mounts on both sides of the ANY locked position can be used in vehicle. seat until they click into place. -
Page 20: Safezone Tm Load Leg
SafeZone Load Leg (cont.) SafeZone Load Leg DEATH or SERIOUS DEATH or SERIOUS WARNING! WARNING! INJURY can occur. INJURY can occur. The load leg helps minimize crash • The load leg MUST be locked in forces on a baby in a frontal crash. It a locked position and the foot allows the child restraint’s safety system MUST... - Page 21 SafeZone Load Leg (cont.) SafeZone Load Leg (cont.) To extend load leg, pull leg Turn the base over as down until it reaches the floor shown. and the indicator turns green. CLICK! If it does not rest flat on the Pull the load leg out floor, push button and lower as shown.
- Page 22 SafeZone Load Leg Storage SafeZone Load Leg Removal Although we recommend using the base with To remove load leg, the load leg, in some cases it may not be open the user guide possible. If it is not possible you should store storage compartment and or remove the load leg.
-
Page 23: Installation Checklist With Base
Installation Checklist with Base Installation Checklist with Base (cont.) 1.Secure SecureMax base to the vehicle seat. 2.Secure child to the carrier. Refer to p. 87-91. Harness straps are at, or below, shoulder level Base is securely installed with lower (p. 75). -
Page 24: Installing The Base With The Lower Anchor Connector Assembly
Installing the Base with the Lower Anchor Installing the Base with the Lower Anchor Connector Assembly Connector Assembly (cont.) WARNING! WARNING! DEATH or SERIOUS DEATH or SERIOUS INJURY can occur. INJURY can occur. • This lower anchor connector assembly is intended •... - Page 25 Installing the Base with the Lower Anchor Installing the Base with the Lower Anchor Connector Assembly (cont.) Connector Assembly (cont.) BEFORE installing base, make Route the LATCH belt sure vehicle is on level ground. through the belt path Place base on an approved openings on both sides of LATCH vehicle seating location.
- Page 26 Installing the Base with the Lower Anchor Installing the Base with the Lower Anchor Connector Assembly (cont.) Connector Assembly (cont.) Push the LATCH connectors Close the Fit-loc belt tightener by onto the vehicle lower anchor pushing down with your two thumbs CLICK! points on both sides of the base next to the indicator window.
- Page 27 Installing the Base with the Lower Anchor Installing the Base with the Lower Anchor Connector Assembly (cont.) Connector Assembly (cont.) To remove base, open the Attach the carrier into the Fit-loc belt tightener, then base until you hear a click. push button on LATCH Finish the load leg connector then unhook from the...
-
Page 28: Installing The Base With The Vehicle Seat Belt/Shoulder Belt
Installing the Base with the Vehicle Installing the Base with the Vehicle Seat Seat Belt/Shoulder Belt Belt/Shoulder Belt (cont.) BEFORE installing base, make sure Route the lap/shoulder belt through vehicle is on level ground. Place the belt path openings on both sides base on an approved vehicle seating of base and under the Fit-loc belt location. - Page 29 Installing the Base with the Vehicle Seat Installing the Base with the Vehicle Seat Belt/Shoulder Belt (cont.) Belt/Shoulder Belt (cont.) To remove the carrier CHECK the recline indicator from the base, squeeze the to make sure the base is release handle at the back of correctly reclined.
-
Page 30: Installing The Base With The Vehicle Seat Belt
Installing the Base with the Vehicle Seat Installing the Base with the Vehicle Seat Belt (cont.) Belt Route the lap belt through the belt path BEFORE installing base, make sure openings on both sides of base and under vehicle is on level ground. Place base the Fit-loc belt tightener. - Page 31 Installing the Base with the Vehicle Installing the Base with the Vehicle Seat Belt (cont.) Seat Belt (cont.) To remove the carrier from CHECK the recline indicator the base, squeeze the release to make sure the base is handle at the back of the correctly reclined.
-
Page 32: Installation Checklist Without Base
Installation Checklist without Base Installation Checklist without Base (cont.) 1. Place the child in the carrier. 3. Secure child restraint to the vehicle seat. The child’s back and bottom are flat against the Carrier is securely installed with vehicle seat belt back and bottom surfaces of the carrier. -
Page 33: Installing The Carrier With The Vehicle Seat Belt/Shoulder Belt
Installing the Carrier with the Vehicle Installing the Carrier with the Vehicle Seat Belt/Shoulder Belt Seat Belt/Shoulder Belt WARNING When using the carrier WITHOUT the base, ALWAYS CHECK for MISE EN GARDE line MUST be tight installation and the red level Improper recline of your child restraint or level with the ground line on the carrier each and every... - Page 34 Installing the Carrier with the Vehicle Installing the Carrier with the Vehicle Seat Belt/Shoulder Belt (cont.) Seat Belt/Shoulder Belt Push down in center of BEFORE installing carrier, make sure carrier and pull the shoulder vehicle is on level ground. Place belt portion of the vehicle carrier on an approved vehicle seat belt to tighten carrier...
-
Page 35: Installing The Carrier With The Vehicle Seat Belt
Installing the Carrier with the Vehicle Installing the Carrier with the Vehicle Seat Belt (cont.) Seat Belt Push down in center of carrier to BEFORE installing carrier, make tighten carrier against the vehicle sure vehicle is on level ground. seat while pulling on the free end Place carrier on an approved of the vehicle belt. -
Page 36: Adjusting The Recline
Checking the Recline with the Base Adjusting the Recline When using the carrier and the base together: The slope of the vehicle 1) Make sure vehicle is on seats vary so your child level ground. restraint base has a feature for adjusting the proper recline 2) Only use the recline angle. -
Page 37: Placing Your Child In The Carrier
Checking the Recline with the Base (cont.) Placing Your Child in the Carrier WARNING When using the carrier with the base, if the foot MISE EN GARDE Improper placement of the harness straps and buckle strap is in the lowest position increases the risk of serious injury or death in a sudden and the indicator still ADVERTENCIA... - Page 38 Installing the Carrier without the Convenience Placing Your Child in the Carrier (cont.) Placing Your Child in the Carrier (cont.) Base (cont.) Pull all slack out of the harness Place your child in system, starting with the webbing the carrier with their around the child’s legs and bottom pushed back moving up toward their shoulders.
- Page 39 Installing the Carrier without the Convenience Installing the Carrier without the Convenience Changing the Crotch Strap Position Changing the Crotch Strap Position (cont.) Base (cont.) Base (cont.) As your child grows, you will need to change the crotch Crotch Strap in the Middle Slot strap position so that it is in the slot closest to your child.
-
Page 40: Changing The Crotch Strap Position
Installing the Carrier without the Convenience Installing the Carrier without the Convenience Changing the Crotch Strap Position (cont.) Changing the Crotch Strap Position (cont.) Base (cont.) Base (cont.) To reposition crotch strap, loosen the harness straps and move the strap out of the way. Remove the crotch strap anchor from its position on the bottom of the carrier, and... -
Page 41: Changing The Waist Strap Position
Changing the Waist Strap Position Changing the Waist Strap Position (cont.) As your child grows, you will need to change the waist Push the crotch strap strap position so that it is in the slot closest to your through the slot in the seat child. - Page 42 Changing the Waist Strap Position (cont.) Changing the Waist Strap Position (cont.) Medium size baby Push the anchor down through the appropriate slot to the bottom of the seat. Then push anchor up through the appropriate slot to the top of the seat. Note: See images (p.
- Page 43 Changing the Waist Strap Position (cont.) Changing the Waist Strap Position (cont.) Small size baby Medium size baby Large size baby Rehook the front of the child restraint’s seat pad . Make sure the anchor is completely through and is laying flat against the bottom of the seat.
-
Page 44: Using The Infant Body Support
Using the Infant Body Support Securing Your Child in the Carrier WARNING WARNING MISE EN GARDE MISE EN GARDE To prevent ejection or serious Improper placement of the harness straps and injury: buckle strap increases the risk of serious injury or ADVERTENCIA ADVERTENCIA death in a sudden stop or vehicle crash. - Page 45 Securing Your Child in the Carrier (cont.) Securing Your Child in the Carrier (cont.) Insert the buckle tongues into Hook the harness buckle tongues the buckle as shown. MAKE over the vehicle belt path guides sure you hear each buckle to get them out of the way to tongue click into place.
- Page 46 Securing Your Child in the Carrier (cont.) Securing Your Child in the Carrier (cont.) Slowly pull harness adjuster CHECK STEP: strap to make the shoulder MAKE SURE the straps are straps snug around the child’s flat, not twisted and snug. If shoulders.
-
Page 47: Securing The Child In The Carrier
Removing the Child from the Carrier Using as an Infant Carrier Secure the child in the carrier by following “Securing the Child in the Carrier” on page 87. Press the red buckle release, Position 4 and remove the buckle tongues. To use as a stand: Squeeze both handle releases and rotate the handle to Position 4 (Stand) -
Page 48: Latch Storage
WARNING! DEATH or SERIOUS LATCH Storage INJURY can occur. • NEVER place this carrier near the edges of counter tops, Insert LATCH connectors into the LATCH tables, or other high surfaces. The child’s movements can storage pockets on the base as shown. cause the carrier to slide and fall. -
Page 49: Storing Your Instructions
Storing Your Instructions SENSORSAFE APPLICATION The preferred storage NEVER INSTALL or use this Child Restraint until you have read and After thoroughly reading and understand the instructions in this manual following these instructions, AND in your vehicle Owner’s Manual store instructions look for the If there is a conflict between the two, the logo on front of seat pad. - Page 50 GENERAL INFORMATION ABOUT SENSORSAFE GENERAL INFORMATION ABOUT SENSORSAFE (CONT.) Secure your child into the child restraint as you would normally. The • The SensorSafe Chest Clip is designed to go into SensorSafe Receiver Plug monitors both the Chest Clip Transmitter a sleep mode after being clipped for 12 hours.
- Page 51 GENERAL INFORMATION ABOUT SENSORSAFE GENERAL INFORMATION ABOUT SENSORSAFE (CONT.) (CONT.) SensorSafe Technology ™ BATTERY USAGE • To preserve battery life, always store the Questions? Comments?: Visit us at: www.evenflogold.com or www.evenflogold.ca SensorSafe Chest Clip in the unclipped position. Or call ParentLink at: 1-800-233-2229 in the •...
- Page 52 GENERAL INFORMATION ABOUT SENSORSAFE USING SENSORSAFE 2.1 USING SENSORSAFE USING SENSORSAFE 2.1 (CONT.) This equipment generates, uses, and can radiate radio 1. INSTALL THE SENSORSAFE RECEIVER. frequency energy and, if not installed and used in accordance with the instructions, may cause harmful interference to Locate the 16PIN OBDII port in your vehicle.
- Page 53 USING SENSORSAFE (CONT.) USING SENSORSAFE (CONT.) 3. CYCLE THE SENSORSAFE CHEST CLIP. REPLACING THE SENSORSAFE CHEST CLIP Your SensorSafe Chest Clip is designed BATTERY. to “go to sleep” if clipped for more than 12 hours. To reset, or “wake up” the 1.
-
Page 54: Securing Your Child Restraint In Aircraft
USING SENSORSAFE (CONT.) Securing Your Child Restraint in Aircraft 4. Turn the male side of the Chest Clip over and loosen screws The Federal Aviation Administration (FAA) with a small Phillips screwdriver. Remove the cover recommends that you secure your child for air travel 5. - Page 55 Installing Carrier WITHOUT Base in Aircraft Installing Carrier WITHOUT Base in Aircraft (cont.) IMPORTANT You must use the internal harness when installing the Squeeze both Position 3 child restraint in aircraft. handle releases and move the handle to Before installing the child restraint, make sure the Position 3.
- Page 56 Installing Carrier WITHOUT Base in Aircraft Installing Carrier WITHOUT Base in Aircraft (cont.) (cont.) The aircraft seat belt must be as tight as possible. Route the excess seat belt strap back through the belt slots, as shown above. Using your full weight, push the child restraint firmly onto the aircraft seat Fasten the aircraft seat belt.
- Page 57 In order to comply with the FAA regulation for Portable Electronic Devices (PED), the SensorSafe Chest Clip MUST be unfastened before take-off. Note: After landing, fasten the SensorSafe Chest Clip before removing the SecureMax Infant Car Seat from the Aircraft seat.
-
Page 58: Replacement Parts
Replacement Parts Replacement Parts (cont.) Not available on all models. Styles may vary. To order replacement parts you can order online at www.evenflogold.com or wwwevenflogold.ca or contact Evenflo. When you contact us, please have the product model number and date of manufacture (found on the back of the child restraint). -
Page 59: Care And Cleaning
Proper Disposal of this Child Restraint Care and Cleaning • DO NOT lubricate or immerse in water the LATCH connectors, the When this child restraint reaches the expiration date buckle, or any other part of this child restraint, unless rinsing is found on the date of manufacture label, Evenflo permitted, as stated on the back of the buckle for your restraint. -
Page 60: Warranty
Warranty (cont.) Warranty Evenflo Gold Lifetime Warranty By simply registering your Evenflo Gold Stroller or Gold Car Seat online within 3 months of purchase, you, the Registrant, will Registration in the Evenflo Gold Lifetime Warranty means have access to the following Gold Lifetime Warranty benefits: that for the life of this Gold product, Evenflo warrants to the original purchaser who registers online (“Registrant”) - Page 61 *GOLD CAR SEAT WARRANTY INFORMATION: Your Evenflo Gold Stroller frame is warranted to be free from Your Evenflo Gold Car Seat is warranted to be free from any any frame damage for the life of the stroller, which is through...
- Page 63 www.evenflogold.com or www.evenflogold.ca USA:, Canada: 1-800-233-2229, 8 AM – 5 PM E.T.
Need help?
Do you have a question about the SECUREMAX and is the answer not in the manual?
Questions and answers