
Related Manuals for Chopin SDmatic


Summary of Contents for Chopin SDmatic
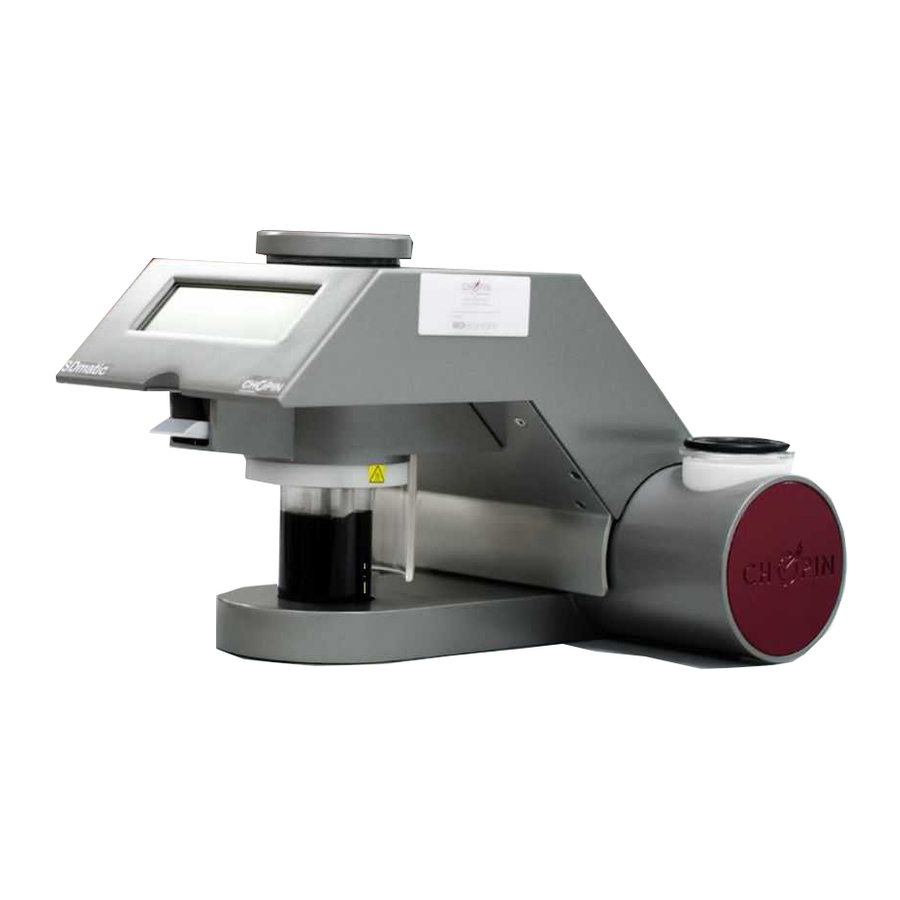
- Page 1 Quick installation and first test Installation rapide et premier test Instalación rápida y primer test Быстрая установка и первый анализ...
-
Page 2: Installation
Install the SDmatic on a stable, horizontal surface. Do not place the SDmatic behind a window, especially if it is in direct sunlight. On delivery, the measurement probe is protected with a plastic cover. This should be unscrewed before using the instrument, and should be stored for use when moving or transporting the instrument. -
Page 3: Performing The Test
Shake the bottle for a few moments and pour the solution obtained into the reaction bowl. Place the reaction bowl in the SDmatic and lower the arm. For increased productivity, it is possible to prepare a test solution in the second reaction bowl and allow it to preheat in the location provided to the right. -
Page 4: The Measurement Cycle
After each test the measurement probe, the stirrer and the element of the SDmatic must be cleaned. To do this, use the container located on the left side of the SDmatic. Place the container below the measurement probe, the stirrer and the element. -
Page 5: Description Des Menus
Poser le SDmatic sur une surface horizontale et stable. Ne pas placer le SDmatic derrière une vitre, surtout si celle-ci est exposée au soleil. A la livraison, la sonde de mesure est entourée par une protection plastique. Il convient de la dévisser avant la mise en service de l’appareil, et de la conserver pour tout déplacement ou transport de l’appareil. - Page 6 Agiter quelques instants le flacon et verser la solution obtenue dans le bol de réaction. Mettre en place le bol de réaction dans le SDmatic et rabattre le bras. Pour gagner en productivité, il est possible de préparer une solution de test dans le deuxième bol de réaction et de la mettre à...
-
Page 7: Eteindre L'appareil
Après chaque test, la sonde de mesure, l’agitateur et la résistance du SDmatic doivent être nettoyés. Pour cela, utiliser le récipient situé sur la partie gauche du SDmatic. Positionner le récipient en dessous de la sonde de mesure, l’agitateur et la résistance. -
Page 8: Instalación
Poner el SDmatic sobre una superficie horizontal y estable. No colocar el SDmatic detrás de un cristal, sobre todo si está expuesto al sol. En el transporte, la sonda de medición está rodeada por una protección plástica. Conviene quitarla antes de la instalación y conservarla para cualquier desplazamiento del aparato. - Page 9 - 1 gota de tiosulfato de sodio (Na2O3S2) 0,1 mol/l. Agitar unos instantes el frasco y verter la solución obtenida en el vaso de reacción. Colocar el vaso de reacción en el SDmatic y plegar el brazo. Para ganar en productividad, es posible preparar una solución de test en el segundo vaso de reacción y ponerla a calentar en el sitio situado a la derecha.
- Page 10 • Salir de la pantalla de resultados presionando sobre el icono “Salir”. F. Limpieza tras cada test Tras cada test, la sonda de medición, el agitador y la resistencia del SDmatic se deben limpiar. Para ello, utilizar el recipiente situado en la parte izquierda del SDmatic.
-
Page 11: Описание Меню
Сохраняйте упаковку. Ее использование обязательно при транспортировке устройства. Защитный кожух зонда Установите SDMatic на твердую горизонтальную поверхность. Не ставьте SDMatic у окна, особенно если в него светит солнце. На измерительный зонд доставленного устройства установлен пластиковый защитный кожух. C. Подключение электричества и подача напряжения... - Page 12 - 1 каплю тиосульфата натрия (Na2O3S2) в концентрации 0,1 моль/л. Встряхните флакон и налейте полученный раствор в реакционную чашу. Установите реакционную чашу в SDMatic и опустите крышку. Для повышения продуктивности допускается подготовка тестового раствора во второй реакционной чаше, после чего ее необходимо поместить в...
-
Page 13: Выключение Устройства
Измерительный зонд очень хрупкий, его необходимо очищать и вытирать с осторожностью, чтобы не повредить измерительные кольца. ВЫКЛЮЧЕНИЕ УСТРОЙСТВА Прекратите подачу напряжения на SDMatic при помощи расположенного сзади выключателя. Когда устройство не используется, измерительный зонд SDMatic необходимо погрузить в воду. Выключатель Вода... -
Page 14: Notes / Notas
Notes / Notas / Примe ания ч... - Page 15 Notes / Notas / Примe ания ч...
- Page 16 Research, loans and training Tel. : +33 1 41 47 50 48 export@chopin.fr Tel. : +33 1 41 47 50 33 Tel. : +33 1 41 47 17 15 service@chopin.fr labo.application@chopin.fr Documentation produced by CHOPIN Technologies © 2016 – Pictures: CHOPIN Technologies...
Need help?
Do you have a question about the SDmatic and is the answer not in the manual?
Questions and answers