Table of Contents
Advertisement
Advertisement
Table of Contents

Subscribe to Our Youtube Channel
Related Manuals for niu N1S


Summary of Contents for niu N1S
- Page 1 N Scooter Service Manual Jiangsu Niu Electric Technology Co. Ltd V1.0.0...
- Page 2 Niu, must be verified. Please make replacement with original electric components made by Niu or equivalents that have corresponding part numbers. We strongly recommend you not to use inferior components.
- Page 3 Importance Safety Notes Make sure that you have completely understood basic workshop operation safety procedures and taken on proper protective clothes and are provided with safety equipment. Extra attention should be paid to the following in the implementation of a maintenance task: Read all the relevant instructions before operation, and make sure that you have necessary tools, •...
-
Page 4: Table Of Contents
Contents Foreword Maintenance Rules and Important notes Cable connector inspection Scooter Identification Specifications Part Names Parts Removal and Installation Procedure Front Wheel Front Fork Steering Handlebar Rear Wheel/ Rear Suspension Brake System Lithium battery/charger Electrical System Main Harness diagram Check Main Harness communication Circuit diagram Electronic components Diagnostic Code... -
Page 5: Foreword
Foreword Key points in maintenance of Niu N1S are described in this maintenance manual. Preparations in the maintenance manual include notes to all operations. Please read the manual carefully before operating. Key points in the inspection and adjustment, including maintenance methods for scooter safety and component performance that are applied from regular examinations, are described. -
Page 6: Maintenance Rules And Important Notes
Important notes 1.Please use original parts made by Niu. Use of components that are not in compliance with design specifications by Niu Company may cause damages to the scooter. 2.Maintenance operations can be performed only with metric tools. The metric bolts, nuts and screws can not be interchanged with British fasteners. -
Page 7: Cable Connector Inspection
Cable connector inspection Loose cables constitute a risk to electric safety. Cables should be checked after their clamping to • ensure electric safety. Bending of cable clamps towards welding points is not allowed. • Cables are bound at designated positions. •... -
Page 8: Scooter Identification
Scooter Identification Vehicle serial number (SN) is in the user manual • The scooter frame identification code (VIN) is made on the rear frame at rear seat cask. • The frame namepad is riveted above the dual supports at right side of the frame. •... -
Page 9: Specifications
Overall specifications Item Specifications Length × width × height 1800×700×1130 mm Wheelbase 1280mm Complete vehicle kerb mass 90Kg Dimensions Ground clearance of the 740mm seat cushion Ground clearance 140mm Type of the scooter frame The pedal type made with combined Scooter frame welding of panels and pipes Specifications of the front... - Page 10 Specifications of the motor controller system Item Specifications Motor type Brushless permanent-magnet motor Controller type FOC vector control Rated voltage DC60V Motor Rated power 1500W Maximum motor power 2400W Maximum motor torque 120N*m Rated voltage DC60V Undervoltage protection 51.4V Controller Maximum current of the controller Specifications of the battery/charger Item...
- Page 11 Specifications of the braking system Item Standard value (mm) Minimum Thickness(mm) Diameter of the front brake disc φ220mm Thickness of the front brake disc Thickness of the front brake pad brake fluid DOT3 or DOT4 Diameter of the rear brake disc φ180mm Thickness of the rear brake disc Thickness of the rear brake pad...
-
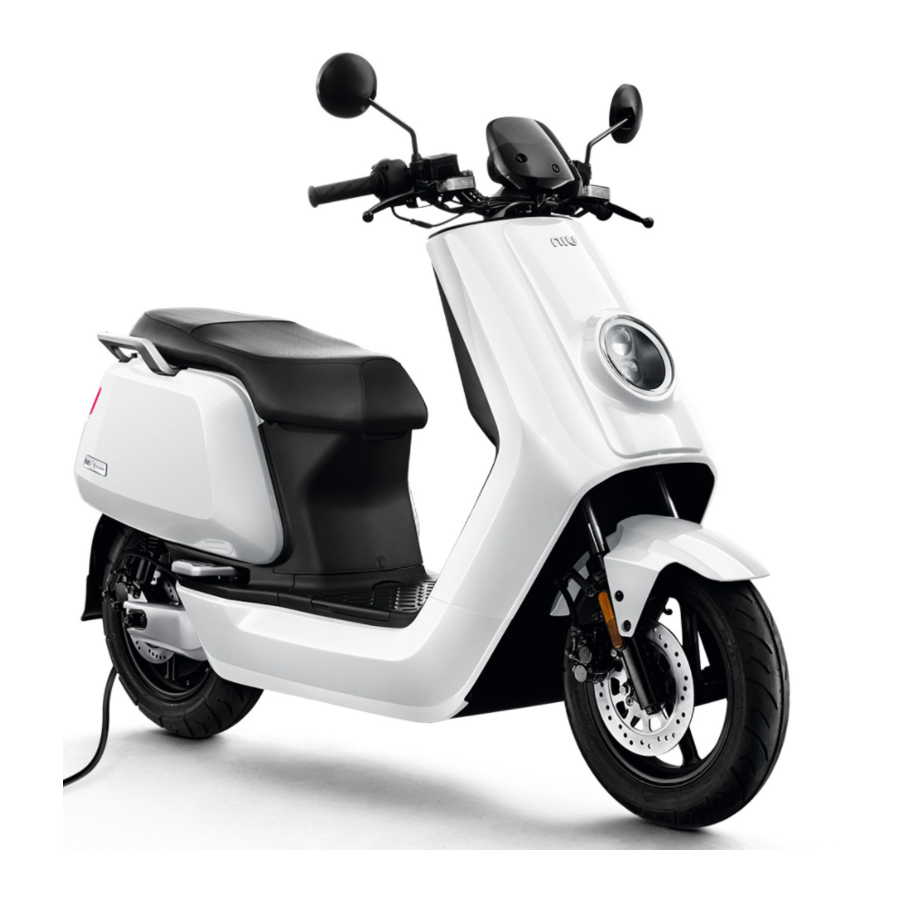
Page 12: Part Names
Part Names Scooter body/scooter body panel Left/Right Windshield Body Panel Saddle Front Neck Cover Front Central Front Panel Cover Rear Left/ Headlight Right Handrail Tail light Front Fender Battery Cover Rear Fender Left/Right Central Left/Right Side Front Left/Right Cover Panel Panel Rear Central Footrest... - Page 13 Front Wheel 1. Front Tire 2. Front Wheel Axle 3. Front Alloy Wheel 4.Valve 5. Valve Cap 6.Front Wheel Oil-seal 7. Bearing 8. Intermediate Spacer on the front wheel 9. Screw M6×20 10. Front Brake Disc 11. Outer Spacer on the front wheel V1.0.0...
- Page 14 Front Fork 1. Welded lower yoke plate assembly 2. Front left shock absorber assembly 3. Front right shock absorber assembly 4. Bolt M10×1.25 5. Lower conical bearing 6. Outer race of the upper conical bearing 7. Upper conical bearing 8. Bearing cover 9. Lock nut 10. Gland nut V1.0.0...
- Page 15 Steering Handlebar 1. Left handle glove 2. Steering handle assembly 3. Left combination switch 4. Rear brake 5. Left rear-view mirror 6. Left turn signal lamp 7. Hex socket bolt M10 8. Right turn signal lamp 9. Upper press block on the scooter handle 10. Front brake 11. Right rear-view mirror 12.
- Page 16 Rear Wheel/ Rear Suspension 1. Left rear shock absorber 2. Side support 3. Rear brake 4. Kickstand 5. Motor 6. Vacuum tire 7. Rear brake disc 8. Rear bottom fork 9. Right rear shock absorber 10. Side Stand Switch 11. FOC Controller V1.0.0...
- Page 17 Electronic Components 1. Power Lock 2. Flasher 3. Alarm 4. ECU 5.Horn 6. Cable Hall Sensor 7.DC-DC converter V1.0.0...
-
Page 18: Parts Removal And Installation Procedure
Parts Removal and Installation Procedure Procedures for removal and installation of scooter body panels are described in this section. The ignition switch and main switch (if applicable) must be turned to OFF before disconnection or connection of electric units, when the storage battery has been installed onto the scooter. Note •... - Page 19 3. Front Panel 3.1 Unscrew two screws on the top of Front Panel 3.2 Take out two Push-in Rivets from the bottom of Front Panel 3.3 Remove Front Panel by pushing it upward V1.0.0...
- Page 20 4. Under Seat Storage Compartment 4.1 Unscrew four screws in the Under Seat Storage Compartment 4.2 Lift up the Under Seat Storage Compartment, disconnect the two connectors 4.3 Pull Battery Compartment Lock cable V1.0.0...
- Page 21 5. Rear Central Cover 5.1 Unscrew the left side screw 5.2 Unscrew the right side screw 5.3 Pull out the rubber cover and unscrew the screw 5.4 Pull out Rear Central Cover carefully V1.0.0...
- Page 22 6. Battery Compartment Cover and Footrest 6.1 Pull out the footrest plug and unscrew two hexagon flange bolt 6.2 Unscrew four cross recessed pan head tapping screws and remove Battery Compartment Cover 6.3 Unscrew two hexagon flange bolts 6.4 Unscrew right side screw V1.0.0...
- Page 23 6. Battery Compartment Cover and Footrest 6.5 Unscrew left side screw 6.6 Pull out the Footrest V1.0.0...
- Page 24 7. Side Panel 7.1 Unscrew left side screw 7.2 Unscrew two screws in dark side 7.3 Pull out the whole side panel V1.0.0...
- Page 25 8. Handrail 8.1 Remove four Hexagon flange bolts marked in the guide photo 8.2 Pull out the Handrail V1.0.0...
- Page 26 9. End cap and Body Cover 9.1 Unscrew four cross recessed medium pan head bolts 9.2 Unscrew Cross recessed pan head tapping screw 9.3 Unscrew two cross recessed pan head tapping screws 9.4 Pull out the whole body panel V1.0.0...
- Page 27 10. Left/Right Central Cover and Foot pegs 10.1 Unscrew the Cross recessed pan head tapping screw 10.2 Unscrew the Cross recessed medium pan head bolt 10.3 Pull out the whole Left/Right Central Cover V1.0.0...
- Page 28 10. Left/Right Central Cover and Foot pegs 10.4 Remove two socket head bolts 10.5 Take out the Foot Pegs V1.0.0...
- Page 29 11. Front Left/Right Panel 11.1 Pull out two front glove compartment bolt hole plugs and unscrew the cross recessed pan head tapping screw inside 11.2 Take out Plastic Expansion Clips from the bottom of Front Left/Right Panel 11.3 Unscrew three screws in the right picture which line out red circle V1.0.0...
- Page 30 11. Front Left/Right Panel 11.4 Unscrew the screw on the top of Front Right/Left Panel 11.5 Have a close-up view of panel jack and take out panel carefully V1.0.0...
- Page 31 12. Helmet Hook 12.1 Unscrew the cross recessed medium pan head bolt 12.1 Pull the Helmet Hook out V1.0.0...
- Page 32 13. Front Central Cover 13.1 Unscrew two cross recessed pan head bolt 13.2 Unscrew the power lock cover screw and take out the cover 13.3 Unplug USB output cable 13.4 Take out whole Front Central Cover V1.0.0...
- Page 33 14. Power Lock 14.1 Unscrew three Cross recessed pan head bolts 14.2 Unplug the Power Lock connector and take out the Power Lock V1.0.0...
- Page 34 15. Front Wheel Cover 15.1 Unscrew 2 Cross recessed medium pan head screw and 2 Cross recessed pan head tapping screw 15.2 Pull out the whole front wheel cover V1.0.0...
- Page 35 16. Display 16.1 Unscrew three Hexagon flange nuts 16.2 Unplug dashboard cable and take out the Display V1.0.0...
- Page 36 17. Brake System 17.1 Unscrew two Hexagon socket head stepped bolts marked in the guide photo 17.2 Pull out the cover 17.3 Plug Brake connector V1.0.0...
- Page 37 17. Brake System 17.4 Unscrew one cross recessed pan head bolt and two Hexagon flange bolts then take out front Brake System 17.5 Unscrew two Hexagon socket head stepped bolts marked in the guide photo 17.6 Unscrew two cross recessed pan head bolt and take out Rear Brake System V1.0.0...
- Page 38 18. Side Stand and Side Stand Switch 18.1 Unscrew the screw and unplug the connector marked in guide photo to take out the side stand switch 18.2 Unscrew the side stand screw and take out the side stand and spring (spring hook on the red circle when installation) V1.0.0...
- Page 39 19. Front Fender and Rear Fender 19.1 Unscrew two Hexagon flange bolts on the left and right sides then take out the Rear Fender 19.2 Unscrew two Cross recessed medium pan head bolts on the left and right sides then take out the Front Fender V1.0.0...
- Page 40 20. Motor 20.1 Unscrew two hexagon flange bolts on the left and right side 20.2 Remove the motor connectors on FOC controller V1.0.0...
- Page 41 20. Motor 20.3 Unplug the motor hall connector( Scooters produced before 2016 Dec ) then pull out Motor V1.0.0...
-
Page 42: Front Wheel
Front Wheel 1. Front Tire 2. Front Wheel Axle 3. Front Alloy Wheel 4.Valve 5. Valve Cap 6.Front Wheel Oil-seal 7. Bearing 8. Intermediate Spacer on the front wheel 9. Screw M6×20 10. Front Brake Disc 11. Outer Spacer on the front wheel Specifications of the front tire: 90/90-12 Installation torque value for screw 11 in the figure: 8Nm Installation torque value for Axle 2 in the figure: 60Nm... - Page 43 Front Wheel Failure diagnosis The tire pressure is too low. There is air leakage from the tire. The tire pressure is insufficient. The front axle is deflected. The front wheel tire is deformed and the tire is deflected. The front wheel oscillates. The wheel is deformed.
-
Page 44: Front Fork
Front Fork Specifications of the Front Fork Installation torque value for screw 4 in the figure: 28Nm 1. Welded lower yoke plate assembly 2. Front left shock absorber assembly 3. Front right shock absorber assembly 4. Bolt M10×1.25 5. Lower conical bearing 6. - Page 45 Front Fork Failure diagnosis The front fork is deflected. There is an abnormal noise from the front shock absorber. Bolts on the shock absorber are loosened. The liquid in the front shock absorber is insufficient. Disassembling Remove the panel, front journal lid and front fender. Remove the steering handle assembly.
-
Page 46: Steering Handlebar
Steering Handlebar 1. Left handle 2. Steering handlebar 3. Left combination switch 4. Rear brake 5. Left rear-view mirror 6. Left turn signal lamp 7. Hex socket bolt M10 8. Right turn signal lamp 9. Upper press block on the scooter handle 10. - Page 47 Steering Handlebar Failure diagnosis The steering handle is difficult to turn. The steering handle bearing failed. The steering handle bearing is damaged. Steering is unstable The steering handle bearing is damaged. Disassembling Remove the left and right rear-view mirror assemblies (5) and (11). Remove the left and right grasp handle assemblies (1) and (12).
-
Page 48: Rear Wheel/ Rear Suspension
Rear Wheel/ Rear Suspension Rear Suspension 1. Left rear shock absorber 2. Side support 3. Rear brake 4. Kickstand 5. Motor 6. Vacuum tire 7. Rear brake disc 8. Rear bottom fork 9. Right rear shock absorber 10. Side Stand Switch 11. FOC Controller 12. Top Bolts on the rear shock absorber 13. Bottom Bolts on the rear shock absorber Diameter of the rear brake disc: φ180mm... - Page 49 Motor 1. Self-locking nut 2. Spring washer 3. Lock washer 4. Locating washer 5. Vacuum tire 120/90-12 6. Motor 7. Brake disc 8. Rear disc brake pump Specifications of the Motor Installation torque value for self-locking nut 1 in the figure: 75Nm Motor oscillation value :...
- Page 50 Failure diagnosis Oscillation of the rear wheel Deformation of the motor rim Motor failure Motor un-tightened Bearing loosened or worn Insufficient tyre pressure Shock absorber softened excessively Insufficient spring elasticity Oil leakage from shock absorber No elasticity of the rear shock absorber spring Extremely low tyre pressure Shock absorber hardened excessively Shock absorber rod deflected...
-
Page 51: Brake System
Brake System Front Brake 1. Front Disc Brake Lower Fluid Bump 2. Front Disc Brake Pad Set 3. Front disc brake Top Fluid Reservoir 4. Bolt M6 5.Screw M6 6.Front Disc Brake Lever 7. Tightening bolts on the handle 8. Installation board Diameter of the front brake disc: φ220mm Thickness of the front brake disc: 4.0mm... - Page 52 Brake System Rear Brake 1. Self-locking nut 2. Spring washer 3. Lock washer 4. Locating washer 5. Vacuum tire 120/90-12 6. Motor 7. Brake disc 8. Rear disc brake pump Diameter of the rear brake disc: φ180mm Thickness of the rear brake disc: 3.5mm Operating limit: 2.5mm Free travel of the brake handle: 7-15mm...
- Page 53 Brake System Maintenance instruction Note • There should be no oil stains on the brake assembly in installing or removal. • The cleaning should be made with a specified detergent to avoid reduction of the brake performance. • Oil stains on the brake pad will result in reduction of the brake performance •...
- Page 54 Failure diagnosis Failure of the hydraulic disc brake Check the brake liquid level in the main brake pump reservoir. The brake liquid level is below the lower The brake liquid level is above the lower limit scale in the reservoir. limit scale in the reservoir.
- Page 55 Failure diagnosis The brake performance is not good. The brake is not adjusted properly. The brake pad and brake disc are worn. The brake assembly is not installed properly. The brake pad and brake disc are contaminated. The brake responds slowly or the handle is tight. The brake is not adjusted properly.
- Page 56 Brake System Brake liquid change/air discharging (for the disc brake type) Drainage of the brake liquid The paint coatings, plastics or rubber parts should be covered with cloths as good as possible to avoid splash of the brake liquid onto them in changing the system liquid or draining the liquid. There should be no foreign matters that enter into the system in liquid injection into the liquid reservoir.
- Page 57 Brake liquid injection/air discharging The following operation steps can be performed if air discharge pumps are not available. Hold the front brake handle tightly and pressurize the system until there are no air bubbles from the liquid reservoir hole and the resistance to the front brake handle is felt. Connect the oil drainage hose to the oil drainage screw, and perform air discharging from the system as per the following steps: Check the brake liquid level frequently in air discharging to avoid air entrance into the hydraulic...
-
Page 58: Lithium Battery/Charger
Lithium battery/charger Overview The charger will be generate heat during charging. It should be subject to good ventilation and radiation. The battery and charger must not be covered. They must not be close to flammable or explosive objects in charging to avoid the explosion or fire that may cause personal injuries. - Page 59 Battery Pack Battery Model Charger input/output Serial number of the battery pack Operation/maintenance instruction V1.0.0...
- Page 60 BMS (Battery Management System) Description Connect H1 to Battery Pack directly, Press BMS_Info Icon to Read BMS Information Then press the screen to continue If BMS is working normal/abnormal, H1 will read Battery Pack info shown as below. Replace the BMS if OFFLINE is shown. BMS_STATE: No Load BMS Status: currently not in use ONLINE...
- Page 61 Table of BMS STATE(BMS Status) No Load: Discharging: Charging: Over-Charged: Over-Discharged: Charging Over-Current Discharging Over-Current Over Temperature Temperature Low Other Warning(Open Circuit detected/ Difference between Cell Voltages is higher than 0.3V) Short Circuit Water Detected BMS MOS Failure How to read Battery voltage(Ref 30) Connect H1 to Battery Pack directly, Press BMS_Info Icon to Read battery total voltage and single cell voltage he max total voltage is 71.4V...
- Page 62 Charger When the charger is connected with battery. The indicator of charger illuminates as red means charging. It will turn to green when the battery is fully charged. The charger should be disconnected first from the 110-240V AC power supply and then disconnect from the battery.
-
Page 63: Electrical System
Electrical System Main Harness diagram (01.2017~current) ( ) V1.0.0... -
Page 64: Check Main Harness Communication
How to check Main Harness communication wire for closed circuit (Ref: 005) Check communication between ECU and Battery Step 1: Disconnect the main Battery Step 2: Disconnect the ECU connector Step 3: Connect negative pin of multimeter to pin 5 (White) of ECU female connector Step 4: Connect positive pin of multimeter to the pin of power cord shown above( white and grey) Step 5: Set multimeter to test closed circuit mode which should beep if the circuit is closed. - Page 65 Check communication between ECU and Display Step 1: Disconnect the main Battery Step 2: Disconnect the ECU connector Step 3: Connect negative pin of multimeter to pin 3 (grey and violet) of ECU female connector Step 4: Connect positive pin of multimeter to the pin 6 of Display connector(grey and violet) Step 5: Set multimeter to test closed circuit mode which should beep if the circuit is closed.
-
Page 66: Circuit Diagram
Electrical System Circuit diagram (05.2016~current) Air switch S t a r t u p switch Brake lamp L e f t b r a k e handle Brake lamp Right brake handle Horn Left horn Front aperture C l e a r a n c e High beam Headlight Low beam... -
Page 67: Electronic Components
Electrical System Motor The motor used in this scooter is an efficient brushless DC motor with a permanent magnet made of rare earths, which is integrated with the rear wheel. The motor does not require maintenance in daily riding. However, attention should be paid to the status of installation and tightening nuts on the motor shaft. - Page 68 Component name Motor Connector code J25-A Connector Definition Color Definition Blue Phase Green Phase Yellow Phase Motor Hall Black Power cord Phase Blue Phase Green Phase Yellow Negative cord V1.0.0...
- Page 69 How to replace Motor (Ref: 009) 1. Screw up two hexagon flange bolts on the left and right side 2. Install the motor connectors on FOC controller 3. Connect the motor hall connector( Scooters produced before 2016 Dec ) V1.0.0...
- Page 70 FOC Controller The controller for this model makes controlling in the way that it receives the signal from speed regulation handle and controls operation of the brushless DC motor. Main protective functions 1. Current limit protection The maximum controller output current is limited to protect the motor, controller, battery and other components from being damaged by a current greater than specified.
- Page 71 Component Name FOC Controller Connector Code J26-A Connector Type Connector 30P-J2X Connector Definition Color Definition White and yellow Mode 1 Mode 2 White and blue White and black Mode 3 Blue EABS earth Orange ACC power lock Violet Brake lamp Blue EABS White and grey...
- Page 72 How to read FOC controller indicator flashing frequency (Ref: 001) • Turn ON the power and count how many times the indicator flashes between each interval. • If FOC controller is in good working condition, after turning ON the power, the indicator should only flash once and no more flashing FOC Controller Flashing Indicator Explanation Flashing...
- Page 73 How to check FOC Controller power input (Ref: 013) Step 1: Turn the power OFF. Step 2: Check voltage of the main power cord by disconnecting the following connectors: - Controller connector Red and Black wires Step 3:Check DC voltage between the Red wire and Black(Negative)at harness side. Step 4:Turn the power ON and DC voltage reading on multimeter should be same as battery voltage.
- Page 74 How to check FOC controller ACC wire of Alarm for closed circuit (Ref: 007) Step 1: Turn the power ON. Step 2: Check voltage of the PIN 10 orange(ACC power lock)by disconnecting the following connectors: - Controller connector Red and Black wires Step 3:Check DC voltage between the PIN 10 orange(ACC power lock)...
- Page 75 How to replace FOC controller (Ref: 004) V1.0.0...
- Page 76 Component Name Cable Hall Sensor Connector Code J25-A Connector Type Connector Definition Color Definition Dark red Power cord White and green Signal wire Black Negative electrode V1.0.0...
- Page 77 How to adjust Twist Grip(Ref: 010) Tighten the adjuster. Loosen the adjuster. Free travel distance 2-4mm Free travel distance 2-4mm V1.0.0...
- Page 78 How to check Hall Cable Sensor(Ref: 011) Inspection of the signal output Turn the power lock switch to OFF. Remove the front panel. Connect the multimeter between the white/green signal output wire and the black ground wire on Hall cable sensor. Turn the ignition switch to ON.
- Page 79 How to replace Hall Cable Sensor(Ref: 012) 1. Pull out the cable of twist grip 2. Unscrew the four screws as guide picture 3. Disconnect the connector of Hall Cable Sensor 4. Reassemble Hall Cable Sensor is reverse order V1.0.0...
- Page 80 Component Name DC-DC Converter Connector Type Connector Code J12-A Color Definition Red and green 60V input wire to the converter Black Negative electrode Black Negative electrode Red and white Power cord (12V) V1.0.0...
- Page 81 How to check DC-DC Converter power input (Ref: 015) Step 1: Turn the power ON. Step 2:Check DC voltage between the Red wire and Black(Negative)at component side. Step 3:DC voltage reading on multimeter should be same as battery voltage. How to check DC-DC Converter power output (Ref: 016) Step 1: Turn the power ON.
- Page 82 Component Name Alarm Connector Type Connector Code J3-A Color Definition Red and white Power cord (12V) Red and green Power cord (60V) Yellow Left turn signal lamp wire Pink Power Lock Yellow 1 Alarm signal Light blue Right turn signal lamp wire Orange Controller ACC Black...
- Page 83 How to check Alarm (Ref: 017) Step 1: Press buttons of the remote, the indicator should light up, if not, use the backup remote or Check the remote battery Step 2: if the horn doesn’t work after pressing the remote buttons, then replace the alarm Step 3: if both horn and lights works after pressing remote buttons, then check alarm voltage input/ output Step 4:Use a multimeter and set to DC,measure alarm voltage input(Negative to Black wire,...
- Page 84 How to replace Alarm (Ref: 008) 1. Unscrew the two screws as guide picture 3. Disconnect the connector of Alarm 3. Reassemble Alarm is reverse order V1.0.0...
- Page 85 Flasher Component Name Connector Code J14-A Color Definition Black Negative electrode Grey Flashing signal Red and white Power cord (12V) V1.0.0...
- Page 86 How to check Flasher(Ref: 019) Remove the front panel. The flashing relay is above the alarm Check the following items: - Functions of the ignition switch and turn signal switch - Connector looseness Disconnect the turn signal relay connector from the relay. Make the turn signal relay connector terminal (at cable side) shorted with a short wire.
- Page 87 Component Name Power Lock Connector Code J11-A Connector Type Connector Code J11-A Component side Color Definition Power cord(60V) Black Power Lock On/Off Connector Code J11-B Harness side Color Definition Power cord(60V) Pink Electrical lock key V1.0.0...
- Page 88 How to check Power Lock (Ref: 020) Step 1:Turn the power ON Step 2:Check DC voltage between Pink wire and Red wire Step 3:DC voltage reading on multimeter should be same as battery voltage V1.0.0...
- Page 89 Component Name Connector Code J2-A Connector Type Disassembling Connector Definition Color Definition Power cord(60V) Pink Power Lock On/Off Violet and Grey Communication B Black Negative electrode White and Grey Communication A Black and white 485 Ground wire Yellow 1 Alarm signal V1.0.0...
- Page 90 How to check ECU by checking App Data (Ref: 002) • This method only applied to scooter with activated SIM card • Log into NIU E-scooter App to check latest data update, replace ECU if data is not up to date How to replace ECU (Ref: 003) V1.0.0...
- Page 91 V1.0.0...
- Page 92 Bound NIU E-scooter APP Step 1: Use a smart phone to scan the QR code of the spare part ECU Step 2: Input details of the vehicle which the spare part ECU is about to be installed, information such as Vehicle Frame Number, Vehicle SN and mobile number which was banned on the App.
- Page 93 Component Name Connector Code J5-A Connector Type Disassembling Connector Definition Color Definition Power cord(60V) Black Negative electrode V1.0.0...
- Page 94 Left combination Component Name Connector Code switch J1-A Connector Type Disassembling Connector Definition Color Definition Yellow Left turn signal lamp Blue High beam Dark green Horn Light blue Right turn signal lamp White Low beam Red and white Power cord (12V) Grey Flashing Red and white...
- Page 95 How to check Left Combination Switch(Ref: 022) Check the Left turn signal Step 1:Turn the power ON Step 2:Check DC voltage between Yellow wire(Left turn signal) and Black wire of another connector Step 3:DC voltage reading on multimeter should be around 12V when the corresponding switch is Other switch detection methods are the similar,choose the corresponding wire and check DC voltage V1.0.0...
- Page 96 Right combination Component Name Connector Code switch J2-A Connector Type Disassembling Connector Definition Color Definition White and yellow Mode 1 White and black Mode 2 Blue and white Hazard Black Negative electrode Blue and white Mode 3 Grey Flasher Signal Brown Startup button V1.0.0...
- Page 97 How to check Right Combination Switch(Ref: 021) Check the Hazard Light Switch Step 1:Turn the power ON Step 2:Check DC voltage between pin 5 blue wire(Hazard) and Black wire of another connector Step 3:DC voltage reading on multimeter should be around 12V when the corresponding switch is Other switch detection methods are the similar,choose the corresponding wire and check DC voltage V1.0.0...
- Page 98 Component Name Headlight Connector Code J13-A Connector Type Disassembling Connector Definition Color Definition White Low beam Blue High beam Red and white Power cord (12V) Black Negative electrode V1.0.0...
- Page 99 How to check Headlight(Ref: 023) Step 1:Turn the power ON Step 2:Check DC voltage between Red-White wire and Black wire Step 3:DC voltage reading on multimeter should be ~12V V1.0.0...
- Page 100 Component Name Left turn signal lamp Connector Code J7-A Connector Type Disassembling Connector Definition Color Definition Yellow Left turn signal lamp Black Negative electrode Component Name Right turn signal lamp Connector Code J8-A Connector Type Disassembling Connector Definition Color Definition Light blue Right turn signal lamp Black...
- Page 101 How to check Left turn signal lamp(Ref: 024) Step 1:Turn the power ON Step 2:Check DC voltage between Yellow wire and Black wire on component side Step 3:DC voltage reading on multimeter should be ~12V How to check Left turn signal lamp(Ref: 025) Step 1:Turn the power ON Step 2:Check DC voltage between Yellow wire and Black wire on component side Step 3:DC voltage reading on multimeter should be ~12V...
- Page 102 Component Name Tail Light Connector Code J9-A Connector Type Disassembling Connector Definition Color Definition Black Negative electrode Yellow Left lamp signal wire Red and white Power cord (12V) Violet Brake lamp Light blue Right lamp signal wire V1.0.0...
- Page 103 How to check Tail Light(Ref: 026) Step 1:Turn the power ON Step 2:Check DC voltage between Yellow wire and Black wire on component side Step 3:DC voltage reading on multimeter should be ~12V V1.0.0...
- Page 104 Component Name Side Stand Switch Connector Code Connector Type Disassembling Connector Definition Color Definition Power cord(5V) Yellow Side Stand Switch signal Black Negative electrode V1.0.0...
- Page 105 How to check Side Stand Switch(Ref: 027) Step 1:Turn the power ON Step 2:Check DC voltage between Yellow wire and Black wire on component side Step 3:DC voltage reading on multimeter should be ~ 3.75V when side stand is not applied,and should be ~5V when side stand is applied V1.0.0...
- Page 106 Component Name Horn Connector Code Connector Type Disassembling Connector Definition Color Definition Green Horn Black Negative electrode V1.0.0...
- Page 107 Component Name Left/right brake Switch Connector Code J16-B Connector Type 4.0 dual-cylinder insertion spring Disassembling Connector Definition Color Definition Red and White Power cord(12V) Violet Left/right brake handle signal wire V1.0.0...
- Page 108 How to check Brake Switch(Ref: 028) Step 1:Check Brake Switch for close circuit by disconnecting the Brake Switch connectors Step 2:Set multimeter to test closed circuit mode which should beep in brake state shown as picture on the right. V1.0.0...
- Page 109 Component Name Charging Port Connector Code J10-A Connector Type 4.0 dual-cylinder insertion spring Disassembling Connector Definition Color Definition Power cord (60V) Black Negative electrode Purple and Grey Communication B White and Grey Communication A Black and White 485 Earth V1.0.0...
- Page 110 How to check Charging Port(Ref: 029) Step 1:Remove the Under Seat Storage Compartment and find the charging port connector Step 2:Check DC voltage between Red wire and Black wire on component side Step 3:DC voltage reading on multimeter should be same as the Charger output voltage V1.0.0...
- Page 111 Component Name Display Connector Code J6-A Connector Type Disassembling Connector Definition Color Definition Red and white Power cord (12V) Light blue Right turn lamp White and grey Communication A Black Negative electrode Blue High beam Violet and gray Communication B Yellow Left turn lamp Black and white...
- Page 112 How to replace Display (Ref: 006) Display 1.Screw up three Hexagon flange nuts 2. Connect dashboard connector V1.0.0...
- Page 113 Description of Display V1.0.0...
- Page 114 Description of Display V1.0.0...
-
Page 115: Diagnostic Code
Diagnostic Code - 00 on display Cable in bad Use H1<Comm connection, Data> reconnect feature to read connectors communication Use H1<BMS Info> between feature to read ECU and Display BMS status Ref: H1 User Ref: H1 User Guide Reconnect cable Guide Replace BMS Replace... - Page 116 Diagnostic Code - 10/11/12/13 on display Check FOC Release Twist Controller indicator grip and restart status Use H1 to check Check FOC Controller the scooter again Ref:001 Use H1 to check Battery Total Current indicator status Check FOC battery Ref: H1 User Guide Ref: 001 Controller indicator temperatures...
- Page 117 Diagnostic Code - 30 on display Use H1 to check single cell Use H1 to check battery pack Total Try charging the battery with voltages Voltage another Charger Ref: H1 User Guide Ref: H1 User Guide Replace Charger Discharge the battery if overcharged Replace the battery pack if Note: BMS may stop the charging difference in single cell...
- Page 118 Diagnostic Code - 31 on display Use H1 to upgrade BMS Value to 29A Try charging the battery with another Ref: H1 User Guide Charger Replace Charger Use H1 to upgrade FOC Controller program if available Ref: H1 User Guide V1.0.0...
- Page 119 Diagnostic Code - 32 on display Use H1 to check Temperature sensors Take the battery pack indoor Ref: H1 User Guide until back to normal operating temperature Replace the BMS if temperature is imbalanced Ref: Contact Supplier V1.0.0...
- Page 120 Diagnostic Code - 60/62/63/64/65 on display Disconnect the battery Update ECU Program pack and connect again Update ECU Program Replace ECU Disconnect the battery after 10 seconds Ref: 003 pack and connect again Disconnect the battery after 10 seconds Disconnect the battery pack and connect again Replace ECU pack and connect again...
- Page 121 Diagnostic Code - 67 on display Log into App and follow Activate the SIM card Move the scooter to open instrunctions Ref: please follow APP ground and wait for 10 mintues instruction for better signal reception Update ECU program to Data Deactivated program to Cancel 67 Warning Code Ref: H1 User Guide...
- Page 122 Diagnostic Code - 99 on display Use H1<Comm Data> Use H1<BMS Info> feature to read feature to read communication between BMS status Check APP status Cable in bad ECU and FOC controller Ref: H1 User Guide Ref:002 connection, Ref: H1 User Guide reconnect connectors Replace ECU...
- Page 123 Diagnostic Code - 110 on display Replace FOC Controller Ref: 004 V1.0.0...
- Page 124 Diagnostic Code - 111 on display Verification Disconnect the connetor, check if all PINs are normal, Disconnect the battery Reconnect again pack, Reconnect after 10 seconds then restart the scooter Replace Alarm Ref: 008 V1.0.0...
- Page 125 Diagnostic Code - 120 on display Motor Hall cable in bad Flashing Frequency: 7times Flashing Frequency: 5times connection with FOC controller One or more phase cables Motor Hall sensor failed connector(please check both missing connectors between FOC Controller and Motor) Please pay attention to vehicles produced before 12.2016)...
- Page 126 Diagnostic Code - 130/131/132/133 on display Disconnect the Check the Current battery pack and Disconnect the Battery LOW, Check of battery with H1 battery pack and check the battery battery Ref: H1 User Guide check the battery temperature with H1 voltages by H1 and Ref: H1 User Guide temperature with...
- Page 127 Diagnostic Code - 140 on display Check main harnness <>FOC Controller connector Pin 27 for damage Disconnect Hall Check connectors check voltages Cable Sensor are connected of hall cable and check if properlly sensor when fault throttle is Not-applied code is and when fully applied cancelled Ref: 011...
- Page 128 Diagnostic Code - 161 on display V1.0.0...
- Page 129 Diagnostic Code - 190 on display Check FOC Controller Replace Replace Motor indicator status Alarm Ref: 009 Ref: 001 Ref: 008 Twist Grip Failure Ref: 011 Replace Check Motor Hall Cable Connector Controller Ref: 004 Replace Motor Ref: 009 V1.0.0...
- Page 130 Diagnostic Code - 191 on display Use H1 to Check BMS connect the connectors battery properlly attached Ref: H1 User Ref: Contact Guide Supplier Contact Supplier if show <OFFLINE> Ref: Contact Supplier V1.0.0...
-
Page 131: Regular Maintenance Checklist
Regular Maintenance Checklist Overview The scooter is set on a flat ground before operating.The scooter is inspected, tested, cleaned, adjusted, lubricated or replaced (if necessary) as per items and maintenance cycles specified in the maintenance schedule. The following items require a certain degree of the mechanical knowledge. Some items may require more technical data and tools. - Page 132 Regular Maintenance Checklist Power lock Lighting inspection Instrument inspection scooter insulation Electronic Components Alarm and horn EBS energy recovery Controller inspection Wire connection and appearance Inspection for abnormal Wheel-hub motor noise Startup inspection Tolerance and deformation ECU software version FOC software version Display software version Software BMS 29Ah setting...
- Page 133 Regular Maintenance Checklist Inspection of the Accelerator Handle • Check the accelerator handle for smooth operating. • Check the accelerator handle for smooth opening and automatic resetting at all steering positions of the steering handle. • Check the accelerator handle cable if the accelerator handle can not be reset as usual. Inspection of Brake Pads wearing •...
- Page 134 Regular Maintenance Checklist Inspection of Brake Lamp Switch and Front/Rear Brake • The brake switch on the brake handle can not be adjusted • Make sure that the brake lamp turns on in actual application of the brake.Replace the front/rear brake switch or other faulty components in the braking system, if turn-on of the front brake switch is not synchronous with brake application Inspection of Lamp System and Switches...
- Page 135 Regular Maintenance Checklist Inspection of Suspension system Front suspension • Operate the front brake and check the front suspension system by pressing down the handle bar for several times to check motion of the fork. • Check the entire assembly for leakage, damages or loosened fasteners. •...
- Page 136 Regular Maintenance Checklist Nuts, Bolts and Fasteners • Make sure that all nuts and bolts on the chassis have been tightened as per correct torque values. • Make sure that all the split pins, safety clips, hose clamps and wire cables have been placed properly and secured tightly.
- Page 137 Regular Maintenance Checklist Inspection of Wheels and Tires • Support the scooter with the Central Stands. • Lift up the Front/Rear Wheel to check range of the free travel. • Hold the Front/Rear Wheel and try to move it leftward and rightward to check the front wheel bearing for wearing.
- Page 138 Regular Maintenance Checklist Steering column bearing • Support the scooter with Central Stands, and lift up the Front Wheel to make it off the ground. • Make sure that scooter handles can be turned freely to left and right sides. •...
- Page 139 V1.0.0...
Need help?
Do you have a question about the N1S and is the answer not in the manual?
Questions and answers