Table of Contents
Advertisement
Available languages
Available languages
Quick Links
Congratulations on your latest furniture purchase! Dorel Living furniture has been developed with
quality, convenience and style in mind. We trust it will provide you with many years of exceptional
comfort and service.
Before beginning assembly, we encourage you to familiarize yourself with your new furniture piece
by taking a few minutes to go through this booklet. It contains important information on our warranty
and care tips to keep your furniture looking as good as new.
For more great furniture ideas, check out our website at
You can also keep up to date on all the latest trends by liking our
and
Instagram
page.
Date of Purchase: _____ / _____ / _____
Questions, concerns, missing parts? Customer satisfaction is important to us at Dorel
Asia. CONTACT OUR CUSTOMER SERVICE DEPARTMENT BEFORE RETURNING
Our agents are available Monday to Friday 8am to 5pm (EST) to take your call and
answer any questions. For faster service, always have the model number ready when contacting us.
You can also reach us by email or by visiting our website and clicking on the Support tab:
NOTE: THIS INSTRUCTION BOOKLET CONTAINS IMPORTANT SAFETY
INFORMATION. PLEASE READ AND KEEP FOR FUTURE REFERENCE.
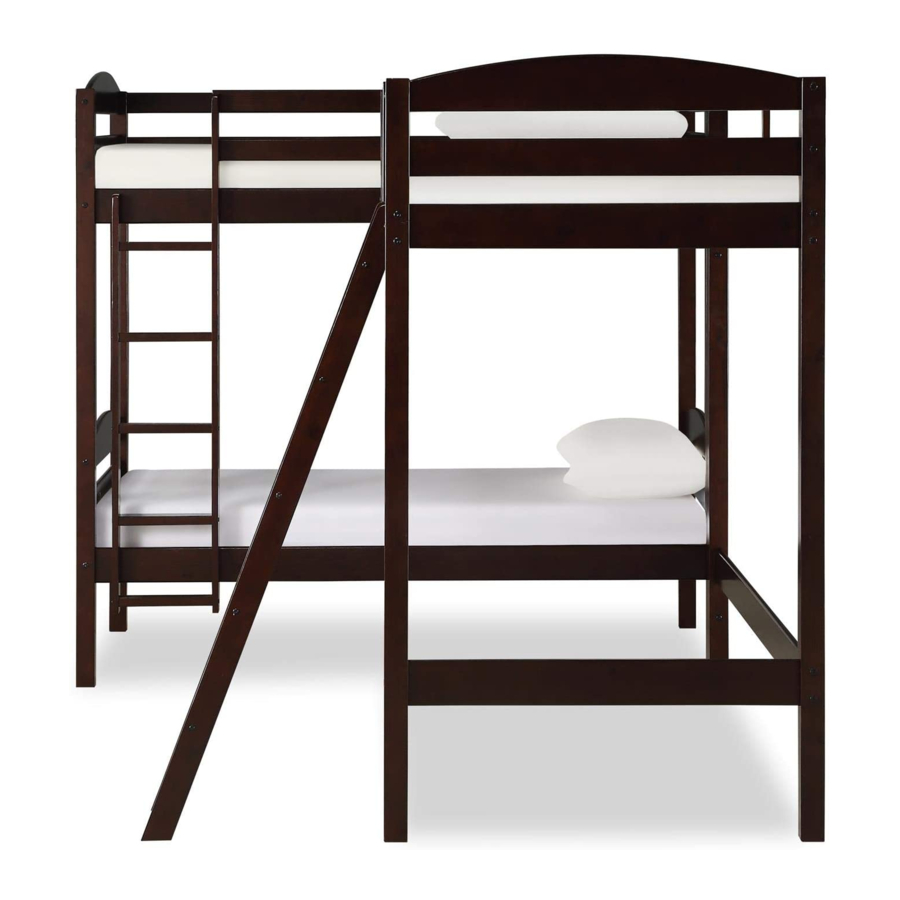
Triple Bunk Bed
Model Number:
DL8794
DL8794-1
DL8794-2
DL8794W
DL8794W-1
DL8794W-2
PRODUCT TO THE RETAILER.
Toll free #: 1-800-295-1980
das@dorel.com
UPC Code:
0-65857-20177-2
0-65857-20178-9
0-65857-20179-6
0-65857-20180-2
0-65857-20181-9
0-65857-20182-6
www.dorelliving.com
Facebook page
Lot Number:
(taken from carton)
Color:
Espresso
Espresso
Espresso
White
White
White
Advertisement
Table of Contents

Subscribe to Our Youtube Channel
Related Manuals for Dorel Living DL8794


Summary of Contents for Dorel Living DL8794
- Page 1 DL8794W-2 0-65857-20182-6 White Congratulations on your latest furniture purchase! Dorel Living furniture has been developed with quality, convenience and style in mind. We trust it will provide you with many years of exceptional comfort and service. Before beginning assembly, we encourage you to familiarize yourself with your new furniture piece by taking a few minutes to go through this booklet.
- Page 2 CUSTOMER SERVICE You can also contact us by writing to the address listed below. Please include the product model number, color and a detailed description of your enquiry. Dorel Living - Customer Service Department 12345 Albert-Hudon Boulevard, Suite 100 Montreal, Quebec...
- Page 3 NOTES READ EACH STEP CAREFULLY BEFORE STARTING. IT IS VERY IMPORTANT THAT EACH STEP OF INSTRUCTION IS PERFORMED IN THE CORRECT ORDER. IF THESE STEPS ARE NOT FOLLOWED IN SEQUENCE, ASSEMBLY DIFFICULTIES WILL OCCUR AND CAN RESULT IN INJURY. CAUTION: ADULT ASSEMBLY REQUIRED. MAKE SURE ALL PARTS ARE INCLUDED.
- Page 4 Triple Bunk Bed HARDWARE LIST ∅4mm x 35mm ∅6.5mm x 100mm WOOD JOINT CONNECTOR (4mm HEX HEAD) FLAT HEAD WOOD SCREW- 36 PCS 34 PCS ∅6.5mm x 140mm ∅4mm x 30mm WOOD JOINT CONNECTOR (4mm HEX HEAD) FLAT HEAD WOOD SCREW- 9 PCS 2 PCS ∅1/4"...
- Page 5 Triple Bunk Bed PARTS LIST POST POST POST 1 PC 1 PC 1 PC POST POST POST 1 PC 1 PC 1 PC POST 1 PC...
- Page 6 Triple Bunk Bed PARTS LIST GUARDRAIL POST TOP CROSS CENTER CROSS 1 PC 5 PCS 5 PCS BOTTOM CROSS BOTTOM CROSS BOTTOM CROSS 5 PCS 1 PC 1 PC SIDE RAIL (WITH 4 HOLES) SIDE RAIL (WITH 1 HOLE) SIDE RAIL (WITH 2 HOLES) 1 PC 2 PCS 1 PC...
- Page 7 Triple Bunk Bed PARTS LIST LONG GUARDRAIL SHORT GUARDRAIL SHORT GUARDRAIL 4 PCS 2 PCS 2 PCS GUARDRAIL LEG GUARDRAIL POST SLAT 3 PCS 1 PC 6 PCS SLAT SHORT LADDER END LONG LADDER END 18 PCS 1 PC 1 PC SHORT LADDER STEP LEFT LADDER END RIGHT LADDER END...
- Page 8 Triple Bunk Bed STEP 1 One of the top crosses (H) has a label on it. Use it in this step. Insert wood dowels (11) into the ends of top cross (H) and center cross (I) and bottom cross (J). Attach posts (A1 and B) &...
- Page 9 Triple Bunk Bed STEP 2 Insert wood dowels (11) into the ends of top cross (H) and center cross (I) and bottom crosses (J & K1). Insert barrel nuts (8) into bottom cross (K1) Attach posts (E & F) using wood joint connectors (1) though crosses (H, I and J) and joint connectors (5) through bottom cross (K1).
- Page 10 Triple Bunk Bed STEP 3 Insert wood dowels (11) into each end of the long guardrails (R1). Insert barrel nuts (8) into side rails (L, M, N and O) as shown below. Attach the long guardrails (R1) to posts (B and A2) and secure using joint connectors (1). Attach the side rails (L, M, N and O) to the posts using joint connectors (5).
- Page 11 Triple Bunk Bed STEP 4 Insert wood dowels (11) into the ends of the ladder steps (W). Attach ladder ends (V1 & V2) to ladder steps (W) with wood joint connectors (14) and Allen key (12) 10 PCS 10 PCS...
- Page 12 Triple Bunk Bed STEP 5 Attach the ladder to the side rails (L & N) with wood joint connector (14) as shown. back view 4 PCS...
- Page 13 Triple Bunk Bed STEP 6 Insert wood dowels (11) in the ends of short guardrails (R2). Attach short guardrails (R2) to post (C) with wood joint connectors (1). Attach short guardrail (R2) to the ladder with wood joint connector (14) and Allen key (12). Attach guardrail leg (S1) to long guard rails (R1) and side rail (M) with flat head wood screws (4).
- Page 14 Triple Bunk Bed Step 7 Insert wood dowels (11) into the ends of bottom cross (K2). Secure bottom cross (K2) to posts (G) & (D) using wood joint connectors (1) as shown. Insert wood dowels (11) into long guardrails (R1) and secure them to posts (D and E) using joint connectors (1).
- Page 15 Triple Bunk Bed STEP 8 Attach post (C) to post (D) with joint connectors (7) and hex cap (10) as shown. Insert barrel nuts (8) into side rail (P) as shown below. Attach side rail (L) to guardrail post (G) with joint connectors (9) and Allen key (12). back view 2 PCS 2 PCS...
- Page 16 Triple Bunk Bed STEP 9 Insert wood dowels (11) into short guardrails (R3). Attach short guardrails (R3) to guardrail post (S2) with wood joint connectors (1) as shown. 4 PCS 2 PCS...
- Page 17 Triple Bunk Bed STEP 10 Attach the short guardrails (R3) to post (G) with wood joint connectors (3) through short guardrails (R2) as shown. Attach the guardrail post (S2) to side rail (P) with joint connectors (13) and hex cap (10) as shown. Attach the guardrail leg (S1) to the short guardrails (R3) and side rail (P) with flat head screws (4).
- Page 18 Triple Bunk Bed STEP 11 Insert wood dowels (11) into the ends of the long ladder steps (Z). Attach ladder ends (Y1 & Y2) to long ladder steps (Z) with wood joint connectors (14). 10 PCS 10 PCS...
- Page 19 Triple Bunk Bed STEP 12 Insert slats with wood dowel (T) into the center slots of the side rails (L and M) & (N and O) & (P and M) of the bunk as shown. Attach slats without wood dowel (U) onto side rails (L and M) & (N and O) & (P and M) of the bunk with flat head screws (2) using a Phillips screwdriver (not included).
- Page 20 Triple Bunk Bed STEP 13 Attach the ladder to the side rail (P) with flat head screw (6) as shown. back view 2 PCS...
- Page 21 Triple Bunk Bed CAUTION: This unit is intended for use only with the products and/or maximum weights indicated. Use with other products and/or products heavier than the maximum weights indicated may result in instability or cause possible injury. DO NOT ALLOW HORSEPLAY DO NOT ALLOW CHILDREN UNDER 6 YEARS ON OR UNDER THE BED AND OF AGE TO USE THE UPPER BUNK.
- Page 22 DL8794W-2 Blanco ¡Felicitaciones por su nueva compra de un mueble! Los muebles de la línea Dorel Living han sido diseñados con la calidad, la comodidad y el estilo en mente. Estamos seguros de que este mueble le servirá por muchos años con su comodidad excepcional.
- Page 23 También puede contactarnos escribiendo a la dirección que figura a continuación. Por favor incluya el número de modelo del producto, el color y una descripción detallada de su pregunta. Dorel Living - Customer Service Department 12345 Albert-Hudon Boulevard, Suite 100...
- Page 24 NOTAS LEA ATENTAMENTE CADA ETAPA ANTES DE COMENZAR. ES MUY IMPORTANTE QUE CADA ETAPA SE LLEVE A CABO EN EL ORDEN CORRECTO. SI ESTAS ETAPAS NO SE SIGUEN EN ORDEN, PUEDEN SURGIR DIFICULTADES PARA ARMAR LA CAMA Y CAUSAR LESIONES A LOS NIÑOS QUE LA USAN.
- Page 25 CAMA CUCHETA TRIPLE LISTA DE ACCESORIOS ∅6.5mm x 100mm ∅4mm x 35mm CONECTOR PARA MADERA (4MM CABEZA HEX.) TORNILLO PARA MADERA DE CABEZA 34 PCS PLANA - 36 PCS ∅6.5mm x 140mm ∅4mm x 30mm CONECTOR PARA MADERA (4MM CABEZA HEX.) TORNILLO PARA MADERA 2 PCS DE CABEZA PLANA - 9 PCS...
- Page 26 CAMA CUCHETA TRIPLE LISTA DE PIEZAS PATA PATA PATA 1 PC 1 PC 1 PC PATA PATA PATA 1 PC 1 PC 1 PC PATA 1 PC...
- Page 27 CAMA CUCHETA TRIPLE LISTA DE PIEZAS PATA DE BARANDA TRAVESAÑO SUPERIOR TRAVESAÑO CENTRAL 1 PC 5 PCS 5 PCS TRAVESAÑO INFERIOR TRAVESAÑO INFERIOR TRAVESAÑO INFERIOR 5 PCS 1 PC 1 PC LARGUERO (CON 4 AGUJEROS) LARGUERO (CON 1 AGUJERO) LARGUERO (CON 2 AGUJEROS) 1 PC 2 PCS 1 PC...
- Page 28 CAMA CUCHETA TRIPLE LISTA DE PIEZAS BARANDA LARGA BARANDA CORTA BARANDA CORTA 4 PCS 2 PCS 2 PCS SOPORTE DE BARANDA PATA DE BARANDA LISTÓN 3 PCS 1 PC 6 PCS LISTÓN LADO ESCALERA CORTA LADO ESCALERA LARGA 18 PCS 1 PC 1 PC PELDAÑO ESCALERA CORTA...
- Page 29 CAMA CUCHETA TRIPLE ETAPA 1 Uno de los travesaños superiores (H) tiene una etiqueta. Utilícelo para esta etapa. Inserte clavijas de madera (11) en los extremos de los travesaños superiores (H), de los travesaños centrales (I) y de los travesaños inferiores (J). Fije las patas (A1 y B) y (A2 y C) con conectores para madera (1) como ilustrado.
- Page 30 CAMA CUCHETA TRIPLE ETAPA 2 Inserte clavijas de madera (11) en los extremos del travesaño superior (H), del travesaño central (I) y de los travesaños inferiores (J y K1). Inserte tuercas barrilete (8) en el travesaño inferior (K1). Fije las patas (E y F) con conectores para madera (1) en los travesaños (H, I y J) y con pernos conectores (5) en el travesaño inferior (K1).
- Page 31 CAMA CUCHETA TRIPLE ETAPA 3 Inserte clavijas de madera (11) en los extremos de las barandas largas (R1). Inserte tuercas barrilete (8) en los largueros (L, M, N y O) como ilustrado más abajo. Una las barandas largas (R1) a las patas (B y A2) y fíjelas con pernos conectores (1). Fije los largueros (L, M, N y O) a las patas con pernos conectores (5).
- Page 32 CAMA CUCHETA TRIPLE ETAPA 4 Inserte clavijas de madera (11) en los extremos de los peldaños (W). Fije los lados de la escalera (V1 y V2) a los peldaños (W) con conectores para madera (14) y la llave Allen (12). 10 PCS 10 PCS...
- Page 33 CAMA CUCHETA TRIPLE ETAPA 5 Fije la escalera a los largueros (L y N) con conectores para madera (14) como ilustrado. back view Vista posterior 4 PCS...
- Page 34 CAMA CUCHETA TRIPLE ETAPA 6 Inserte clavijas de madera (11) en los extremos de las barandas cortas (R2). Fije las barandas cortas (R2) a la pata (C) con conectores para madera (1). Fije las barandas cortas (R2) a la escalera con conectores para madera (14) y la llave Allen (12). Fije el soporte de baranda (S1) a las barandas largas (R1) y al larguero (M) con tornillos para madera de cabeza plana (4), con un destornillador Phillips (no incluido).
- Page 35 CAMA CUCHETA TRIPLE ETAPA 7 Inserte clavijas de madera (11) en los extremos del travesaño inferior (K2). Fije el travesaño inferior (K2) a las patas (G) y (D) con conectores para madera (1) como ilustrado. Inserte clavijas de madera (11) en las barandas largas (R1) y fíjelas a las patas (D y E) con pernos conectores (1).
- Page 36 CAMA CUCHETA TRIPLE ETAPA 8 Fije la pata (C) a la pata (D) con pernos conectores (7) y pernos de brida hexagonal (10) como ilustrado. Inserte tuercas barrilete (8) en el larguero (P) como ilustrado más abajo. Fije el larguero (L) a la pata de baranda (G) con pernos conectores (9) y la llave Allen (12). back view Vista posterior 2 PCS...
- Page 37 CAMA CUCHETA TRIPLE ETAPA 9 Inserte clavijas de madera (11) en las barandas cortas (R3). Fije las barandas cortas (R3) a la pata de baranda (S2) con conectores para madera (1) como ilustrado. 4 PCS 2 PCS...
- Page 38 CAMA CUCHETA TRIPLE ETAPA 10 Fije las barandas cortas (R3) a la pata (G) con conectores para madera (3) pasando a través de las barandas cortas (R2) como ilustrado. Fije la pata de baranda (S2) al larguero (P) con pernos conectores (13) y pernos de brida hexagonal (10) como ilustrado.
- Page 39 CAMA CUCHETA TRIPLE ETAPA 11 Inserte clavijas de madera (11) en los extremos de los peldaños de la escalera larga (Z). Fije los lados de la escalera (Y1 e Y2) a los peldaños de la escalera larga (Z) con conectores para madera (14).
- Page 40 CAMA CUCHETA TRIPLE ETAPA 12 Inserte los listones con clavijas de madera (T) en las ranuras ubicadas en la parte central de los largueros (L y M), (N y O) y (P y M) de las literas como ilustrado. Fije los listones que no tienen clavijas de madera (U) en los largueros (L y M), (N y O) y (P y M) de las literas con tornillos de cabeza plana (2) con un destornillador Phillips (no incluido).
- Page 41 CAMA CUCHETA TRIPLE ETAPA 13 Fije la escalera al larguero (P) con tornillos de cabeza plana (6) como ilustrado. back view Vista posterior 2 PCS...
- Page 42 CAMA CUCHETA TRIPLE PRECAUCIÓN: Esta unidad está diseñada para ser utilizada únicamente con los productos y/o pesos máximos indicados. Su uso con otros productos y/o productos más pesados que los pesos máximos indicados puede provocar inestabilidad o causar lesiones. NO PERMITA QUE LOS NIÑOS NO PERMITA QUE NIÑOS MENORES DE 6 HAGAN PAYASADAS SOBRE O AÑOS DUERMAN EN LA CUCHETA...
- Page 43 DL8794W-2 Blanc Félicitations pour votre dernier achat d’un meuble ! Les meubles de la ligne Dorel Living ont été conçus ayant en tête la qualité, la commodité et le style. Nous sommes convaincus que ce meuble vous servira durant de nombreuses années avec un confort exceptionnel.
- Page 44 CUSTOMER SERVICE You can also contact us by writing to the address listed below. Please include the product model number, color and a detailed description of your enquiry. Dorel Living - Customer Service Department 12345 Albert-Hudon Boulevard, Suite 100 Montreal, Quebec...
- Page 45 NOTES AVANT DE COMMENCER, LISEZ CHAQUE ÉTAPE ATTENTIVEMENT. IL EST TRÈS IMPORTANT QUE CHAQUE ÉTAPE SOIT EFFECTUÉE DANS L'ORDRE INDIQUÉ. SI CES ÉTAPES NE SONT PAS SUIVIES DANS LA SÉQUENCE INDIQUÉE, DES DIFFICULTÉS D'ASSEMBLAGE PEUVENT SE PRODUIRE ET PEUVENT ENTRAÎNER DES BLESSURES.
- Page 46 Lit superposé triple LISTE DE QUINCAILLERIE ∅6.5mm x 100mm ∅4mm x 35mm RACCORDEMENT POUR BOIS (4MM TÊTE HEX.) VIS À BOIS À TÊTE PLATE - 36 PCS 34 PCS ∅6.5mm x 140mm ∅4mm x 30mm RACCORDEMENT POUR BOIS (4MM TÊTE HEX.) VIS À...
- Page 47 Lit superposé triple LISTE DE PIÈCES PIED PIED PIED 1 PC 1 PC 1 PC PIED PIED PIED 1 PC 1 PC 1 PC PIED 1 PC...
- Page 48 Lit superposé triple LISTE DE PIÈCES PIED DE BARRIÈRE TRAVERSE SUPÉRIEURE TRAVERSE CENTRALE 1 PC 5 PCS 5 PCS TRAVERSE INFÉRIEURE TRAVERSE INFÉRIEURE TRAVERSE INFÉRIEURE 5 PCS 1 PC 1 PC CÔTÉ DE LIT (AVEC 4 TROUS) CÔTÉ DE LIT (AVEC 1 TROU) CÔTÉ...
- Page 49 Lit superposé triple LISTE DE PIÈCES BARRIÈRE LONGUE BARRIÈRE COURTE BARRIÈRE COURTE 4 PCS 2 PCS 2 PCS SUPPORT DE BARRIÈRE PIED DE BARRIÈRE LATTE 3 PCS 1 PC 6 PCS LATTE CÔTÉ ÉCHELLE COURTE CÔTÉ ÉCHELLE LONGUE 18 PCS 1 PC 1 PC MARCHE ÉCHELLE COURTE...
- Page 50 Lit superposé triple ÉTAPE 1 Une des traverses supérieures (H) porte une étiquette. Utilisez-la pour cette étape. Insérez des goujons de bois (11) dans les extrémités des traverses supérieures (H), des traverses centrales (I) et des traverses inférieures (J). Fixez les pieds (A1 et B) et (A2 et C) avec des raccordements pour bois (1) tel qu’illustré. Servez-vous de la clé...
- Page 51 Lit superposé triple ÉTAPE 2 Insérez des goujons de bois (11) dans les extrémités de la traverse supérieure (H), de la traverse centrale (I) et des traverses inférieures (J et K1). Insérez des écrous transversaux (8) dans la traverse inférieure (K1). Fixez les pieds (E et F) avec des raccordements pour bois (1) dans les traverses (H, I et J), et avec des boulons de raccordement (5) dans la traverse inférieure (K1).
- Page 52 Lit superposé triple ÉTAPE 3 Insérez des goujons de bois (11) dans les extrémités des barrières longues (R1). Insérez des écrous transversaux (8) dans les côtés de lit (L, M, N et O) tel qu’illustré ci-dessous. Attachez les barrières longues (R1) aux pieds (B et A2) et fixez-les à l’aide des raccordements pour bois (1).
- Page 53 Lit superposé triple ÉTAPE 4 Insérez des goujons de bois (11) dans les extrémités des marches (W). Fixez les côtés de l’échelle (V1 et V2) aux marches (W) avec des raccordements pour bois (14) à l’aide de la clé Allen (12). 10 PCS 10 PCS...
- Page 54 Lit superposé triple ÉTAPE 5 Fixez l’échelle aux côtés de lit (L et N) avec des raccordements pour bois (14) tel qu’illustré. back view Vue arrière 4 PCS...
- Page 55 Lit superposé triple ÉTAPE 6 Insérez des goujons de bois (11) dans les extrémités des barrières courtes (R2). Fixez les barrières courtes (R2) au pied (C) avec des raccordements pour bois (1). Fixez les barrières courtes (R2) à l’échelle avec des raccordements pour bois (14) à l’aide de la clé Allen (12).
- Page 56 Lit superposé triple ÉTAPE 7 Insérez des goujons de bois (11) dans les extrémités de la traverse inférieure (K2). Fixez la traverse inférieure (K2) aux pieds (G) et (D) avec des raccordements pour bois (1) tel qu’illustré. Insérez des goujons de bois (11) dans les barrières longues (R1) et fixez-les aux pieds (D et E) avec des raccordements pour bois (1).
- Page 57 Lit superposé triple ÉTAPE 8 Fixez le pied (C) au pied (D) avec des boulons de raccordement (7) et des vis à tête hexagonale (10) tel qu’illustré. Insérez des écrous transversaux (8) dans le côté de lit (P) tel qu’illustré ci-dessous. Fixez le côté...
- Page 58 Lit superposé triple ÉTAPE 9 Insérez des goujons de bois (11) dans les barrières courtes (R3). Fixez les barrières courtes (R3) au pied de barrière (S2) avec des raccordements pour bois (1) tel qu’illustré. 4 PCS 2 PCS...
- Page 59 Lit superposé triple ÉTAPE 10 Fixez les barrières courtes (R3) au pied (G) avec des raccordements pour bois (3) en passant au travers des barrières courtes (R2) tel qu’illustré. Fixez le pied de barrière (S2) au côté de lit (P) avec des boulons de raccordement (13) et des vis à tête hexagonale (10) tel qu’illustré.
- Page 60 Lit superposé triple ÉTAPE 11 Insérez des goujons de bois (11) dans les extrémités des marches de l’échelle longue (Z). Fixez les côtés de l’échelle (Y1 et Y2) aux marches de l’échelle (Z) avec des raccordements pour bois (14). 10 PCS 10 PCS...
- Page 61 Lit superposé triple ÉTAPE 12 Insérez les lattes avec des goujons de bois (T) dans les fentes situées au centre des côtés de lit (L et M), (N et O) et (P et M) des lits, tel qu’illustré. Fixez les lattes qui n’ont pas de goujons de bois (U) dans les côtés de lit (L et M), (N et O) et (P et M) des lits avec des vis à...
- Page 62 Lit superposé triple ÉTAPE 13 Fixez l’échelle au côté de lit (P) avec des vis à tête plate (6) tel qu’illustré. Vue arrière back view 2 PCS...
- Page 63 Lit superposé triple ATTENTION: Cette unité est conçue pour être utilisée seulement avec les produits et/ou les poids maximum indiqués. L'utilisation avec d'autres produits et/ou des produits plus lourds que les poids maximum indiqués peut causer de l'instabilité ou des blessures. NE PAS PERMETTRE DE JEUX BRUTAUX SUR OU SOUS LE LIT NE PAS PERMETTRE AUX ENFANTS DE MOINS DE...
Need help?
Do you have a question about the DL8794 and is the answer not in the manual?
Questions and answers